Category: Living Rooms

  • Make Room for Floor Exercises Without Emptying the Living Room

    Make Room for Floor Exercises Without Emptying the Living Room

    You roll out a mat between the sofa and TV, then discover that your arm reaches under the coffee table and your foot nearly catches a chair leg. A mat-sized opening is not necessarily an exercise-sized opening. The goal is to make a repeatable setup for the movements you already do—not to empty the room or turn it into a gym. These ten adjustments help you decide what can stay, what must move, and what needs a different location.
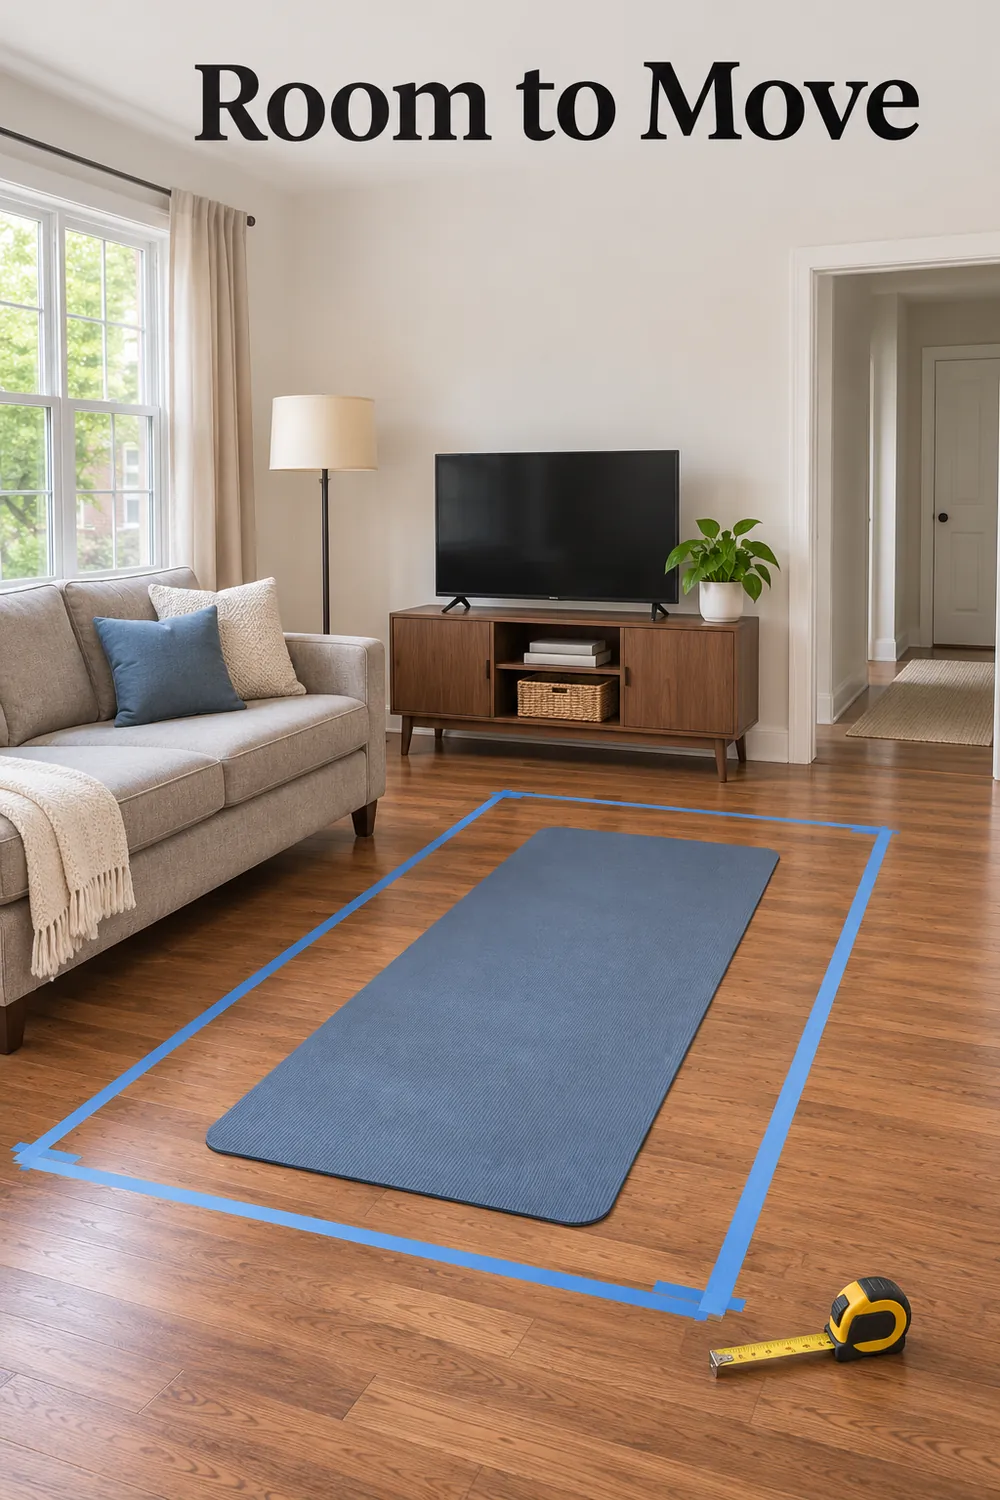
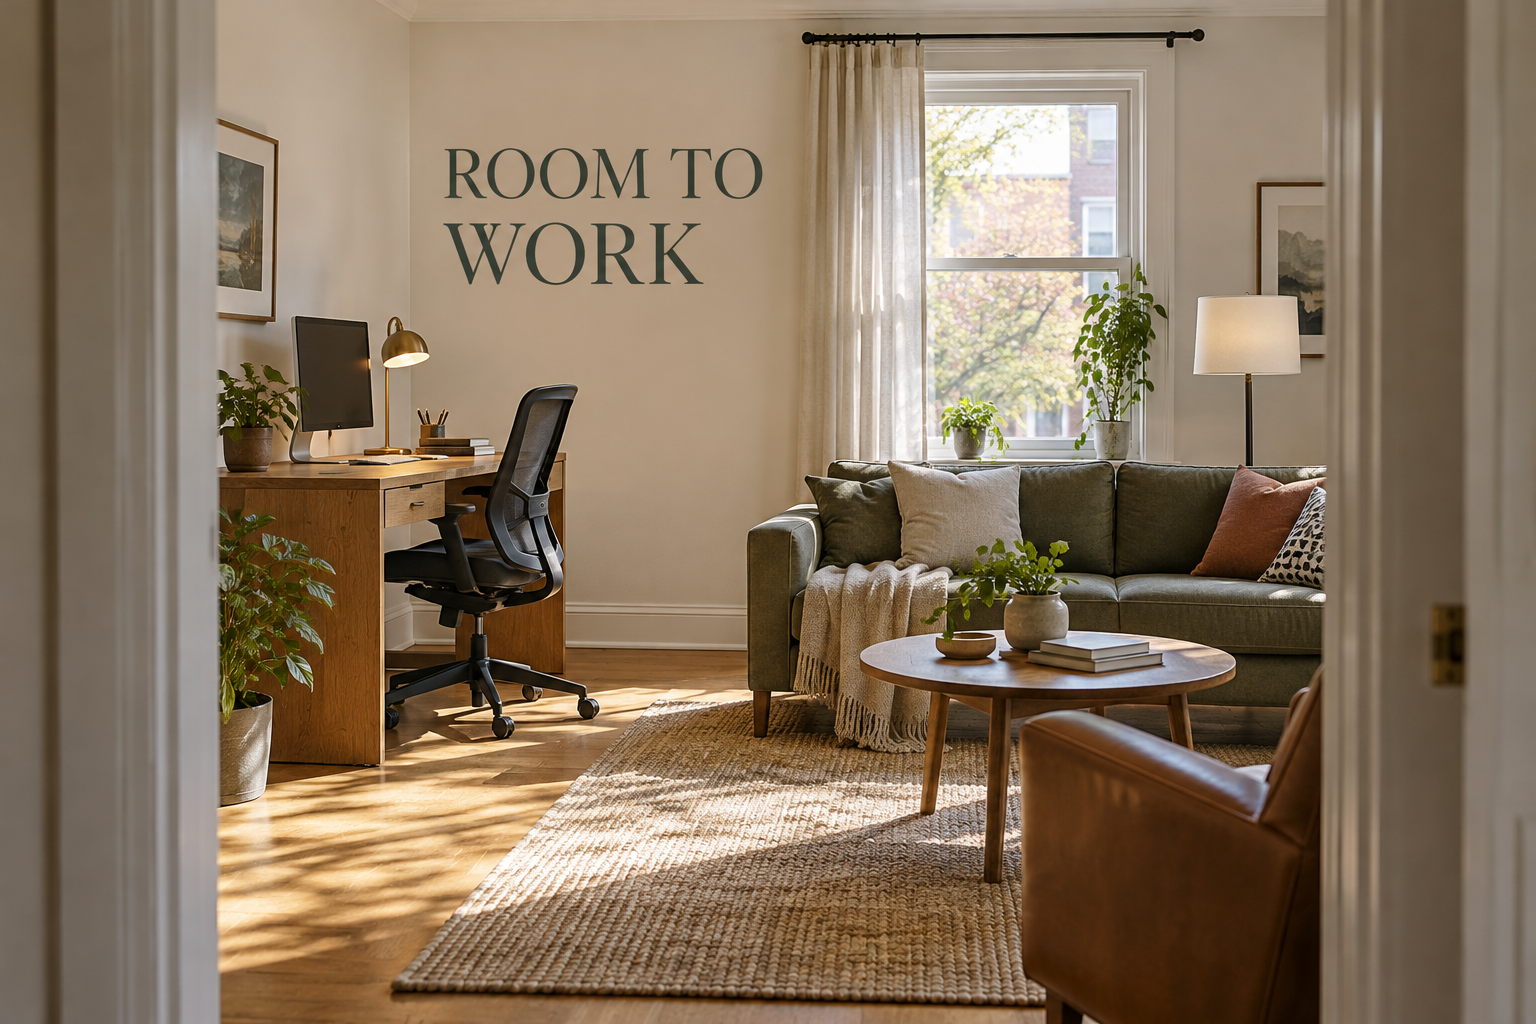
    Room to Move headline above an exercise mat with a taped movement envelope.

    1. Map the space your movements actually use

    Start with your usual movements, not the dimensions printed on a mat package. Measure the room, furniture projections, door swings, and access routes. Then slowly check where your hands and feet travel during familiar floor positions, stopping before any obstacle. A side-reaching arm or an extended leg may need space well beyond the mat. Include room to get down and stand up without grabbing unstable furniture.

    Mark that larger movement envelope with small pieces of removable tape after testing the adhesive in a hidden spot. A roughly 2-by-6-foot mat is only a starting reference, not a clearance recommendation. If a movement extends into a doorway or beneath a sharp table edge, change the setup or use another location for that movement. Keep exits and shared access routes available throughout the session.

    2. Match the exercise surface to the floor beneath it

    Check both contact points: your body against the mat and the mat against the floor. On a clean, dry surface, place the mat flat and gently test whether it slides, bunches, or lifts at the corners before exercising. A mat that grips your hands can still move across smooth flooring. Follow its manufacturer's guidance for compatible flooring, care, and any recommended protective layer.
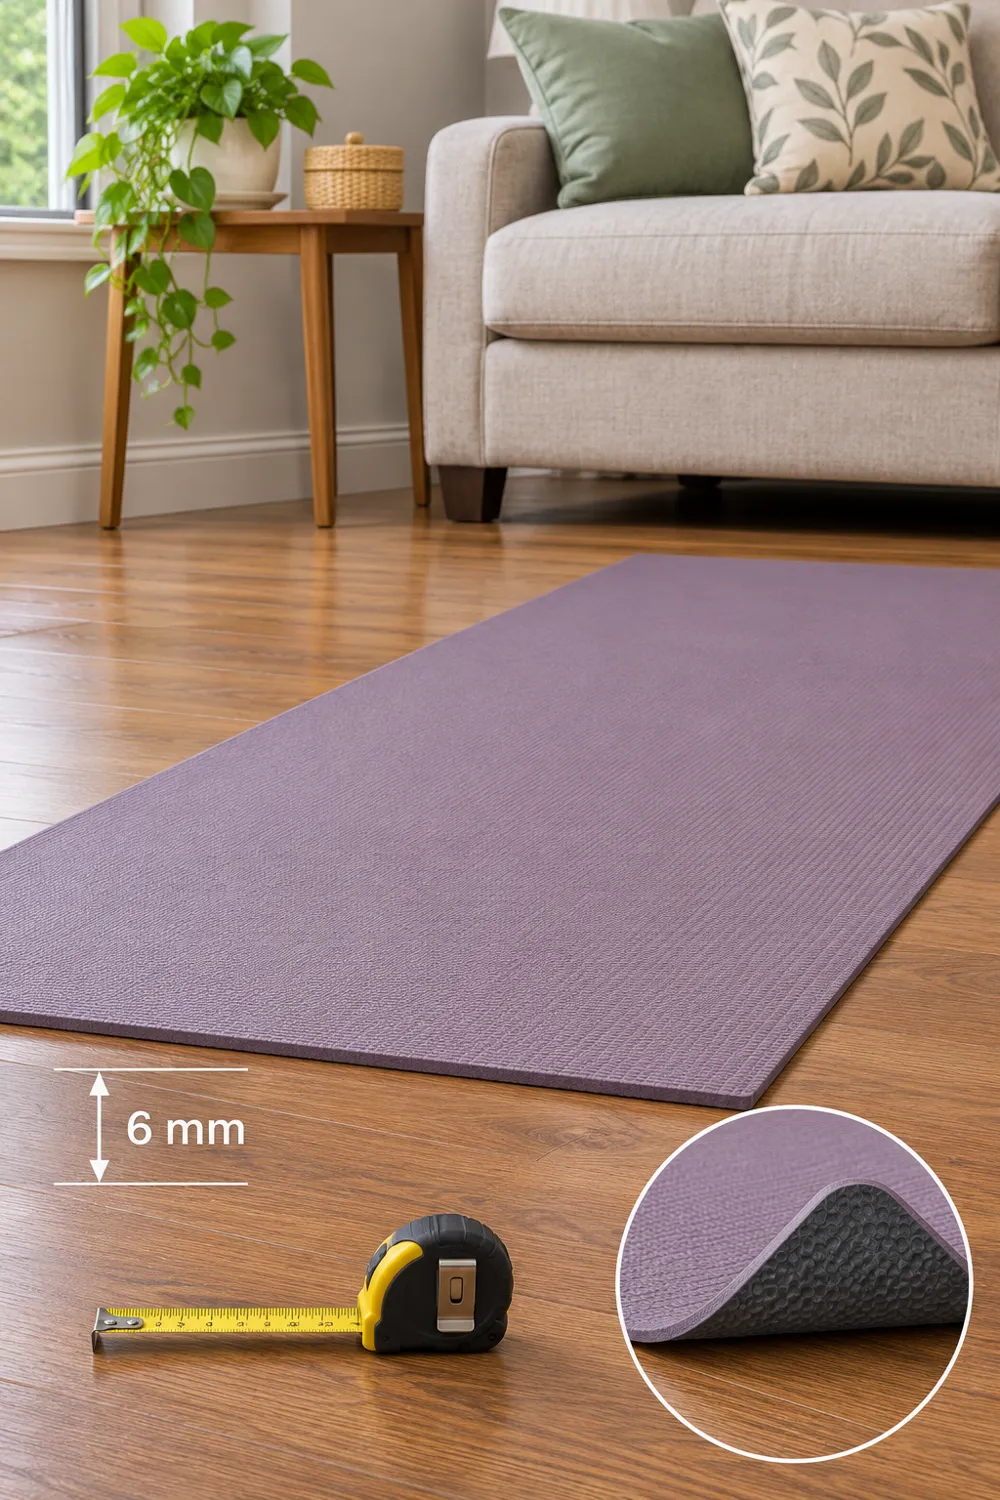
    An exercise mat lies flat on wood flooring with an inset showing its underside.

    Thicker is not automatically better. Soft carpet beneath a thick pad may feel comfortable when lying down but less steady for standing movements. A loose area rug can shift underneath everything. Choose a floor-compatible surface suited to the activity rather than stacking improvised layers, and check flooring instructions for backing materials that may discolor the finish. Repeat the stability check whenever you change locations.

    3. Turn the mat away from furniture edges

    Try the mat lengthwise, crosswise, and diagonally within your measured envelope before moving large furniture. The best orientation puts moving limbs into open space rather than toward table corners, cabinet handles, or exposed sofa feet. In a narrow room, lying parallel to the sofa may leave more room for an arm to open toward the center than pointing your head toward the TV does.

    A diagonal position can fit the mat while leaving its corners awkwardly close to furniture, so check the actual movements again. Don't count the space under a coffee table as usable clearance simply because a foot fits beneath it. If the safest orientation makes the screen difficult to see, solve the viewing arrangement separately instead of accepting a collision risk for a better view.

    4. Give every movable piece a stable parking spot

    Assign a specific temporary home to anything you move. A lightweight chair might park beside a bookcase; an ottoman might fit along an unused wall. Check the parking spot with the furniture actually occupying it, not just by estimating the empty gap. Keep pieces upright and stable, with doors, exits, heating equipment, and required ventilation clear. Nothing should lean precariously against the sofa.
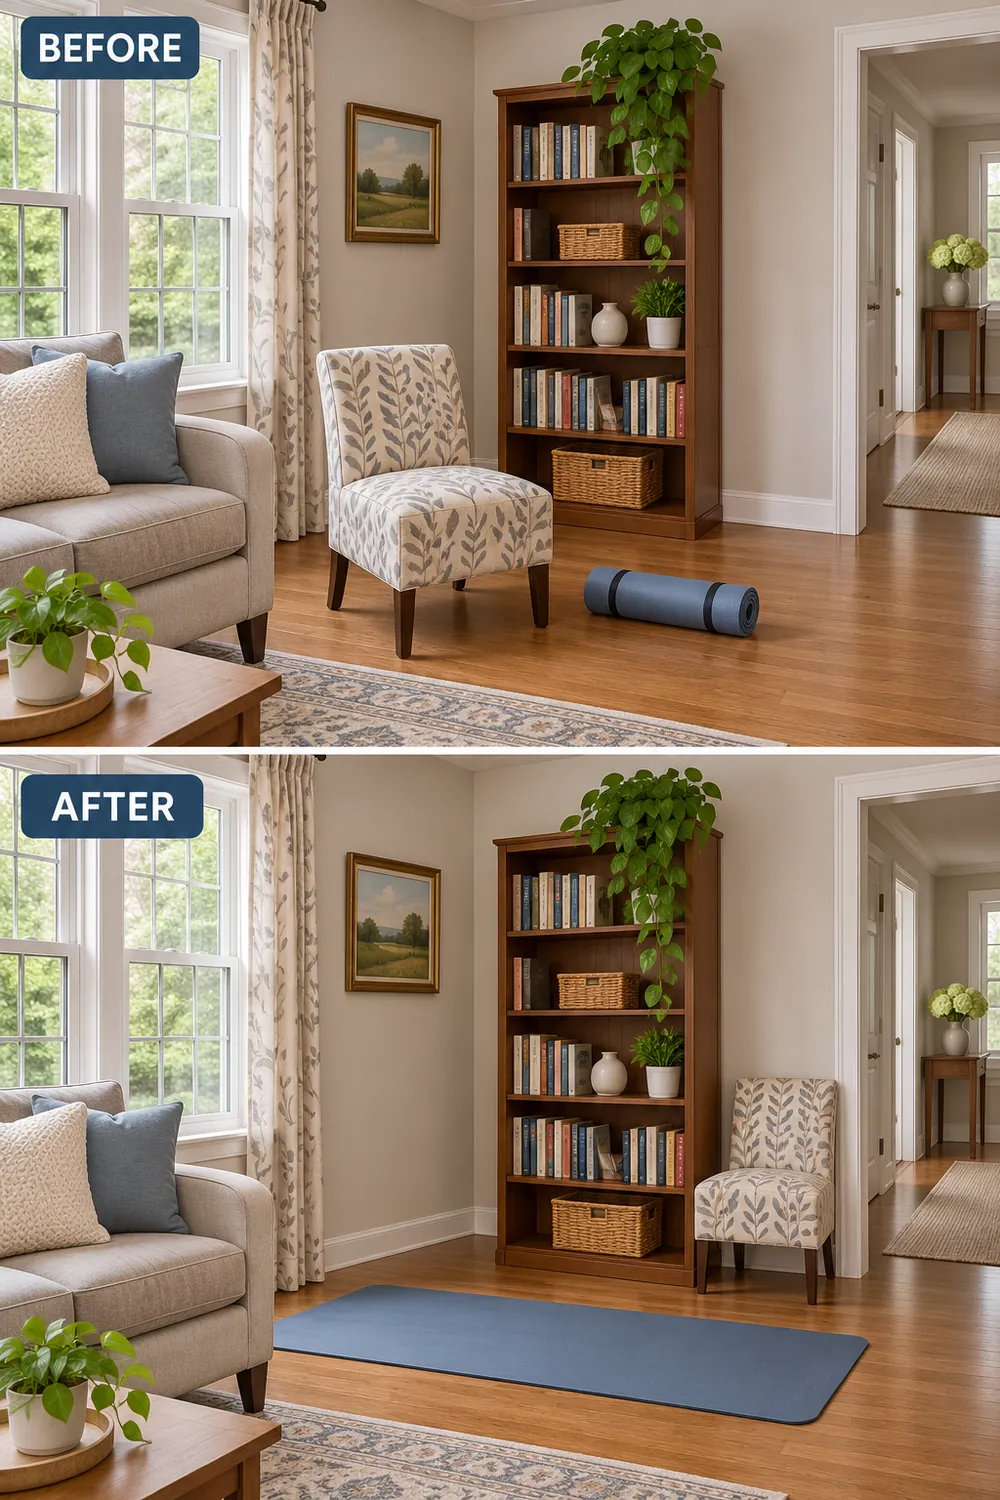
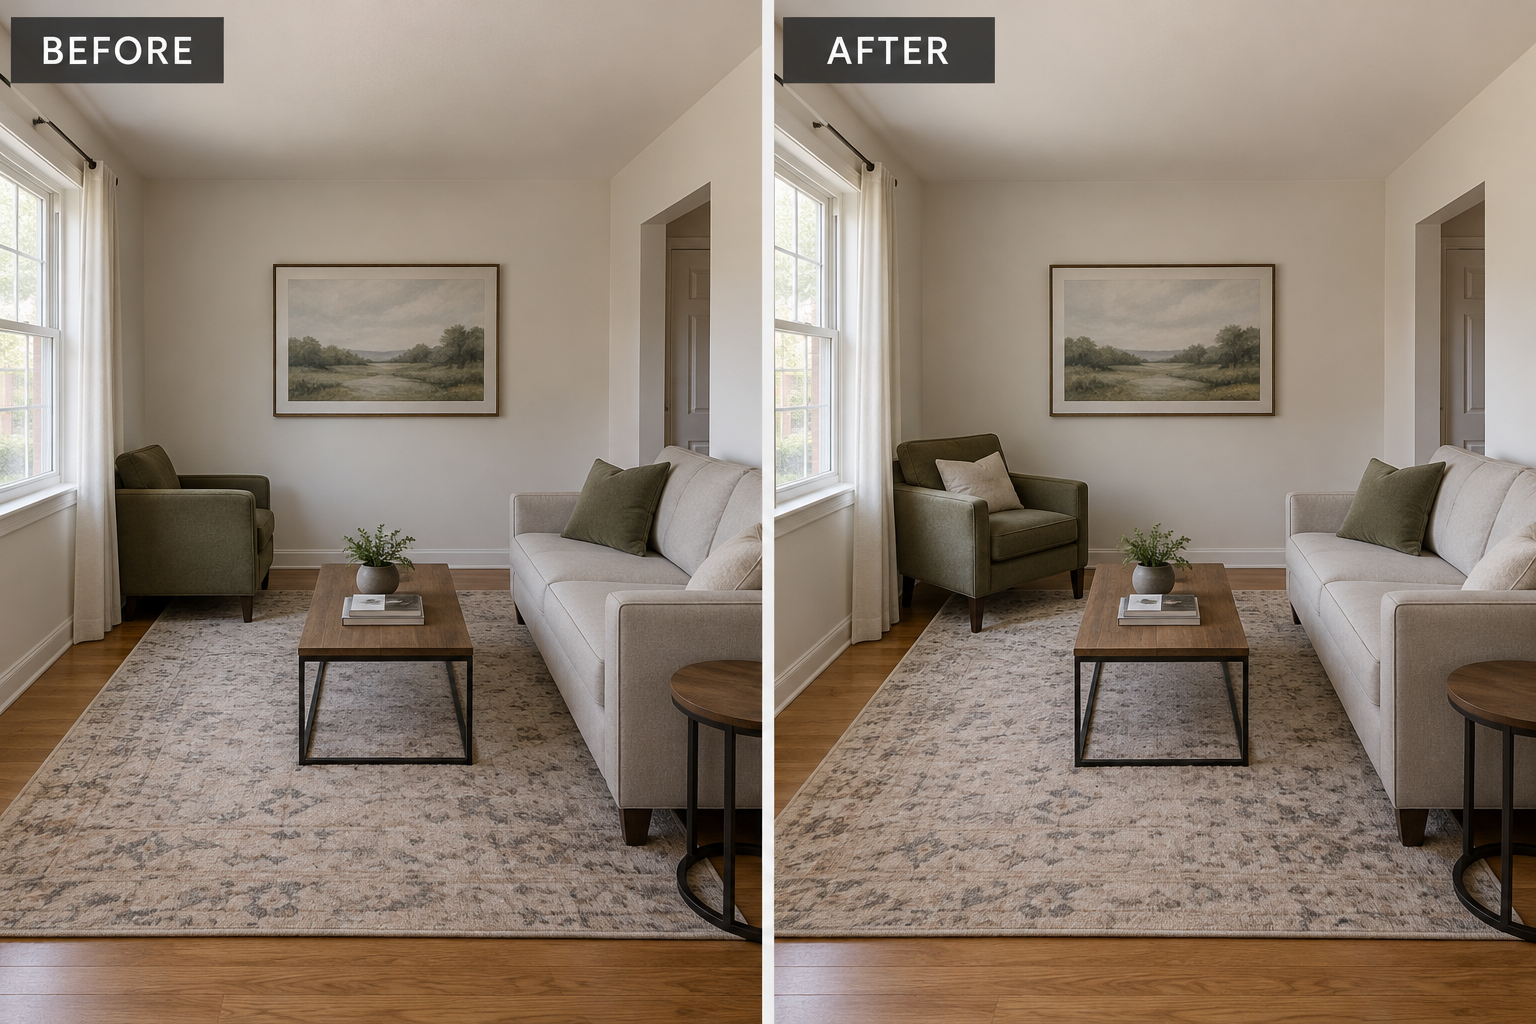
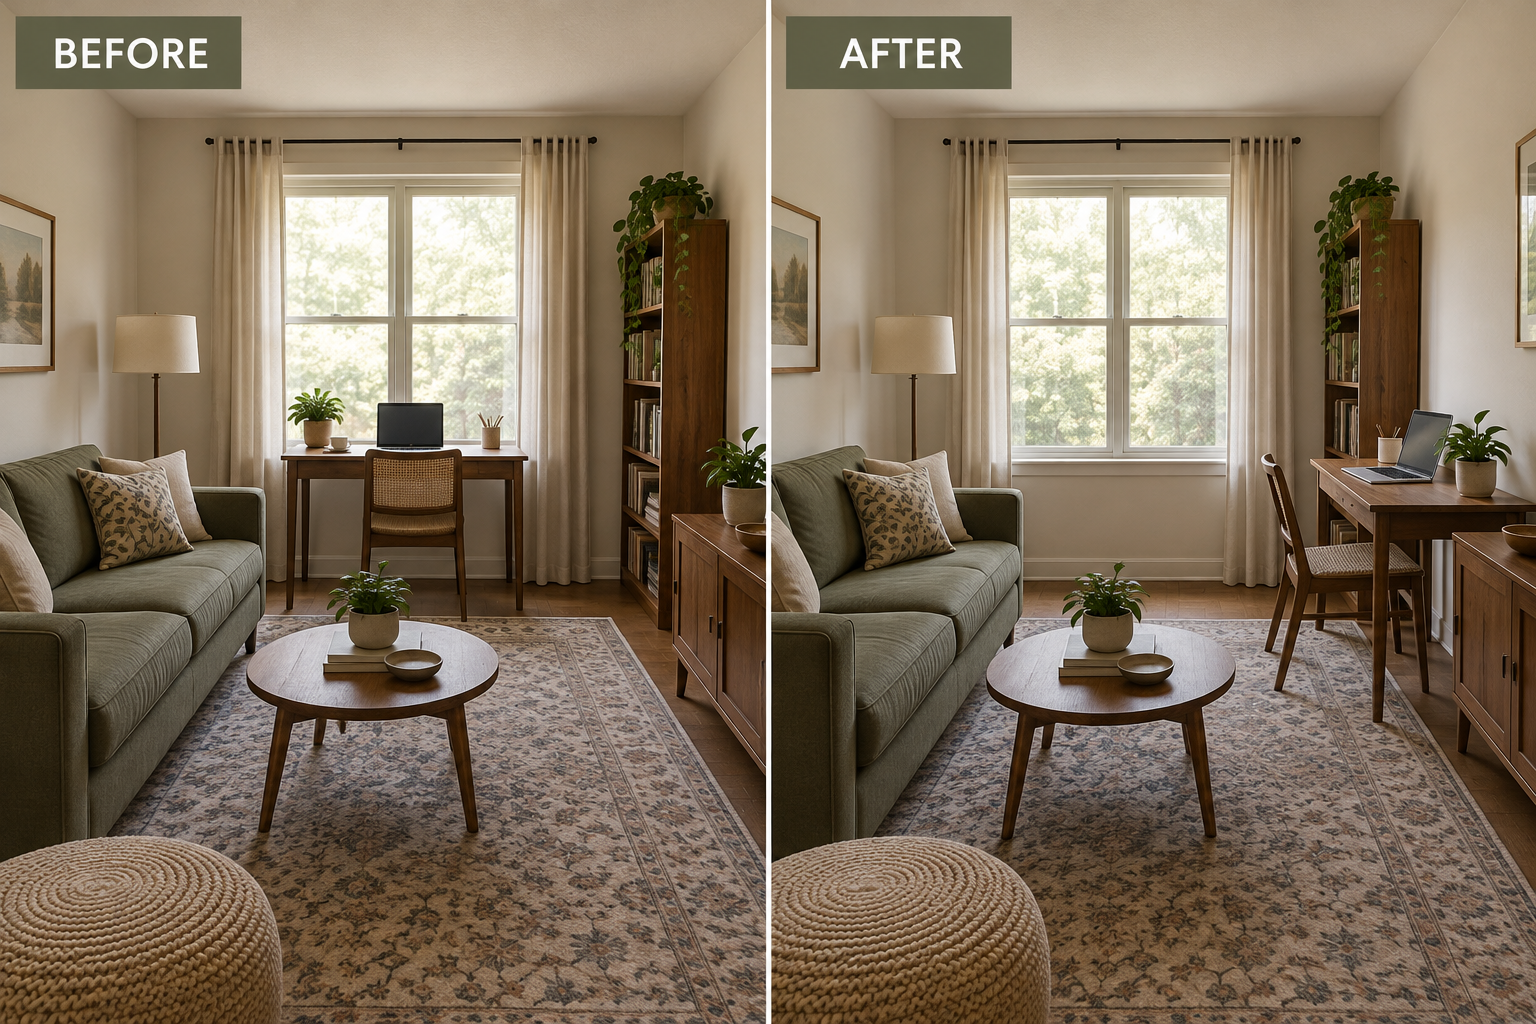
    Before and after moving an accent chair clear of an exercise mat.

    Rehearse the move once. If a chair only fits when balanced on two legs, or an ottoman blocks the front door, that is not a workable parking position. Lock casters where provided and follow furniture instructions. A setup that requires two people to shift a heavy piece every morning probably needs a smaller movable item or a different exercise location, not more determination.

    5. Replace the central table only if it remains the obstacle

    Keep your existing coffee table if rotating the mat or moving one light piece solves the problem. Replacement makes sense when the table repeatedly occupies the only usable movement envelope and has nowhere stable to park. Possible alternatives include a smaller table, two independently movable side tables, or no central table, with drinks placed beside the sofa instead.

    Test the proposed footprint with tape before buying. Nesting tables only help if the nested stack has a real parking place; a storage ottoman may be harder to move once filled. For the seating-and-table tradeoff, these small living room layout ideas offer broader context. The aim here is less setup effort, not replacing a useful table with several smaller obstacles.

    6. Address impact at the movement, not just beneath the mat

    If you have downstairs neighbors, distinguish cushioned contact from repeated impact. Padding may change how the floor feels, but it does not establish that jumping or dropped equipment will be quiet below. Where your existing workout offers a no-jump option, choose it if it fits your needs. Set equipment down under control rather than letting it land heavily.

    Avoid building a tall stack of foam, rugs, and mats in pursuit of silence; it can create an unstable exercise surface without solving transmitted vibration. Ask a qualified instructor about appropriate movement alternatives rather than improvising an unfamiliar technique. Agreeing on reasonable exercise hours with neighbors can help manage expectations, but it isn't soundproofing, and some activities may simply need another location.

    7. Check overhead reach before the session starts

    Look above the entire movement envelope, including where you stand up or raise an arm. Pendant lights, ceiling fans, and low beams can interfere even when the floor looks clear. With any fan switched off and fully stopped, establish your highest planned reach in a clear location away from fixtures, then compare that height with the lowest overhead obstruction. Include equipment you intend to lift.
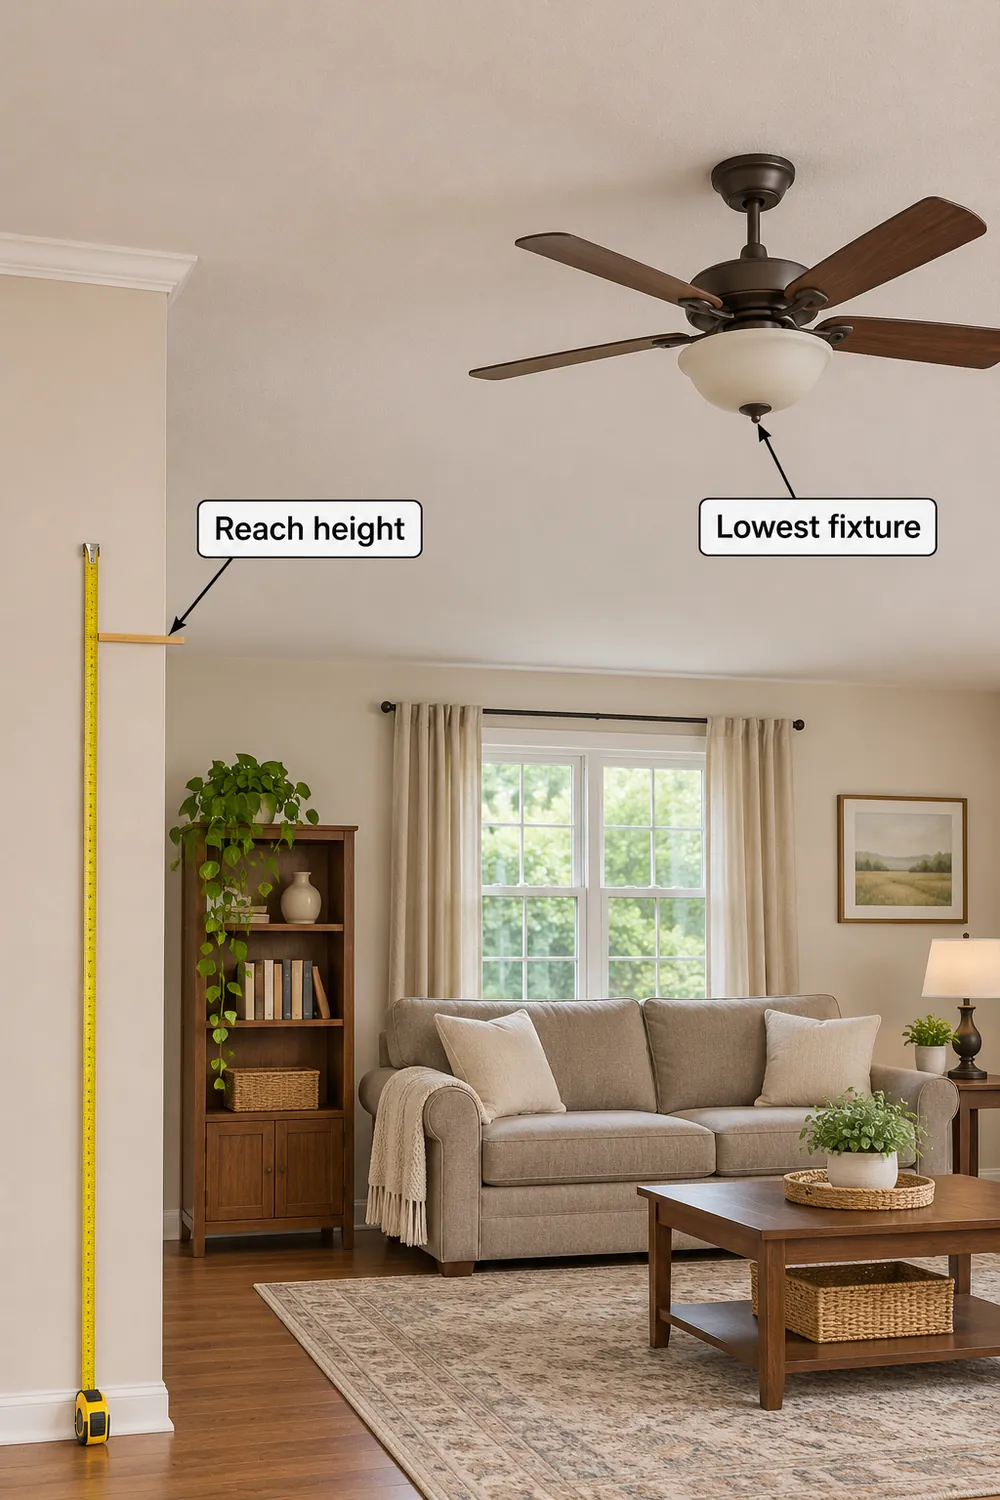
    A tape measure indicates reach height beside a stopped ceiling fan.

    Don't discover the limit by reaching toward a blade or light. If clearance is uncertain, shift the exercise footprint or use another location for overhead movements. Keep a fan off whenever your movement could enter its sweep, and follow its installation and clearance instructions. Floor-level exercises may fit a room that cannot accommodate standing overhead work; the setup does not have to support every activity.

    8. Keep small weights from rolling into your path

    Create an equipment station outside the movement envelope but close enough to reach between movements. Round dumbbells should sit in a purpose-made cradle or another manufacturer-approved holder that prevents rolling, not loose beside your ankle. Keep the holder on a level surface. A low, stable storage position also avoids lifting weights down from a high shelf before every session.

    If you are buying weights anyway, flat-sided designs can reduce rolling, but they still need a designated resting place. Don't improvise a heavy stack inside a flimsy basket or assume a decorative tray can support lifting by its handles. Check storage weight limits, keep heavier items low, and prevent children or pets from accessing equipment during both exercise and storage.

    9. Put screens and cords outside the movement envelope

    Position a phone, tablet, or television so you can check instructions without placing the device where a hand or foot will land. A stable stand on an existing media cabinet is usually preferable to a phone propped against a water bottle on the floor. Test the view from your actual floor position before starting, including whether furniture hides the lower part of the screen.

    Charge portable devices beforehand when possible. Route necessary cords outside the exercise footprint and access routes, without pinching them beneath furniture or covering them with the mat. Keep water away from powered devices. If the screen cannot be seen without repeatedly twisting into an awkward position, pause to watch the instruction rather than rearranging yourself mid-movement to follow it.

    10. Build cleaning and storage into the reset

    Choose storage that keeps equipment dry, contained, and ready to retrieve. Wipe the mat according to its care instructions and let it dry fully before rolling or folding it. Store weights low in a load-rated holder inside a secure cabinet where appropriate; contain bands separately so they do not trail onto the floor. Keep the drying mat outside access routes.
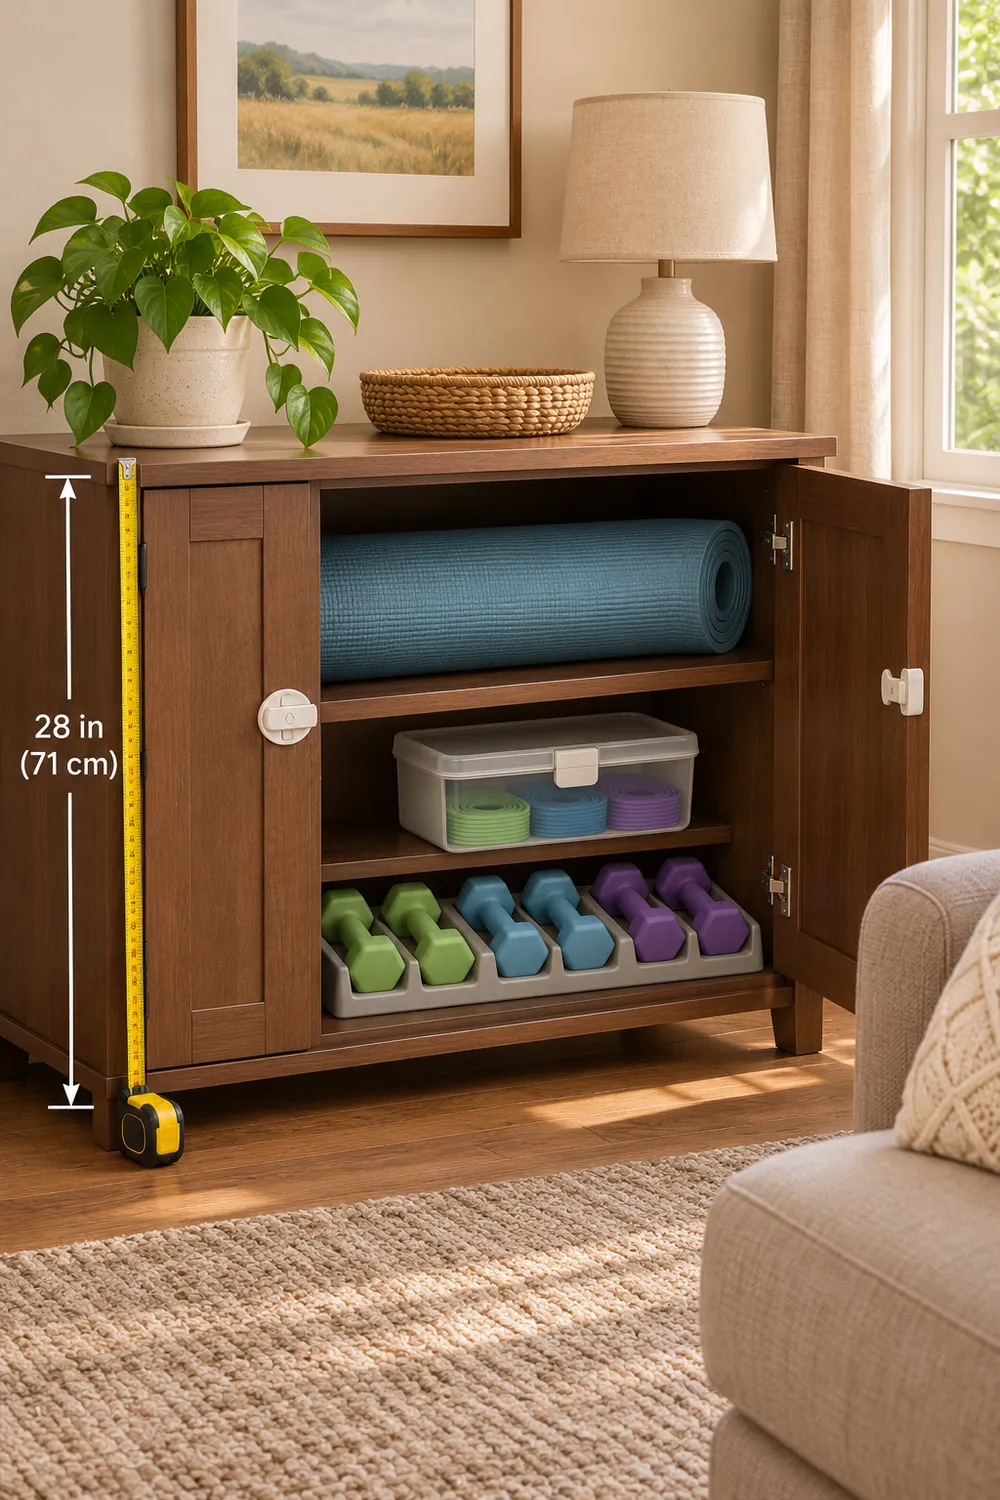
    A cabinet stores a rolled exercise mat, contained weights, and bands.

    Before the next session, remove grit and pet hair from the floor so they aren't trapped under the mat. A nearby handheld vacuum can make that step easier; these living room pet-hair cleaning strategies can help with recurring buildup. Return furniture only after equipment is contained. If cleanup regularly gets skipped, simplify the kit rather than adding another storage bin to maneuver around.

    Begin by marking the movement envelope for one familiar floor exercise. Check it against furniture edges, overhead obstructions, and access routes. That small test will reveal whether you need a different mat direction, one reliable parking spot, or a genuinely different setup.

  • A Small Living Room That Is Easier to Keep Free of Pet Hair

    A Small Living Room That Is Easier to Keep Free of Pet Hair

    You clear a place on the sofa, sit down in dark pants, and stand up wearing half the cat. When that sofa is also your reading chair, guest seating, and evening landing spot, keeping it usable matters more than making the whole room spotless. These ten changes target where fur collects and how you remove it, without requiring a new furniture set. The aim is less visible hair and easier upkeep—not an allergen-free room.

    Fur collects on a sofa throw and seat seam beneath the headline “Less Fur, Easier Upkeep.”

    1. Find the collection points before cleaning everything

    Before the next cleanup, look at the room in daylight from a low angle. Check the pet’s favorite seat, the crease beside the arm, the rug edge, and the floor beneath the sofa’s front rail. Note three places that collect the most hair. These are your priority zones, even if the middle of the floor looks more obvious.

    Separate resting spots from traveling fur. A dog may sleep beside you but leave loose hair along the route between the sofa and water bowl. Clean those routes as well as the seat. Don’t move a lamp or pet bed into a walkway just to contain shedding; a more convenient cleaning route is the better adjustment.

    2. Give the favorite resting spot a washable boundary

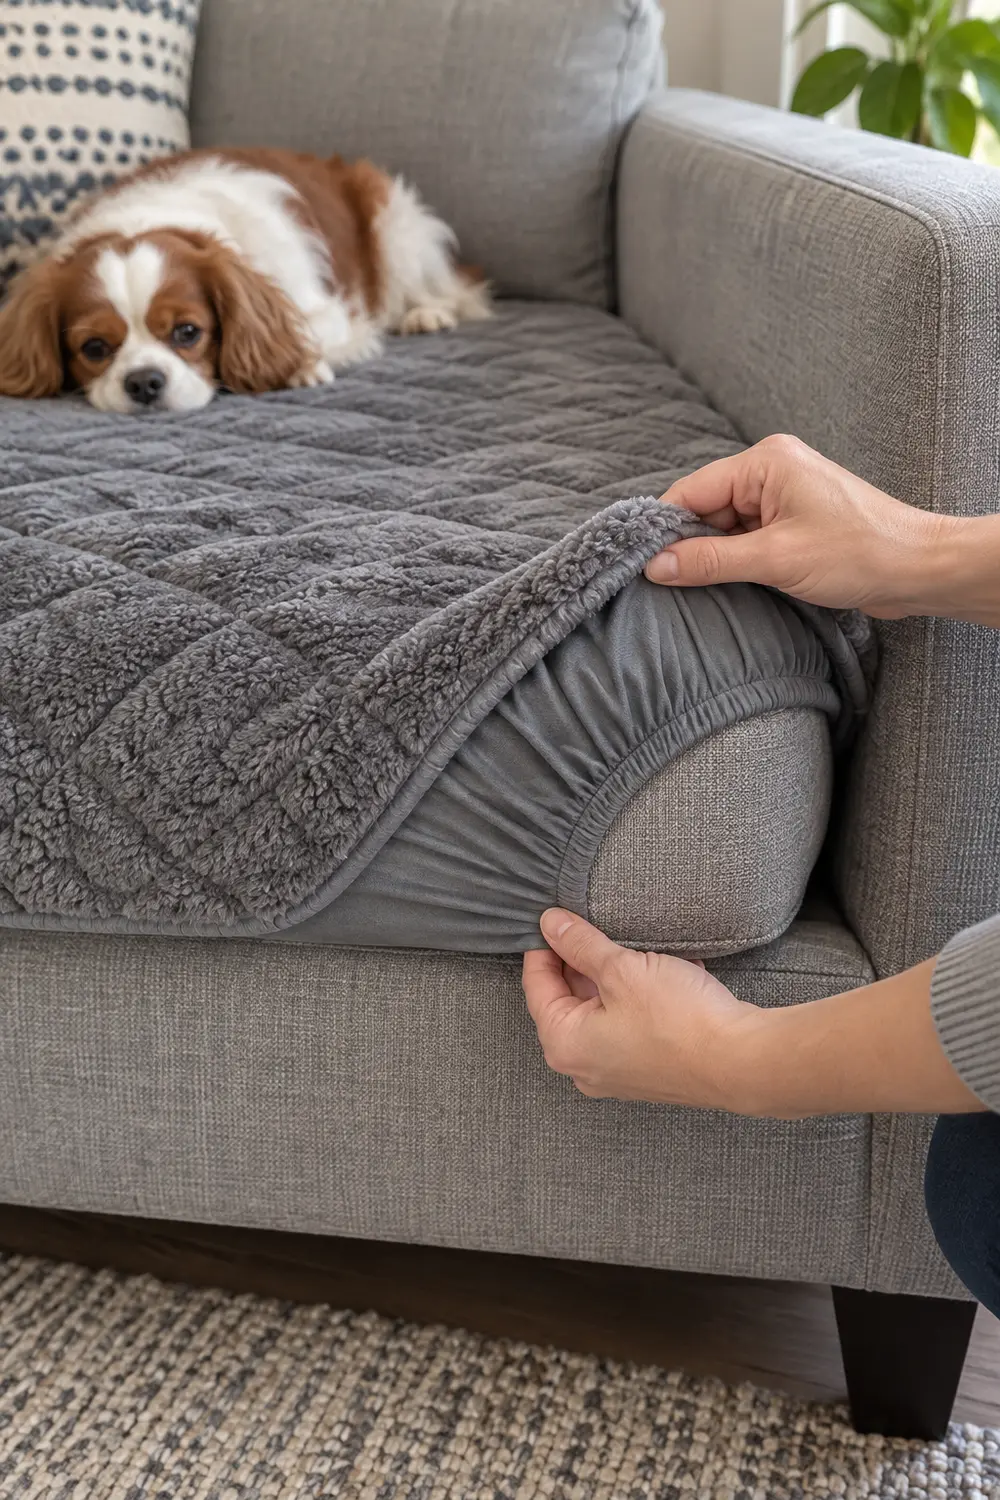
    Work with the place your pet already chooses. Cover that sofa corner with a washable pad large enough to catch hair when your pet curls up or stretches out. A fitted pad with enclosed elastic corners can stay put better than a loose towel. Check the attachment regularly, and avoid exposed straps or loops your pet might chew.

    Enclosed elastic holds a washable pet pad around a sofa cushion without dangling straps.

    Keep one spare if storage allows, so the seat stays protected while the first pad dries. Choose a size your washer can handle according to its instructions; an oversized blanket can turn a small cleanup into a bulky laundry job. A designated spot concentrates some fur, but it won’t persuade every pet to stop using the other cushions.

    3. Make the people’s seats removable too

    Protect the seats people actually use, not just the pet’s corner. Separate removable seat covers let you clean one cushion after a shedding-heavy afternoon instead of stripping the whole sofa. Measure cushion width, depth, and thickness before buying. Check that the cover’s care instructions permit the cleaning method you intend to use.

    On a sofa with attached cushions, a washable seat-and-back protector may be more practical, though it will need straightening. Tuck it only where the furniture design allows, and keep fabric away from reclining mechanisms. Don’t assume the original zippered cushion casing is washable: the zipper may exist for assembly, and laundering could shrink or distort the fabric.

    4. Compare upholstery by how readily it releases hair

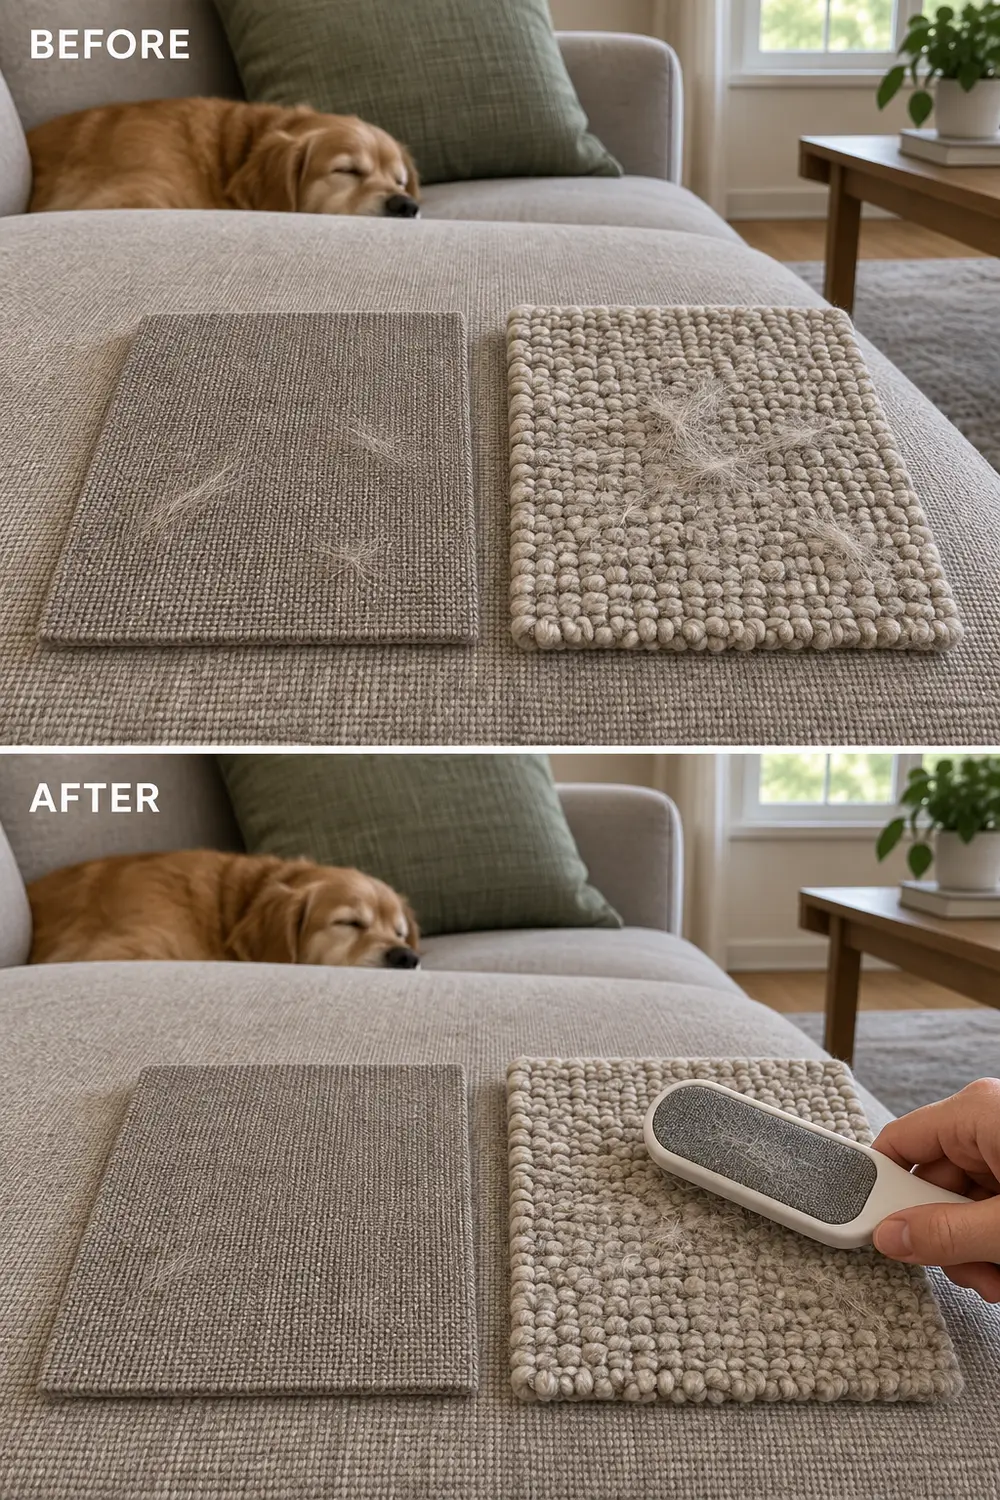
    If you’re choosing a cover or replacing worn seating, compare actual fabric samples rather than relying on a “pet-friendly” label. With permission, test your usual lint tool on samples carrying a little of your pet’s shed hair. Look for strands that lodge in loops, resist brushing, or remain after a light vacuum pass.

    Before-and-after sample demonstration shows some hair remaining caught in looped upholstery after brushing.

    A tight, relatively smooth weave may be easier to clear than a deeply textured one, but pet hair and fabrics vary. Leather and coated surfaces can be easier to wipe, yet claws may mark them and finishes need appropriate care. Matching upholstery to your pet’s coat disguises shedding; it doesn’t reduce the amount you need to remove.

    5. Reduce the cushion layers you have to clean

    Every extra pillow creates another face, seam, and sheltered pocket for fur. Keep the cushions that support someone’s back or make the sofa comfortable, then remove the ones that spend every evening on the floor. Two useful pillows with removable covers are often less work than a stack of decorative cushions with different care requirements.

    Try one washable throw instead of layering a knitted blanket over a fuzzy throw over the seat protector. Open knits and fringe can hold strands and take longer to clear. You don’t need a bare sofa: keep a favorite textured piece if you enjoy it, but recognize it as an item that requires separate attention.

    6. Choose furniture bases your tools can reach

    The useful gap under a sofa is one your actual vacuum head can enter. Measure the head’s height and how much room it needs to pivot, then check the lowest rail—not just the leg height. Before rearranging, measure the room, furniture, door swings, and access routes so cleaning access doesn’t come at the expense of a usable walkway.

    For existing furniture, move a lightweight side table out of the vacuum’s approach instead of buying taller sofa legs. Replacement legs can affect stability and should be used only when approved for the furniture. Cozyana’s guide to a living room arranged for everyday use can help you balance cleaning access with seating and storage.

    7. Match the tool to the surface

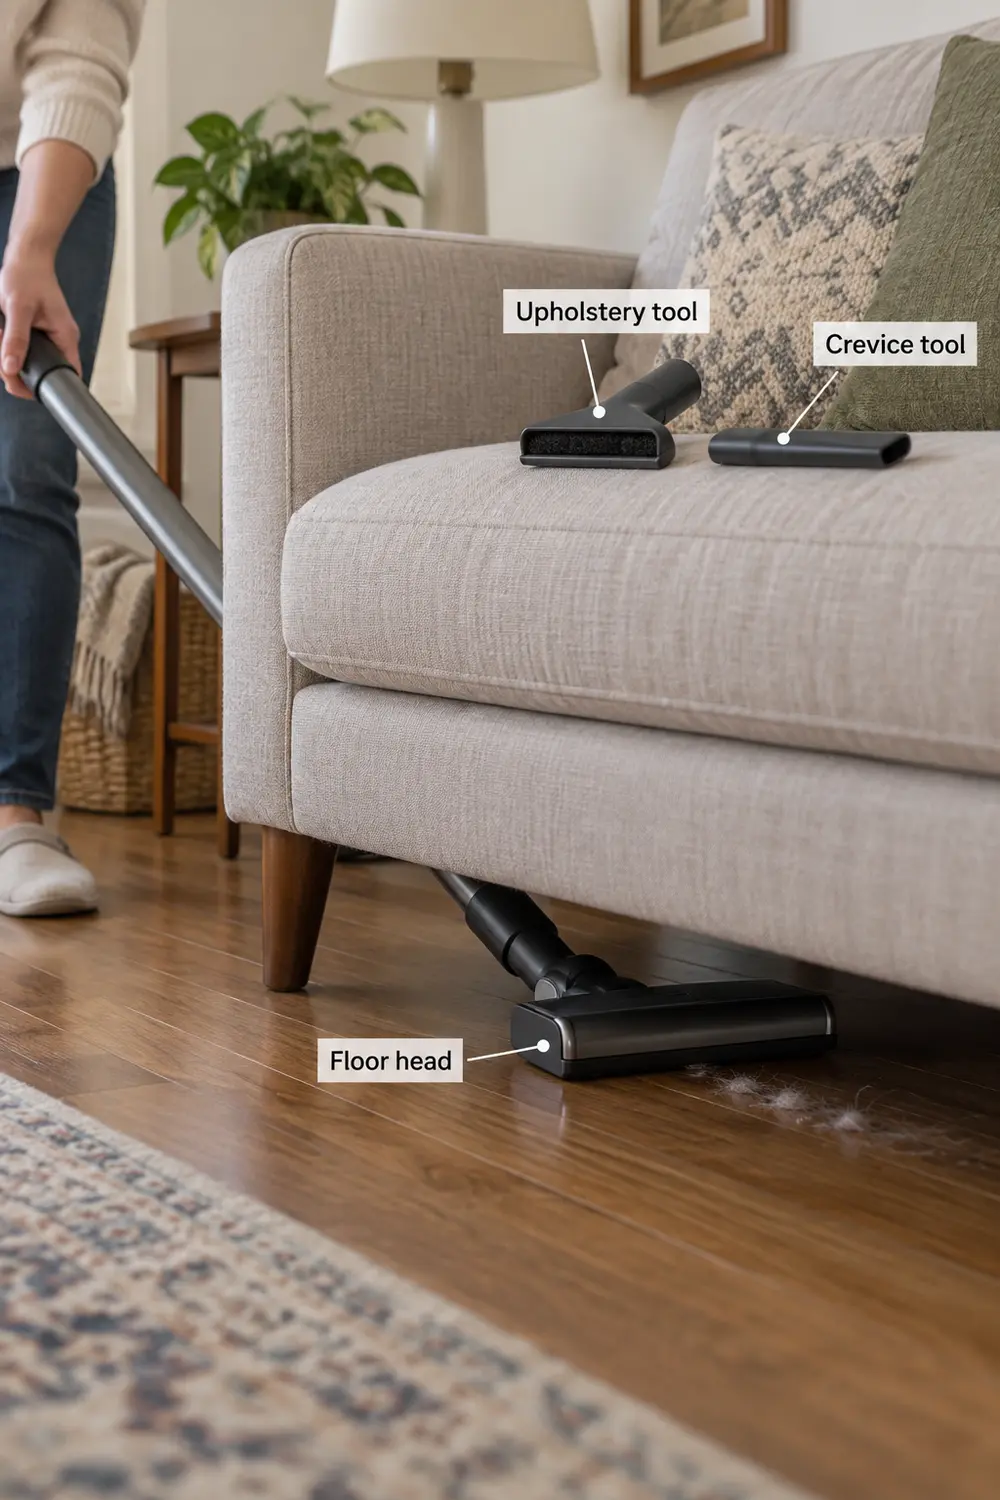
    Use a crevice attachment for sofa seams and narrow edges, an upholstery attachment for broad fabric areas, and a suitable floor head beneath furniture. Check the vacuum and surface manufacturers’ instructions before using powered brushes. A low-profile head may reach under the sofa while an upholstery tool handles the seat; one attachment rarely does both jobs well.

    A low-profile floor head reaches under the sofa, with separate upholstery and crevice tools identified above.

    A reusable lint brush can be convenient for a quick seat cleanup, while a rubber hair tool may help on compatible fabric. Test either in a hidden spot and stop if it snags, changes the nap, or leaves marks. Avoid dragging an abrasive carpet rake across upholstery simply because it collected hair well from a rug.

    8. Keep vacuum attachments ready to collect

    Before blaming the vacuum, inspect the attachment. Hair wrapped around a brush roll, a blocked opening, or an overfilled bin can interfere with pickup. Switch off and unplug the machine—or follow its battery-disconnection instructions—before clearing it. Use the manufacturer’s method for removing tangled hair rather than pulling hard against bristles or belts.

    Check the upholstery tool after a heavy shedding session; felt strips and small wheels can collect their own fringe. Maintain filters on the schedule in the manual, washing only those identified as washable and allowing them to dry fully before reinstalling. Keeping the attachments together in one accessible container also makes a two-minute cleanup more likely to happen.

    9. Remove loose fur before moving textiles

    Don’t snap a hairy throw into the air in the middle of the room. Brush or vacuum off loose hair first, then fold the dirty surface inward and carry it to the laundry area. For a cushion cover, remove it gently rather than peeling it off with a shake that drops collected fur onto the newly cleaned seat.

    Follow the textile’s care label and your washer’s load guidance. Heavy bedding may need its own load, and some throws cannot tolerate machine drying. Remove visible hair from the washer gasket or drum afterward as appropriate for the machine, and clean the dryer lint screen according to its instructions. Washing is a finishing step, not a substitute for removing loose clumps.

    10. Build a short reset around the next person sitting down

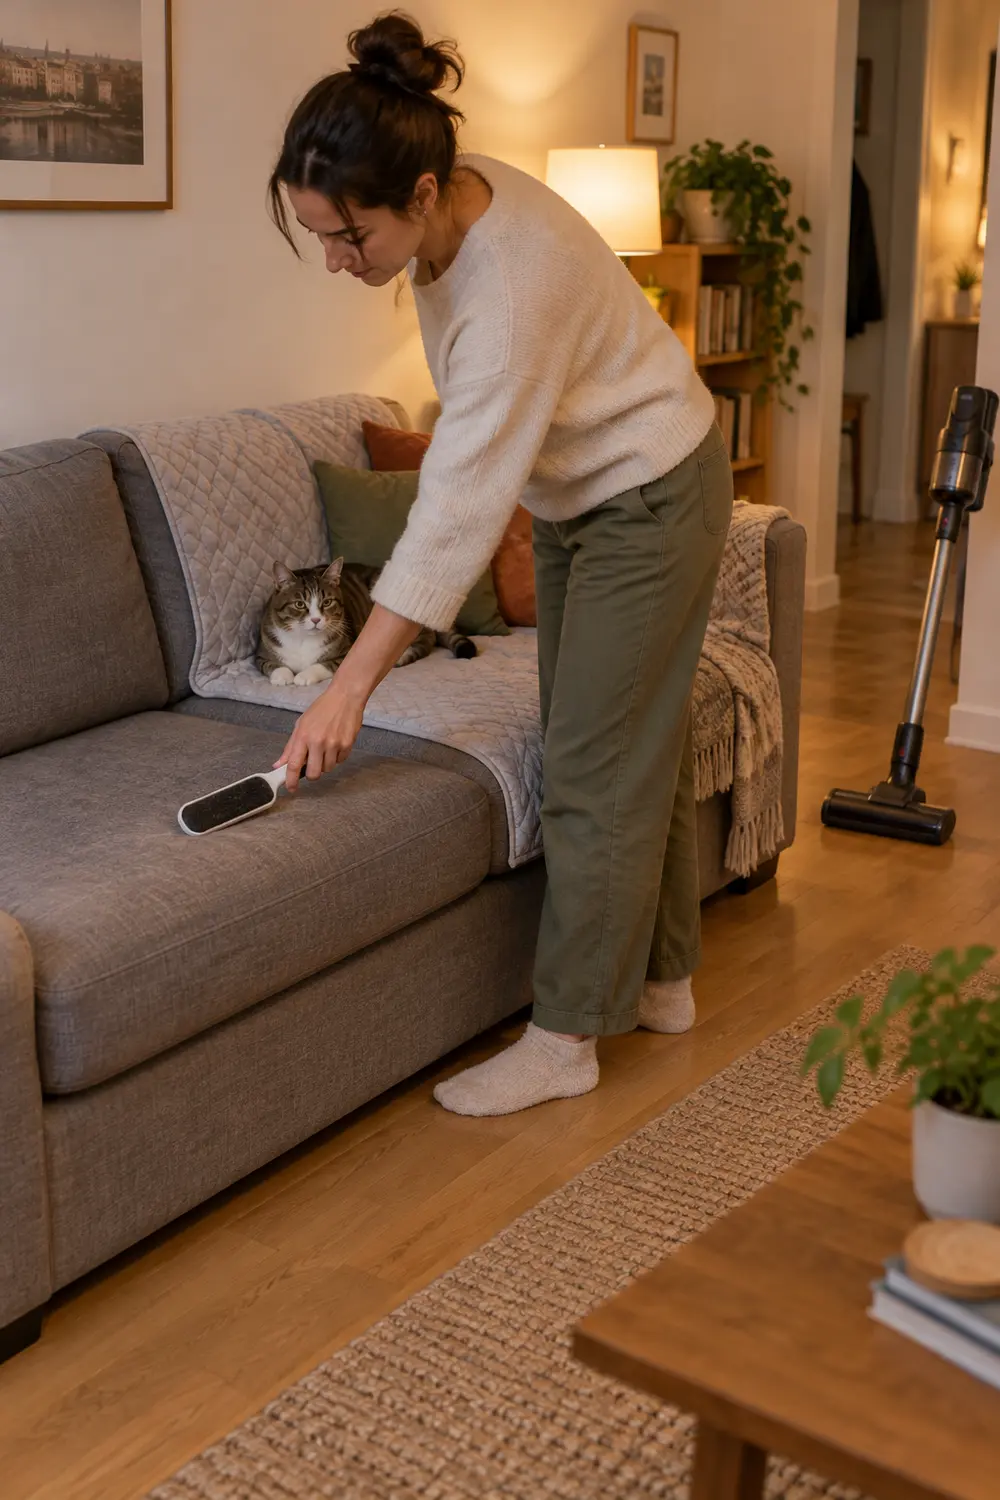
    Choose a repeatable cue: before evening TV, clear the pet’s corner, brush the next person’s seat, and vacuum the strip of floor in front. Work from seating down to the floor so fallen strands get collected last. Keep the routine short enough to do regularly; save cushion removal and full under-sofa cleaning for a separate session.

    A person brushes the sofa seat before an evening reset, with a floor vacuum ready nearby.

    If toys, chargers, and shoes block that strip, give them nearby homes rather than moving them twice a day. These daily drop-zone fixes address the clutter that slows cleaning down. Increase attention to your three hotspots during heavier shedding, but don’t turn every reset into a whole-room project. The goal is seating someone can use now.

    Start with the seat you keep brushing off before sitting down. Identify its worst collection point, fit one washable layer, and put the right cleaning tool within easy reach. Try that smaller routine before buying furniture or adding another cover.

  • A Small Living Room That Works Harder: 10 Ways to Make Space for Everyday Life

    A small living room often handles several jobs: a place to unwind, welcome friends, fold laundry, and sometimes work. The most useful small living room ideas start with those routines rather than a shopping list. These ten approaches help you decide what deserves floor space, what can move, and where a modest change will make daily life easier. All dimensions below are approximate planning guidelines; measure your room, furniture, doorways, and clearances before buying or rearranging.

    Compact living room with comfortable seating and an open walking route.

    1. Protect the Route You Use Most

    Map the walk from the entry to the next room before positioning seating. Aim for about 30–36 inches along the main route as an approximate planning guideline, allowing more for accessibility needs. In a living room that connects to a kitchen, shifting the sofa a few inches toward the window may create a continuous passage behind it without changing the entire arrangement.

    A common mistake is centering every piece on the room instead of respecting how people move through it. An off-center arrangement can look less formal, but it often functions better. This approach may not suit a room where moving the sofa would block a heater, door swing, or essential outlet; in that case, reduce furniture depth rather than forcing a passage.

    2. Choose a Sofa by Usable Seating, Not Bulk

    Compare a sofa’s seat width with its overall width. Slim arms can preserve sitting space without consuming extra floor area, while moderate depth leaves room in front. For example, a sofa about 72 inches wide may accommodate your household better than a bulky loveseat with oversized arms. Tape the footprint on the floor and check how the seat depth feels in person.

    Buying the smallest sofa available is a common mistake when it leaves everyone uncomfortable. Narrow arms may be less pleasant for leaning, and a shallow seat may disappoint someone who likes curling up. This strategy may not suit a household that needs a sleeper sofa or supportive reclining seats. Prioritize those requirements, then simplify the other furniture around the larger piece.

    3. Add Guest Seating That Can Change Jobs

    Let occasional seating serve another purpose between visits. A firm upholstered stool can sit beneath a console, then move beside the sofa when a friend arrives. A lightweight dining chair can also join the conversation area. For example, keep one attractive wood chair at a small desk and bring it forward for short gatherings instead of permanently squeezing in another armchair.

    The mistake is counting every stool as equivalent to a comfortable chair. Backless seating saves space but offers less support, especially during long visits. Moving furniture also creates a small setup task each time guests arrive. This idea may not suit households that entertain frequently or need supportive seating for older relatives; one permanent, well-chosen armchair may be the better investment.

    4. Break the Coffee Table Into Smaller Surfaces

    Replace one large coffee table with nesting tables or two compact side tables when the center of the room needs flexibility. Keep a surface within comfortable reach of each primary seat. For example, a small round table beside the sofa can hold a mug while a nesting partner slides forward for snacks, then returns underneath when you want floor space for stretching.

    Choosing tables that are too light or too small is a common mistake; they can wobble or become crowded after one drink. Separate surfaces improve flexibility but provide less continuous space for games or shared meals. This approach may not suit a room where the coffee table regularly serves as a dining spot. A single stable table could better support that routine.

    5. Use One Rug to Connect the Seating

    Choose a rug that connects the sofa and primary chair rather than sitting alone beneath the coffee table. As an approximate planning guideline, placing the front legs of the main seats on the rug usually creates a coherent group. In a compact apartment, test a 6-by-9-foot footprint with tape before assuming a smaller rug is the only option. Measure nearby door clearances too.

    A common mistake is choosing a tiny rug because the room is tiny, which can make the seating look disconnected. A larger rug brings visual continuity, but it costs more to clean and may cover flooring you enjoy. This idea may not suit a room with difficult door clearance or a household that needs especially easy rolling access; a low-pile option or bare floor may work better.

    6. Put Closed Storage Where Clutter Collects

    Locate storage beside the activity that creates the mess. A shallow cabinet near the sofa can hold chargers, game controllers, and reading glasses; a lidded basket can contain throws. For example, replace an open accent table with a small cabinet that has one drawer and an adjustable shelf. Check the interior dimensions against the actual objects, not just the cabinet’s exterior footprint.

    The common mistake is adding storage without leaving room to open it. Doors and drawers need clearance, and closed cabinets can feel visually heavier than open tables. This solution may not suit a narrow pinch point beside the entry or a spot where a recliner extends. Consider sliding doors or accessible baskets instead, while keeping frequently used items easy to retrieve.

    7. Use Wall Height Without Filling Every Inch

    Concentrate vertical storage in one useful zone, such as a tall bookcase beside the media cabinet. Keep everyday items on reachable shelves and reserve higher shelves for lightweight, infrequently used belongings. For example, a narrow bookcase can hold books below shoulder height and a few fabric bins above. Anchor furniture according to its instructions and confirm that the wall and fasteners are suitable.

    Filling every wall with shelves is a common mistake that trades floor clutter for visual clutter. Vertical storage increases capacity, but reaching high items can be inconvenient and anchoring may require landlord approval. This idea may not suit walls with unsuitable construction or rooms where safe anchoring is not possible. A lower, stable storage unit is preferable to an unsecured tall piece.

    8. Keep Window Treatments Clear of Daily Obstacles

    Choose window coverings around how the window, radiator, and nearby furniture operate. Where wall space allows, extending a curtain rod beyond the frame lets panels stack away from the glass. For example, use simple panels that stop just above the floor beside a sofa, or select an inside-mounted shade when curtains would brush a desk. Confirm mounting permissions in a rental.

    Hanging long panels automatically is a common mistake when fabric would cover a heat source or catch behind furniture. Curtains soften a room, but they require stacking space and cleaning; shades keep the perimeter simpler. This approach may not suit windows close to cooking splatter, damp areas, or heating equipment. Follow equipment clearance instructions rather than prioritizing a particular curtain length.

    9. Give Each Lighting Source a Specific Job

    Combine general illumination with light where you read or work. A compact floor lamp beside a chair and a small table lamp across the room can provide useful coverage without a large central fixture. For example, place an adjustable reading light behind the chair’s shoulder, then use a shaded lamp on a cabinet for softer evening light. Keep cords outside walking routes.

    The mistake is adding lamps wherever an outlet happens to be, leaving glare at eye level or cords crossing the floor. Multiple lights offer control but occupy surfaces and require accessible switches. This setup may not suit a room with very limited outlets or no safe cord route. A well-positioned ceiling fixture and one task light may be a more practical combination.

    10. Build a Calm Backdrop With a Few Repeated Colors

    Create visual continuity by repeating two or three colors across the room rather than matching every object. Start with a piece you already own, such as a blue sofa, and echo that color in one print or pillow. Warm off-white walls, wood furniture, and a muted rust accent can then provide variety without making each corner compete for attention.

    A common mistake is interpreting coordination as a requirement to replace everything or use only pale neutrals. A restrained palette can feel calmer, but too much matching can flatten the room’s character. This approach may not suit someone who enjoys a lively collection of colorful art. Keep the surrounding large surfaces quieter instead, allowing the collection to remain the focus.

    Start with the inconvenience you notice most, whether it is a blocked walkway, an unreachable lamp, or nowhere to set a drink. Test one change using furniture you already have, then live with it before buying anything. A successful small living room does not need every space-saving trick; it needs a few thoughtful choices that fit the people using it.

  • Why Conversation Sounds Harsh in a Small Living Room

    Why Conversation Sounds Harsh in a Small Living Room

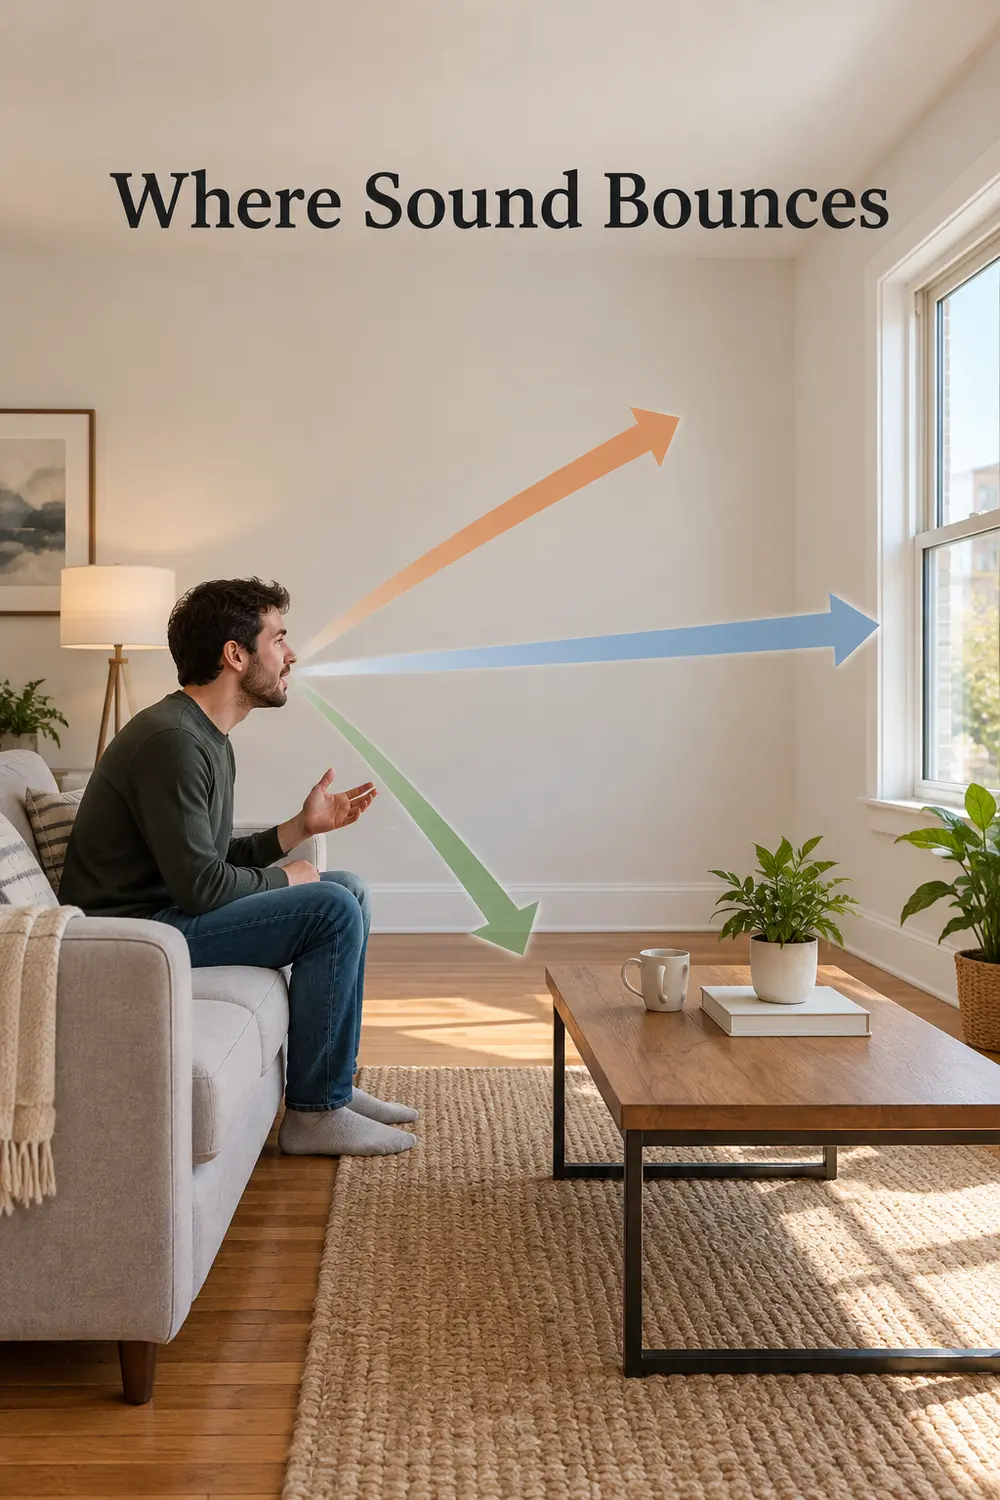
    Two people are talking, the dishwasher is running, and suddenly everyone seems to be raising their voice. In a small living room, sound bouncing off glass, bare floors, and painted walls can make conversation feel sharp or muddled. The goal is to reduce those reflections and competing sounds—not seal out the neighbors. Soft furnishings can help, but their thickness, coverage, and placement matter more than simply adding pillows.

    Small living room reflection map highlighting glass, bare flooring, and a painted wall beneath the headline “Where Sound Bounces.”

    1. Find the surfaces that keep sound bouncing

    Start with the room as you normally use it. Turn off music and listen while someone speaks from the usual chair. Notice exposed flooring, glass doors, a large mirror, and long stretches of bare wall. A single handclap may reveal a brief ringing or flutter, though it cannot tell you precisely which surface needs treatment.

    Sketch a quick floor plan and mark those hard surfaces, especially around and between the seats. Then temporarily hang a blanket over a broad bare area, safely away from heat, and repeat the conversation. A noticeable improvement gives you a useful lead before spending money. This is a comparison, not an acoustic measurement; one test will not diagnose every source of harshness.

    2. Give substantial curtains enough coverage

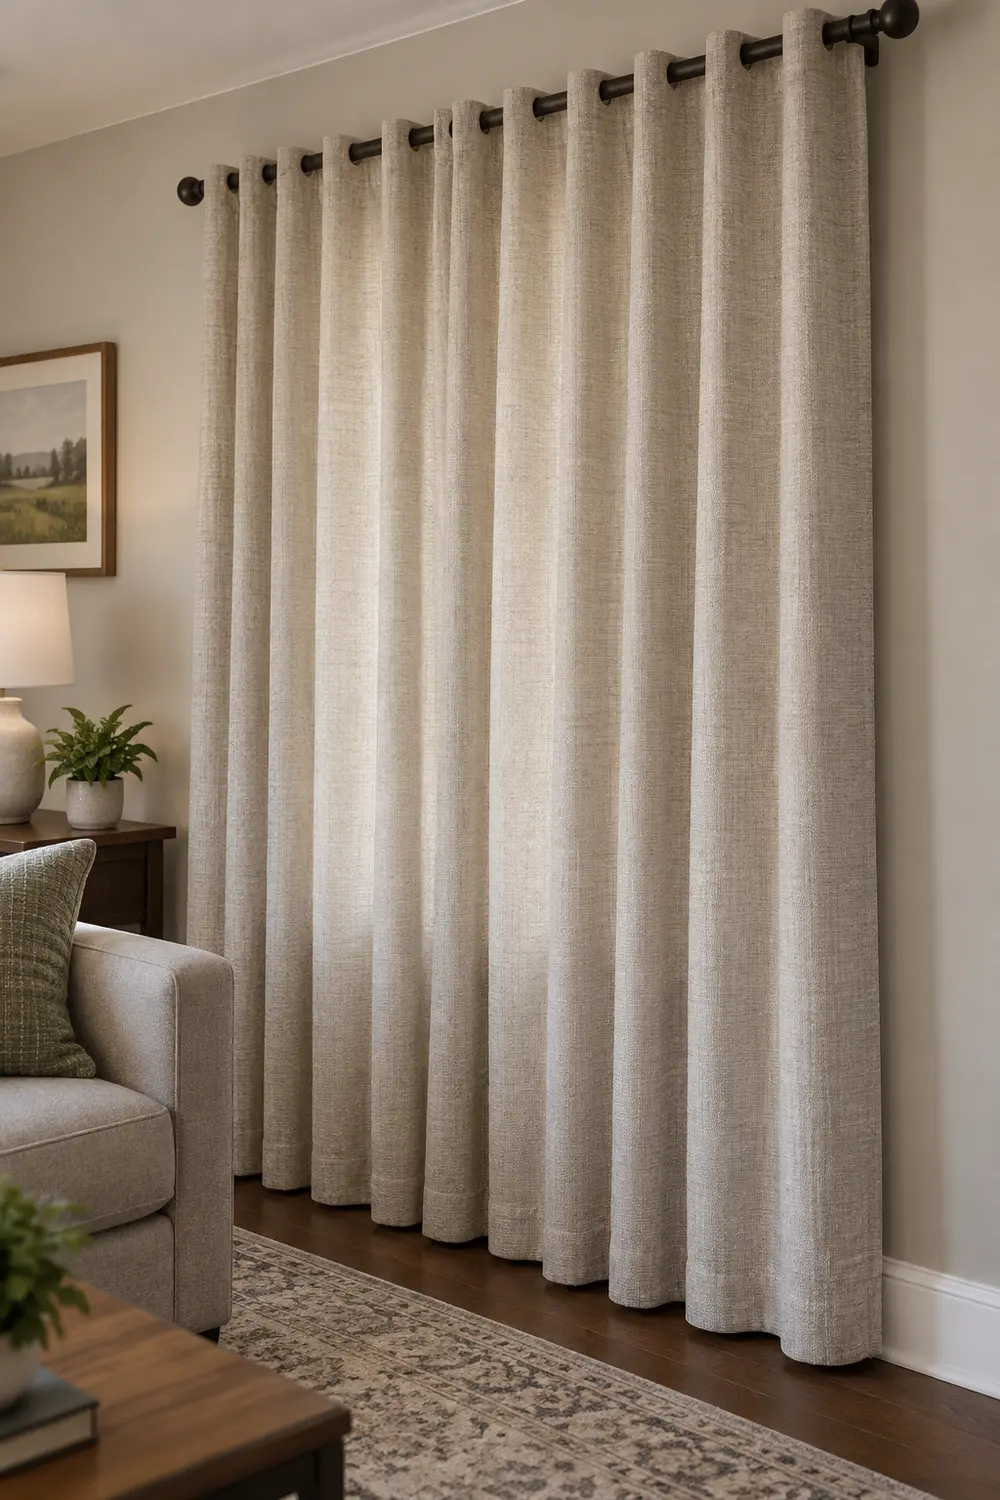
    A thin sheer offers privacy but little material to absorb reflected speech. If the window occupies much of one wall, try heavier, densely woven curtains with generous folds. Use panels wide enough to cover the glass when closed without stretching flat. Borrowing a substantial curtain from another room can help you judge the benefit before replacing anything.

    Substantial curtains drawn across a living room window, with full folds rather than fabric stretched flat.

    The compromise is daylight: curtains only treat the area they actually cover, so panels parked beside exposed glass do less during daytime conversation. You might close just the panel nearest your seating. Follow rod load limits and mounting instructions, observe heater clearances, and keep fabric off vents. Heavier curtains can soften reflections; they are not a dependable barrier to street or neighbor noise.

    3. Test where people sit before moving everything

    Move one lightweight chair and compare the same short conversation in two positions. Try facing your companion more directly instead of speaking across the full length of the room. Bringing seats into a comfortable conversational grouping can make direct speech easier to hear without requiring everyone to speak louder.

    Also test shifting a chair away from a bare corner or a wall immediately behind the listener. Even a modest adjustment may sound different, but keep the position that actually helps in your room. Measure furniture, door swings, and access routes before committing; these layout fixes for a narrow living room can help preserve a usable walking route while you regroup seats.

    4. Cover more of the exposed floor between seats

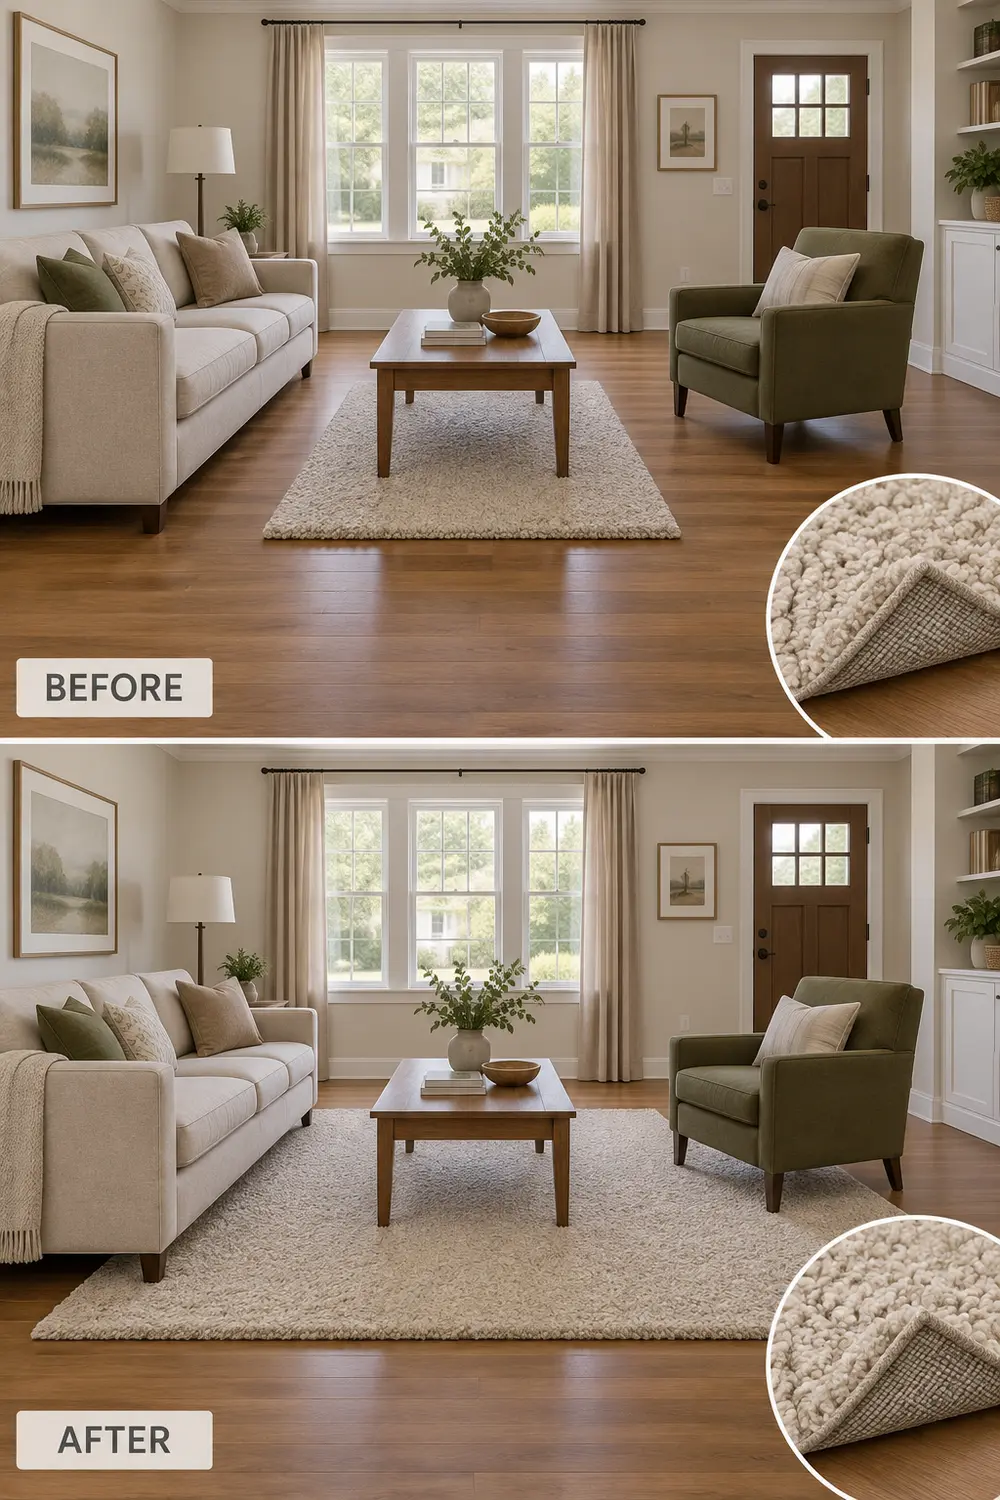
    A tiny rug under the coffee table leaves most of the reflective floor untouched. Aim for meaningful coverage through the conversation area, often with the front feet of the sofa and chairs resting on the rug. A substantial pile generally offers more sound-absorbing material than a thin, tightly woven mat, though neither treats the whole room.

    Before and after comparison showing a small rug replaced by wider floor coverage, with turned corners revealing pile and backing.

    Tape out a proposed size before ordering, checking entry doors and the route around the coffee table. Our guide to rug sizing and furniture placement helps connect that coverage to the seating layout. Choose a pile you can realistically vacuum and clean; a thick rug that traps pet hair or blocks a door is not a useful improvement.

    5. Choose underlay for the rug and floor you have

    Check what is beneath an existing rug before replacing it. A compatible felt or felt-and-grip pad can add a cushioning layer and keep the rug more stable. Match the pad to the floor finish and rug manufacturer's recommendations; some backing materials can discolor particular floors. Trim or order it slightly smaller than the rug so the edges sit properly.

    Underlay is a supporting choice, not a cure for a room full of bare walls and glass. A thin nonslip mesh mainly addresses movement and adds little absorbing material. Avoid stacking loose pads to chase thickness: that can create shifting edges and interfere with doors. Check the combined rug-and-pad height, especially where children play or people regularly cross the rug edge.

    6. Soften seating that is mostly hard or smooth

    If your seating is a leather sofa and two wooden chairs, work with those pieces before replacing them. Add properly fitting upholstered seat cushions to the chairs, or use a substantial washable throw across part of the sofa. These additions introduce some absorbing material close to the conversation, where a bare seating group otherwise offers little.

    Keep expectations proportional to coverage. Two decorative pillows will not balance a large glass wall, and fabric stretched thinly over a hard surface does less than substantial upholstery. Choose cushions that stay secure without dangling ties in walking paths. Leave enough clear seating for actual people; repeatedly moving a pile of pillows makes an acoustic improvement feel like another household chore.

    7. Use filled bookcases without treating them as acoustic panels

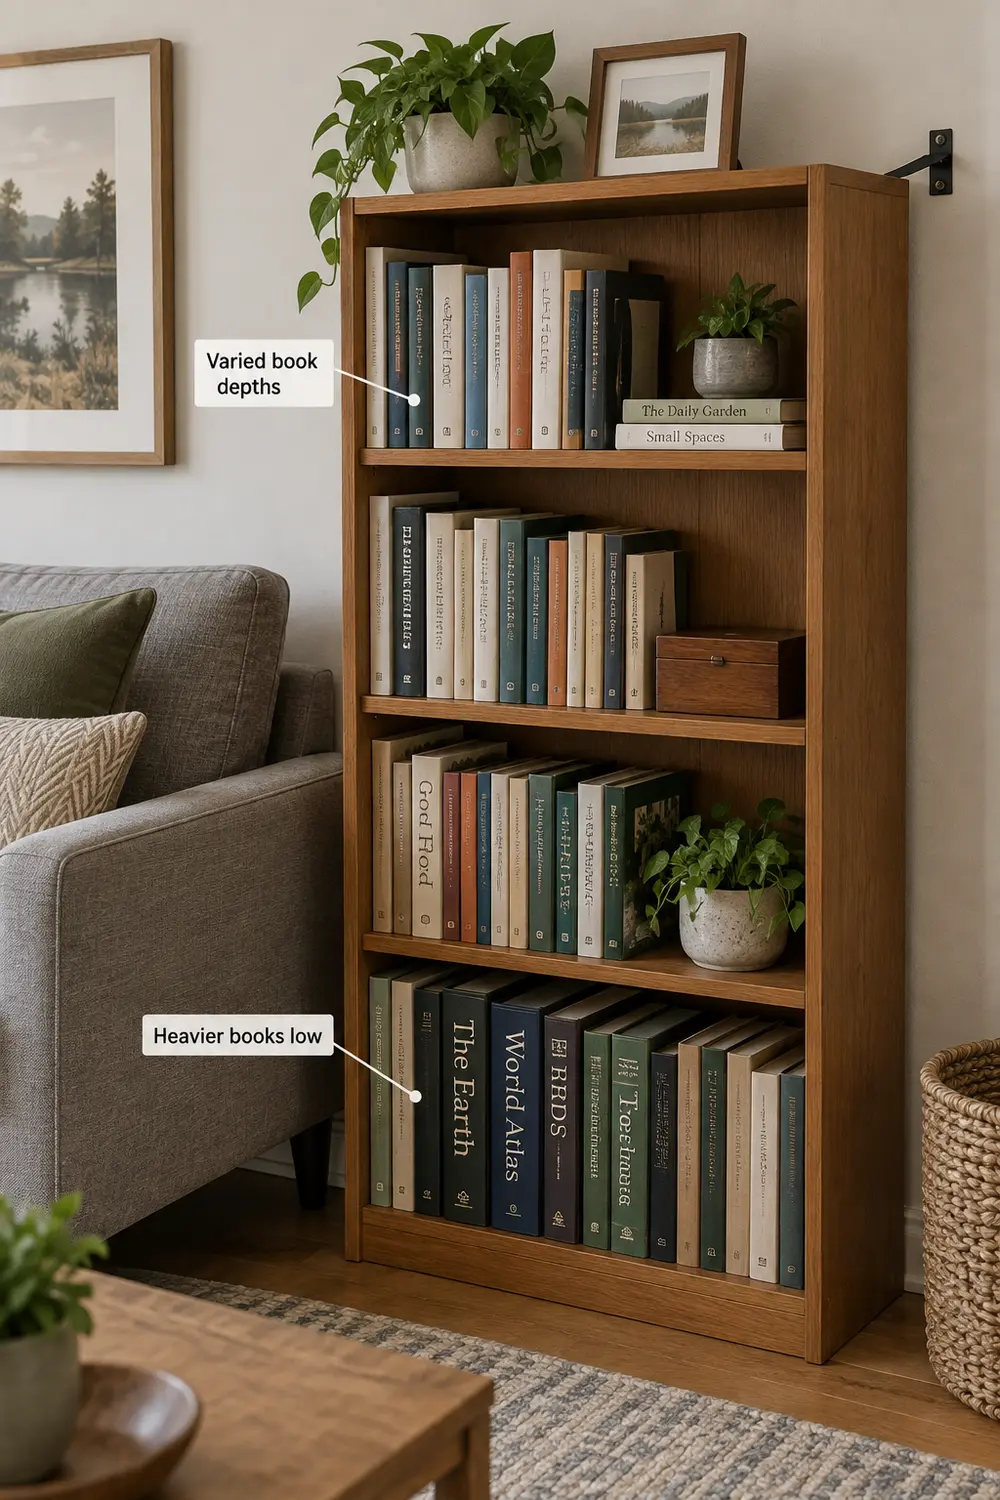
    A bookcase along a bare wall can interrupt a broad, flat surface. Arrange books in practical groups with some variation in depth, rather than leaving most shelves empty or filling them with glass ornaments. Keep frequently used books accessible. This is a useful way to work with storage you already need, not a reason to buy books by the foot.

    Filled bookcase with varied book depths, heavier volumes on lower shelves, and an anti-tip attachment beside a sofa.

    Books and shelf edges may scatter some reflected sound, but a household bookcase is not a tested diffuser or a substitute for absorption. It will not reliably stop voices traveling through a shared wall. Keep heavy volumes low and secure the unit according to its instructions. If rental restrictions prevent a safe installation, choose another treatment rather than leaving tall furniture unsecured.

    8. Let necessary wall-side furniture add upholstery

    When you genuinely need another seat, consider an upholstered bench or compact padded chair along an exposed wall instead of a hard bench. The upholstery adds absorbing area while serving a daily purpose. A padded reading chair beside the conversation group may be more useful than squeezing in a console that provides another smooth surface.

    This is a replacement decision, not an instruction to fill every wall. Measure the piece, its delivery route, and the space needed to use it without blocking doors, ventilation, or heaters. An upholstered storage bench can help a shared room, but its acoustic contribution remains limited by size and construction. Skip it if the room already has enough seating and needs breathing room.

    9. Lower the background noise competing with voices

    Sometimes the immediate problem is less echo than competition. Pause the robot vacuum, move a portable fan farther from the conversation, or schedule the dishwasher for later when practical. In an open-plan apartment, one appliance can make everyone talk louder. Compare the room with those optional sounds off before deciding you need more furnishings.

    Do not disable necessary ventilation or tolerate uncomfortable temperatures for quieter conversation. Maintain user-serviceable filters and parts only as the manufacturer directs, and report a newly rattling vent or appliance to the landlord or an appropriate technician. Rugs and curtains cannot repair mechanical vibration. Addressing a noisy source is a separate task from reducing the sound reflected around the room.

    10. Place rated acoustic panels where they can help safely

    If the room still sounds harsh, consider purpose-made panels with published sound-absorption ratings and installation instructions. Use your earlier listening tests to choose an exposed wall near the seating, such as the wall behind the listener. Position panels around seated ear height where practical, clear of outlets, vents, heaters, and door swings. Test the location before permanent mounting.

    Two people talking beside securely mounted fabric acoustic panels, with the doorway and wall outlet left clear.

    Compare ratings for the complete panel construction, not just the fabric covering; an NRC rating describes absorption, not soundproofing. Follow mounting, weight, and fire-safety guidance, and get rental permission where required. Do not assume adhesive strips will support a panel. Properly supported freestanding products may offer another option, but their feet need floor space and protection from tipping around children or pets.

    Start with a quiet-room conversation and one reversible test: close substantial curtains, reposition a chair, or temporarily cover a reflective area. Keep the change that makes listening easier. Then decide whether better floor coverage or a targeted panel is worth the space, maintenance, and expense.

  • A Dark Small Living Room: 10 Ways to Find More Light Without Going All White

    A Dark Small Living Room: 10 Ways to Find More Light Without Going All White

    A dark living room does not automatically need white walls or another lamp. Sometimes the bigger problem is a curtain covering precious glass, a sofa blocking the sill, or dark surfaces absorbing the daylight that does arrive. The most useful small living room ideas start with those conditions. These ten changes focus on getting daylight farther into the room and making existing surfaces work harder, while leaving room for color, privacy, and furniture you already own.

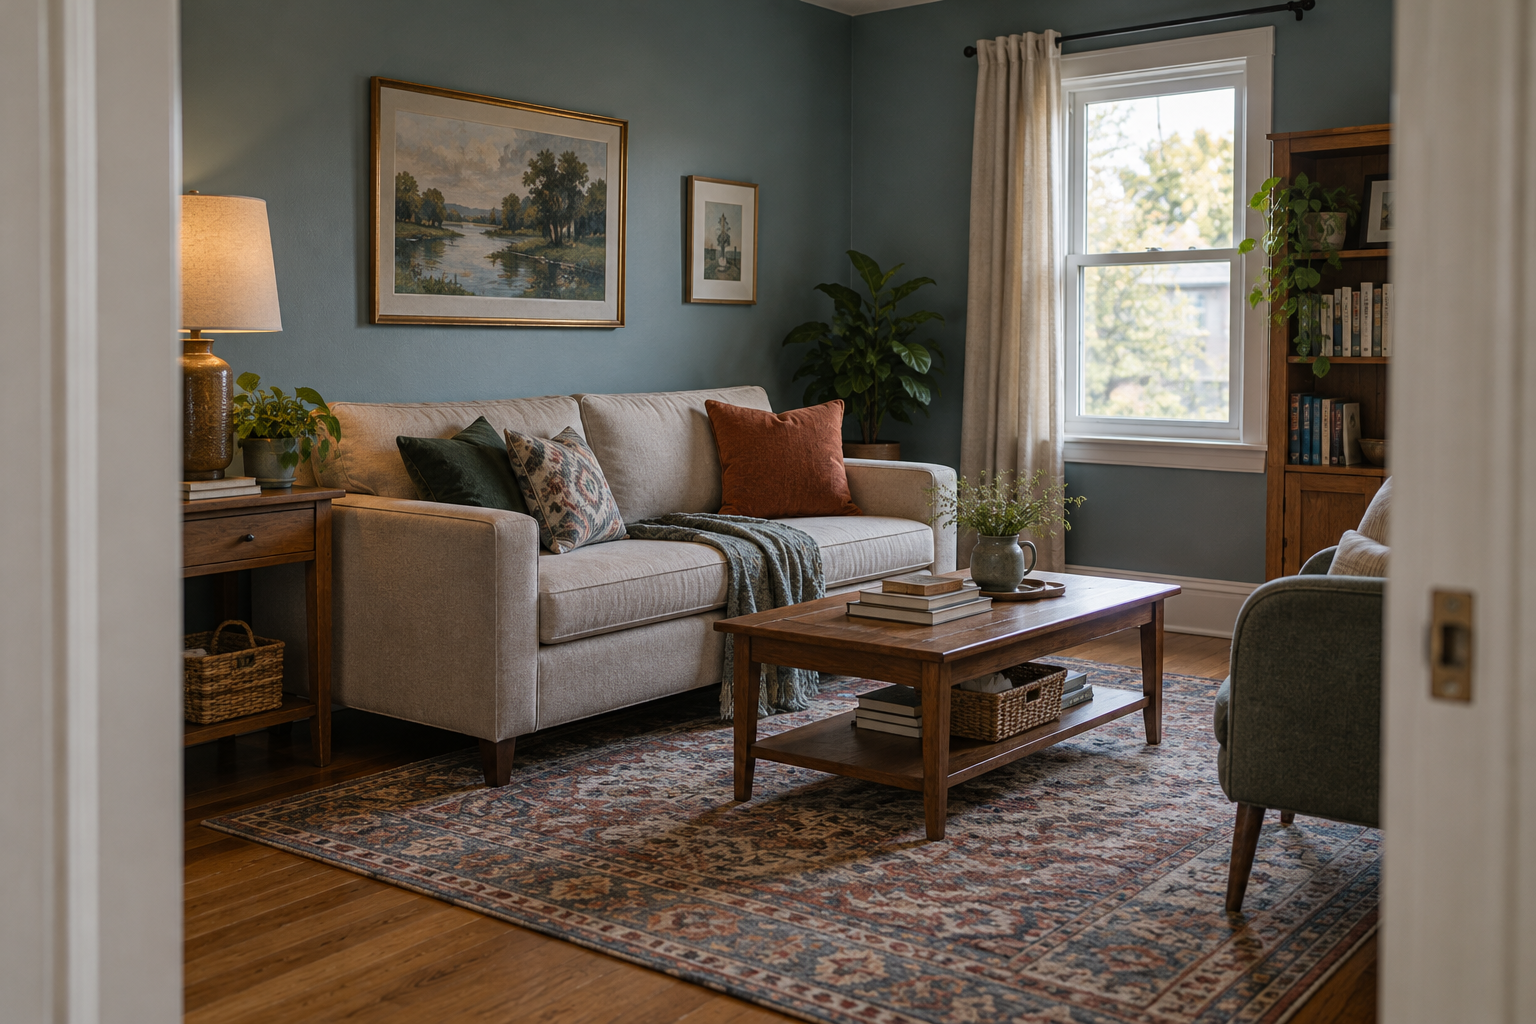
    Compact blue-green living room with clear windows and daylight reaching an oatmeal sofa.

    1. Start With the Glass, Screens, and Window Ledge

    Before buying anything, clean the interior glass and any safely accessible exterior glass, following the window manufacturer’s care instructions. Dust removable insect screens and clear objects from the ledge. In a living room with one window, a dusty screen and a row of tall plants can noticeably dull the opening. Move those plants to a nearby stand that sits outside the glass area.

    The mistake is assuming every obstruction is yours to remove. Exterior screens, storm windows, and nearby branches may require landlord approval or professional access. Cleaning will not overcome a shaded courtyard or deep roof overhang, and reaching outside an upper-story window is not worth the risk. Treat this as a low-cost baseline, not a guarantee of a dramatically brighter room.

    2. Give Open Curtains Somewhere to Go

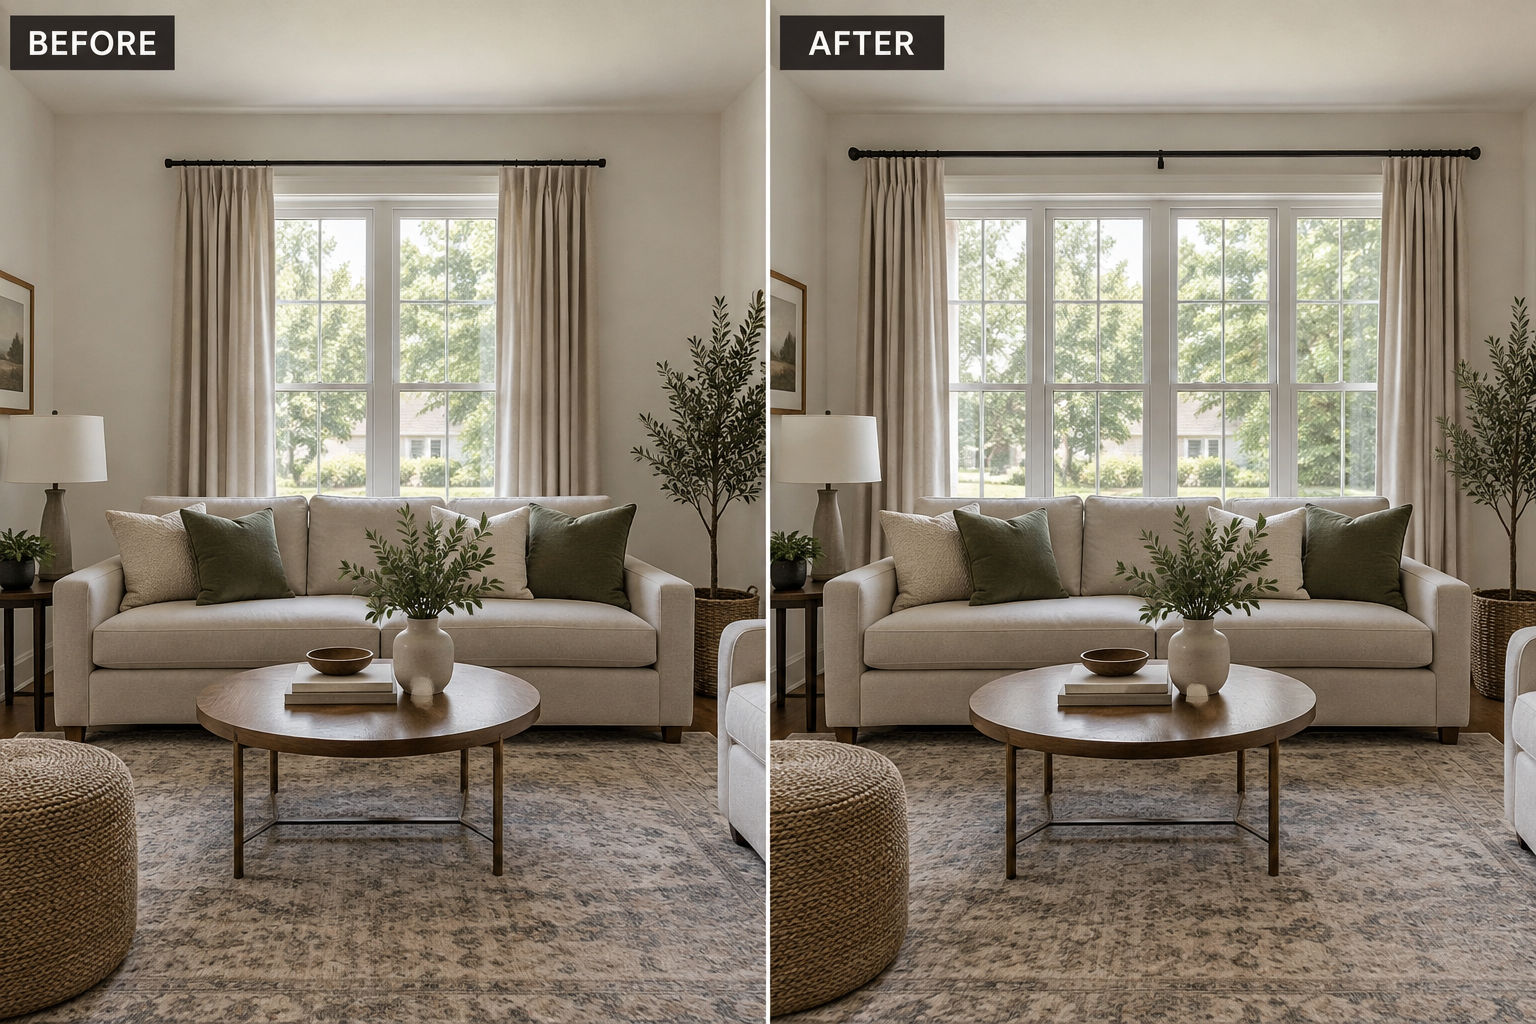
    Open curtains should rest mostly beside the window, not across it. If wall space allows, extend the rod approximately 8–12 inches beyond each side as a planning guideline; measure your window, panel bulk, and neighboring walls first. For example, reposition existing linen-look panels so their gathered folds clear the glass instead of leaving a narrow strip of daylight down the middle.

    Before and after comparison showing curtains moved beside the window to expose more glass.

    Hanging the rod higher without making it wider does not solve blocked glass. Oversized panels can also create bulky stacks that crowd a corner or heater. Wider placement sacrifices some usable wall space, so it may not suit a window squeezed between cabinets. In that situation, a slim inside-mounted shade can keep the opening clearer, provided its raised stack is compact.

    3. Lower the Furniture in Front of the Window

    Look at the window from the doorway and notice what cuts across its lower half. A tall sofa back, solid bookcase, or crowded console may interrupt daylight before it reaches the room. Try moving a high-backed chair to an interior wall and putting a low bench beneath the window instead, keeping its top below the sill and required heater clearances unobstructed.

    Do not trade a blocked window for a blocked walkway. Moving the sofa may make circulation worse or create an awkward television angle, especially in a narrow rental. Lower furniture also tends to offer less concealed storage. If the window wall is your only workable seating location, prioritize a lower profile when replacement is necessary rather than discarding a serviceable sofa now.

    4. Aim a Mirror at Daylight, Not Clutter

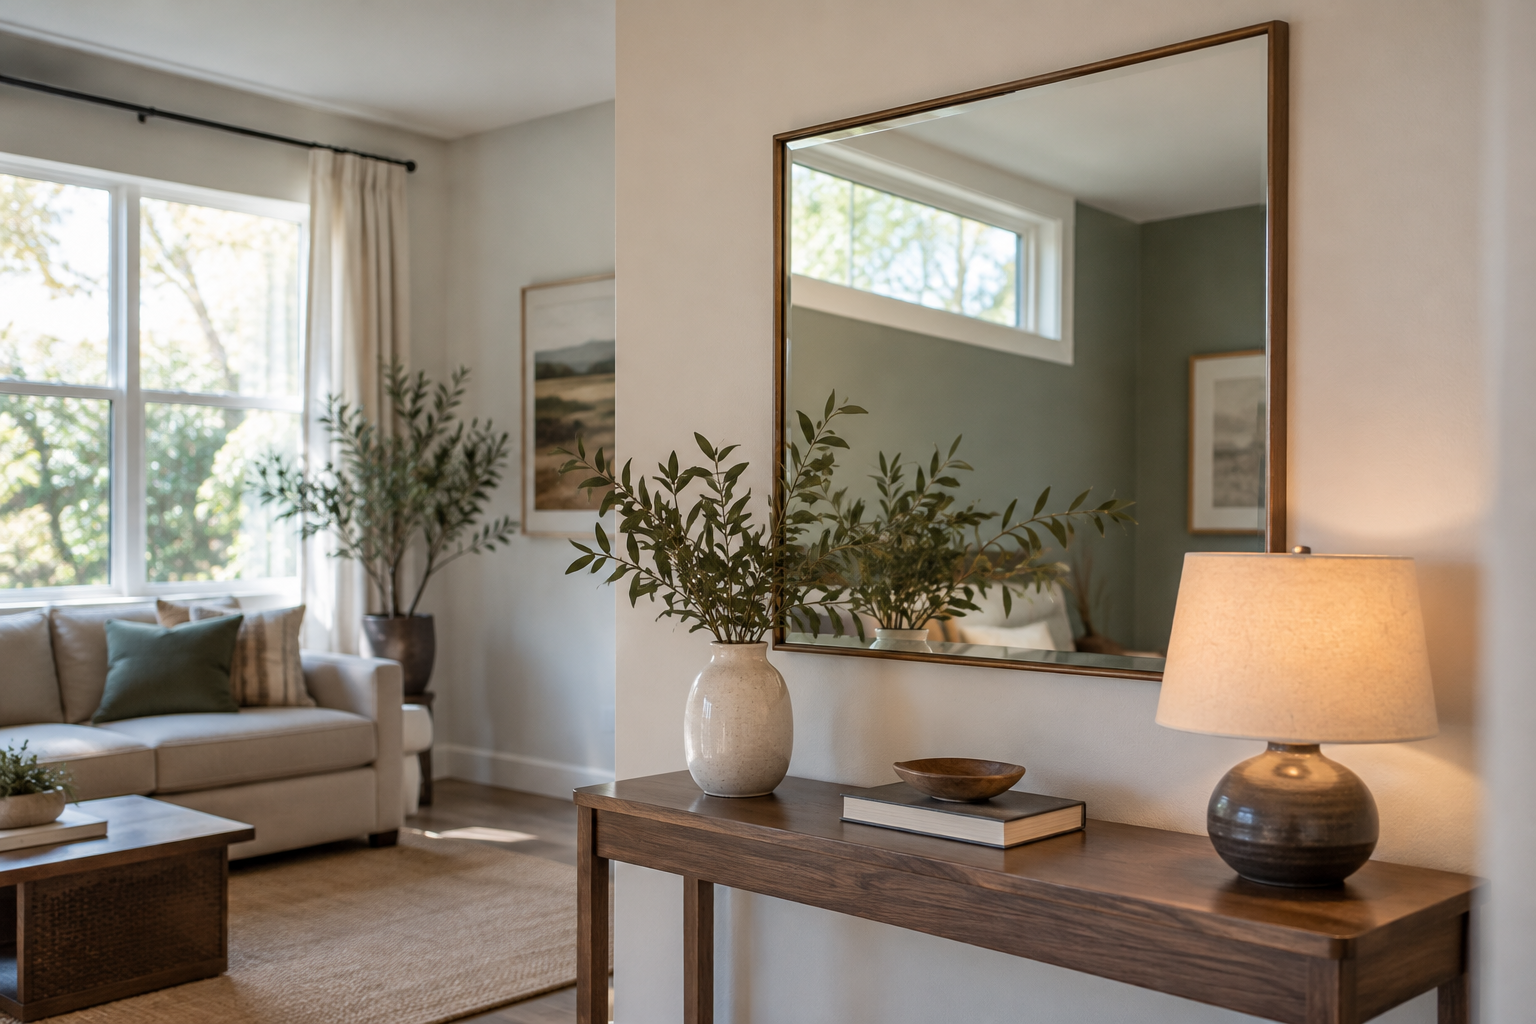
    Test a mirror’s position before making holes. Have someone hold it securely on a wall perpendicular to the window, then check the reflection from your usual seat. A medium-size mirror above a shallow console might catch bright sky or a softly lit wall and share that brightness with a dim corner. Choose the location by its reflection, not symmetry alone.

    Mirror above a shallow console reflects a bright window into a dimmer corner.

    A mirror cannot manufacture daylight, and a poorly aimed one may double the view of a dark hallway or cluttered shelf. Direct sun can also produce uncomfortable reflected glare. This approach may not suit a room where every available wall faces visual clutter. Use appropriate mounting hardware, and avoid an unsecured leaning mirror where children, pets, or tight circulation make tipping a concern.

    5. Choose a Lighter Color Without Abandoning Color

    If painting is an option, consider a lighter version of a color you actually enjoy: pale sage, soft clay, or warm gray-beige. Compare large samples on more than one wall, morning and afternoon. A light-reflectance value can help compare paint options, but the room test matters most. For example, softened sage can retain personality while reflecting more light than deep forest green.

    The common mistake is choosing from a tiny chip under store lighting. A pale color may look muddy in a shaded room or unexpectedly cool beside blue-tinted daylight. Repainting also takes time and may require permission. If you love an existing dark wall, keep it and address the window and furnishings first; lighter paint alone cannot compensate for very little incoming light.

    6. Keep Privacy Where You Need It

    For a street-facing room, separate the need for privacy from the need to cover the entire window. A top-down shade can screen the lower view while leaving upper glass open to the sky. For example, lower the top edge enough to admit daylight above eye level while keeping the seating area screened from pedestrians. Check sightlines from outside when possible.

    Sheer fabric is not reliable nighttime privacy when the room is brighter than outdoors. Likewise, frosted film can obscure a view while still showing silhouettes, and some films are unsuitable for particular glazing. Partial coverage may not work opposite taller buildings. Confirm product compatibility and rental rules, and keep a full-coverage option when neighbors can look down into the room.

    7. Let a Lighter Rug Interrupt a Dark Floor

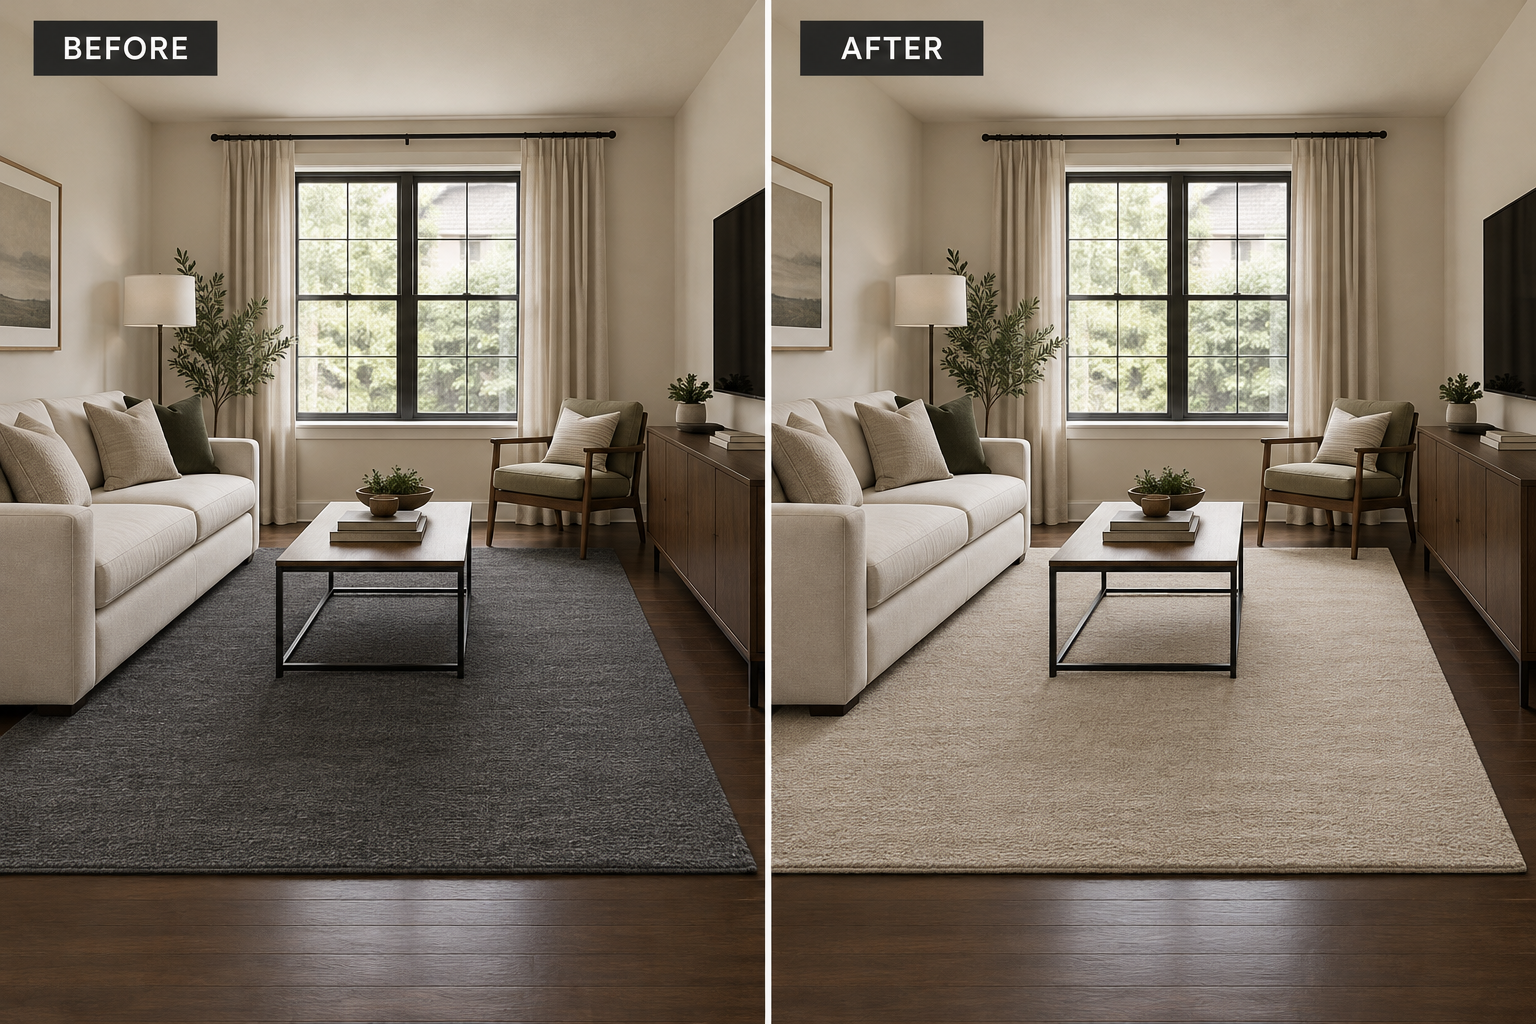
    A dark floor occupies a large part of your view, even when the walls are light. Covering some of it with an oatmeal, pale camel, or softly patterned rug can make the room’s lower half feel less heavy. For example, replace a charcoal rug with a low-pile sand-colored version of the same size, leaving the furniture arrangement and visible floor border unchanged.

    Before and after comparison of charcoal and sand-colored rugs on the same dark floor.

    A tiny pale rug floating between furniture can create visual fragments instead of a calmer surface. Measure your seating arrangement before choosing a size, and use a suitable rug pad. Light rugs reveal spills and tracked-in dirt, while thick piles complicate door clearance and mobility. This may not be the best change for a high-traffic entry that opens directly into the living room.

    8. Lighten the Largest Upholstered Surface

    When a dark sofa dominates the room, change its visible surface before replacing its frame. A well-fitted slipcover in warm flax or light taupe can reduce that large dark area without introducing stark white. Order fabric samples and examine them beside the window. A tightly woven fabric often reads more evenly than deep, heavily textured upholstery with strong shadows between its fibers.

    Loose sheets tucked over cushions usually look temporary and shift with use. Slipcovers also do not fit every sofa shape, and pale upholstery requires a realistic cleaning plan. Fabric texture affects appearance, not the amount of daylight entering the room. If pets, spills, or an unusual frame make this impractical, retain the sofa and lighten a different large surface instead.

    9. Concentrate Dark Accents Instead of Scattering Them

    Brightness is partly about what surrounds it. Keep some dark accents, but gather them into deliberate groups rather than outlining every surface in black. For example, consolidate several small dark-framed pictures into one arrangement over the sofa, leaving a broad area of lighter wall nearby. That uninterrupted area makes the available daylight easier to notice without stripping away all contrast.

    Removing every dark detail can make the room feel flat without making it physically brighter. This is a visual adjustment, not a substitute for clearing a window. Large art collections may also need more display space than one grouping allows. Keep meaningful pieces, but consider rotating them rather than covering every available patch of wall with high-contrast frames.

    10. Use One Reflective Finish Where Light Already Lands

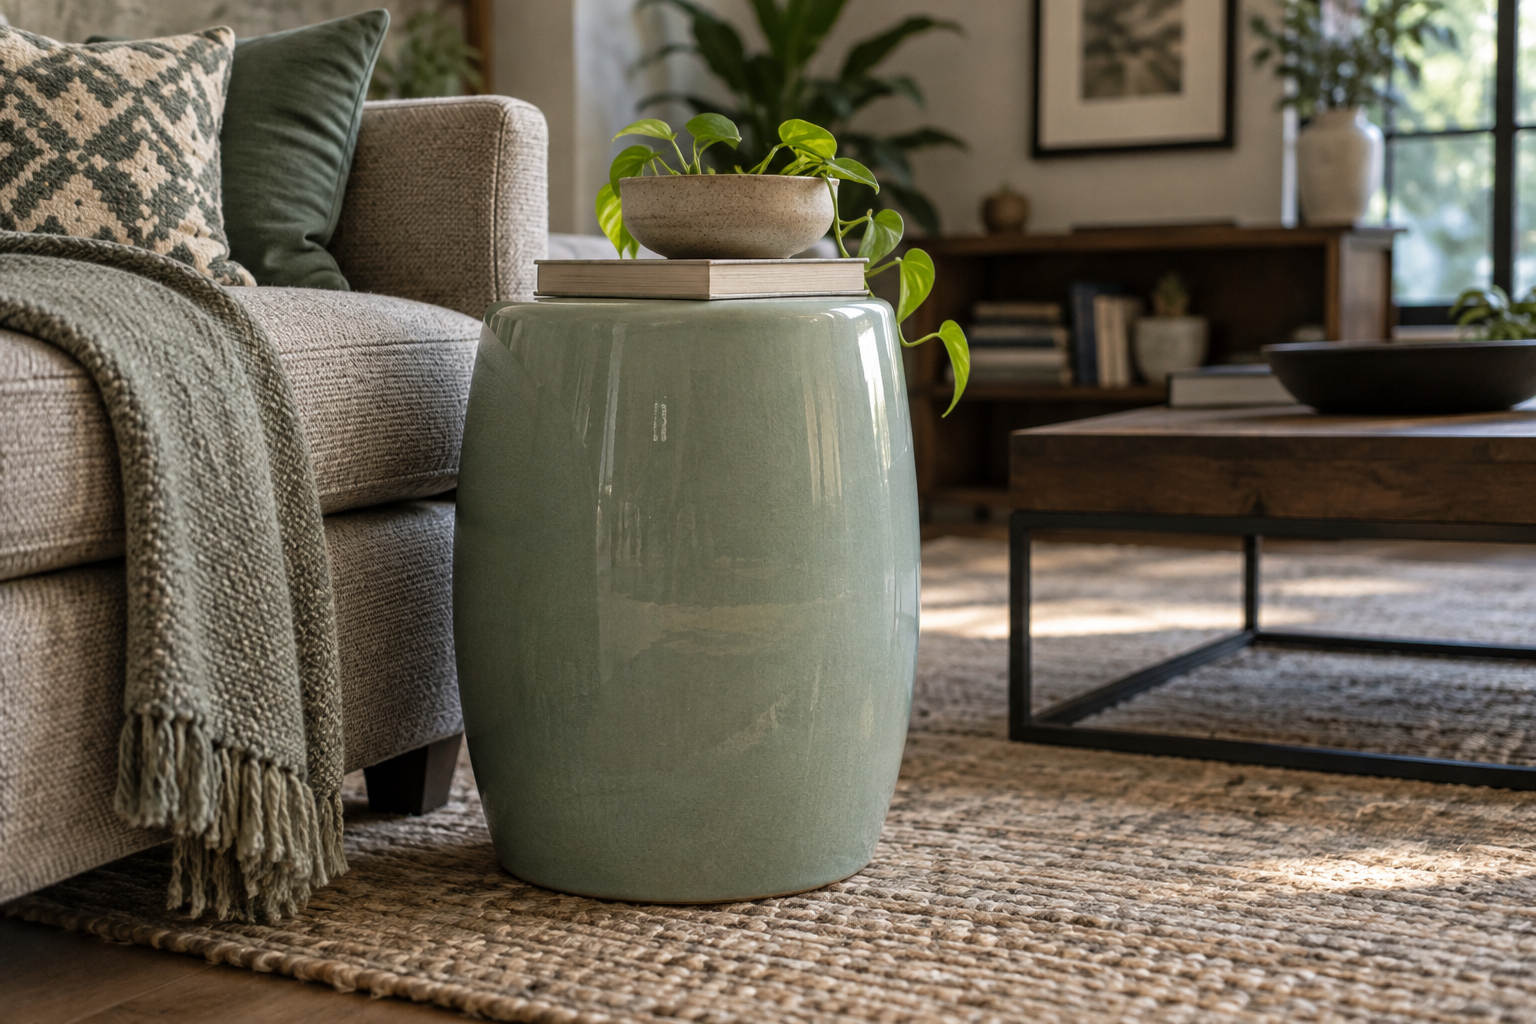
    Introduce a modest reflective surface along an existing daylight path: a glazed ceramic side table, a satin-finished cabinet, or a metal tray on an ottoman. For example, place a pale glazed table beside the sofa where afternoon window light catches its curved edge. The small highlight adds liveliness without requiring a glossy room or another large mirror.

    Window light catches the curved edge of a pale glazed ceramic side table.

    Do not confuse shine with useful brightness. A glass tabletop is mostly transparent, and a shiny surface placed in a dark corner has little light to reflect. Highly polished finishes can show fingerprints or bounce glare toward a television. This approach is less suitable where direct sun is intense; test a movable tray first and check the view from each seat.

    Start with the window, then follow the daylight across the room. Clear one obstruction, test one lighter surface, and check reflections from where you actually sit. You may find that your existing wall color works beautifully once the room stops blocking its own light. The goal is a more comfortable balance, not a whitewashed room.

  • Less TV Glare, Better Reading: 10 Lighting Fixes for a Small Living Room

    Less TV Glare, Better Reading: 10 Lighting Fixes for a Small Living Room

    A lamp that makes your book readable can also put a bright reflection across the TV. In a compact living room, those competing needs often share the same few feet. The most useful small living room ideas start with where you sit, what you need to see, and what the screen reflects—not with adding more fixtures. These ten fixes target those conflicts. Any dimensions below are approximate planning guidelines; measure your space, furniture, and clearances before buying or moving anything.

    Compact living room with TV glare and a dim reading corner, with the overlay FIX THE GLARE.

    1. Find the Reflection From Your Actual Seat

    Before shopping, sit in every regular viewing position and switch on one light at a time. With the TV off, its dark screen makes reflected bulbs and windows easier to locate; then check again during a dark scene. For example, a lamp that disappears from the sofa’s center may show up from the chaise. Note which source creates each reflection before changing its position.

    The common mistake is checking glare while standing in the doorway. Reflections change with viewing angle, so a room can look balanced from the entrance yet feel uncomfortable from the couch. This test takes time and cannot eliminate every reflection in a room with several seats. If the TV swivels regularly, repeat the check at its usual angles rather than optimizing one fixed position.

    2. Aim Reading Light at the Page, Not Across the Room

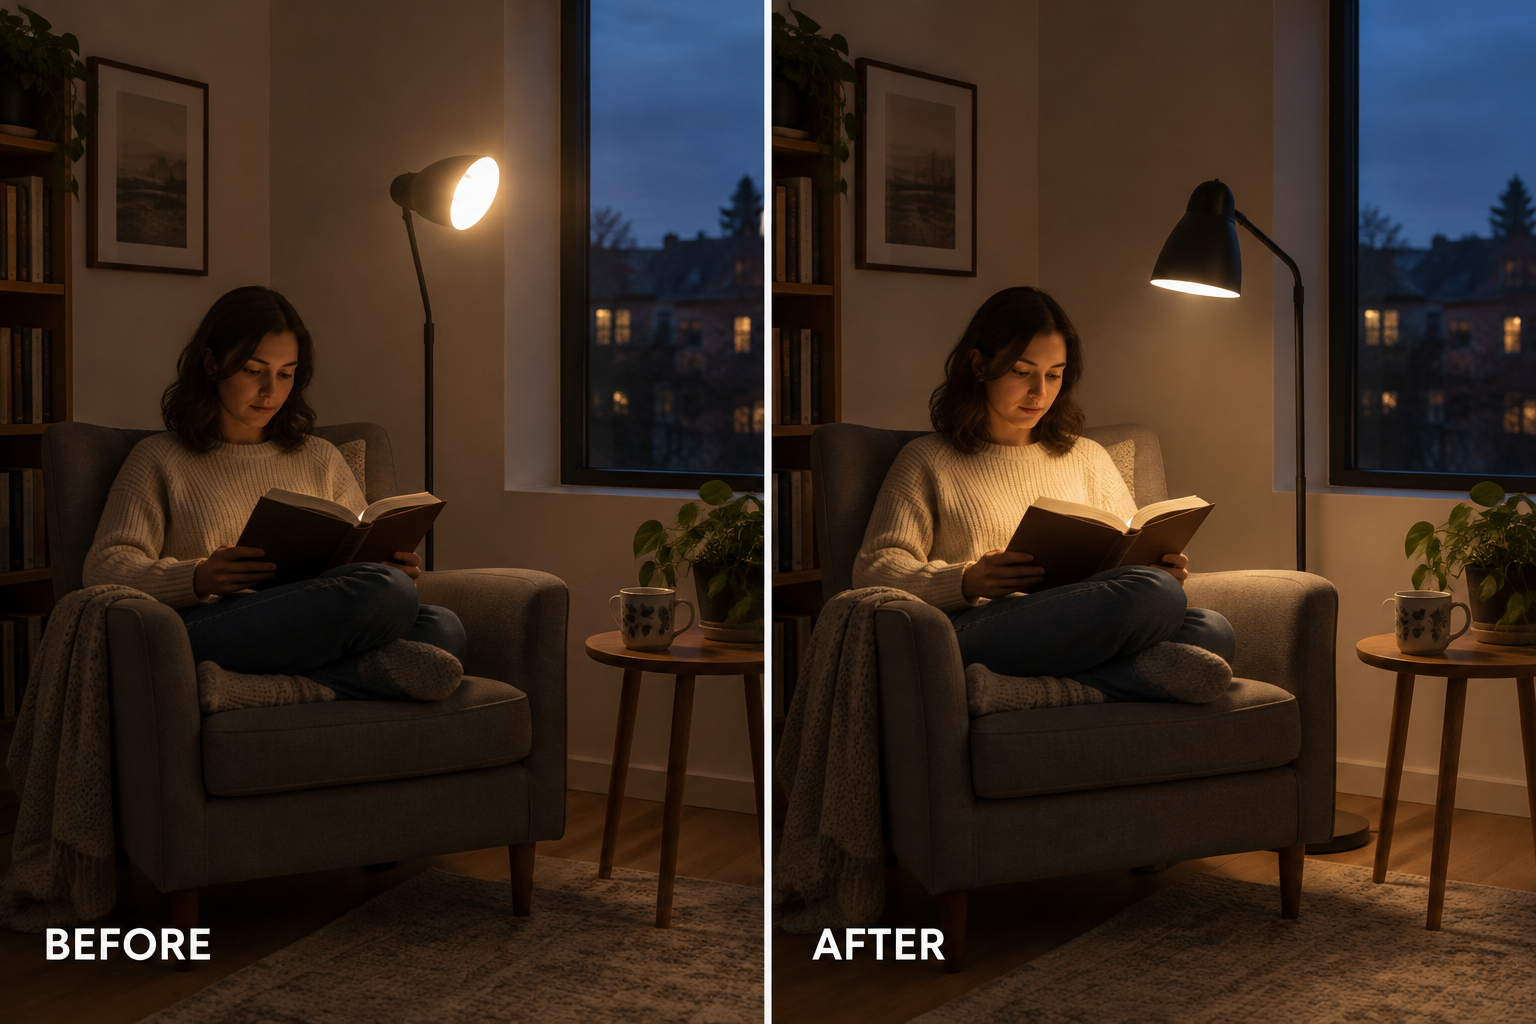
    Give the reading seat its own adjustable task light, positioned beside or slightly behind your shoulder. Aim the head toward the open book while keeping the bulb out of your seated sightline. For example, turn a floor lamp’s adjustable head downward so its light lands across both pages instead of shining toward the TV. Test it in your normal reading posture before settling the base.

    Before and after comparison showing a reading lamp redirected downward onto an open book.

    A frequent mistake is compensating for poor aim with a brighter bulb. That can increase glare without putting useful light on the page. A focused head also covers less area than a shaded table lamp, so another person nearby may still need light. This solution may not suit a seat shared by people of very different heights unless the fixture adjusts easily.

    3. Choose a Shade That Hides the Bulb

    Judge shade shape from the chair, not just from the store aisle. A sufficiently deep shade can hide the bulb at seated eye level, while an open bottom lets light reach a nearby book. For example, replace a shallow shade that exposes the bulb with a deeper drum shade compatible with the lamp’s fitter, bulb clearance requirements, and manufacturer instructions.

    Do not assume every fabric shade controls glare: a thin white shade may itself become a bright shape reflected in the screen. Darker or opaque shades reduce sideways light but can make the surrounding corner feel dimmer. A larger shade may also crowd a narrow end table. This swap is less useful when the entire lamp, rather than its exposed bulb, appears in the TV.

    4. Filter the Window That Washes Out the Screen

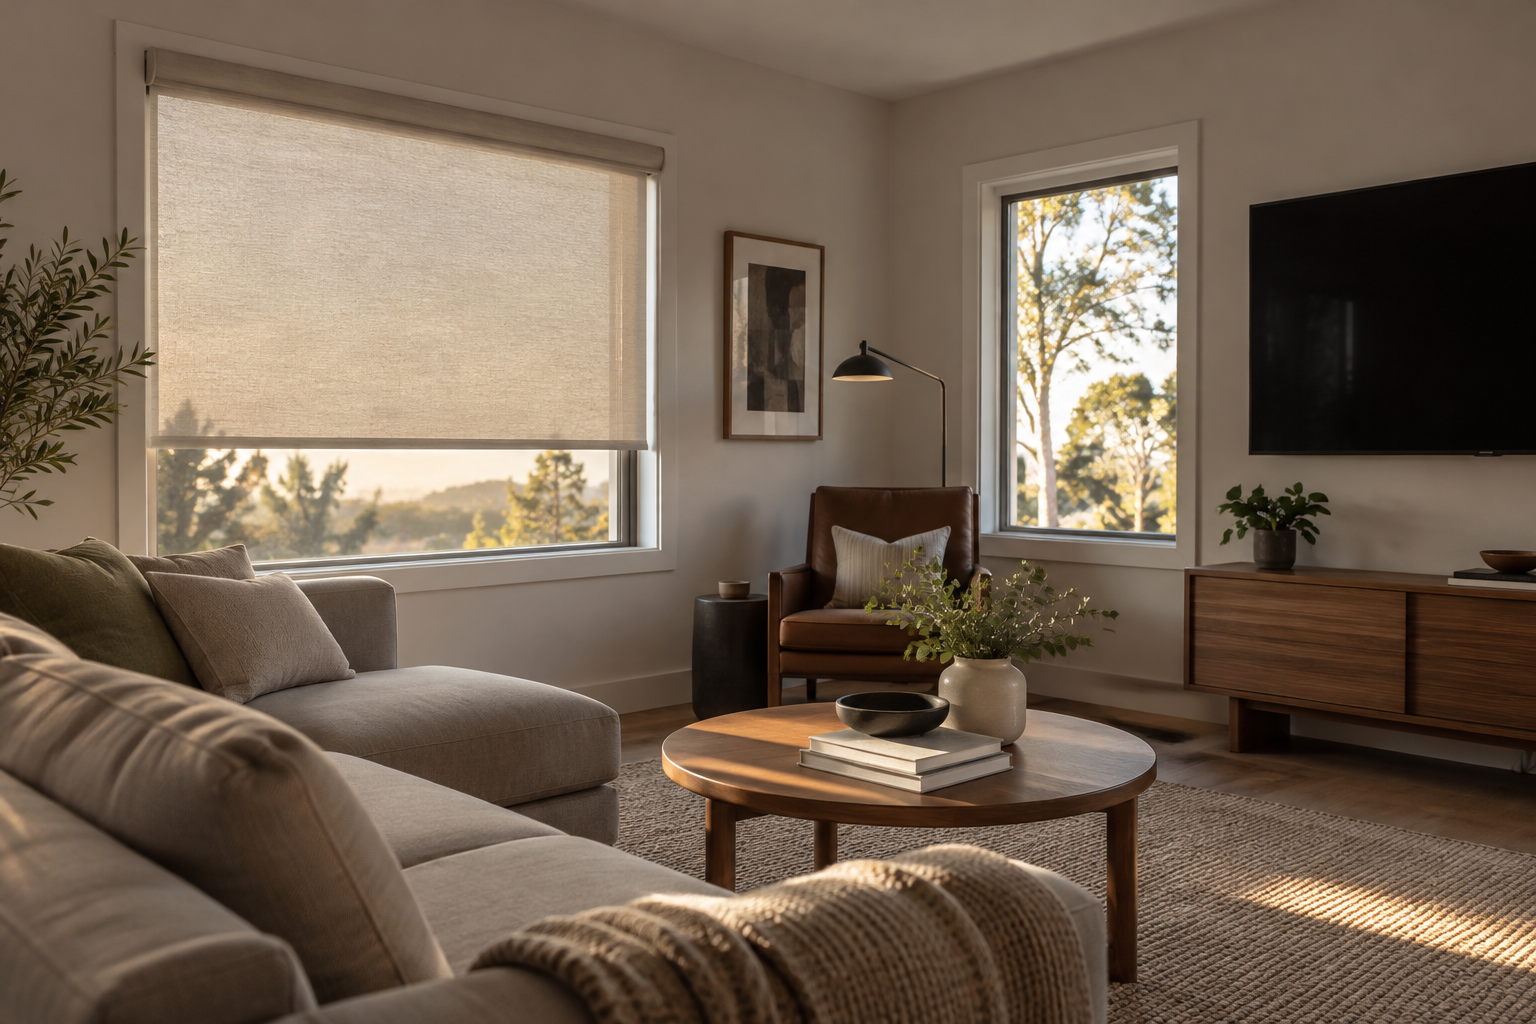
    Treat the offending window rather than darkening every window automatically. An adjustable roller shade can reduce daylight during viewing, while a sheer softens milder brightness without fully blocking the view. For example, lower a light-filtering roller shade on the west-facing window during afternoon TV time, leaving another window uncovered to provide comfortable daylight for the rest of the room.

    A lowered roller shade filters bright afternoon light beside a living room television.

    The mistake is expecting a sheer curtain to stop strong direct sun. More opaque coverage controls glare better but reduces daylight and outdoor views; gaps around the edges can still admit bright streaks. Renters should confirm mounting permissions before installing hardware. If the TV directly faces a large sunny window, filtering alone may not be enough, and a furniture or screen-angle adjustment may be necessary.

    5. Stop Asking the Ceiling Light to Do Every Job

    Use the ceiling fixture for general movement and cleaning, then reduce it for evening viewing while keeping a dedicated reading light on. If replacing a fixture is practical, consider a diffused design that conceals its bulbs. For example, a shaded flush mount can provide background illumination in a low-ceilinged room without the exposed points of light produced by an open multi-bulb fixture.

    Simply turning off the overhead light can leave the route to the hallway uncomfortably dark. Conversely, a bright ceiling fixture may reflect in the TV or flatten the whole room. Diffusion softens visible brightness but does not guarantee freedom from reflections. Fixture replacement may not suit a rental or a limited budget; changing how you use existing lamps is often the more practical first step.

    6. Match Bulb Color Before Increasing Brightness

    Check the Kelvin rating on bulbs that will operate together. Choosing one warm-white target, such as 2700K or 3000K, helps the reading corner and TV area feel connected. For example, replace a cool-white bulb in the floor lamp with one matching the nearby table lamp, then choose brightness separately. Color temperature describes the appearance of the light, not how much light the bulb produces.

    A common mistake is choosing bulbs by the word “warm” alone; packaging descriptions vary, so compare the numerical ratings. Matching color will not fix an underpowered reading lamp, and dimming some LEDs changes their appearance. A warmer palette may not suit someone who prefers cooler light for detailed hobbies. If preferences differ, keep the specialty task light localized rather than mixing competing colors throughout the room.

    7. Move the Lamp Out of the Screen’s Reflection

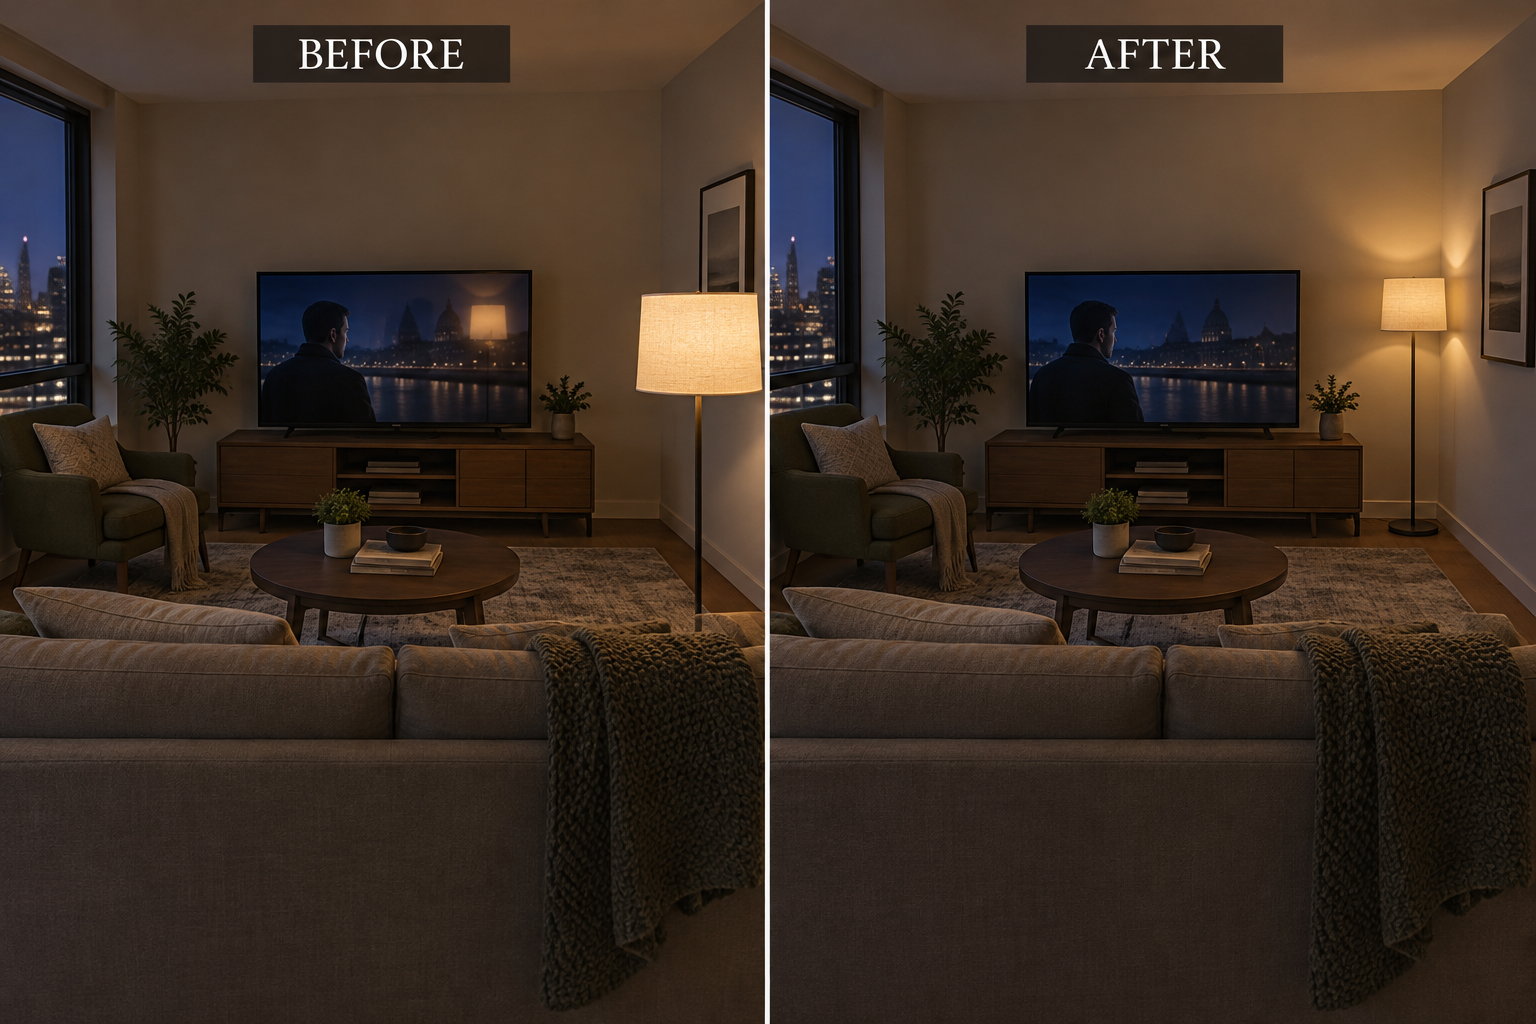
    If a shaded lamp still appears in the TV, change its location rather than repeatedly changing bulbs. Slide it along the wall in small increments, checking from the main viewing seat after each move. For example, move a slim floor lamp from beside the sofa toward the nearby wall corner until its reflection leaves the screen, provided it still lights the intended seating area.

    Before and after comparison showing a floor lamp moved to remove its reflection from the TV.

    Do not move the lamp into a walkway just because the reflection disappears. Relocation may also put light farther from the reader, making it less useful for close work. In a room with several viewing seats, the new position may solve one angle but create another. This approach may not suit a tight furniture layout unless the lamp has a genuinely clear alternate location.

    8. Add Gentle Light Behind the TV

    A low-output light behind the television can soften the jump between a bright screen and a dark surrounding wall. Use a concealed light intended for that placement, following its installation and ventilation instructions. For example, position a dimmable strip behind the TV so it creates an even wall glow without visible individual LEDs, then keep it subtle enough that it does not compete with the picture.

    The mistake is treating this background glow as a reading light or choosing a bright, shifting color effect that draws attention away from the screen. It will not remove a reflected window or illuminate a book. Dark, heavily textured walls may produce an uneven result, while an open-backed TV location may provide no useful surface for the light to wash. Skip it when there is no suitable backdrop.

    9. Control Reading and Viewing Lights Separately

    Give lights with different jobs separate controls. A reachable switch or compatible plug-in dimmer lets one person read while another watches TV without flooding the whole room. For example, keep the reading lamp at a useful level and lower the ambient table lamp beside the sofa. Check that the bulb, fixture, and dimming device are compatible and used within their stated ratings.

    Avoid putting every lamp on one switched outlet or shared control if they serve different activities. That arrangement is simple but forces reading brightness and viewing brightness to rise together. Incompatible dimmers can cause flicker or unreliable operation. Separate controls may not suit someone who wants one uncomplicated switch; in that case, use two clearly accessible manual switches rather than adding an elaborate control system.

    10. Plan the Cord Route Before Placing the Lamp

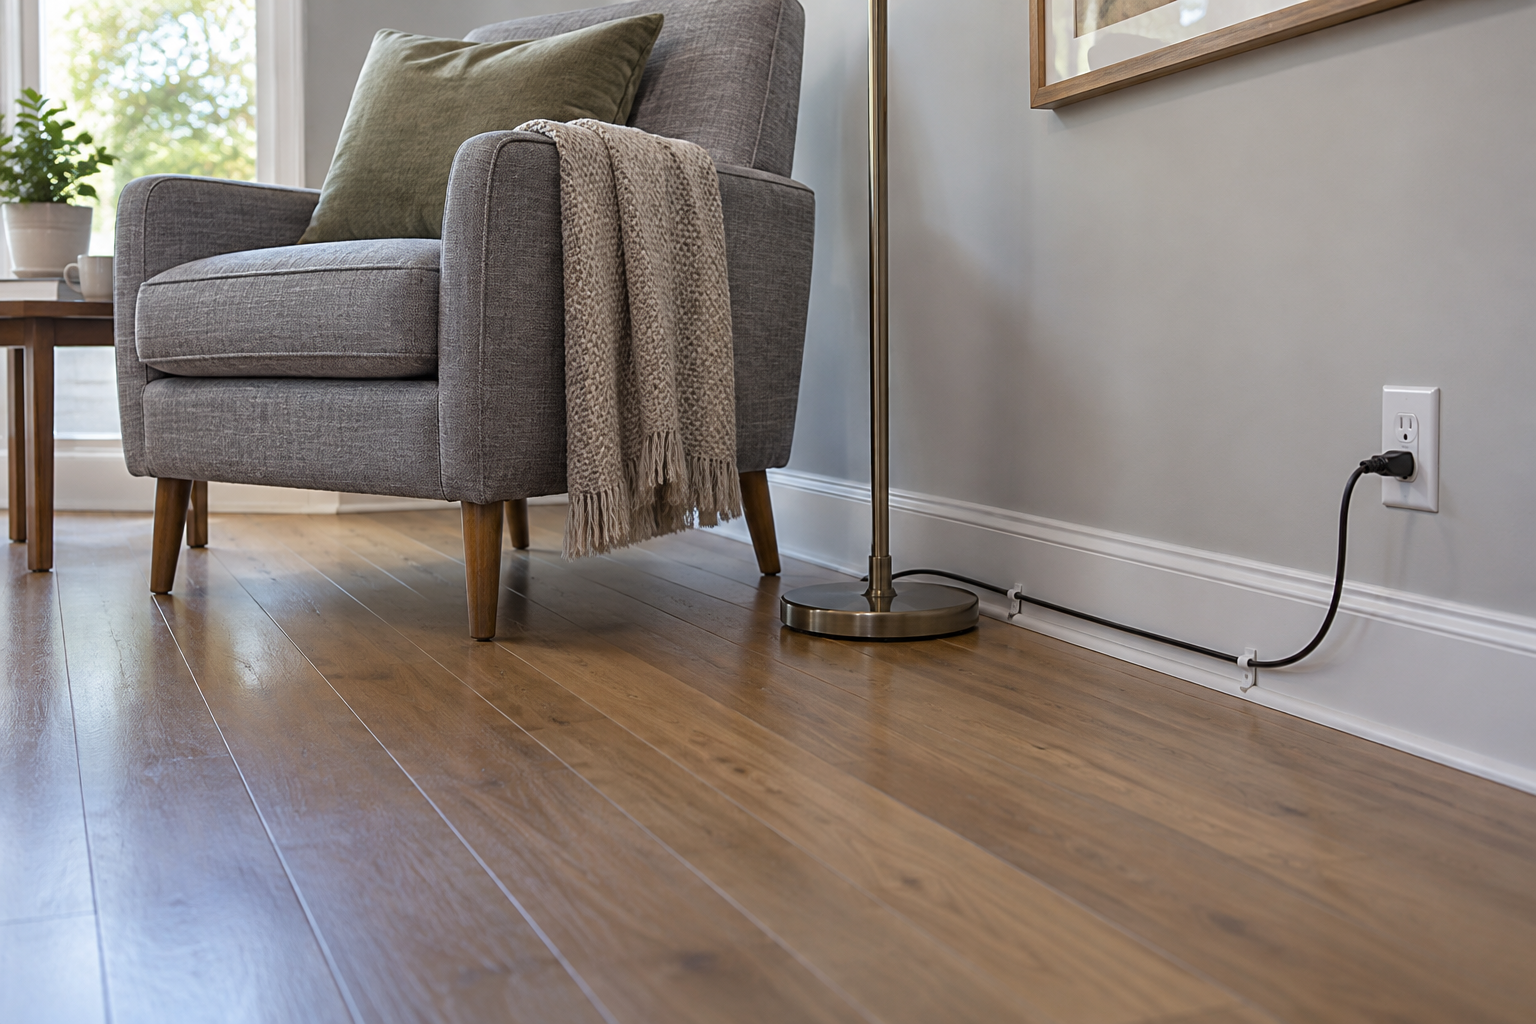
    Trace a safe route to the receptacle before committing to a lamp location. Keep cords along the perimeter, away from doors, chair mechanisms, heat sources, and walking paths. For example, place a reading lamp beside the wall and use suitable removable cord clips along the baseboard, leaving enough slack to avoid tension at the plug. Keep the plug accessible and follow the cord-management product’s instructions.

    A reading lamp cord follows the baseboard with removable clips, leaving the walkway clear.

    Never hide a cord beneath a rug or pinch it behind furniture to make the arrangement look finished. A floor cord cover can reduce a trip hazard in some situations, but it still creates a raised surface and must suit the application. If the only supply requires crossing the room, reconsider the lamp location. Do not use extension cords as a substitute for permanent wiring.

    Start with the reflection check, then fix the reading seat and cord route before adding more light. A small adjustment to aim, shade, or placement may be enough. Keep the page comfortably lit, the screen free of distracting bright shapes, and everyday controls easy to reach.

  • A Rental Living Room With Personality: 10 No-Drill Changes You Can Take With You

    A Rental Living Room With Personality: 10 No-Drill Changes You Can Take With You

    A rental living room can feel unfinished even after the sofa arrives: bare walls, flat lighting, and builder-basic finishes leave little sense of who lives there. The most useful small living room ideas add character without making the security deposit part of the decorating budget. These ten changes rely on freestanding pieces, fabric, and movable arrangements rather than holes or adhesive. Check your lease, measure your space, and remember that reversible does not automatically mean damage-free.

    Compact rental living room furnished with layered textiles, a floor lamp, and movable accents.

    1. Give the Seating Area a Grounding Rug

    Use a rug to give anonymous flooring a deliberate color story and define the seating area. For example, a muted rust-and-cream flatweave can connect a beige sofa with a secondhand wood table. An approximately 5-by-8-foot rug may work in a compact room, but treat that as a planning guideline: measure so the sofa’s front feet can sit on it without blocking doors.

    The common mistake is choosing a tiny rug that floats between the furniture, making the room feel fragmented. A larger rug provides continuity but costs more and adds a door-clearance concern. Choose a pad explicitly compatible with your floor finish; some rubber or latex backings can discolor certain surfaces. This approach may not suit thick existing carpet if the rug creeps or creates a trip edge.

    2. Change the Sofa’s Expression With Removable Textiles

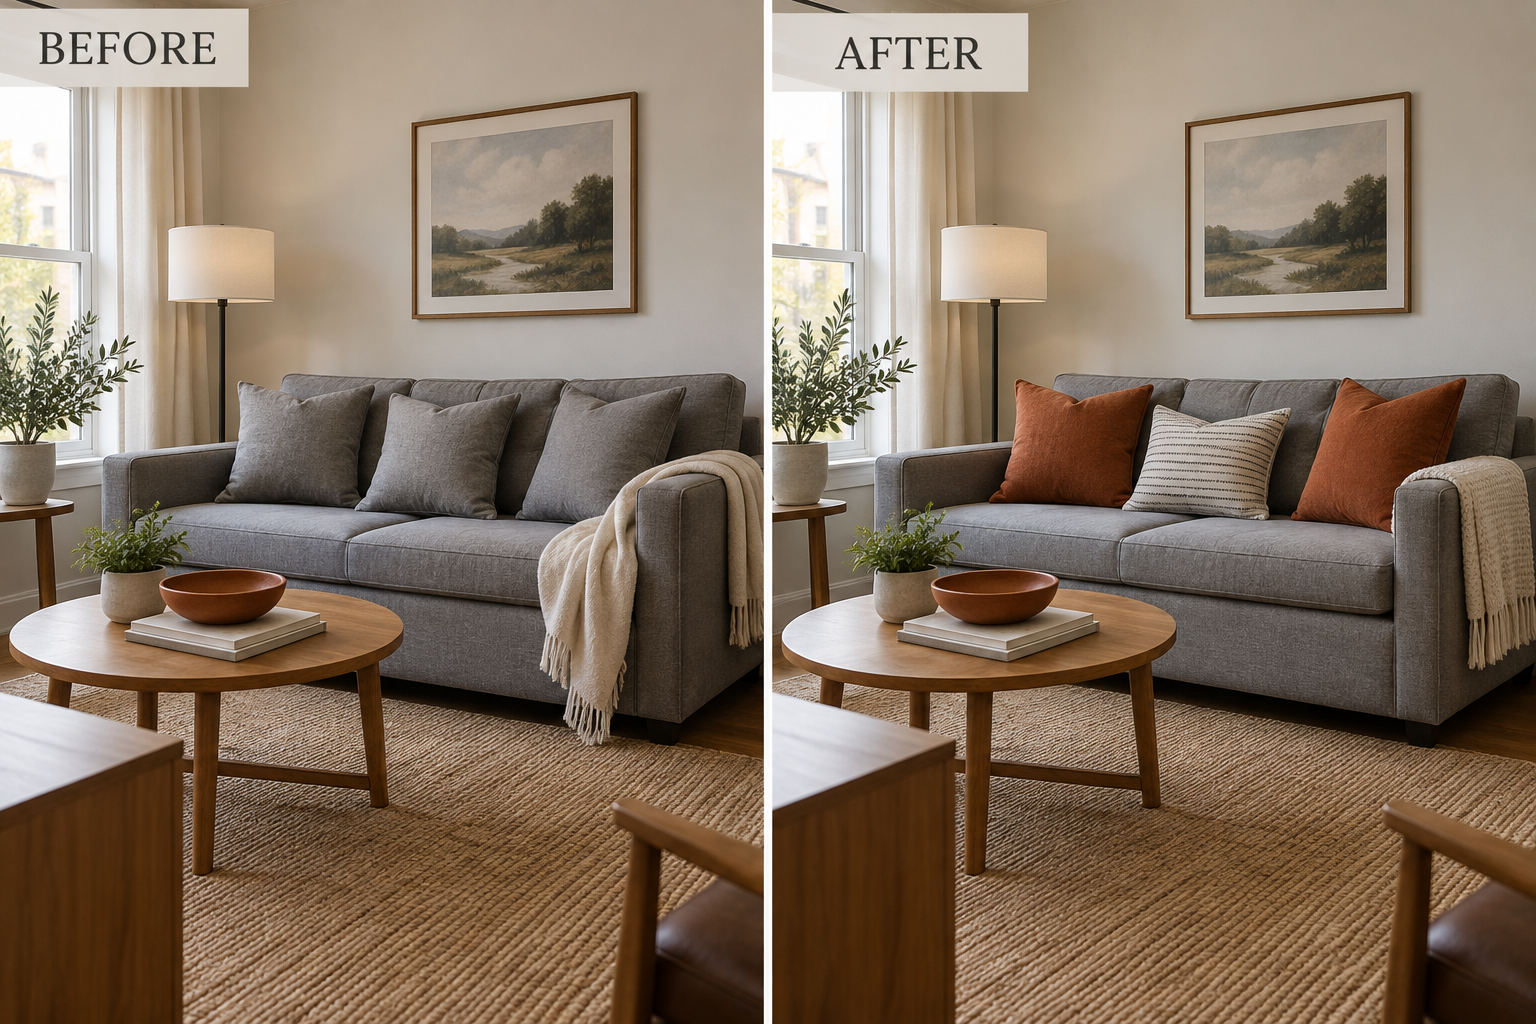
    Make the largest upholstered piece feel intentional with washable pillow covers and one textured throw. On a gray sofa, try two rust-colored covers, one small-scale striped cover, and an oatmeal throw folded over an arm. Reuse existing pillow inserts where possible. Repeating one color elsewhere, perhaps in a bowl on the coffee table, makes the change look connected rather than like a collection of unrelated accessories.

    Before and after views of the same gray sofa with plain versus colorful, textured textiles.

    Avoid covering every seat with pillows; constantly moving them defeats the purpose of a comfortable living room. Fewer, better-chosen textiles offer character with less clutter, though washable covers still require care. Dark or saturated fabric can transfer dye onto pale upholstery, particularly when damp. If the sofa already has a busy pattern or serves as a nightly bed, keep this layer especially restrained.

    3. Use a Folding Screen as Movable Architecture

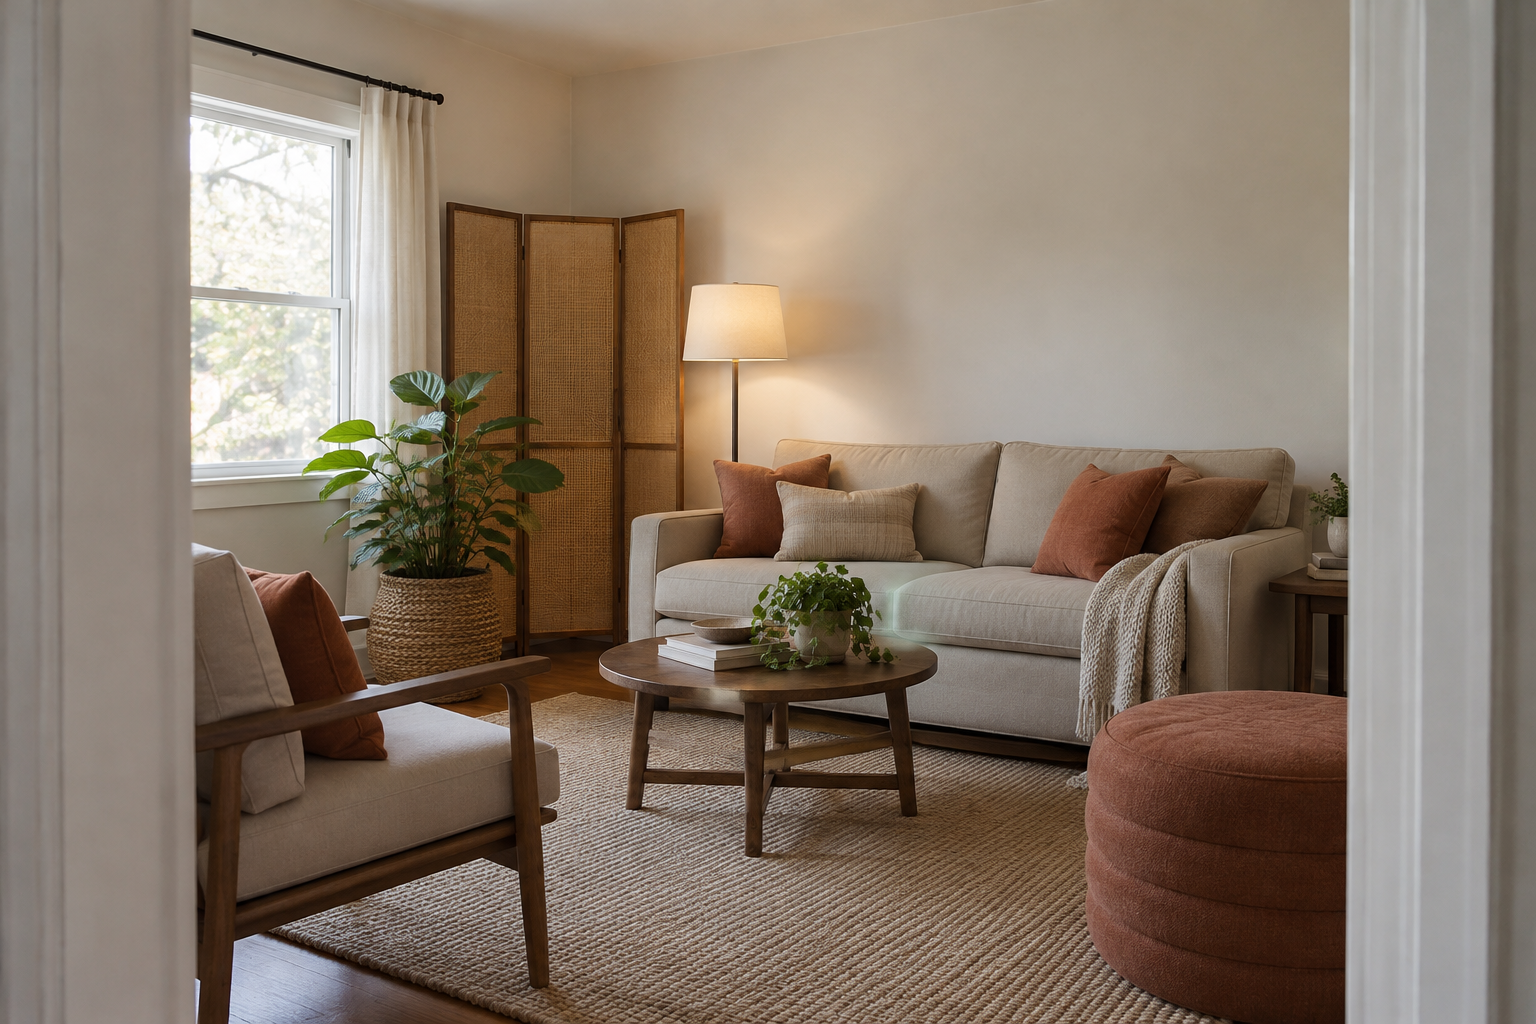
    A freestanding folding screen can give a blank corner texture or soften the view of an awkward utility door without covering it permanently. Try a woven three-panel screen behind an accent chair, opened in a shallow zigzag according to its stability instructions. It creates a backdrop without fastening anything to the wall. Keep access to outlets, vents, and required exits fully available.

    Buying a screen solely for its folded width is a common mistake: its stable open footprint is larger. The tradeoff is useful visual separation at the expense of floor area and some daylight. Look for smooth, floor-compatible feet and inspect contact points for scratching. Skip this idea in a tight circulation route or where children or pets could easily knock the screen over.

    4. Create an Evening Corner With a Plug-In Floor Lamp

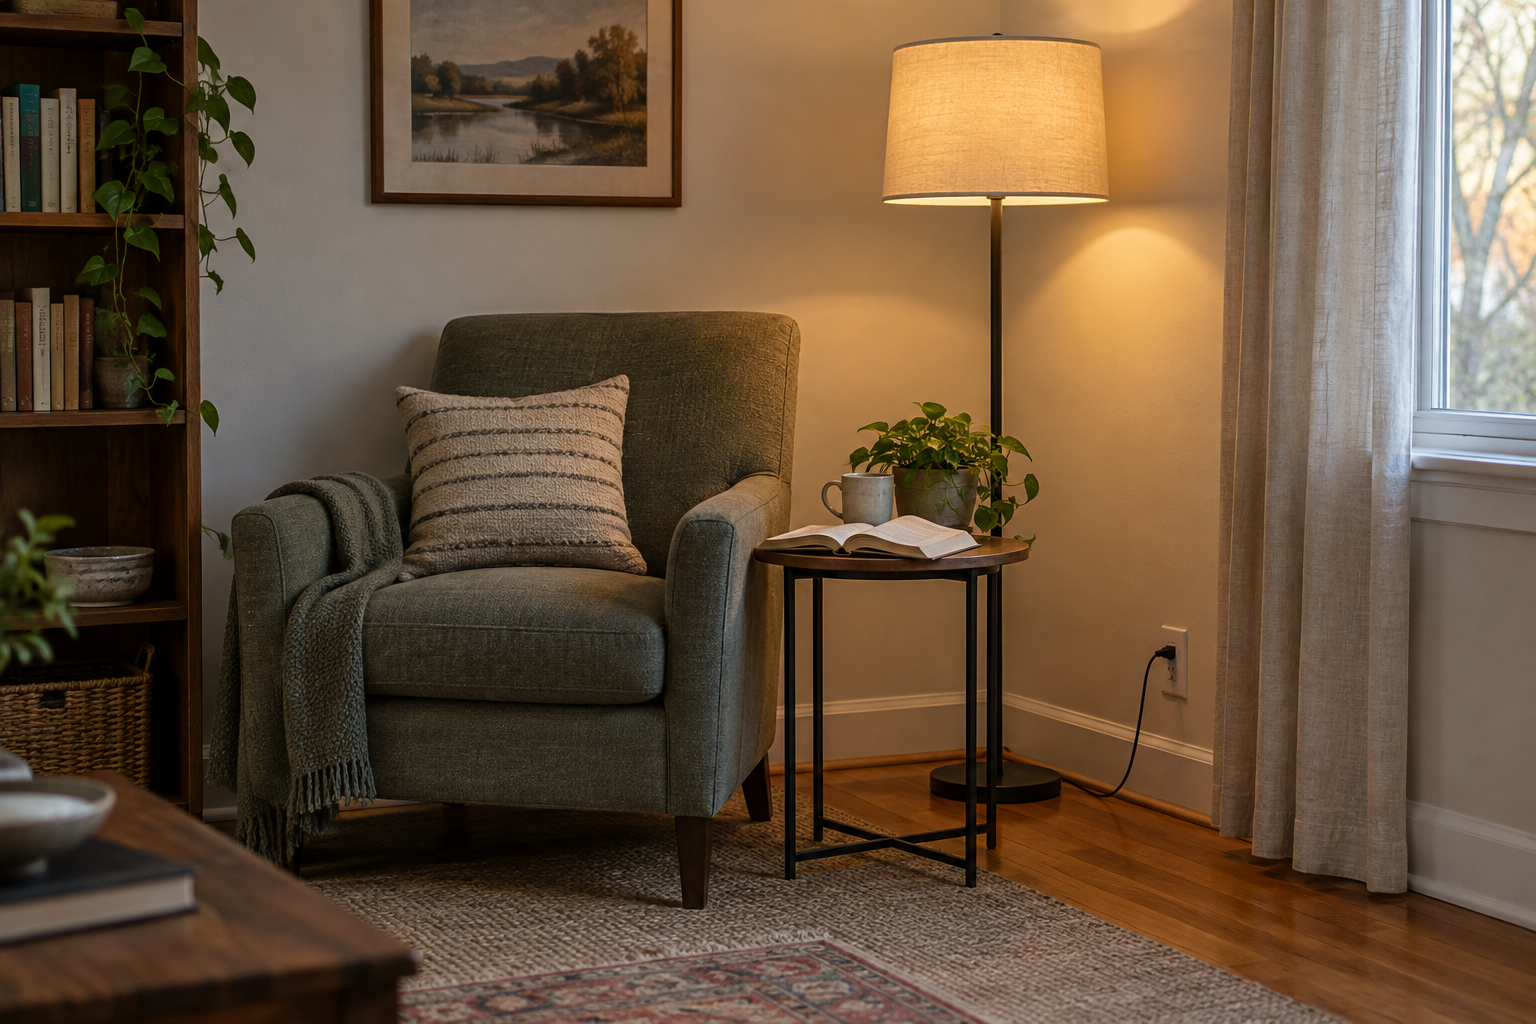
    Replace the overhead-only feeling with a freestanding floor lamp beside the sofa or reading chair. A shaded lamp that directs comfortable light toward a book adds both atmosphere and a useful vertical shape. Choose a stable base that fits outside the walking path, and route its cord along the room’s perimeter without adhesive clips. Use a bulb within the fixture’s stated rating.

    Shaded floor lamp beside a reading chair with its base clear of the walkway.

    The usual mistake is selecting a dramatic arc lamp whose base or shade overwhelms the seating area. A slimmer lamp takes less space but may illuminate a smaller zone. Never hide cords under rugs or place them where furniture can crush them. This solution may not suit a corner without a safely reachable outlet; avoid turning a character-building detail into an extension-cord obstacle course.

    5. Soften Utility Storage With a Skirted Side Table

    Turn an ordinary sturdy side table into a softer accent with a removable fabric skirt. A tailored cotton cover over a small round table can conceal a basket of chargers or game controllers while introducing a stripe or check. Keep frequently used items on top and storage contained underneath. Hem the fabric above the floor so it does not collect dirt or catch underfoot.

    Do not use fabric to disguise a wobbly table or overloaded storage pile. The skirt adds softness and concealment, but reaching underneath is less convenient than opening a drawer. Check that the textile is colorfast and dry before placing it against finished furniture. Skip this treatment if pets tug hanging fabric or if the table sits near a heater, where clearance requirements take priority.

    6. Display Small Artwork on Tabletop Easels

    Bring art into the room at furniture height rather than treating every blank wall as a hanging problem. Set a small framed print on a tabletop easel atop an existing console, then pair it with one low object. For example, a landscape print and a ceramic dish can create a focal point beside the sofa. Choose an easel rated for the frame’s size and weight.

    Avoid balancing a heavy frame against the wall and assuming friction will hold it. A tabletop display sacrifices some usable surface and cannot replace the scale of large wall art, but it is easier to relocate. Use clean, finish-compatible protective pads beneath the stand. This idea is unsuitable on narrow, frequently bumped tables or anywhere a child can pull the frame down.

    7. Reorient Existing Furniture Around Conversation

    Character sometimes comes from arrangement rather than another purchase. In a room with a sofa, one chair, and a coffee table, angle the chair toward the sofa instead of lining everything against separate walls. Keep the same furniture and let the seating relationship become the change. Approximately 30–36 inches for a main passage is a planning guideline, not a guarantee; measure your room and accommodate household mobility needs.

    Before and after views showing the same armchair angled toward the sofa for conversation.

    The mistake is copying a floating furniture layout without checking what remains behind it. Better conversation can come at the cost of a direct television view or generous circulation. Lift furniture when moving it, and use suitable protective glides rather than dragging legs across the finish. In a very narrow room, a subtle chair rotation may work better than pulling the sofa away from the wall.

    8. Frame a Suitable Window With a Tension Rod

    If the window recess and lease allow it, an inside-mounted tension rod can support lightweight curtains without brackets. Try airy ivory panels to soften a plain window while retaining the existing blinds. Measure the recess and follow the rod’s span and load limits; this is not a solution for heavy drapes. Check that curtains will stay clear of heaters and will not interfere with window operation.

    Overtightening the rod to stop slipping can dent soft trim or mark paint, while too little pressure risks a fall. The no-hole benefit therefore comes with finish and load limitations. Check the manufacturer’s surface guidance and inspect contact points periodically; rubber ends can still leave marks. Skip tension hardware on fragile finishes, unsuitable recesses, or windows where curtains would obstruct required emergency access.

    9. Give an Existing Bookcase a Clear Display Rhythm

    Restyle a stable, existing low bookcase instead of adding more decorative furniture. Gather books into a few upright groups, leave breathing room, and repeat one material across the shelves. For example, two small wooden bowls can connect mismatched paperbacks with a wood coffee table. Keep heavy books low, and follow all furniture safety instructions, including any anchoring requirements; styling does not make an unstable case safe.

    A common mistake is filling every gap with an object, which makes a small room visually restless and leaves no useful storage capacity. Editing creates a calmer display but may mean storing some belongings elsewhere. Avoid damp pottery or abrasive objects directly on finished shelves. If the case requires anchoring that your lease prohibits, choose another display surface rather than leaving the furniture unsecured.

    10. Add Living Shape With a Protected Plant Group

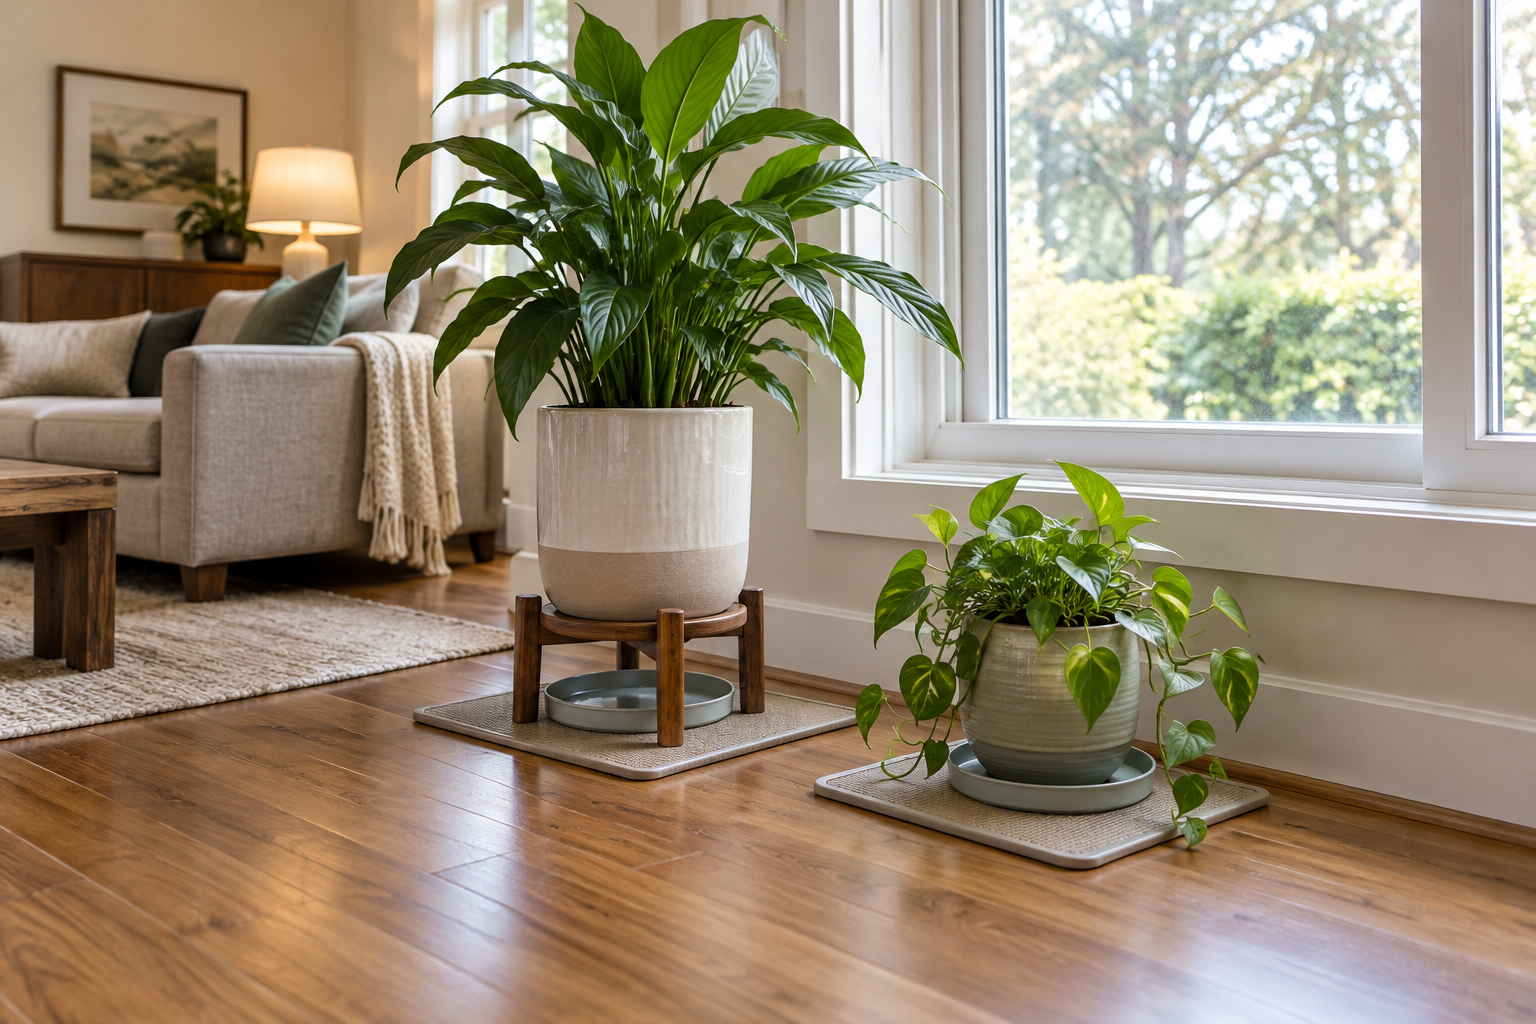
    Use one medium plant and one smaller companion to break up the room’s straight furniture lines. Place them near an appropriate window on stable freestanding supports, not suspended hooks. For example, a leafy upright plant beside a low pot creates varied height without filling the floor with separate stands. Select plants for the actual light available, and check household pet safety before bringing them home.

    Two plants of different heights grouped near a window with protected containers.

    The mistake is trusting a decorative cachepot to be waterproof. Plants bring organic texture but require maintenance, and trapped moisture can stain wood, swell laminate, or damage furniture finishes. Use watertight saucers plus finish-compatible barriers, water at the sink when practical, and check underneath regularly. This idea may not suit a dim room, a frequently traveled corner, or a household unable to keep plants safely out of reach.

    Start with the room’s most noticeable gap: a bare floor, harsh lighting, or an impersonal sofa. Make one change, live with it, and check both circulation and contact surfaces before adding another. A rental gains character through deliberate choices, not permanent installation—and the best additions can leave with you without leaving damage behind.

  • Why Your Small Living Room Feels Disconnected—and 10 Rug Fixes That Bring It Together

    Why Your Small Living Room Feels Disconnected—and 10 Rug Fixes That Bring It Together

    When the sofa, chair, and coffee table seem to occupy separate islands, the rug may be drawing the wrong boundaries. Its footprint tells your eye which pieces belong together—and can accidentally exclude half the seating. Among small living room ideas, correcting that boundary is often more useful than adding another accessory. Start with what you own, then check fit, clearance, and upkeep. All dimensions below are approximate planning guidelines; measure your room, furniture, and door swings before buying.

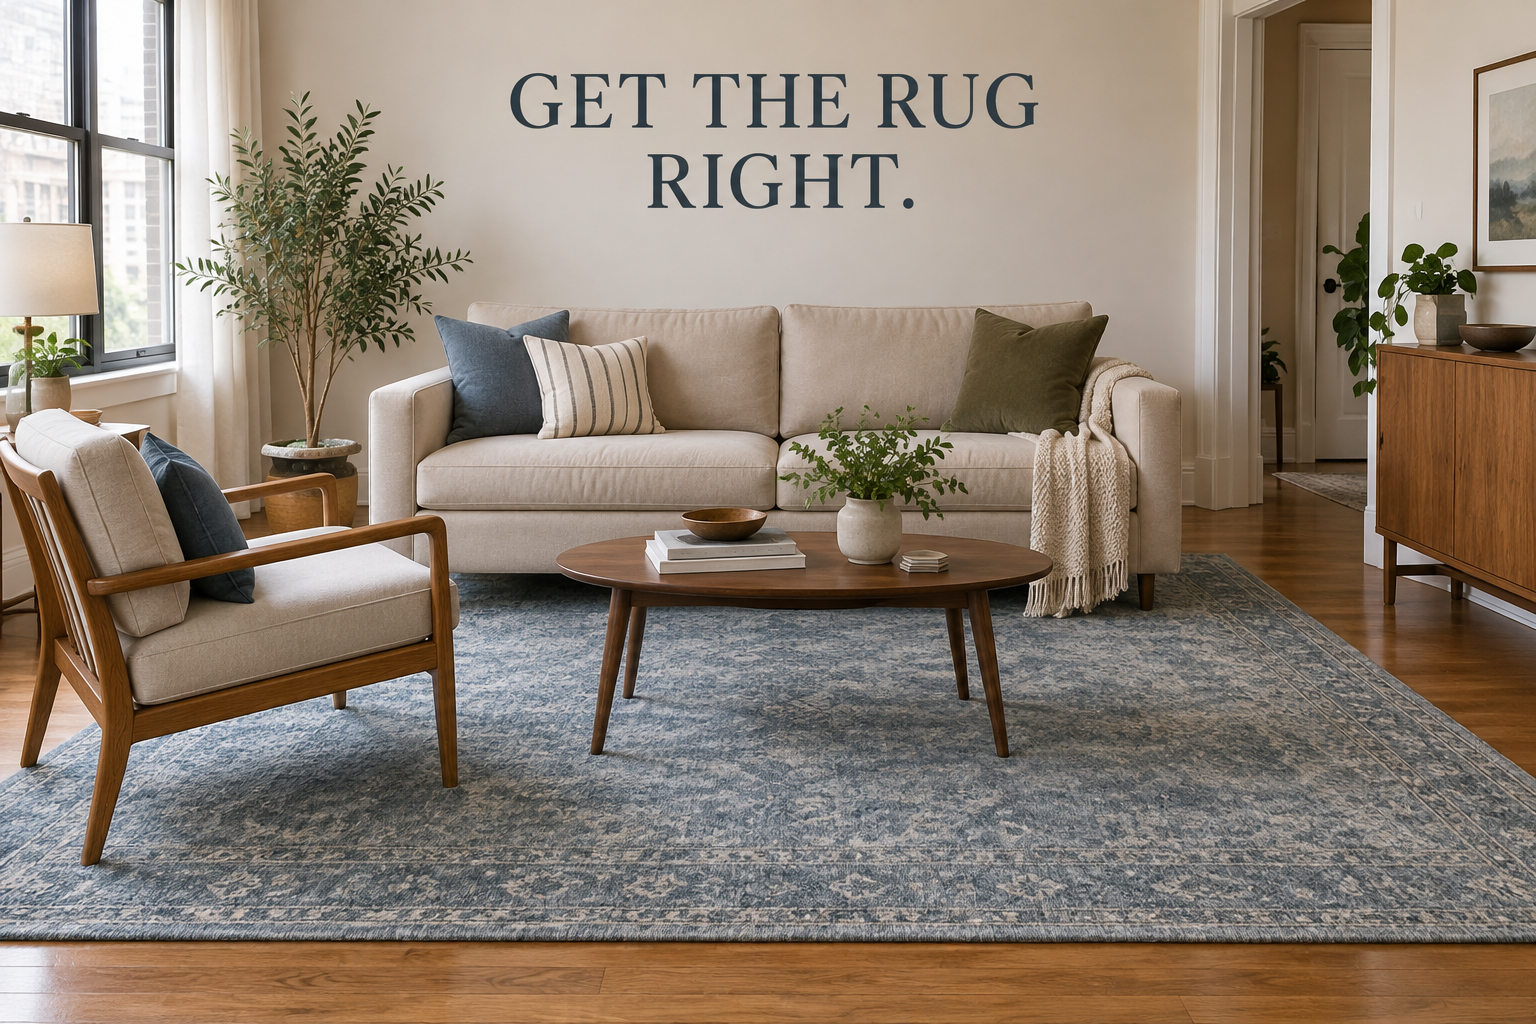
    A blue rug connects a sofa and accent chair beneath the overlay GET THE RUG RIGHT.

    1. Map the Seating Footprint Before Choosing a Size

    Outline the proposed rug with painter’s tape before browsing sizes. Mark the sofa, chair, and table positions first, then establish a rectangle that connects them. In a roughly 10-by-12-foot living room, compare taped 6-by-9-foot and 8-by-10-foot footprints rather than assuming the smaller rug is safer. Walk around both layouts and photograph them from the doorway; the better boundary should read as one seating area.

    A common mistake is measuring only the empty space between furniture legs. That produces a coffee-table mat instead of a seating boundary. A larger footprint may improve connection, but it also covers more flooring and costs more to replace. This approach needs adjustment in irregular rooms: tape around fixed obstacles and usable seating, not an imaginary rectangle that extends through a hearth or cabinet.

    2. Give the Main Seats Consistent Front-Leg Contact

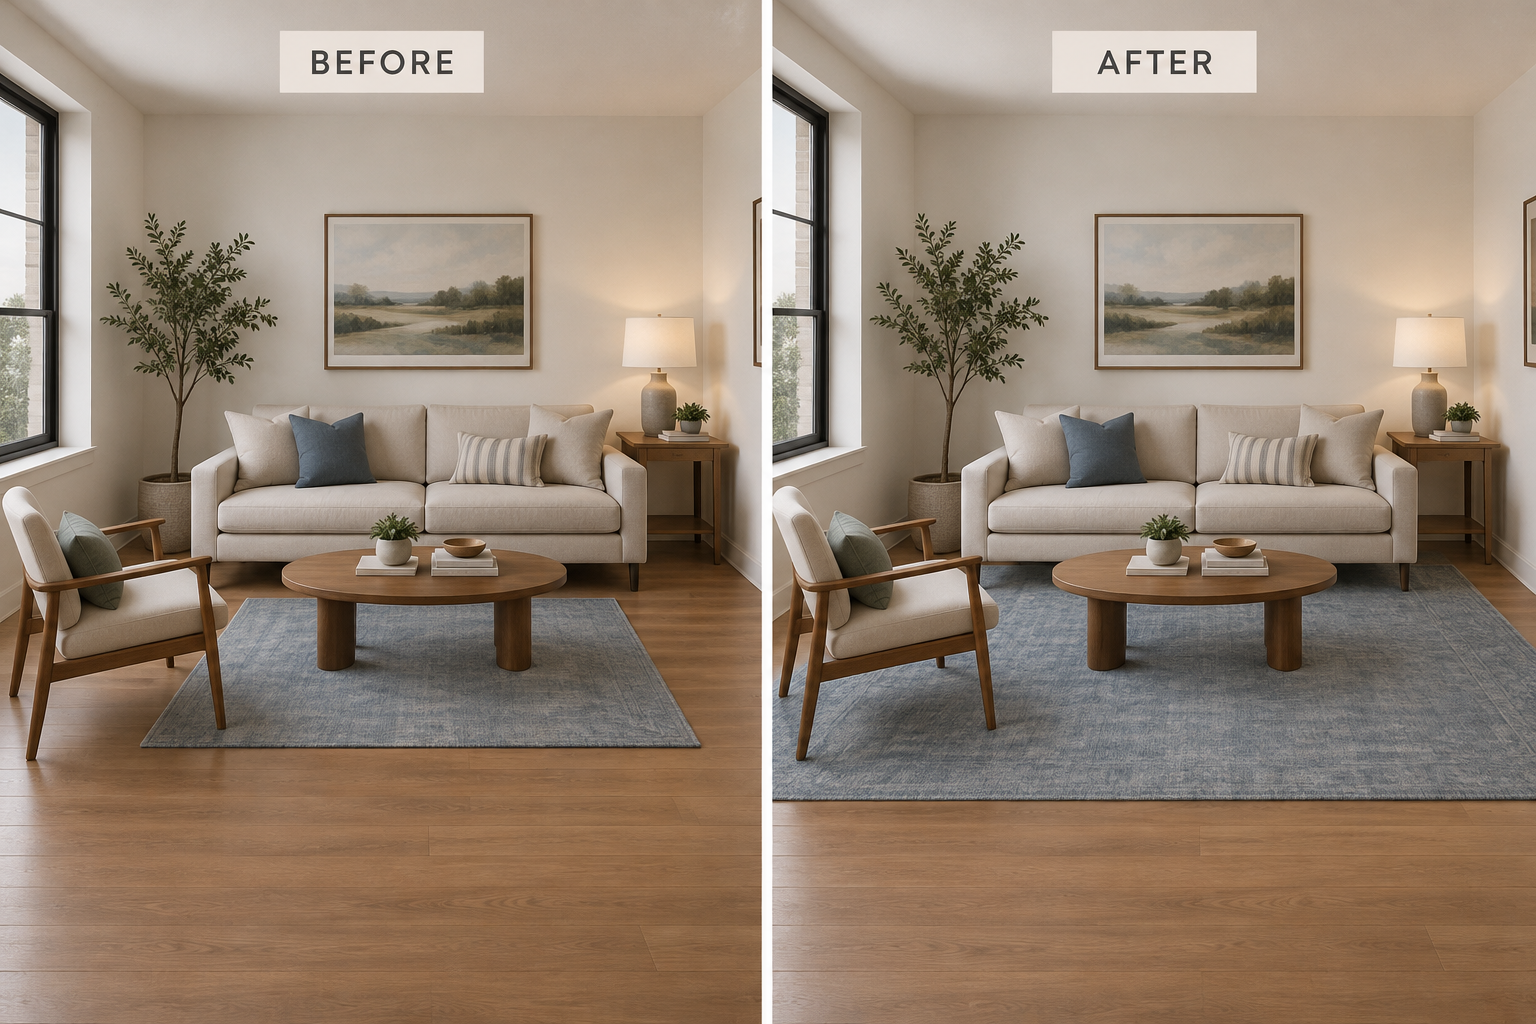
    Place the front legs of the sofa and primary chair on the rug so they share a visible base. Start with roughly 6 to 10 inches of rug beneath the sofa’s front edge, then check every foot. For example, replacing a centered 5-by-7-foot rug with a suitably positioned 8-by-10-foot rug can connect the same furniture without moving it closer together or adding another piece.

    Before and after comparison shows a larger rug connecting the same sofa and chair.

    Avoid catching one sofa foot while leaving the other off, or letting a chair straddle a thick edge. Uneven contact can look accidental and make furniture wobble. Front-leg placement preserves more exposed floor than putting every leg on the rug, but it is not universal. A recliner’s moving base or an unusually deep chair may need full support and additional operating clearance.

    3. Turn the Rug to Follow the Seating Arrangement

    Orient the rug’s longer side with the main seating span, not automatically with the room’s longest wall. Beneath a compact sectional, try running that edge along the sofa back so the rug reaches beyond the chaise’s inner corner. A 6-by-9-foot rug rotated ninety degrees may connect a sofa and opposite chair better than the same rug aimed toward the television.

    The mistake is letting the television wall dictate the rug’s axis when people sit across a different direction. Rotating can improve seating contact without buying anything, but it may expose awkward corners or push an edge into circulation. It may not suit a narrow room where the alternate orientation blocks a doorway; preserve the functional route rather than forcing a symmetrical arrangement.

    4. Test Door Swings With the Rug and Pad Together

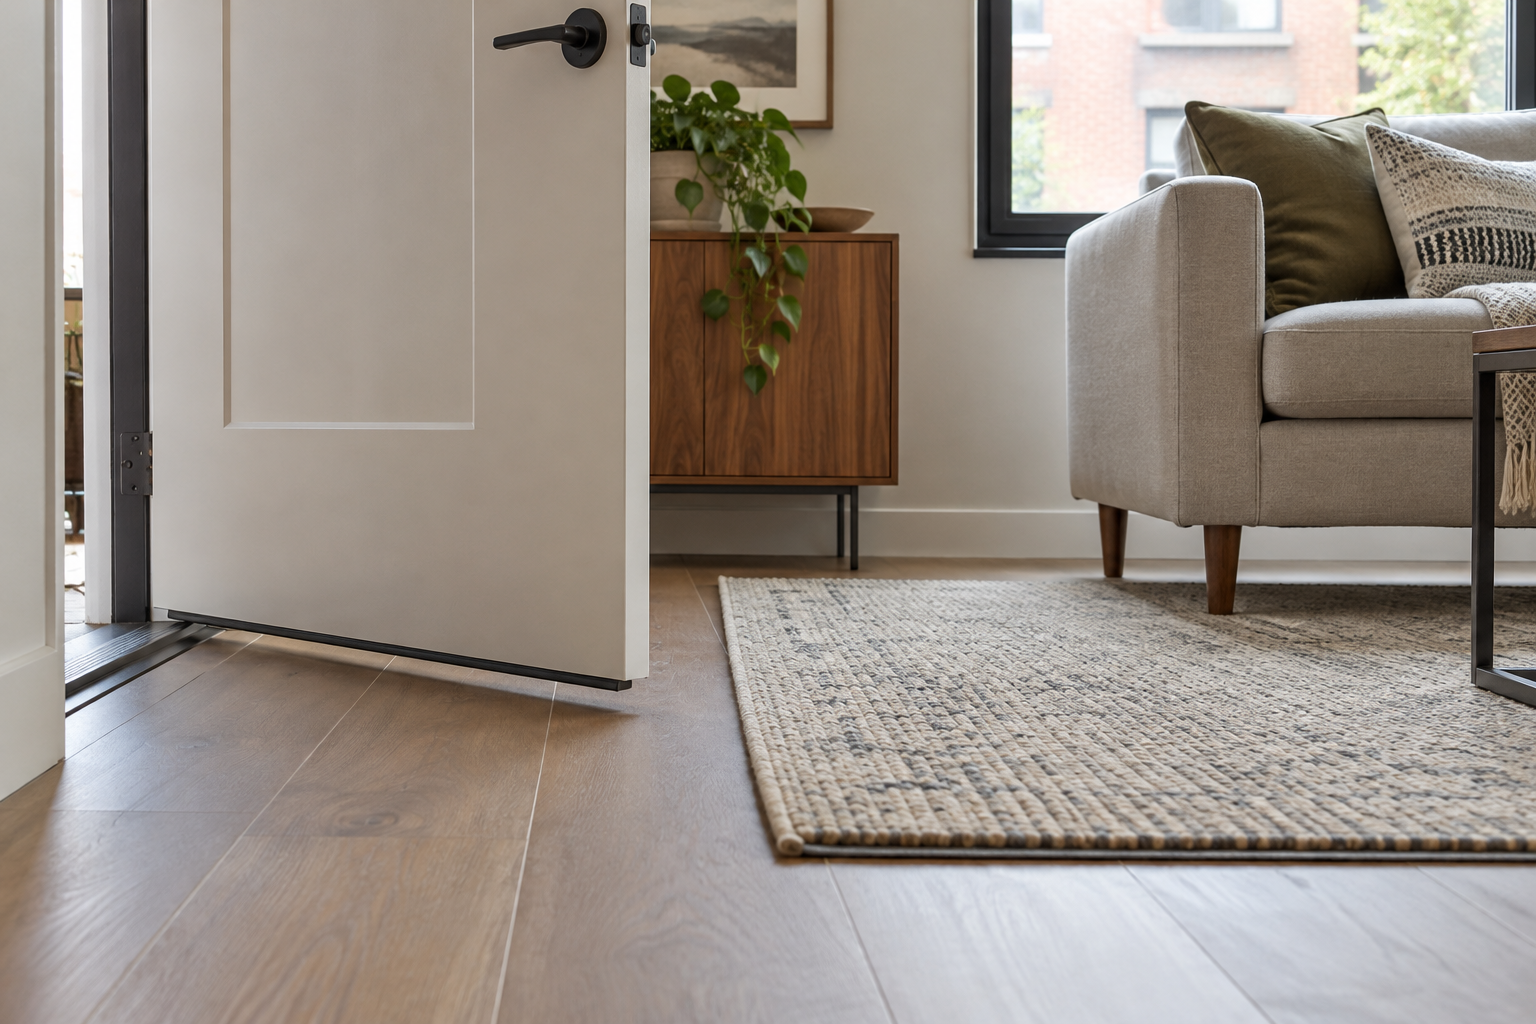
    Check the entire door arc, including closet and balcony doors, before settling on placement. Measure the clearance under the moving door and compare it with the combined rug-and-pad thickness. Where clearance is tight, a low-profile flatweave may work better than a plush pile. For example, pull the rug boundary back from an inward-opening entry door while keeping its opposite edge beneath the sofa’s front feet.

    An entry door clears a low-profile rug positioned beyond its swing.

    Do not assume a door that clears the rug alone will clear an added pad. Dragging can bunch the edge and interfere with opening. A thinner assembly sacrifices cushioning, while moving the rug inward can reduce seating contact. If neither option maintains easy access, that footprint may not suit the room. Renters should not trim a door or alter hardware without the required permission.

    5. Keep Rug Edges Out of the Main Walking Lane

    Trace the route from the entry to the sofa, kitchen, or balcony. Where possible, keep that route entirely on one surface rather than making it follow a rug edge. Around 30 to 36 inches can be a useful initial planning allowance for a walking lane, though household access needs vary. In a pass-through room, shift the rug toward the seating instead of centering it between walls.

    A frequent mistake is preserving equal floor borders while forcing everyone to step along a raised edge. Off-centering may look less formal, but it usually makes the seating zone more legible. This fix may not suit rooms where mobility equipment needs a wider, smoother route. In that case, prioritize individual clearance requirements and consider whether a rug belongs in the passage at all.

    6. Use a Round Rug Only When the Seating Supports It

    A round rug can connect a compact conversational grouping without sending rectangular corners into adjacent routes. Test a roughly 7- or 8-foot diameter beneath a loveseat and two small chairs, positioning their front feet within the circle. A round coffee table reinforces the footprint, but the important test is whether the seats touch the rug—not whether the table sits neatly at its center.

    Choosing a small circle simply because the room is small often leaves every seat outside it. A larger diameter improves contact but may consume more usable width than expected. Round rugs also leave curved gaps beside straight furniture. They may not suit a long sofa-and-chaise arrangement, where a rectangular footprint generally reaches the seating more efficiently and leaves fewer unsupported corners.

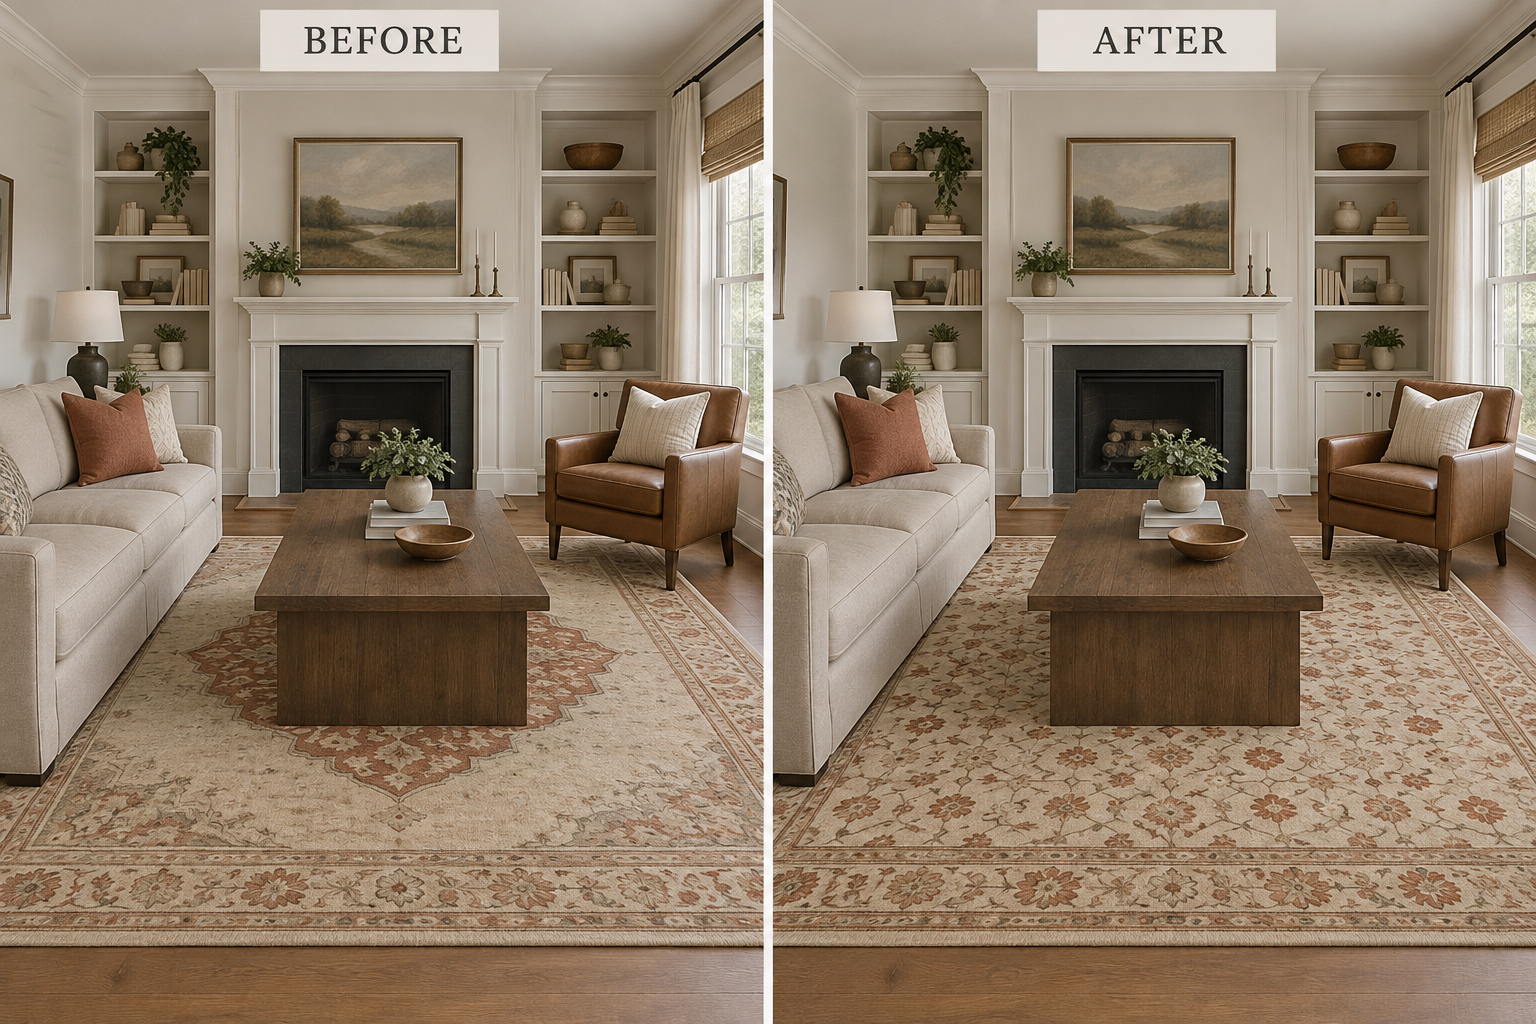
    7. Scale the Pattern to the Visible Rug Area

    Judge a pattern by what remains visible after furniture covers it. A broad border can disappear beneath a sofa, while an oversized central medallion may be mostly hidden by the table. For a compact seating group, try a moderate, repeating motif that reads across exposed strips. Compare it with a large medallion at the same rug size so pattern—not footprint—is the variable you evaluate.

    Before and after comparison replaces a hidden medallion with a visible repeating rug pattern.

    Avoid treating tiny patterns as an automatic small-room solution. Dense, high-contrast detail can compete with upholstery and make narrow exposed sections look busy. A quieter repeat offers continuity and can disguise everyday crumbs, but it will not provide a bold focal point. If the room already has patterned seating or strong floor grain, a nearly solid rug may suit it better.

    8. Choose Contrast That Clarifies the Seating Boundary

    Use the rug’s color value to make the grouping readable against the floor. On medium-brown wood, a light oatmeal rug can establish a clear seating zone while echoing a cream chair. If the rug nearly matches the floor, look for subtle tonal variation or texture so its boundary remains visible. Bring samples home and check them beside both flooring and upholstery in daylight.

    The mistake is choosing a rug solely to match the sofa, then discovering that both merge into the floor. Strong contrast clarifies edges, but it also draws attention to an undersized or crooked footprint. Pale rugs may reveal traffic soil, while very dark ones can show lint. A low-contrast choice may be preferable when the goal is a quieter, less visibly divided room.

    9. Match the Footprint to Your Cleaning Routine

    Before committing to a larger rug, decide how you will vacuum its surface, reach beneath the seating, and handle spills. A low-pile rug usually makes crumbs easier to retrieve than a deep shag. If machine washing matters, check the rug’s care instructions and your washer’s capacity for that exact size. A washable label alone does not mean an 8-by-10-foot rug fits your laundry setup.
    Buying a smaller rug only because it is easier to wash can recreate the disconnected seating problem. Conversely, a large rug trapped beneath heavy furniture may be unrealistic for frequent removal. Weigh a connected footprint against laundering effort, drying space, and any professional care requirements. If lifting is difficult, an easily vacuumed rug with a practical spot-cleaning routine may suit the household better.

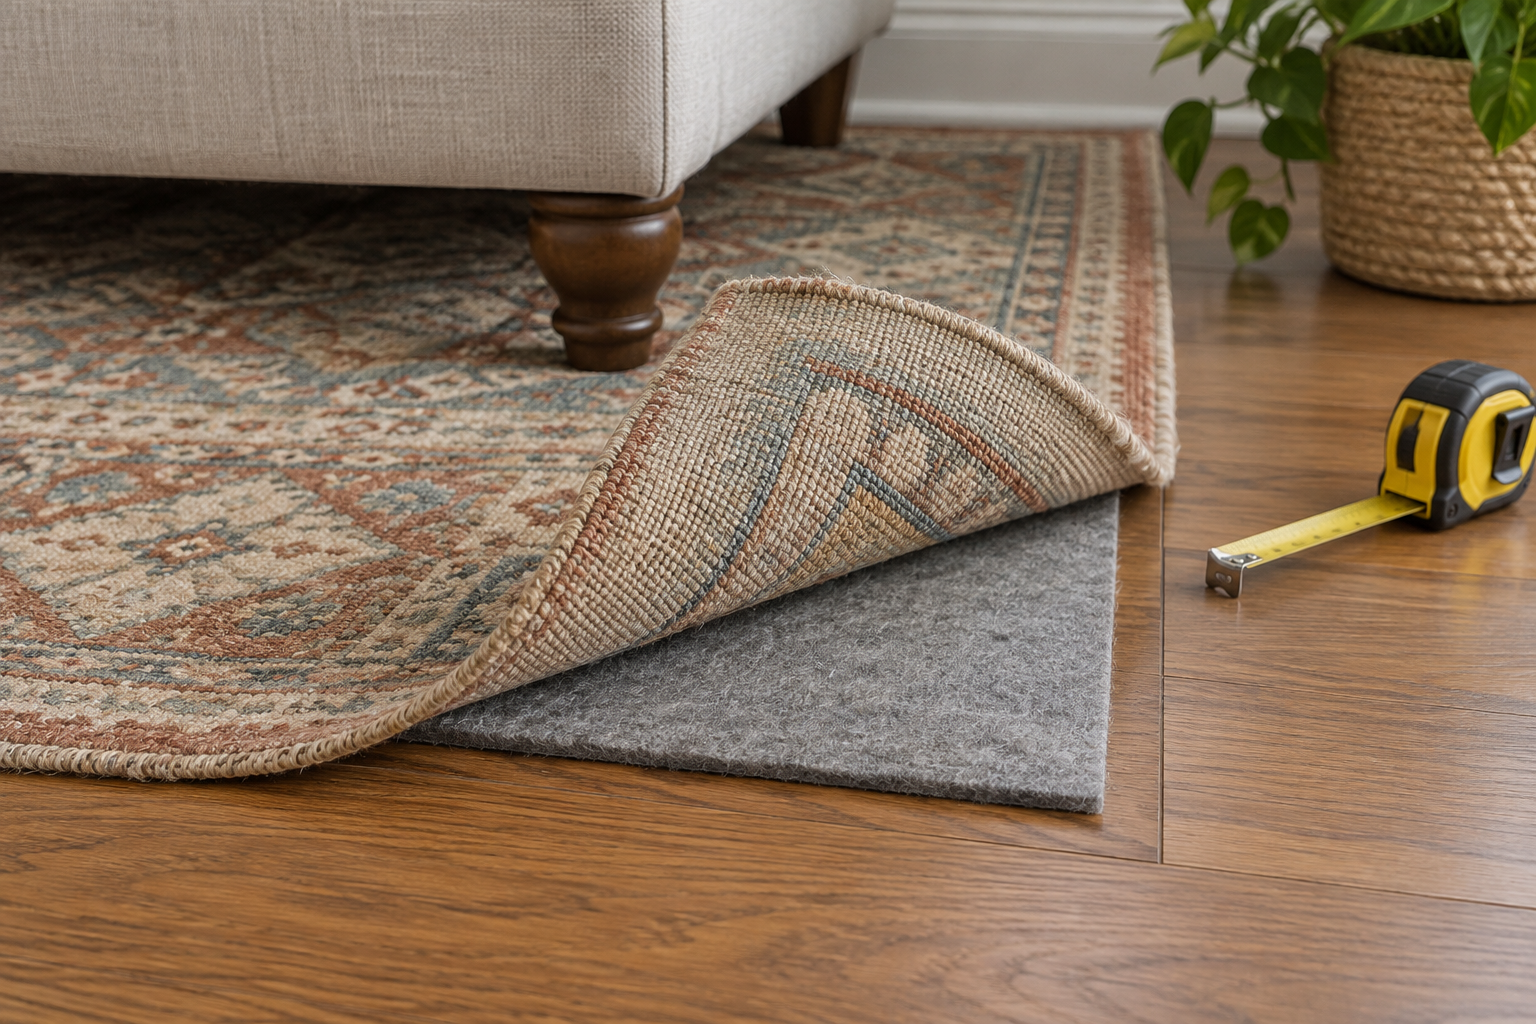
    10. Fit the Pad So the Rug Holds Its Shape

    Finish the placement with a floor-compatible pad trimmed slightly smaller than the rug, following its manufacturer’s guidance. An inset of roughly 1 inch on each side is a common starting point, allowing edges to settle without exposing the pad. For example, fit a thin pad beneath a flatweave so the seating boundary stays straight rather than migrating away from the chair whenever someone walks across it.

    A lifted rug corner reveals a thin pad inset from both edges.

    Do not let the pad protrude or assume more cushioning is always better. Excess thickness can create a ridge, affect furniture stability, and complicate door clearance. Pads also need occasional lifting so grit does not remain underneath. A cushioned version may not suit a tight threshold or a delicate floor finish; confirm compatibility with the flooring and rug care instructions before installing it.

    The right rug does not need to fill the room; it needs to connect the seating without disrupting daily movement. Test the footprint first, confirm furniture contact, and open every nearby door. Then choose the pattern, material, and pad that you can realistically maintain. A coherent boundary underfoot gives the pieces you already own a clearer relationship.

  • Room to Play, Room to Relax: 10 Ways to Share One Small Living Room

    Room to Play, Room to Relax: 10 Ways to Share One Small Living Room

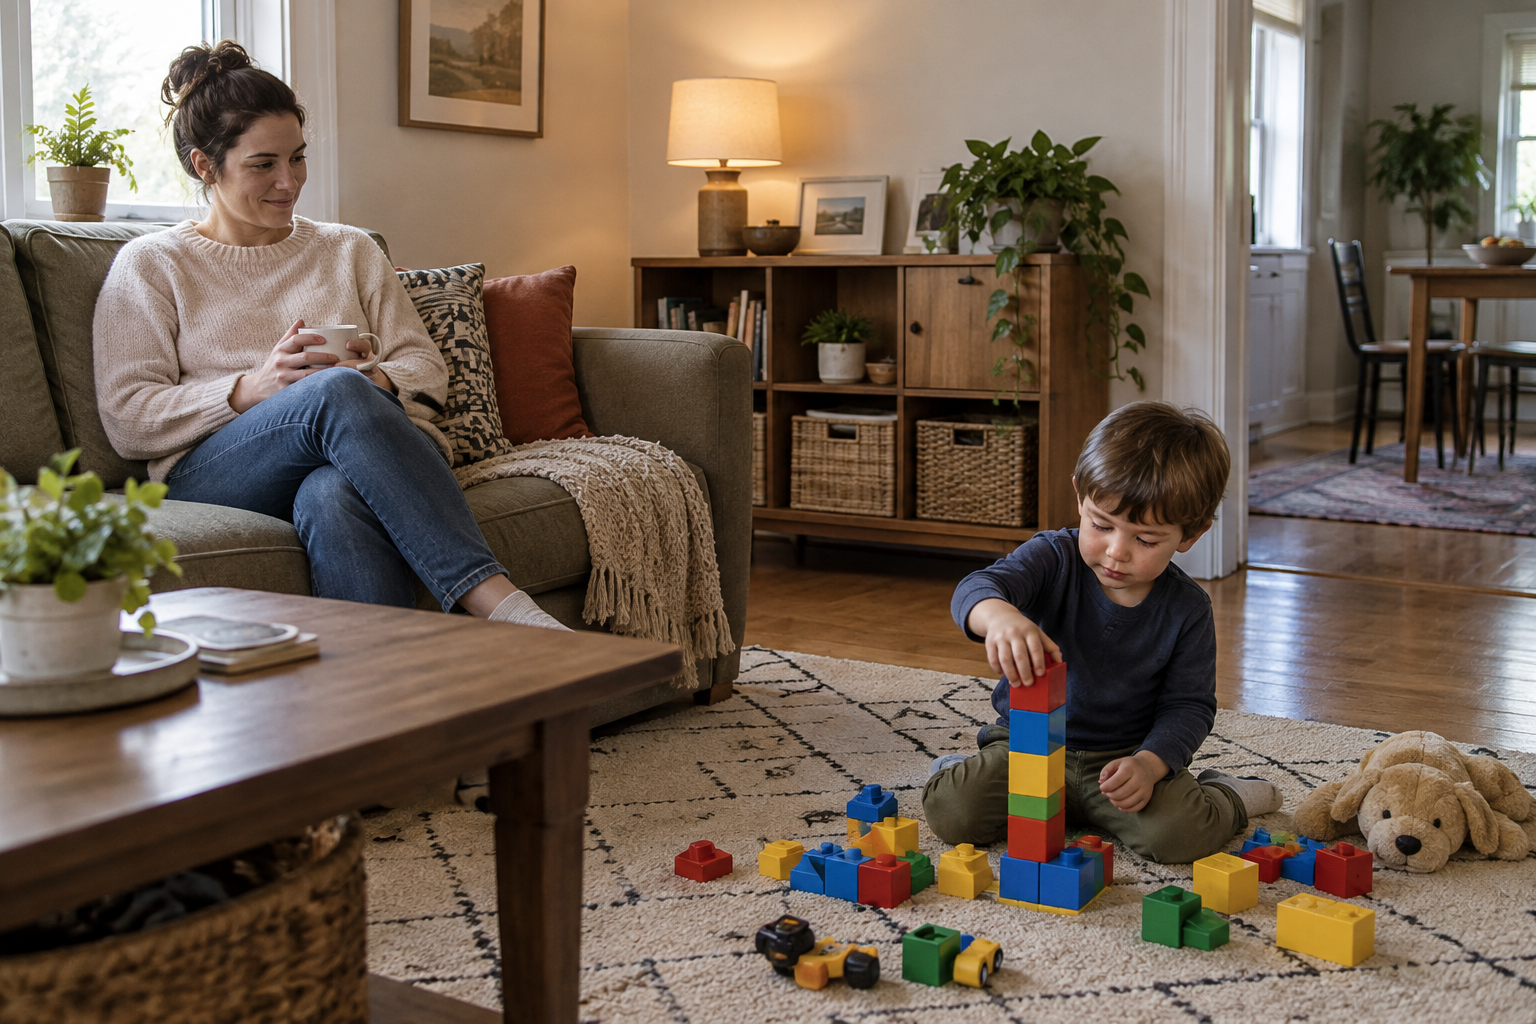
    When the living room is also the everyday playroom, the challenge is not hiding every sign of childhood. It is making room for play while keeping a comfortable seat, a clear walkway, and a realistic way to switch activities. The most useful small living room ideas support both uses without requiring two sets of furniture. Start with what your child actually plays with, where an adult can supervise, and what you can reasonably put away before dinner.

    Adult supervising a child playing beside the sofa in a compact shared living room.

    1. Give the Supervising Seat a Clear View

    Choose the supervising seat before choosing the play corner. Sit where you normally read or fold laundry, then check whether you can see the entire proposed play area without leaning around furniture. For example, place a toddler’s block mat beside the sofa’s open end rather than behind its back. Keep the route between your seat and the child free of tables, cords, and baskets.

    A common mistake is treating an attractive nook as automatically suitable for supervised play. A corner behind a tall chair may contain toys neatly but conceal what a young child is doing. Open sightlines also mean adults will see the clutter. If your room has deep alcoves or an L-shaped layout, a smaller visible play spot may work better than the largest available corner.

    2. Move the Play Footprint Out of the Traffic Lane

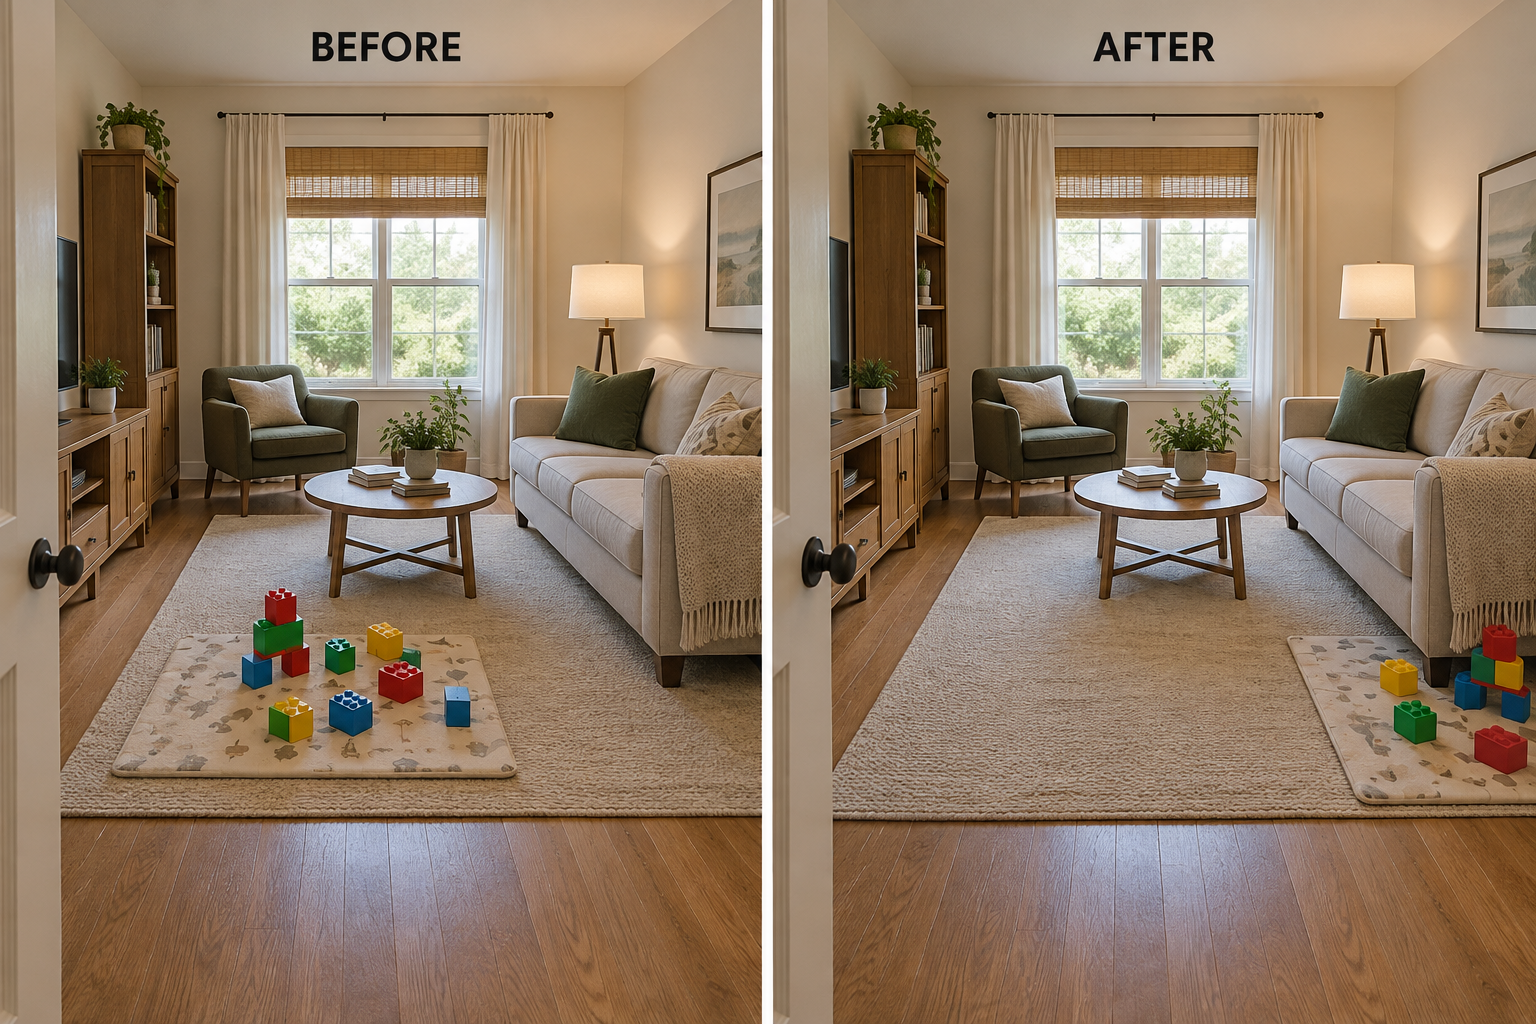
    Use a small washable mat to define where floor play happens, positioning it outside the main walking route. An approximately 3-by-4-foot mat can accommodate a modest block setup beside a sofa in some rooms. That is a planning guideline, not a required size; measure your space and test the location with a towel before buying. The boundary should guide play without becoming an obstacle.

    Before and after comparison showing the same play mat moved out of a living room walkway.

    Do not assume a larger rug creates a better playroom. An oversized play footprint can swallow the only route to the sofa, while thick edges can catch feet or mobility aids. A mat also cannot guarantee that toys stay inside its border. If your room barely accommodates circulation, use a smaller activity surface that comes out only while someone is actively playing.

    3. Rotate Toys by Activity, Not by Calendar

    Keep a limited selection available and store the rest somewhere children cannot access independently. Choose different kinds of play: one building set, a few books, and a pretend-play kit, for example. Swap an activity when interest fades rather than maintaining a rigid weekly schedule. A single backup tote in an adult-access closet makes rotation possible without turning the living room into a storage depot.

    Rotating every favorite out of sight can create frustration rather than renewed interest. Keep a dependable comfort toy available, and let older children help decide what rests. Rotation reduces visible volume but requires another storage location and occasional attention. If no backup space exists, reduce duplicate categories instead; buying extra bins will not solve a room that already holds more toys than it can support.

    4. Make Everyday Storage Reachable and Secure

    Use a stable storage unit with manufacturer-specified anchoring, and place lightweight everyday toys in easy-to-reach bins. Keep heavier items low and adult-only materials secured separately. For example, a short cabinet can hold soft animals and chunky vehicles in open containers. Follow installation instructions for your wall type; renters should discuss approved anchoring methods with their landlord before purchasing furniture that requires attachment.

    Wall-secured low cabinet with lightweight toy bins on accessible shelves.

    The mistake is assuming that low furniture cannot tip or that a heavy lid is harmless because it hides clutter. Children may climb shelves, and lids can trap fingers. Open bins offer easier access but leave contents visible. If you cannot install required restraints or provide safe lid operation, choose a different storage product rather than leaving unsuitable furniture unsecured in a play area.

    5. Protect One Comfortable Adult Seat

    Reserve the sofa or your main armchair for sitting rather than routine toy storage. Give its cushions a permanent home and keep one reachable surface available for a book or remote. For example, let a small basket hold the day’s stuffed animals instead of piling them on the armchair. This preserves a place to supervise comfortably and a usable seat when another adult visits.

    Filling every spare inch with child-sized seating can leave adults perched on the floor without support. Floor cushions are flexible, but they still need storage and may not suit people with limited mobility. A dedicated adult seat uses space that could otherwise hold toys. In an exceptionally tight room, protect part of the existing sofa rather than adding another chair to make this work.

    6. Give the Coffee Table a Planned Parking Place

    If floor play needs the center of the room, choose a table arrangement you can change safely without shifting everything else. A lightweight side table may replace a bulky coffee table, or an existing table may slide into an unused position during play. Test that parking place first: it must not block a door, vent, storage cabinet, or the adult’s route to the child.

    Do not buy movable furniture without deciding where it goes when moved. A table pushed into the hallway simply transfers the obstruction. Lighter pieces are easier to shift but can be less stable, and wheels need reliable locking mechanisms. If lifting is difficult or the table has no safe destination, keep it stationary and plan seated activities rather than a large central floor zone.

    7. Pack Toys in Ready-to-Play Kits

    Organize the available toys into activity kits rather than scattering related pieces among several bins. Put the pretend food with its plates, for example, and keep the train pieces together. Use your existing containers and leave enough room for an imperfect return. At reset time, an adult can hold the bin while a child gathers one category, making cleanup a concrete task instead of an open-ended instruction.

    Before and after comparison of the same toys mixed across bins and grouped into activity kits.

    Overly detailed sorting can make cleanup harder than play. A preschooler may manage a vehicle bin but not separate compartments for every wheel and accessory. Broader kits sacrifice perfect organization in exchange for a quicker reset. If a child mainly combines materials in open-ended play, keep those compatible items together rather than imposing a system that requires an adult to rebuild it every evening.

    8. Choose Quieter Versions of Floor Play

    In apartments or shared households, consider the sound of play as well as its footprint. Offer fabric blocks, soft balls for rolling, or felt pretend food during quieter hours. For example, replace a hard-plastic dumping game with a basket of washable fabric shapes. Keep active play supervised and appropriate to the room; a soft object still needs a safe direction and clear surroundings.

    Soft toys do not soundproof a room, and encouraging indoor throwing can create a different problem around lamps or screens. Quieter materials may also lack the construction possibilities a child enjoys in harder blocks. Use them as one option, not a universal replacement. If the room is too narrow for rolling games, choose seated pretend play and reserve energetic movement for a more suitable location.

    9. Contain Creative Play Before It Starts

    Make drawing or modeling sessions a contained activity rather than leaving supplies permanently spread across shared furniture. Bring out a shallow tray with age-appropriate washable materials and protect the surface underneath. For example, offer paper and chunky crayons at a child’s comfortable working height, then return the complete tray to adult-controlled storage afterward. Check product guidance before using any material near upholstery or finished wood.

    A tray is a boundary, not a spill guarantee, and washable supplies can still mark some finishes. Too many choices also increase setup and cleanup. Limiting materials keeps the activity manageable but may interrupt elaborate projects. If the living room has delicate textiles, no stable work surface, or no way to supervise closely, move wet or staining activities to a more forgiving part of the home.

    10. End With a Clear-Floor Handoff

    Define a short closing sequence that restores the room’s next use: return loose toys, fold the play mat if it is designed to fold, and check the walking route. An approximately 36-inch-wide clear path is a useful planning starting point where feasible, not a universal accessibility standard; measure your room and account for household needs. For example, store the folded mat on a designated low shelf before settling in for the evening.

    Adult storing a folded play mat while the route from the doorway to the sofa stays clear.

    Demanding a spotless reset after every small activity can make the shared room exhausting to use. Prioritize trip hazards and access, then decide which unfinished projects can remain on a contained surface. Daily packing also costs time and may frustrate a child building something complex. If an ongoing project has no safe overnight location, photograph it together before clearing it rather than leaving pieces across the main route.

    A shared living room works best when its rules are simple enough to repeat: play where an adult can see, keep a manageable selection within reach, and restore safe access when play ends. You do not need to erase childhood from the room. You need a setup that welcomes it during the day and still leaves everyone somewhere comfortable to sit.

  • A Desk That Doesn’t Take Over: 10 Ways to Work From a Small Living Room

    A Desk That Doesn’t Take Over: 10 Ways to Work From a Small Living Room

    A living room desk needs more than an empty patch of wall. It needs space for your knees, manageable daylight, a usable video-call background, and a clear stopping point when work ends. The most useful small living room ideas account for the desk in use—not just styled with its chair tucked in. These 10 approaches help you choose a setup around your actual workday. All dimensions below are approximate planning guidelines, not universal requirements; measure your room, furniture, and equipment before buying.

    Compact desk and task chair beside a sofa, with an open walking route through the living room.

    1. Reserve the Chair Space Before Choosing the Desk

    Start by marking the desktop and the chair’s working position with painter’s tape. A desk approximately 36 inches wide and 24 inches deep can accommodate a compact setup, but the occupied chair extends its footprint considerably. For example, test a blank wall beside the sofa with someone seated at the taped desk while another person walks from the entry to the seating area.

    The common mistake is measuring only the desk, then discovering that its chair blocks a doorway or the route to the couch. Aim for roughly 36 inches of clear passage where practical, and allow more wherever your household needs it. A smaller desktop sacrifices spreading room; this wall placement may not suit a narrow room whose only circulation route passes directly behind the chair.

    2. Turn the Screen Sideways to the Window

    Let daylight reach your workstation from the side rather than placing a bright window directly behind the screen or reflected in it. In a living room with one large window, try rotating a freestanding desk 90 degrees before adding accessories. Check the screen during your usual working hours, then adjust the existing shade to soften direct sun without darkening the whole room.

    Before and after views show a desk rotated so window light reaches the laptop from the side.

    A window-facing desk looks appealing in photos, but strong brightness differences can make screen work uncomfortable. Turning sideways reduces that contrast, although low afternoon sun may still require an adjustable shade. Avoid assuming a sheer curtain solves every exposure. This arrangement may not work if rotating the desk blocks circulation or if the only available wall receives intense direct sun throughout your workday.

    3. Use the Sofa Back as a Work-Zone Boundary

    If your sofa already floats away from the wall, place a proper desk behind it, facing the seating area. The sofa back becomes a visual boundary without adding a divider. For example, a 42-inch-wide desk can serve one worker while leaving room at one end for access. Choose enough depth for your equipment rather than treating a narrow decorative console as a workstation.

    Don’t push the sofa forward simply to squeeze in a desk if doing so crowds the coffee table or television area. This approach spends floor depth to preserve wall space, and the monitor may remain visible above the cushions. It is less suitable for shallow rooms, reclining sofas that need rear clearance, or households where someone regularly walks behind the worker during calls.

    4. Build a Compact Setup Around Your Posture

    For regular work, raise the laptop on a stable stand and add a separate keyboard and mouse. Position the screen roughly an arm’s length away, with its top near or slightly below eye level, then adjust for comfortable viewing. At a typical desk around 28–30 inches high, a supportive adjustable chair and footrest can help a shorter user keep shoulders relaxed and feet supported.

    A raised laptop, separate keyboard, adjustable chair, and footrest support a comfortable seated posture.

    The mistake is buying the smallest chair and shallowest desk because they disappear visually. A laptop alone links screen height to hand position, while thick desktop drawers can crowd your thighs. Compact equipment helps, but comfort still requires usable depth and adjustment. A very shallow writing desk may suit brief email sessions, not a full workday with a large monitor or paperwork.

    5. Fit an Alcove Without Trapping Your Knees

    An alcove beside a fireplace or built-in cabinet can hold a simple desktop cut to fit. Measure its width at several heights because walls are not always square, and check baseboards and outlets. For example, a removable freestanding desk inside a 40-inch-wide recess can use an awkward pocket while avoiding permanent installation, making the arrangement more practical for a renter.

    Don’t fill the recess with drawers just because storage fits on paper. Your knees, chair arms, cables, and ventilation need room too. Alcoves offer visual containment but may feel enclosed or leave the screen too close to your face. Skip this solution beside an active heat source, across required access panels, or where the recess cannot accommodate your working posture.

    6. Choose a Secretary Desk for a Visible Stopping Point

    A secretary desk lets the work surface close when the day ends. Choose one with hardware rated for its intended use, adequate legroom, and enough interior clearance for your equipment. For example, a laptop, slim keyboard, and notebook can remain inside while the front folds up, returning the wall to a furniture-like appearance before you settle onto the couch.

    The common mistake is assuming every attractive vintage secretary can support modern equipment or close around a laptop stand. Closing storage creates a strong boundary but adds a daily reset and may require disconnecting accessories. It is usually a poor match for multiple large monitors, extensive paper-based work, or anyone who cannot comfortably operate the folding surface and its supports.

    7. Give the Camera a Quiet Background

    Check the view from your webcam before deciding which direction to face. A plain wall or restrained shelving usually needs less attention than a view across the entire living room. If shelves must sit behind you, an existing ceiling-mounted curtain can conceal their contents during calls. For example, draw a neutral curtain across open storage while keeping soft window light in front and to one side.

    Before and after views show a curtain closing over busy shelves behind a desk chair.

    Avoid rearranging the entire room around an imaginary perfect background without testing the actual camera crop. A curtain simplifies the view but introduces fabric, may cover useful storage, and will not soundproof conversations. This solution is less suitable where curtain installation is prohibited, where fabric would obstruct ventilation or heat, or where the background includes a doorway that must remain accessible.

    8. Share an Existing Table Only With a Reset Plan

    If your living room already contains a small dining or game table, give it a scheduled work role instead of adding another surface. Keep a portable kit containing your laptop stand, keyboard, mouse, and charger. For example, set up at one end each morning, then return everything to a nearby cabinet before the table becomes the household’s dinner or puzzle spot.

    Leaving work spread out indefinitely is the mistake that turns shared furniture into contested territory. You avoid another desk, but pay for that flexibility with setup time and potentially imperfect table height. A cushioned dining chair is not automatically supportive. This arrangement may not suit simultaneous household activities, confidential paperwork, or a workday that routinely continues through meals.

    9. Move Supplies Up, Not Into the Knee Well

    Keep the desktop for active work by placing lightweight supplies on a shallow shelf or wall organizer within comfortable reach. Mount shelves securely with appropriate hardware and landlord approval where needed. For example, store notebooks and headphones above one side of the desk, then route charging cables along the rear edge so they do not spill into the chair’s rolling path.

    Don’t build a tower of storage directly over the monitor or fill every wall inch with office supplies. Vertical storage frees floor space but can make the living room feel busier and requires safe mounting. Keep heavy items low and avoid awkward overhead reaching. This approach may not suit fragile walls, strict rental rules, or a desk that must move frequently.

    10. Create a Rolling Dock for the End of the Day

    For a desk that stays in place, use a narrow rolling cart as the equipment’s off-duty home. Assign each shelf a purpose: keyboard and mouse above, laptop in a suitable protective compartment, notebook below. At quitting time, shut down or sleep equipment as appropriate, disconnect it safely, and roll the cart into a measured parking spot beside a cabinet, leaving the desktop available for living.

    A rolling cart stores work equipment beside a cabinet after the desk is cleared.

    Buying the cart before identifying its parking place simply adds another obstacle. Measure the route, check wheel clearance over rugs, and avoid stacking equipment where it can slide. The tradeoff is a brief daily handling routine rather than an always-ready setup. Skip this method if lifting equipment is difficult, the route includes steps, or children and pets could tip an unsecured load.
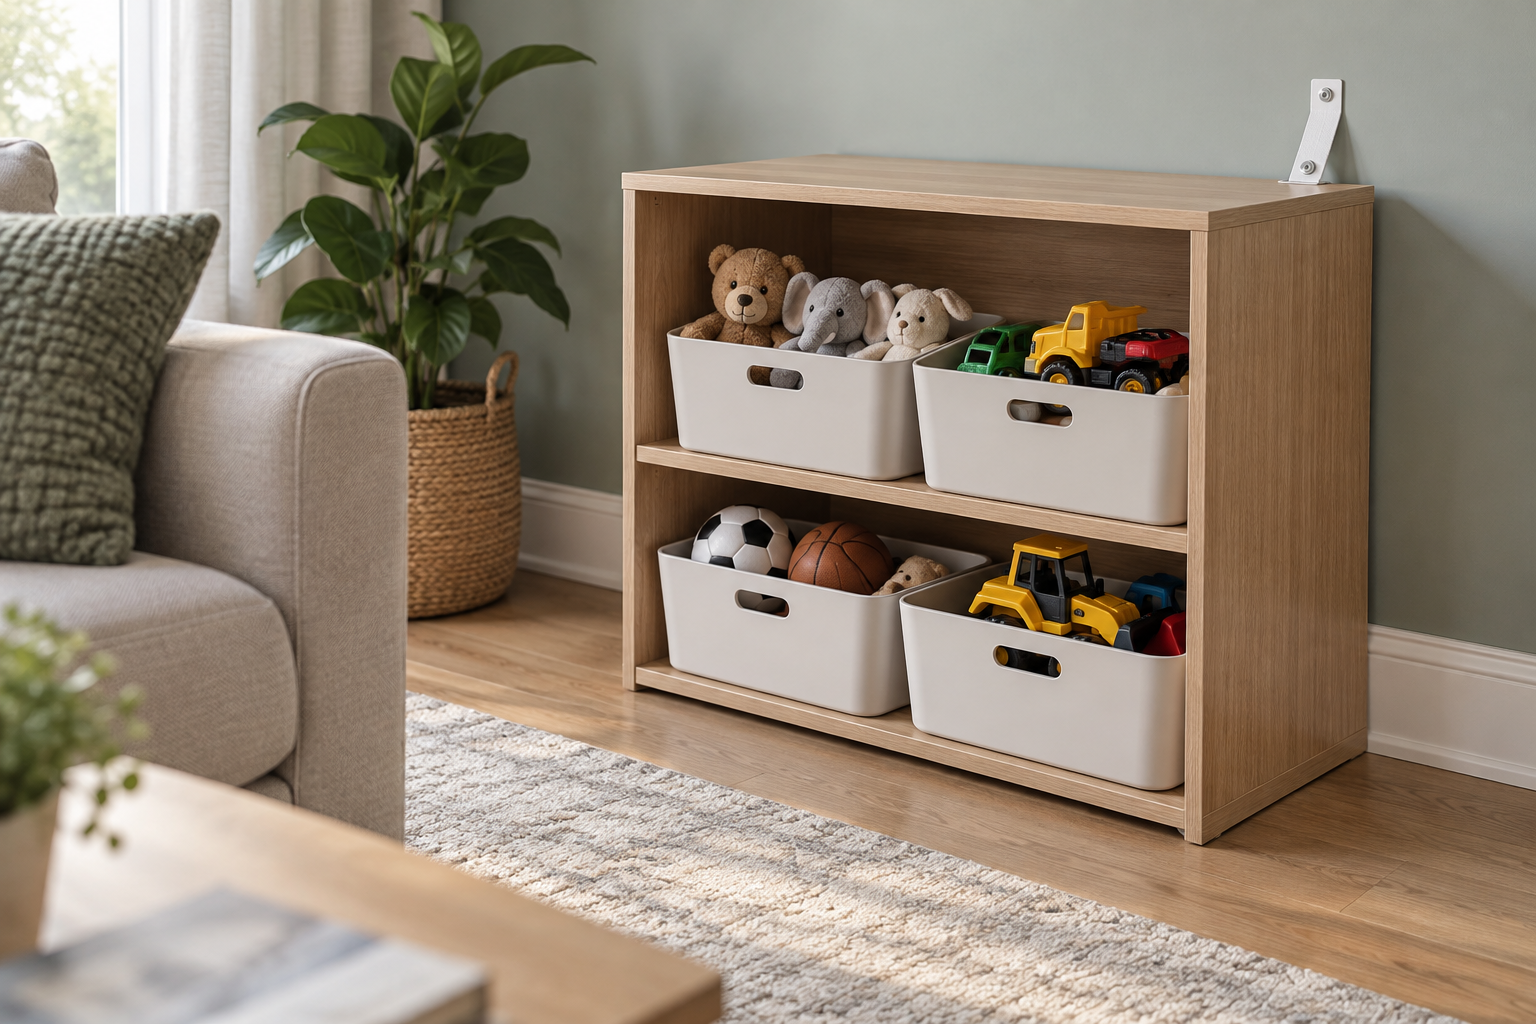
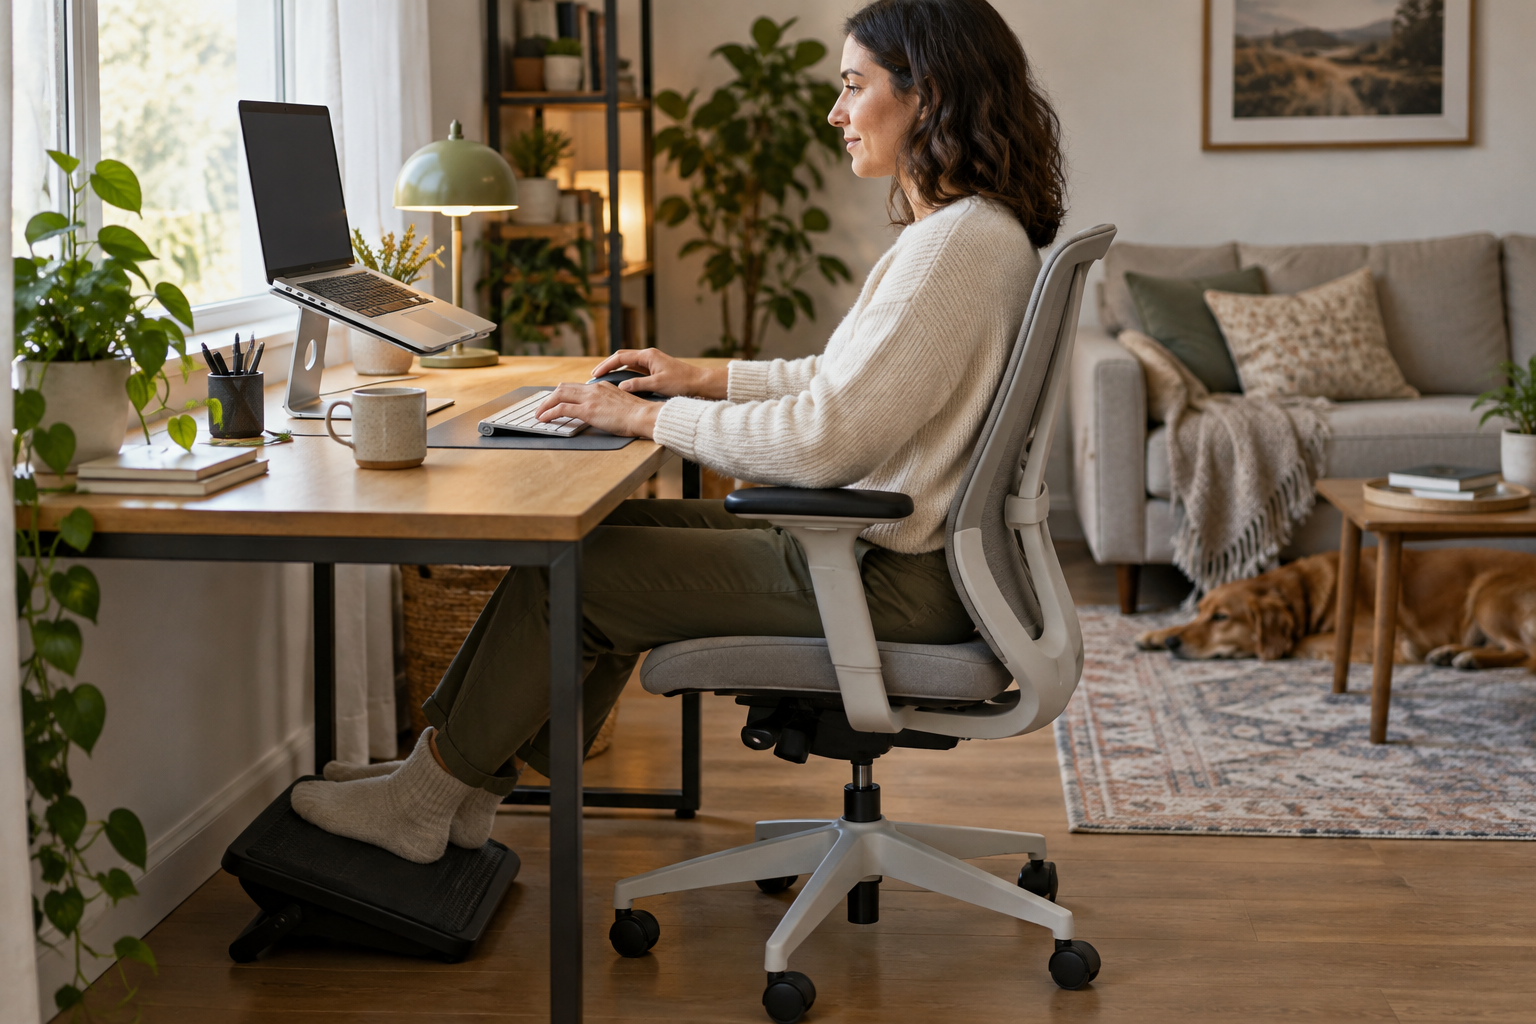
    The right living room workspace supports both the hours you work and the hours you don’t. Test the chair clearance, screen position, camera view, and shutdown routine before committing to furniture. A modest desk with comfortable equipment and a dependable stopping point will usually serve the room better than a larger setup that never lets go.