Category: Studio Apartments

  • Where Can the Litter Box Go When Your Studio Has No Separate Utility Space?

    Where Can the Litter Box Go When Your Studio Has No Separate Utility Space?

    The bathroom door barely clears the toilet, so the litter box has to share the room where you sleep, cook, and eat. That makes placement a daily-use decision, not a hiding exercise. The best available spot must work for your cat, stay separate from food preparation, and be easy to clean. These ten checks help you compare imperfect options without buying furniture first.
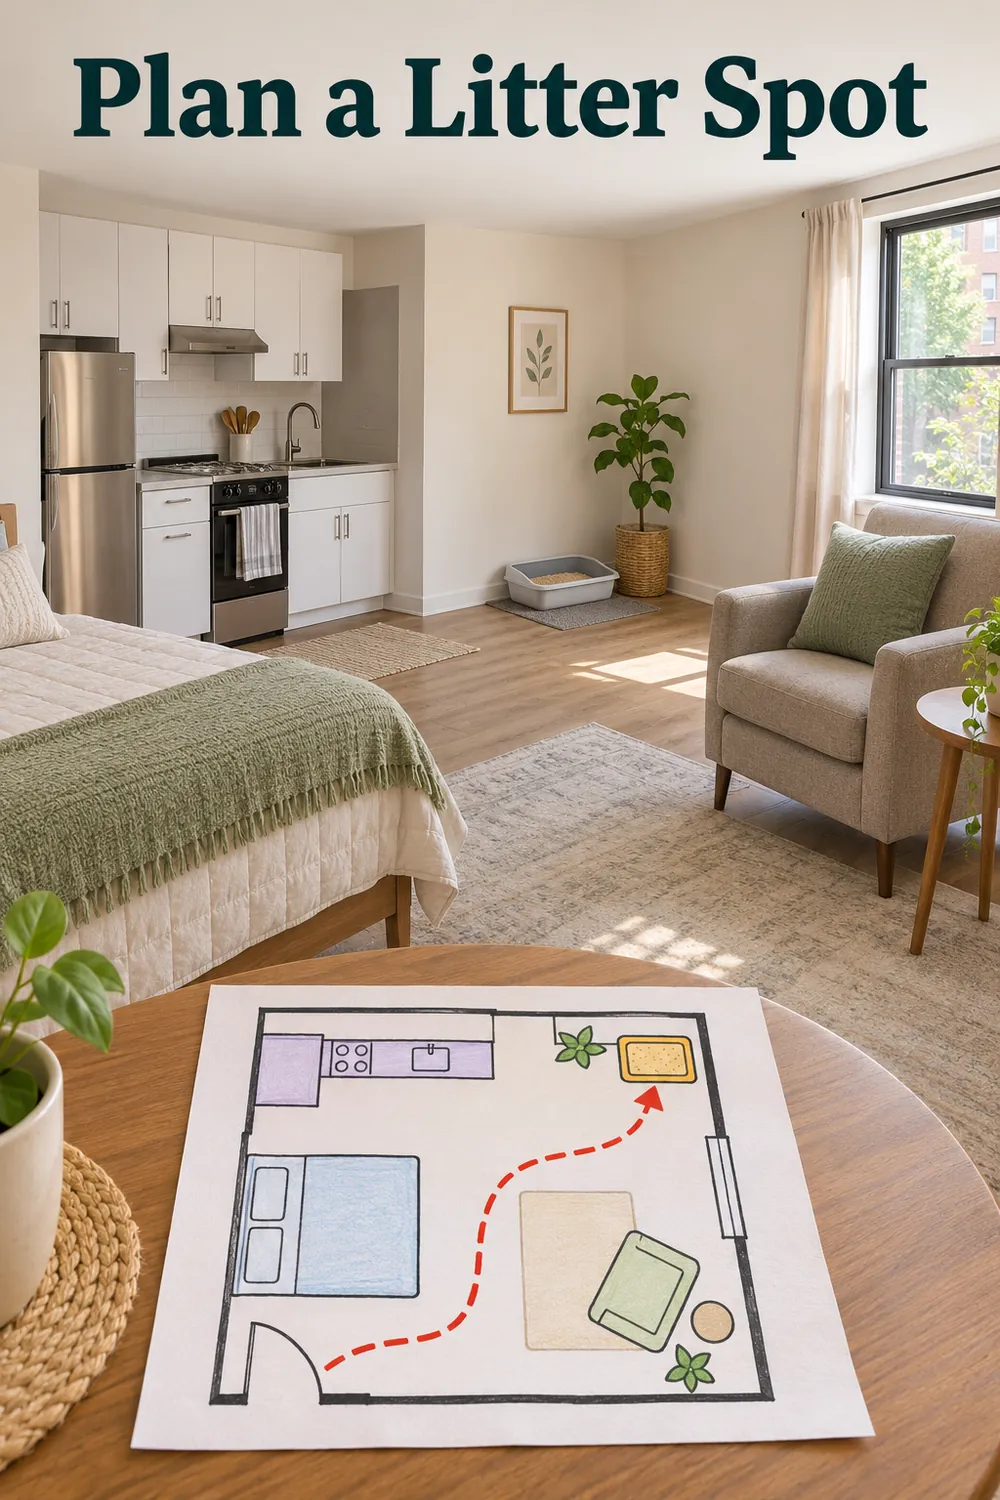
    Studio layout and matching placement sketch showing a litter box away from the kitchen, with the headline “Plan a Litter Spot.”

    1. Start with your cat’s body, not an empty corner

    Choose a workable box before choosing its permanent location. Measure your cat approximately from nose to tail base, then compare usable interior dimensions rather than the package’s outside measurements. As a planning starting point, look for a box roughly one and a half times that body length, with room to turn and dig. A large cat may rule out the narrow gap beside your dresser.

    Watch how your cat steps into the current box. A kitten, older cat, or cat with limited mobility may need a low entrance rather than a tall-sided or top-entry design. High sides elsewhere can help contain litter, but they do not compensate for difficult access. If stepping over the rim seems uncomfortable, ask your veterinarian about an appropriate setup rather than adding an improvised, unstable step.

    2. Test the whole footprint, including the approach

    Tape the proposed box’s outside dimensions onto the floor, then add the space your cat needs to approach, enter, and turn away. For an initial mock-up, leave approximately 18–24 inches of clear floor in front of the entrance, adjusting for your cat and box. This is a planning allowance, not a code requirement. Measure furniture, door swings, and walking routes before committing.
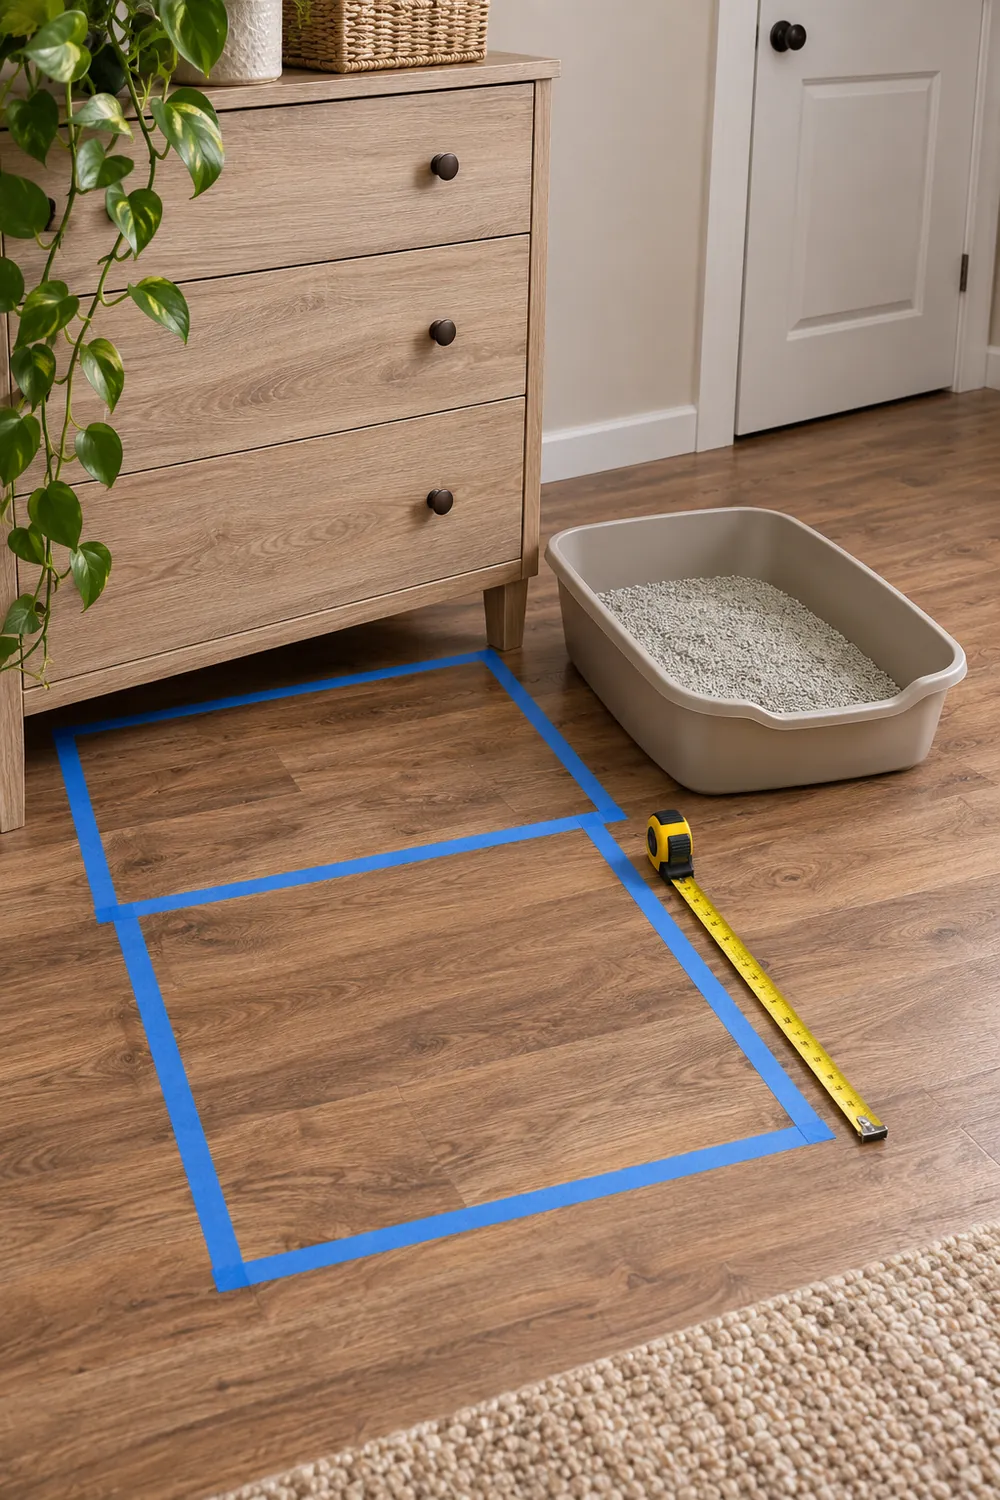
    Tape outlines a litter box and its clear entry approach beside a dresser before permanent placement.

    Live with the outline through an ordinary evening. Pull out your desk chair, open drawers, and walk from bed to kitchen carrying laundry. A spot that works only when the chair is tucked in is not reliably accessible. Beside a nightstand might be feasible; between the nightstand and a bed frame with no turning space probably is not.

    3. Map quieter locations away from food handling

    On a quick room sketch, mark food-preparation counters, dining surfaces, pet bowls, heaters, doors, and busy routes. Then identify quieter floor areas outside those zones. A living-area corner beside a bookcase may be a better candidate than the convenient space beneath a kitchen cart. Keep the box away from food storage and preparation rather than trying to make an adjacent spot acceptable with a screen.

    Check each candidate when the apartment is active, not just when it is quiet. A corner beside a speaker, a rattling refrigerator, or your frequently rolling work chair may be unsettling. Preserve heater and appliance clearances according to manufacturer instructions. In a very tight studio, some proximity to the bed may be unavoidable; prioritize dependable cat access and cleanability over making the box disappear.

    4. Compare open access with genuinely ventilated concealment

    An open box makes it easier to inspect litter and notice when cleaning is needed. If you want concealment, compare that baseline with an enclosure that has generous, unobstructed ventilation openings and enough interior space for the entire box and your cat’s movements. A closed storage cabinet with one small entrance is not equivalent. Do not assume a concealed box will contain odors without affecting the cat’s experience inside.
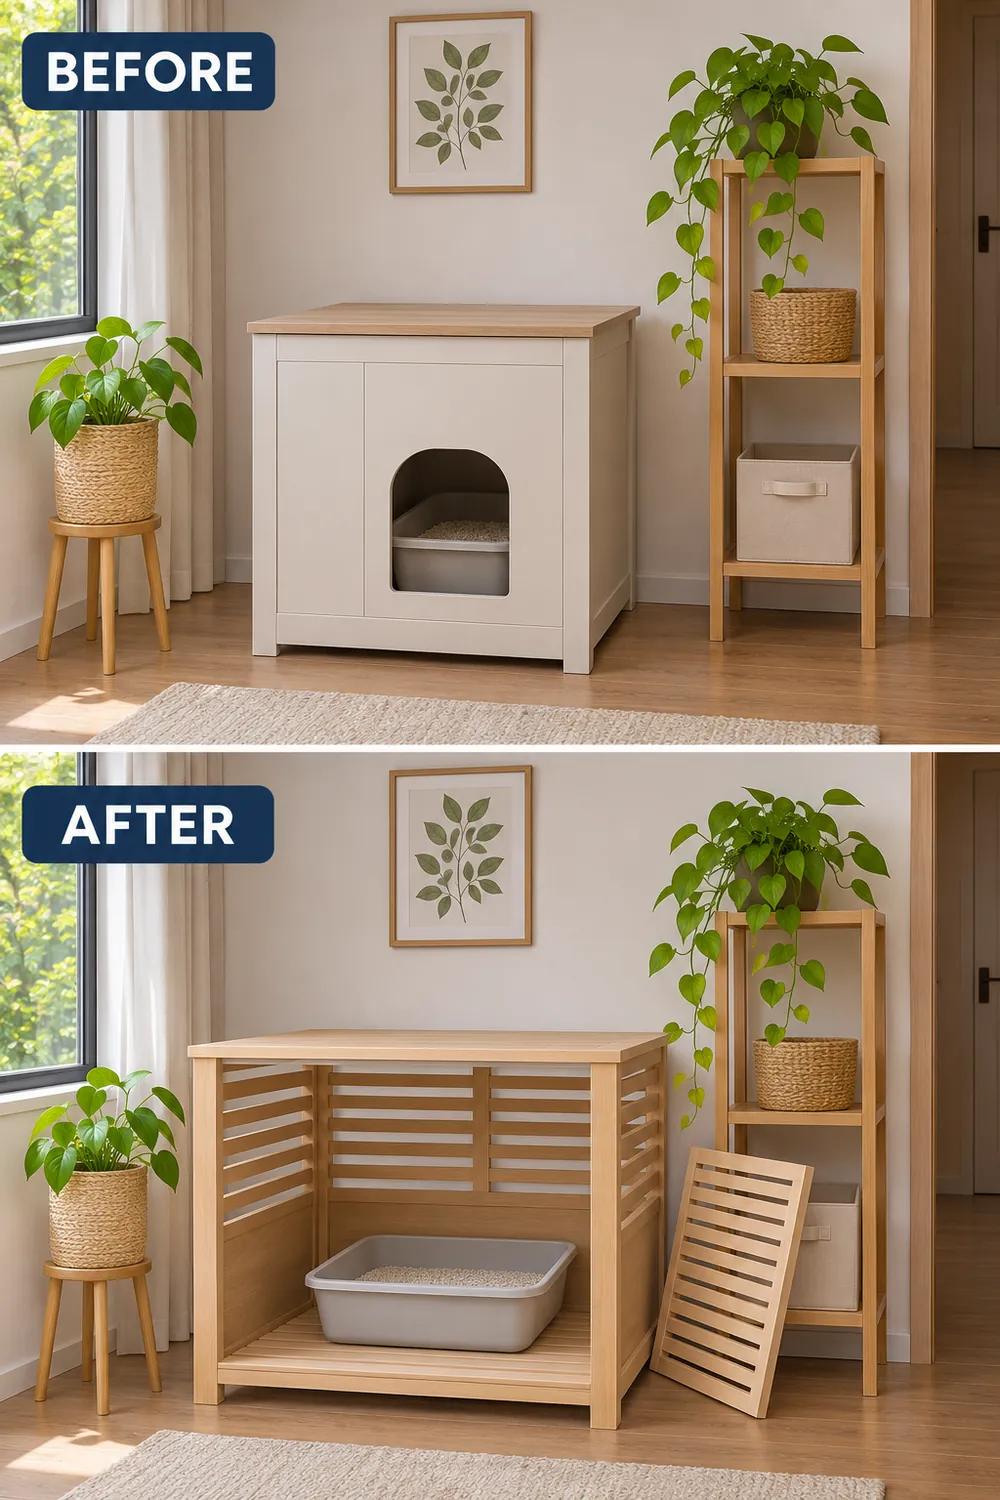
    Before and after comparison replaces a cramped closed cabinet with a roomy enclosure featuring broad ventilation openings.

    Test your cat’s acceptance before treating an enclosure as permanent furniture. Keep vents clear of walls and stored belongings, and choose access that lets you lift out the tray without tipping it. An enclosure also takes more floor space than the tray alone. If your cat hesitates or the interior is difficult to clean, an open box is the more practical compromise.

    5. Keep the exit visible and unobstructed

    A box can fit neatly and still feel like a dead end. Avoid trapping its entrance behind a swinging door, a hanging blanket, or a chair that someone regularly moves. Position it so your cat can leave directly into clear floor space. In a home with another pet, consider whether that animal could stand in the only approach and block access.

    Beside a sofa, face the entrance toward the open room rather than into a tight gap behind the arm. Keep bags, shoes, and charging cables out of that route. A freestanding screen may reduce visibility from the bed, but skip it if it creates a narrow tunnel or unstable obstacle. Neither the box nor its screen should obstruct your apartment’s exits.

    6. Plan for enough boxes, not just one convenient spot

    Use one box per cat plus one additional box as a starting planning guideline, then discuss space constraints and individual needs with your veterinarian. Even a one-cat studio may benefit from a second option. Two cats sharing one hidden tray can create access problems that extra scooping alone will not resolve, especially if one cat guards the approach.

    Map separate locations rather than automatically lining boxes up together. One beside the dresser and another across the living area can provide more choice than two trays inside the same cabinet. The tradeoff is real: additional boxes consume usable floor space. If the guideline seems impossible in your layout, seek veterinary advice about priorities rather than simply choosing smaller, inadequate boxes.

    7. Catch tracking without creating another obstacle

    Place a flat, washable tracking mat where your cat naturally steps out, not merely underneath the tray. Start with enough coverage for a few ordinary steps, then adjust after watching the route. Keep the box entrance fully exposed. A mat that curls upward, slides, or feels unpleasant underfoot can turn an otherwise accessible location into one your cat avoids.
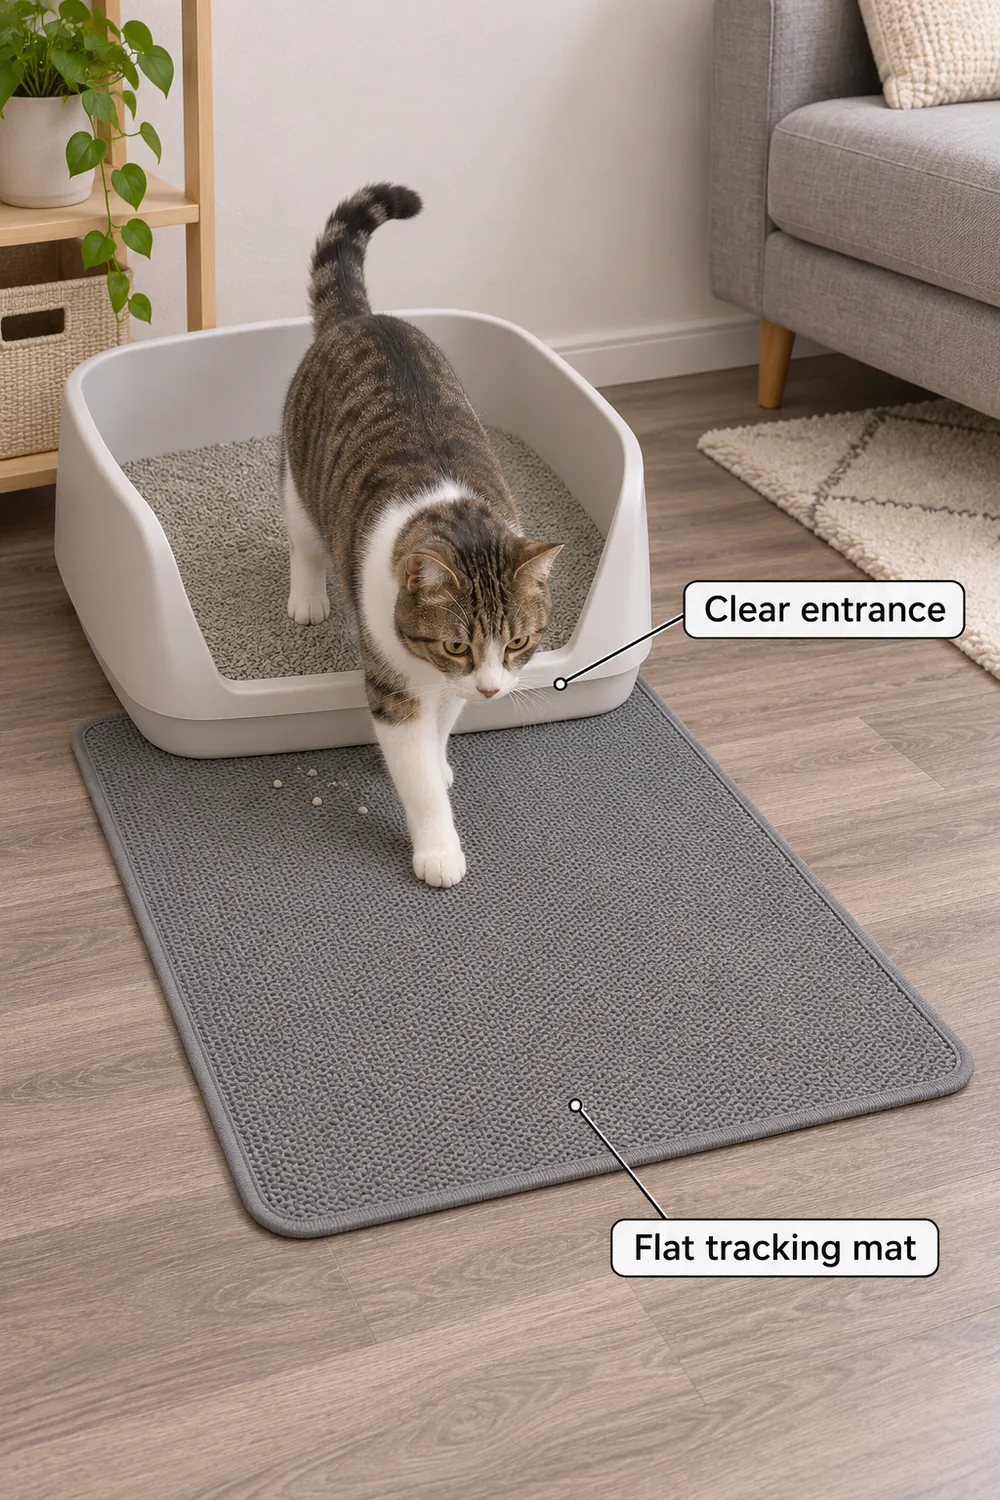
    A flat tracking mat catches litter along the cat’s exit path while leaving the box entrance unobstructed.

    Check that the mat does not overlap a door swing or become a trip point beside the bed. If your cat jumps over a coarse mat, try a softer, flatter surface rather than surrounding the box with more barriers. Shake collected litter into the trash and clean the mat as its instructions allow; a mat full of debris simply relocates the mess.

    8. Introduce a new location without removing the familiar option

    When possible, set up a second box at the proposed location while leaving the familiar box available. Keep the litter type consistent so location is the main change. If you must move one box, make small shifts over several days and watch the response rather than assuming a particular pace will suit every cat. Avoid combining the move with a new enclosure and new litter.

    Notice hesitation, repeated trips toward the old spot, or elimination elsewhere. Restore an accessible familiar option and reconsider noise, entry, or conflict with another pet; do not punish avoidance. Sudden elimination changes warrant veterinary attention, even when they happen during a furniture rearrangement. Do not assume a new accident is merely a preference about where the box belongs.

    9. Make waste removal and washing part of the placement decision

    Choose a spot you can reach for scooping at least daily, removing waste promptly when you notice it. Bag it securely and take it to the appropriate household trash; do not flush litter or waste. A lidded receptacle can bridge the interval before disposal, but should not become long-term storage. This is sanitation, not a substitute for managing cooking odors or dividing the sleeping area.

    Plan where you will empty and wash the tray without using food-preparation surfaces. Follow the box and litter manufacturers’ cleaning directions, rinse as directed, and dry before refilling. Never mix cleaning products or use fragrance to cover inadequate cleaning. If your trash arrangement is awkward, these ideas for organizing waste without a bin cabinet can help establish a separate, manageable disposal route.

    10. Keep a hygienic scooping kit within immediate reach

    Give the box its own small maintenance station: a scoop in a washable holder, waste bags, and a dedicated litter brush and dustpan. Place it beside the box on a wipeable tray, away from food, dishes, and bedding. Store cleaning chemicals securely elsewhere if children or pets could reach them. The aim is to make a quick cleanup possible without crossing the apartment for supplies.
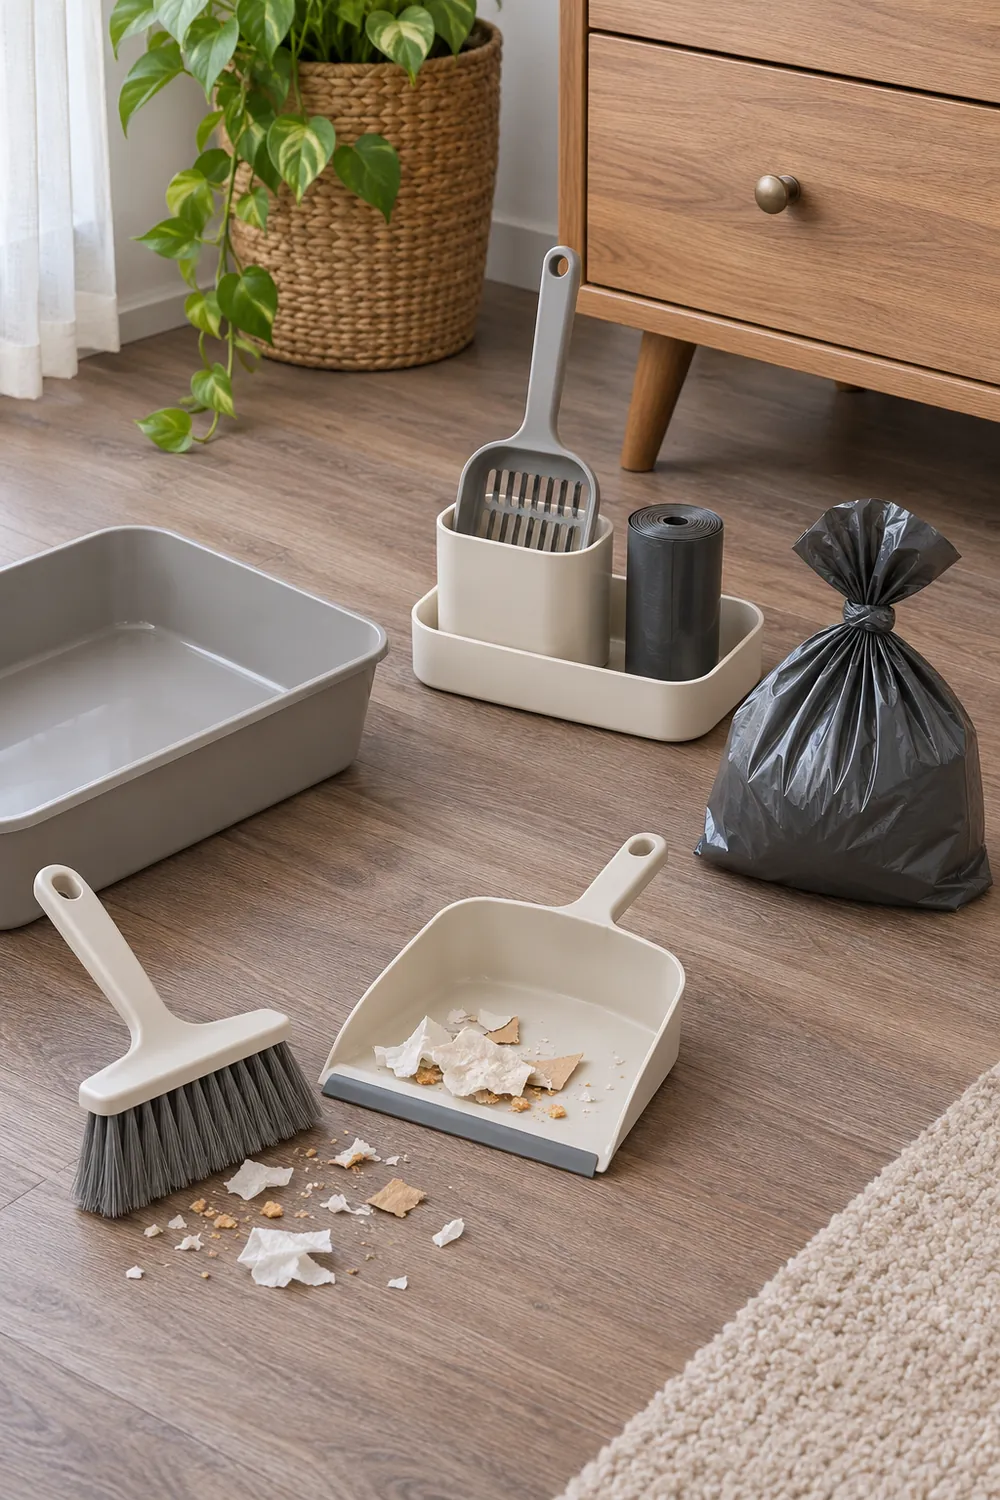
    A dedicated brush, dustpan, scoop holder, and waste bags make cleanup possible beside the litter box.

    Keep dirty tools contained, wash the holder and tray regularly, and wash your hands after handling litter or waste. A kitchen drawer is not a suitable overflow spot. If storage is tight, adapt a dedicated caddy from these small-home cleaning-tool storage ideas, keeping litter equipment separate from tools used on food surfaces. Easy access should not mean loose, contaminated tools on the floor.

    Start with the box your cat can comfortably use, then tape out two possible locations and their approaches. Test both against your daily routines before buying an enclosure. The better choice is the one your cat can reliably reach and you can consistently keep clean—even if it remains visible.
  • Hosting an Overnight Guest in a Studio Without Giving Up Your Bed

    Hosting an Overnight Guest in a Studio Without Giving Up Your Bed

    Your friend can stay Saturday night—but once a second bed opens, where does the coffee table go, and can either of you reach the bathroom? Hosting in a studio works better when you plan a temporary sleeping place, not a second bedroom. You can keep your own bed and most of your daytime arrangement, provided the guest setup has a workable footprint, a storage home, and a clear pack-away routine.

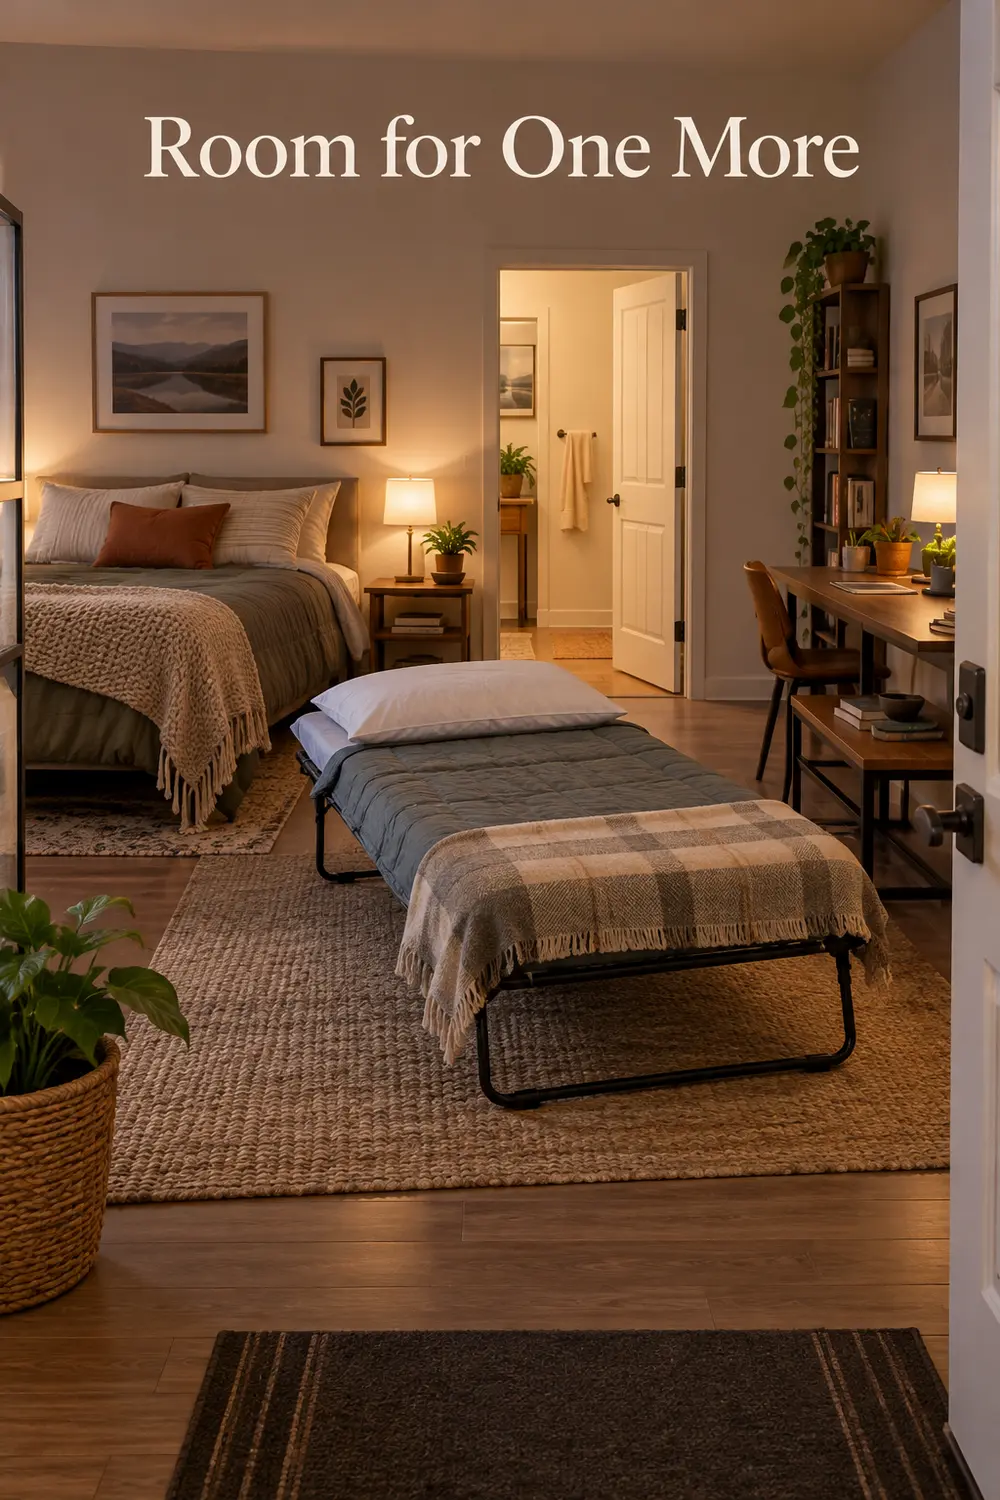
    An open guest cot fits beside the resident’s bed with a clear walking route; the headline reads “Room for One More.”

    1. Test the bed with someone actually lying on it

    Measure the proposed sleeping place before committing to equipment. A roughly 30-by-75-inch cot may fit on paper, but its frame, bedding, and the person getting into it need room too. Use the actual product dimensions to mark a footprint with removable tape suitable for your floor, then check the room, furniture, door swings, and access routes.

    If you can borrow the bed first, open it completely and have someone lie down, turn over, and get up. Check whether feet extend into the kitchen route or a blanket catches a cabinet handle. Relocate the coffee table to a measured parking spot—not the entryway. A setup that fits only with the exit blocked does not fit.

    2. Choose a cot or floor mattress by its stored shape

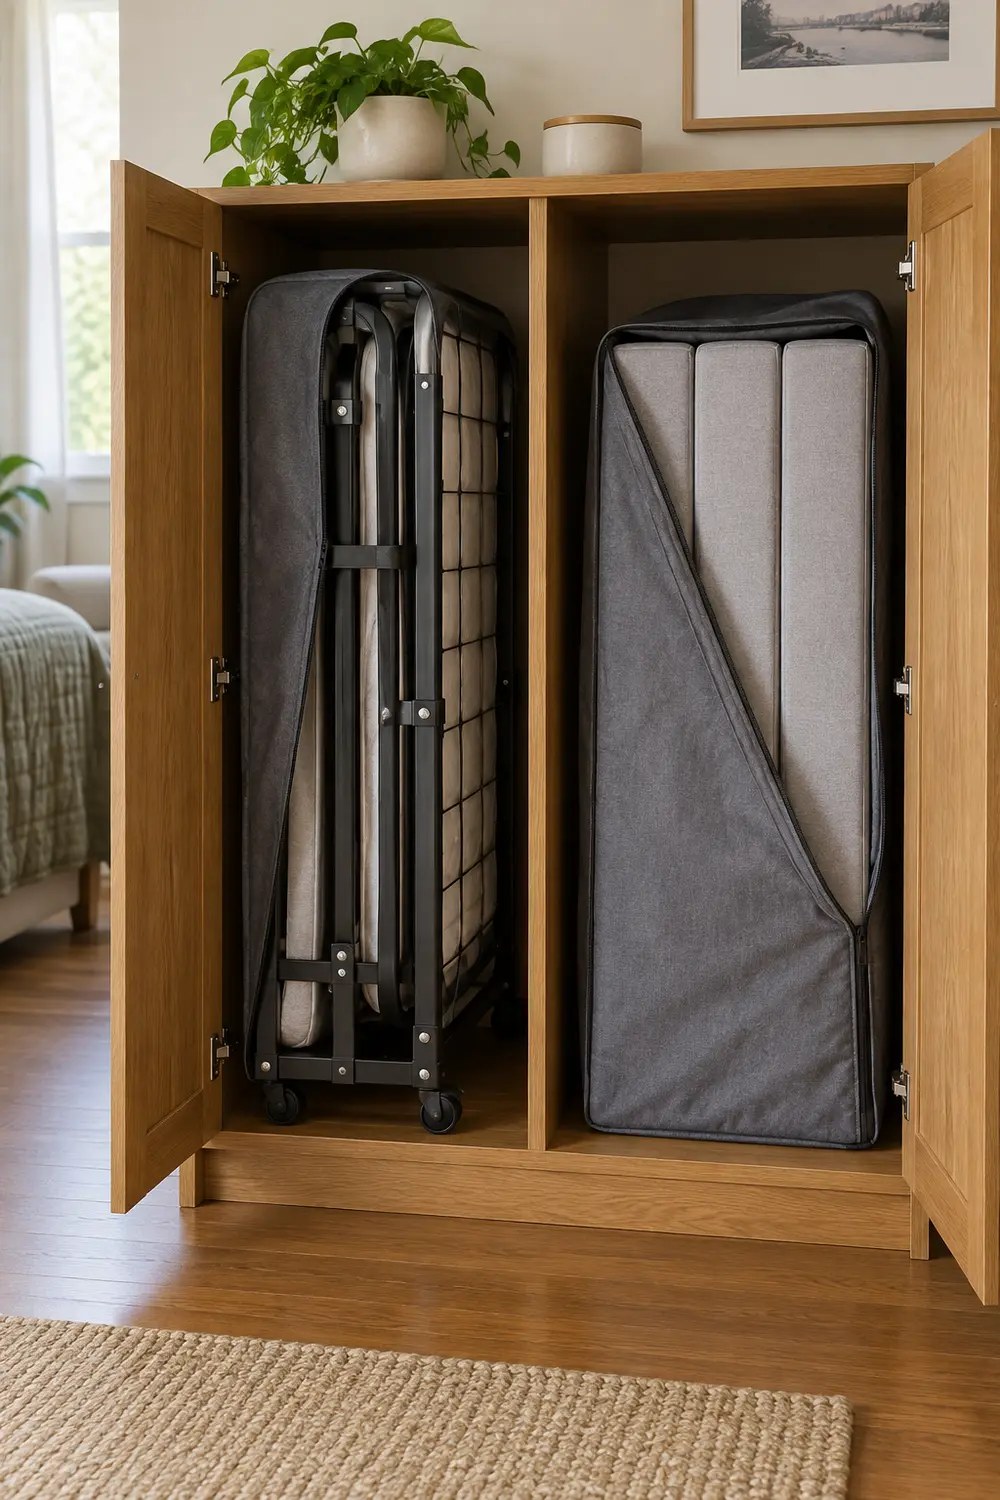
    Compare where each option lives between visits, not just how it looks open. A folding cot becomes a narrow but sometimes tall bundle; a folding foam mattress becomes a shorter, bulkier stack. Measure the folded dimensions against a specific storage spot, such as the closet’s lower compartment. Include handles, hinges, and the space needed to pull it out.

    A folded cot and a stacked folding mattress show the different storage shapes to measure before choosing guest equipment.

    Then consider the guest. A floor mattress requires getting down to floor level; a cot offers a raised surface but may feel narrow or have noticeable support bars. Ask what they can comfortably use rather than assuming. Follow the manufacturer’s weight limits and setup instructions, and never perch a floor mattress on improvised furniture to raise it.

    3. Rehearse the setup before a late arrival

    Run through the entire job once: move the table, retrieve the equipment, open it, and make the bed. This reveals effort that dimensions miss. A cot stored behind a vacuum and three bins may technically have a home, yet require emptying half the closet every visit. Move frequently used guest equipment closer to the front.

    For a guest arriving after dinner, you might shift the dining chairs beforehand while leaving the bed folded until you finish eating. If the same floor area serves both purposes, these pack-away dining setups can help you choose furniture that clears more easily. Frequent visits may justify easier equipment; occasional hosting may not justify replacing furniture.

    4. Store guest bedding as one complete kit

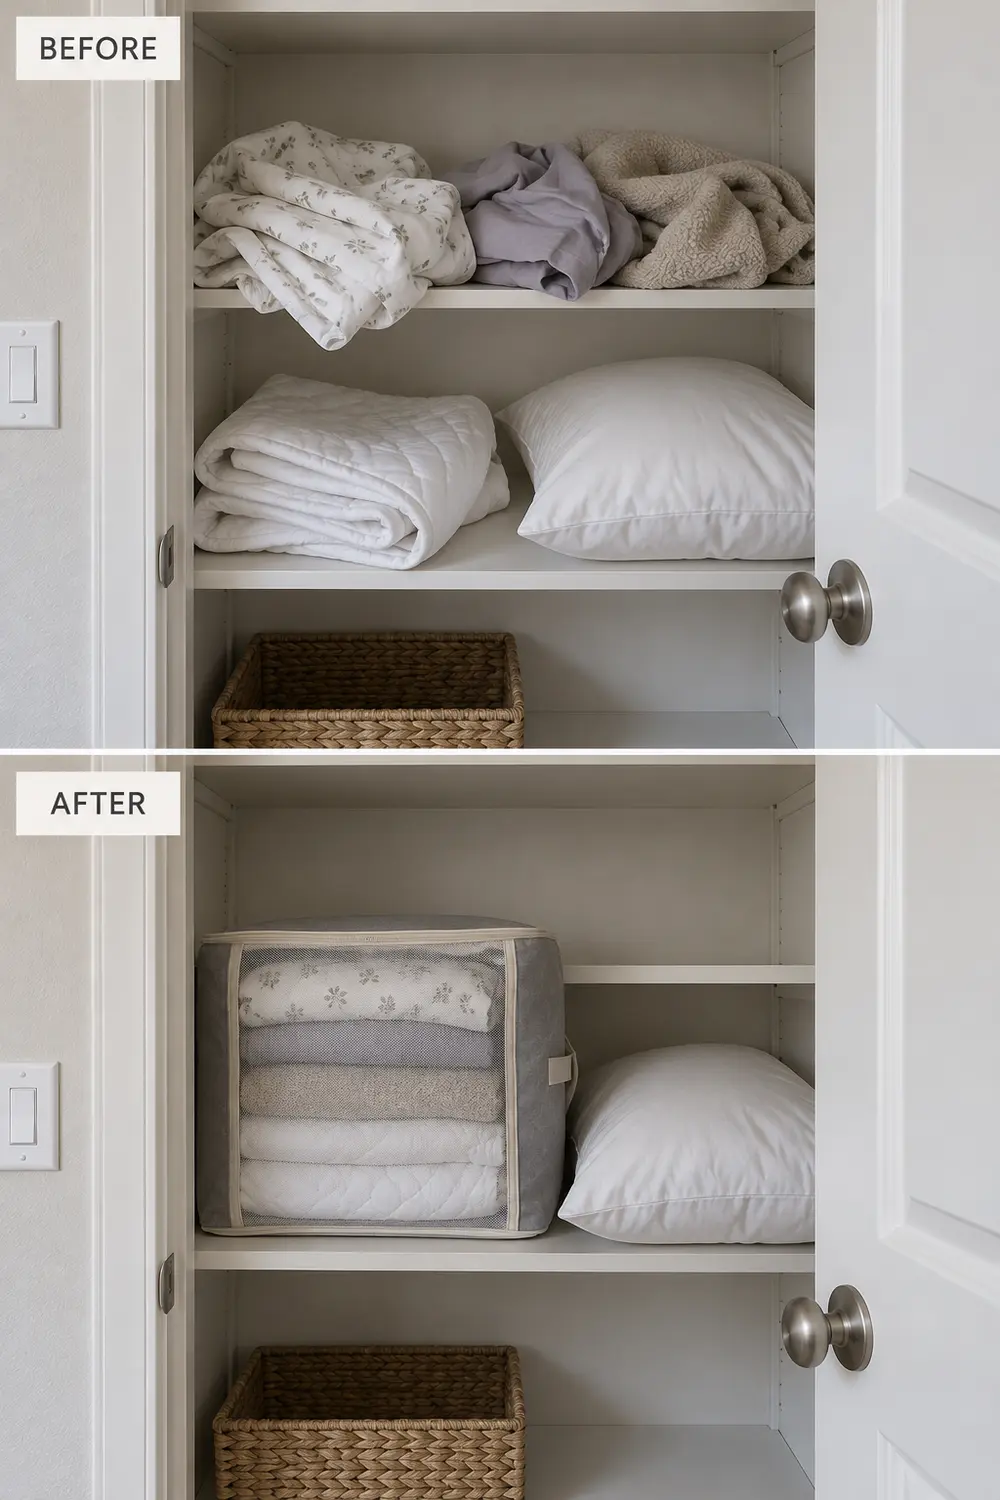
    Gather a correctly sized sheet, pillowcase, light blanket, and any mattress protector into one labeled bag or bin. Keep the guest pillow with it if space allows, without crushing everything into an overfilled container. The improvement is practical: instead of hunting through several shelves, you retrieve one kit and know which pieces belong to the temporary bed.

    Before, guest linens occupy scattered shelf spaces; after, the same bedding is grouped in one bag with the pillow beside it.

    Use what you already own where sizes work, but test the fit: a sheet that repeatedly slips off a narrow mattress is an irritating overnight compromise. Store the kit only when everything is fully dry. If finding room means sorting the whole shelf, start with this linen closet storage reset rather than buying another container.

    5. Give the guest a reachable landing spot

    From the guest bed, check where glasses, a phone, water, and a small light can go. A stable stool or cleared shelf may do the job without adding permanent furniture. For a floor mattress, a low tray beside the head can work, provided it sits outside the place where the guest steps when getting up.

    Charge a portable light before the visit so it does not introduce a cord across the floor. Keep water away from electrical connections, and avoid balancing a heavy lamp on a narrow folding surface. These bedside storage solutions offer other compact options, but choose one the guest can reach without leaning over an unstable edge.

    6. Assign luggage a parking place before it arrives

    Clear a luggage spot that remains usable after the bed opens. An empty lower shelf, a corner beside the dresser, or space beneath a compatible raised cot may hold a small bag. Check under-cot storage against the frame and manufacturer’s instructions; luggage must not interfere with supports or the bed’s stability.

    Tell your guest if a soft overnight bag will be easier to accommodate than a large suitcase. For a rolling case, plan where it can open briefly for unpacking, then close it again before bedtime. Do not count on the hallway, entrance, or bathroom doorway as overflow storage. If no luggage spot exists, reduce another item’s footprint before adding the bed.

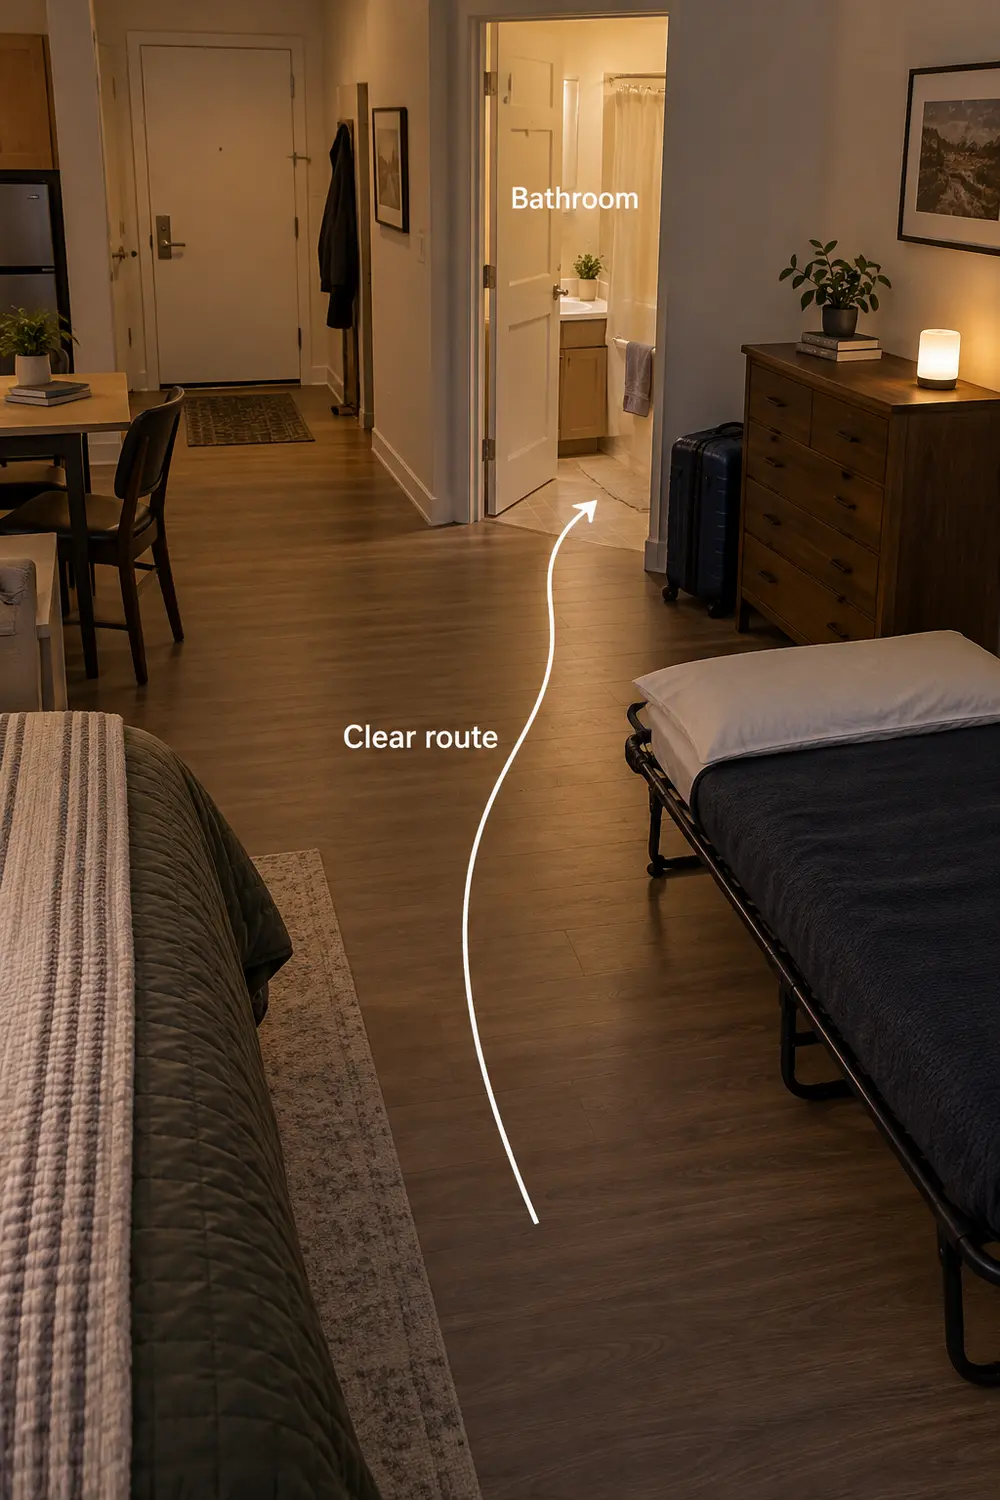
    7. Walk the nighttime route with the bed open

    After setup, walk from both sleeping places to the bathroom and apartment exit. Open the relevant doors fully and look for cot legs, loose bedding, rug edges, and bags along the route. As an approximate planning target, try to preserve a continuous path about 30 inches wide where possible; this is not a building-code or accessibility standard.

    A lightly annotated view shows an unobstructed route past the open guest cot to the bathroom, with luggage parked out of the way.

    Walk it again with the overhead lights off and a small night-light on. Neither person should have to step over the other’s bedding. Keep exits clear regardless of the available width, and maintain required heater and appliance clearances according to manufacturer instructions. If reaching the bathroom requires climbing across a bed, change the arrangement or reconsider the overnight plan.

    8. Agree on lights-out before anyone is tired

    A temporary bed does not solve different sleep schedules. Discuss bedtime, wake-up time, and the last bathroom trip while you are still making plans. If you need to answer work messages after your guest turns in, identify a seated spot with a directed light that does not shine across their pillow, and silence notifications.

    Explain the morning realities too: the coffee grinder, a pet’s breakfast, or an early video call may affect sleep more than the mattress does. Headphones help with audio, not conversation or bright screens. A sleep mask can be offered, but it should not substitute for agreeing on reasonable quiet hours in a room you both occupy.

    9. Air the bedding before putting it away

    When your guest gets up, pull back the covers rather than immediately bundling everything into storage. Remove used sheets for laundering and give the sleeping surface time to air, following its care instructions. For a floor mattress, check the underside as well; do not fold it away with a damp surface trapped inside.

    If the manufacturer permits standing the mattress on edge, use a stable position away from doors and heaters while you have breakfast. Keep ventilation openings clear, and do not drape bedding over a heater to hurry drying. Airing adds a delay to the morning reset, so plan a temporary spot that does not obstruct your exit or work area.

    10. Put the room back in a repeatable order

    Choose a morning sequence that restores the living area without burying unfinished jobs. Move luggage to its daytime parking spot, strip and air the bedding, then fold and store the sleep equipment once it is ready. Return the coffee table and chairs last. You should not have to move the same chair three times to reach the storage cabinet.

    Two people have breakfast in the restored studio living area, with the guest cot stored and luggage outside the walking route.

    Make the timing explicit if you work from home: “I need this floor clear by nine” is more useful than silently packing around a sleeping guest. Replace the clean, dry linens in their kit later rather than delaying the whole room reset for laundry. A quick check for forgotten chargers and glasses finishes the job without turning departure into a major cleanup.

    Start by marking the proposed bed’s full footprint and walking from your own bed to the bathroom and exit. If that arrangement works, choose equipment you can both store and set up comfortably. If it does not, solve the layout before buying bedding or promising the overnight stay.

  • Keeping Cooking Odors Out of a Studio’s Bedding and Upholstery

    Keeping Cooking Odors Out of a Studio’s Bedding and Upholstery

    Dinner is finished, but the pillow beside your kitchen still smells like fried onions. In a studio, cooking fumes have a short trip to the bed, sofa, and curtains. The useful response starts at the stove: find out what your hood actually does, then reduce the grease and odors that escape it. These ten measures work together without relying on candles, room sprays, or a promise that your home will never smell like cooking.

    Resident checking a studio’s range hood, with bedding nearby and the headline “Start at the Stove.”

    1. Find out where your existing hood sends the air

    Before buying anything, identify your hood’s model and check its manual or ask building management how it is configured. A ducted hood sends captured air outdoors; a recirculating hood filters some material and returns the air to the room. A cabinet above the stove does not establish which type you have, and an apparent duct may need confirmation from maintenance.

    Use the hood according to its instructions, starting before cooking and leaving it running afterward as directed. Choose a burner well beneath its capture area when practical. Recirculating filters have limits, especially for gases and odors, and neither a quieter room nor less smell proves combustion safety. With fuel-burning appliances, follow manufacturer and building ventilation guidance and maintain required alarms; an air cleaner is no substitute.

    2. Clean only the hood filters designed to be washed

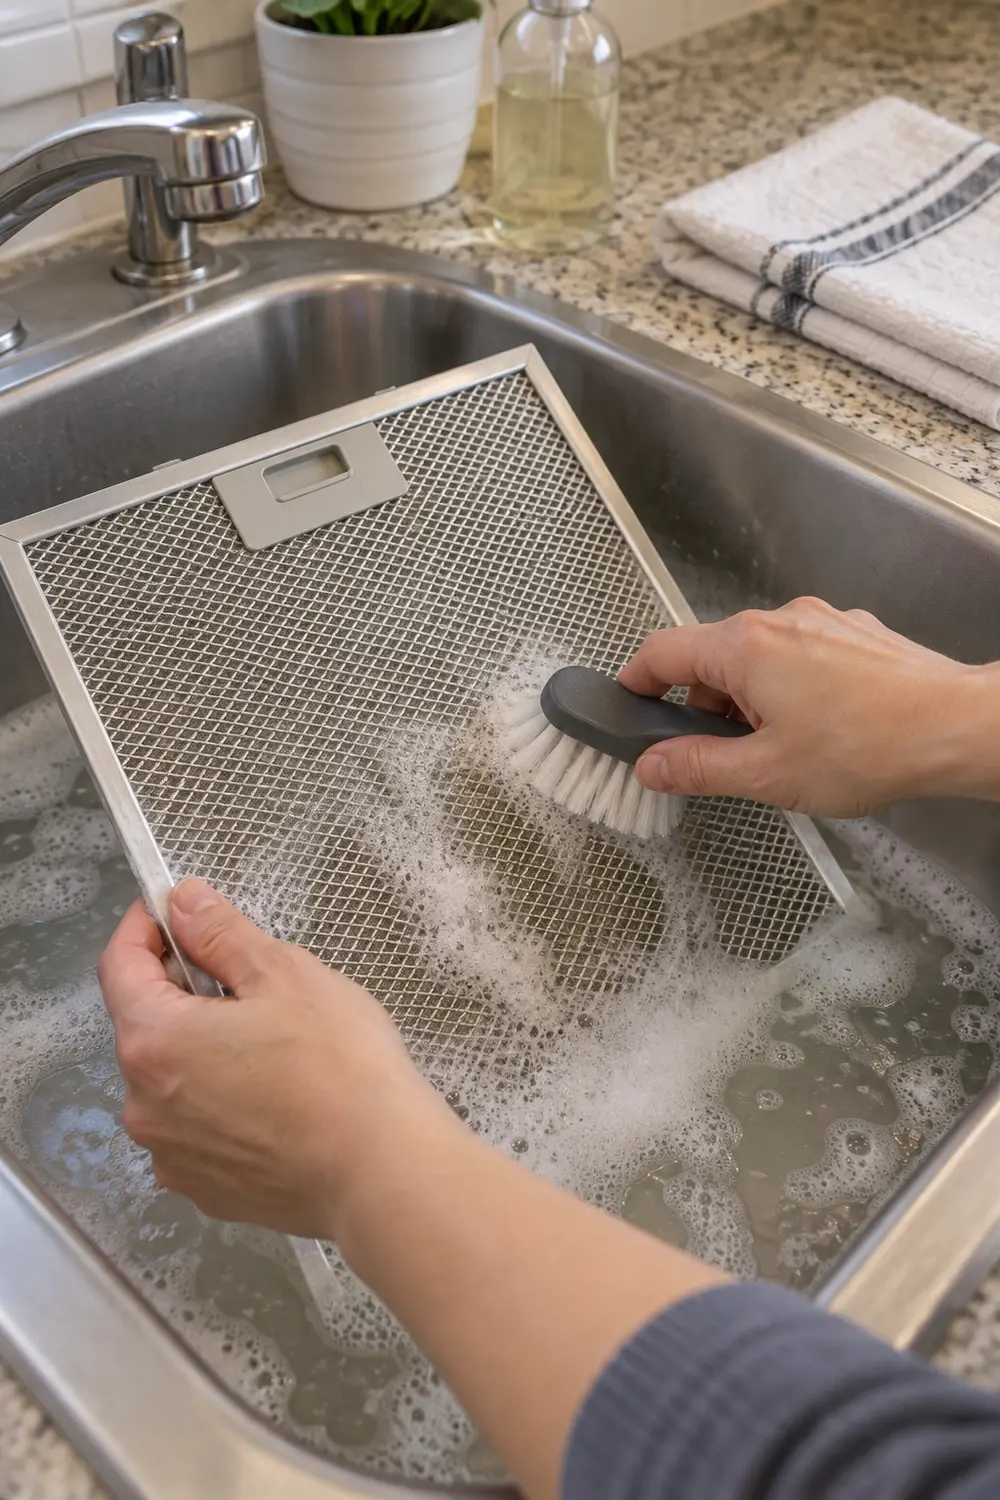
    A sticky metal grease filter is a useful maintenance target, but check the manual before removing it. With the appliance off and cool, take out only user-serviceable parts and protect the counter beneath them. Wash reusable metal filters with the method the manufacturer permits—often dish soap and warm water—and let them dry fully before reinstalling. Do not assume every filter is dishwasher-safe.

    Removable metal hood filter being gently washed in soapy water beside a towel for drying.

    Charcoal odor filters are different: many require replacement rather than washing, on the schedule specified for that model and your cooking use. A grease-loaded hood needs maintenance, not a stronger fragrance nearby. If a filter is missing, damaged, or inaccessible without dismantling the appliance, send the model information and a photo to your landlord or service provider rather than improvising a substitute.

    3. Prevent avoidable oil smoke before it spreads

    Watch the pan instead of letting oil heat unattended while you chop. Prepare ingredients first, use an oil suitable for the cooking method, and increase heat deliberately rather than automatically turning the burner to high. For a skillet dinner in a room shared with your bed, moderate heat and smaller batches may be a better compromise than an aggressively smoky sear.

    Smoking oil is a cue to stop adding heat, not to turn up a fan and continue unchanged. If safe, turn off the burner and let the pan cool; never pour water into hot oil. Clean burnt residue from cooled cookware before the next batch. Some browning smells are part of cooking, but repeated smoke from an overheated empty pan is avoidable.

    4. Cover simmering food when the recipe allows

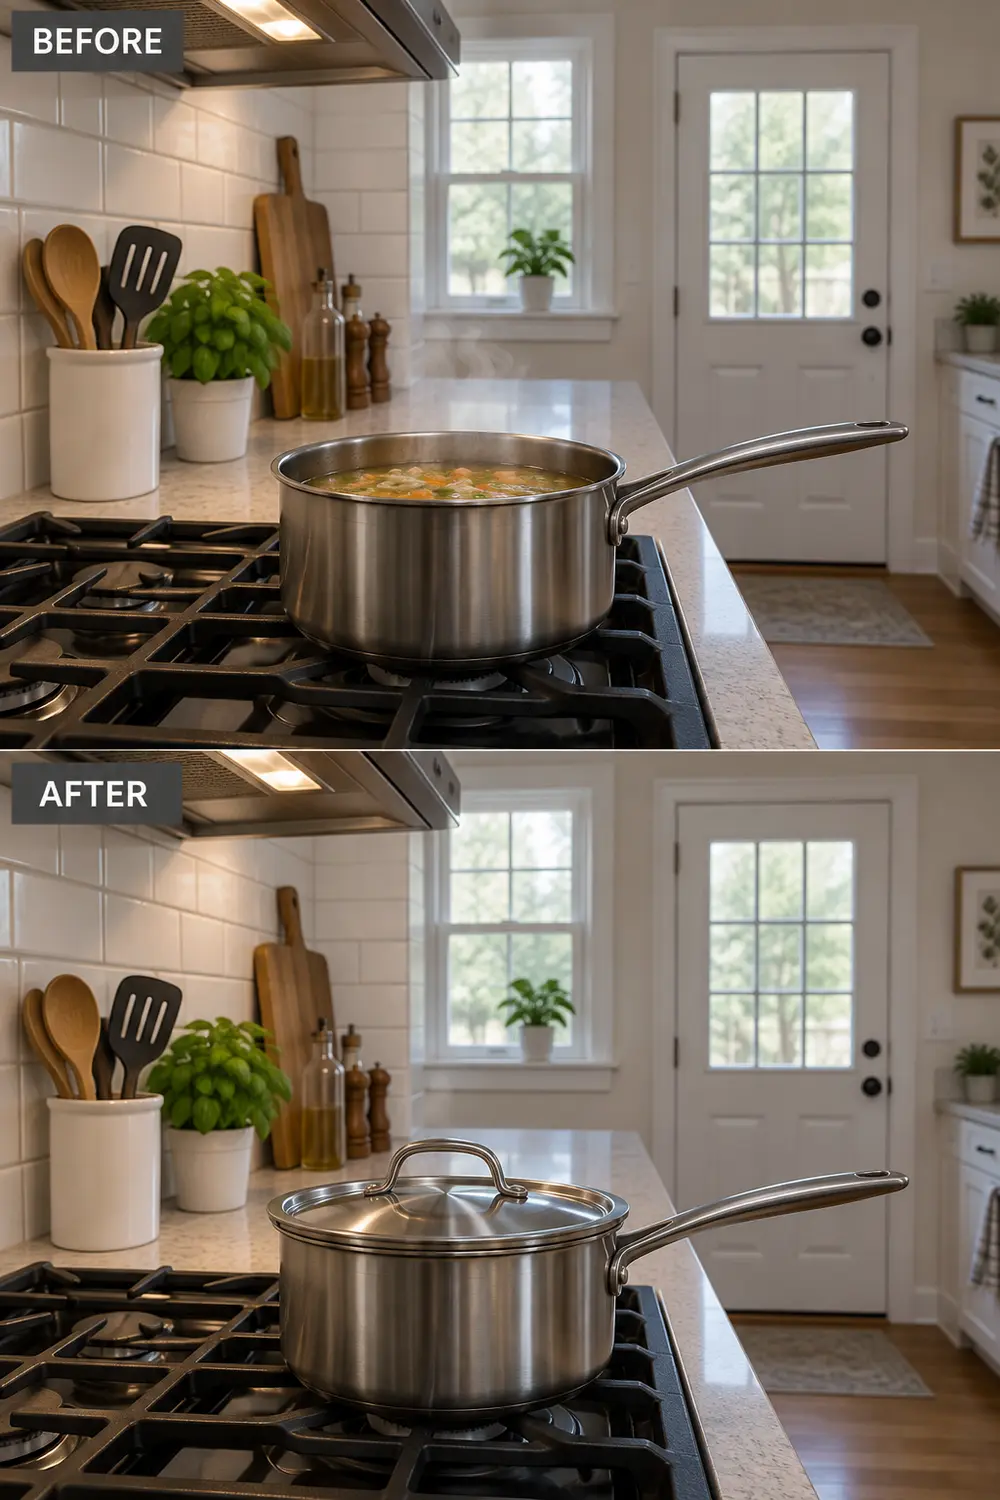
    A properly fitting lid can limit splatter and reduce the direct escape of cooking vapors, though it does not seal in every odor. Cover rice, braises, and soups when the recipe calls for it, adjusting the heat to maintain the intended simmer. A pot of beans needs less exposure to the room than an uncovered skillet used for crisping potatoes.

    Before-and-after comparison of the same soup pot uncovered and then covered with a fitting lid.

    Keep the lid off when evaporation or a crisp surface is necessary; covering everything can spoil the meal and cause boilovers. Lift lids carefully, directing escaping steam away from your face. A splatter screen can contain grease droplets during frying, but its open mesh does not trap cooking gases. Treat it as a cleanup aid, not an odor filter.

    5. Give a portable air cleaner a safe, unobstructed position

    If you already own an air cleaner, check its recommended room size and placement clearances. Set it on a stable surface or the floor as designed, outside the stove’s heat and splatter zone, with its intake and outlet unobstructed. In a studio, the kitchen–living-area boundary may be practical, provided the cord stays out of walkways and the unit does not obstruct an exit.

    A particle filter can capture airborne particles, including some cooking aerosols; it does not remove all odor-causing gases. Activated carbon may help with some gases, but performance depends on the amount of carbon, airflow, and replacement—not simply an “odor” label. Avoid devices intended to generate ozone. Expect fan noise and filter upkeep, and never treat a purifier as protection from combustion gases or inadequate ventilation.

    6. Remove greasy scraps instead of storing their smell overnight

    The pan may be clean while oily paper towels, fish packaging, and food scraps keep scenting the room. After cooking, collect greasy waste and close the trash container. If the building’s disposal area is accessible, taking a small bag out that evening may help more than leaving it beneath a counter a few feet from your pillow.

    Let cooking oil cool before transferring it to a suitable closed container for disposal under local rules; do not pour it down the drain. Empty food scraps from the sink strainer and wipe residue beneath the trash lid. A lidded bin contains waste between trips, but it cannot compensate for accumulated grease. Keep bags and oil containers away from children and pets.

    7. Ventilate along a route that avoids the bed

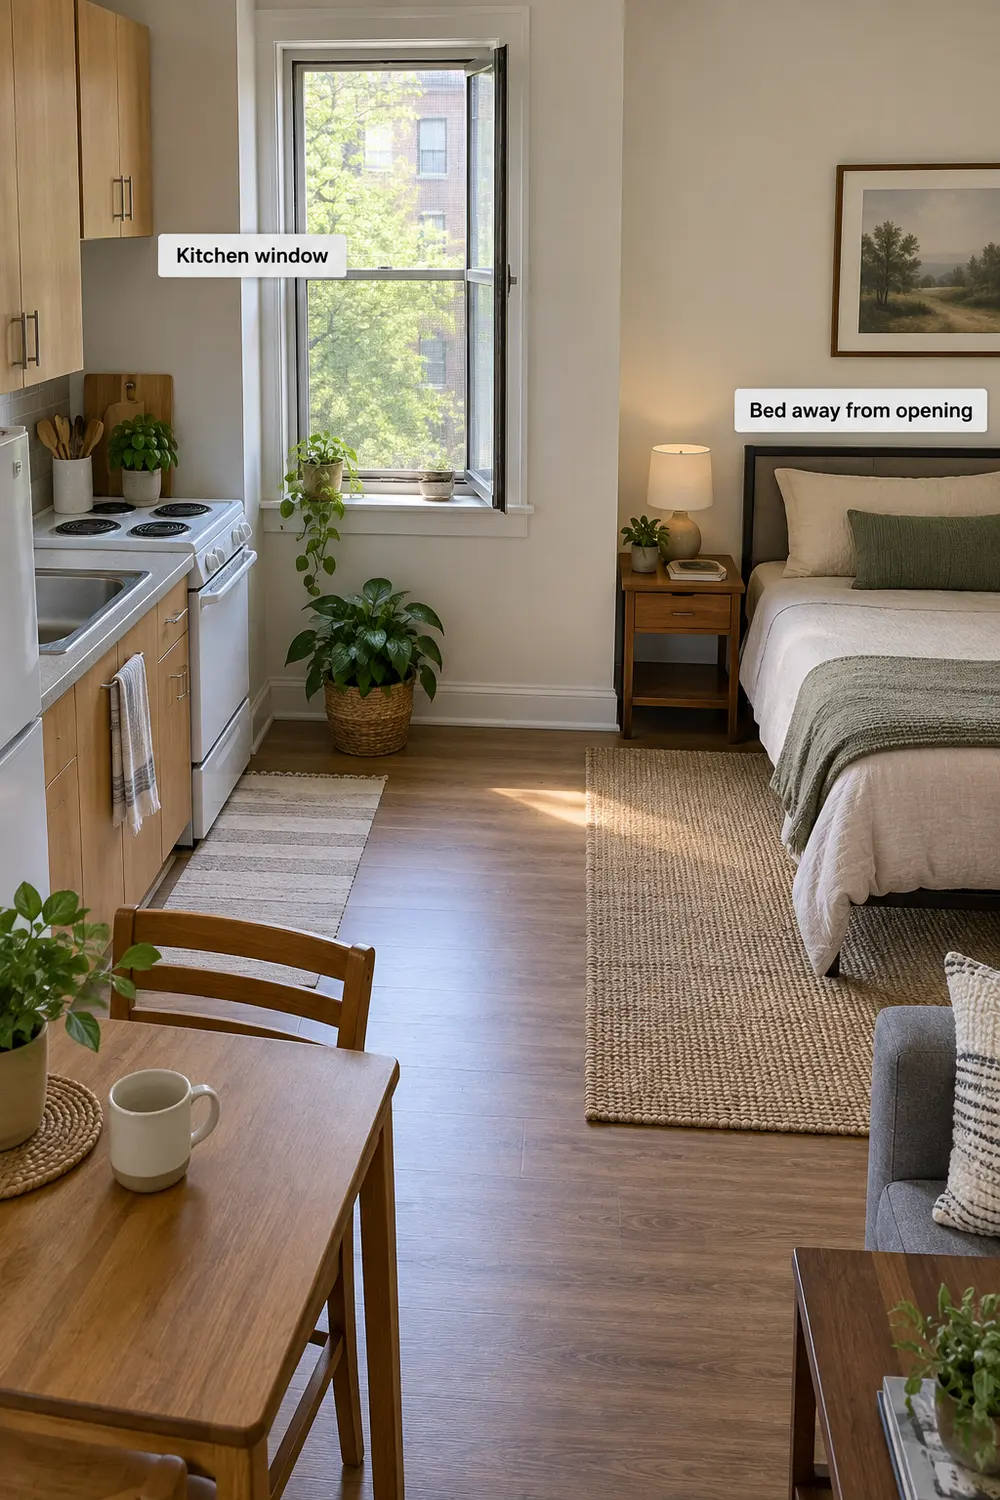
    When outdoor air quality, weather, noise, and security permit, open an appropriate window to help exchange indoor air. Look at the route between the kitchen and that opening: if it crosses the pillows, move washable bedding out of the direct path. A window near the kitchen may be more useful than one beyond the bed, although actual airflow varies with wind and the building.

    Studio layout with an open kitchen-side window and the bed positioned away from that opening.

    Do not prop open a shared hallway door or block an exit to create a breeze. Avoid directing a fan across burners, and get building or manufacturer guidance before adding powerful exhaust equipment where fuel-burning appliances are present. Room dividers can organize a studio, but reversible ways to separate the sleeping area provide privacy, not an airtight barrier against cooking odors.

    8. Wash the textiles that work beside the stove

    Dish towels, aprons, oven mitts, and washable kitchen curtains can retain the greasy residue you have removed from harder surfaces. Retire a splattered towel after the cooking session instead of leaving it on the oven handle for several days. Follow each care label, and dry items completely before putting them away; use clean, dry heat-protective mitts for handling cookware.

    Keep clean replacements outside the immediate splatter zone, even if that means one small drawer rather than a decorative towel basket beside the range. A simple linen-storage reset for towels and bedding can make that rotation easier. Washing kitchen textiles is manageable; laundering every sofa cover after dinner is not. Concentrate first on fabrics closest to the cooking.

    9. Put washable bedding under cover before odor-heavy meals

    Before frying fish or cooking a long onion-heavy meal, tuck exposed pillows and the duvet into a closed closet or other clean storage if space permits. Another option is a lightweight, washable cover spread over the made bed, with pillows underneath. It offers a removable layer for settling droplets rather than leaving your everyday sleep surfaces directly exposed.

    This is not an odor-proof enclosure, and the cover itself will need washing. Remove it after the cooking air has cleared, folding the exposed side inward rather than shaking it across the bed. Keep every cover well away from the range, heaters, and ventilation openings. Protecting bedding is worthwhile for occasional odor-heavy meals; it should not become a substitute for dealing with smoke and grease.

    10. Wipe the nearby surfaces that quietly collect grease

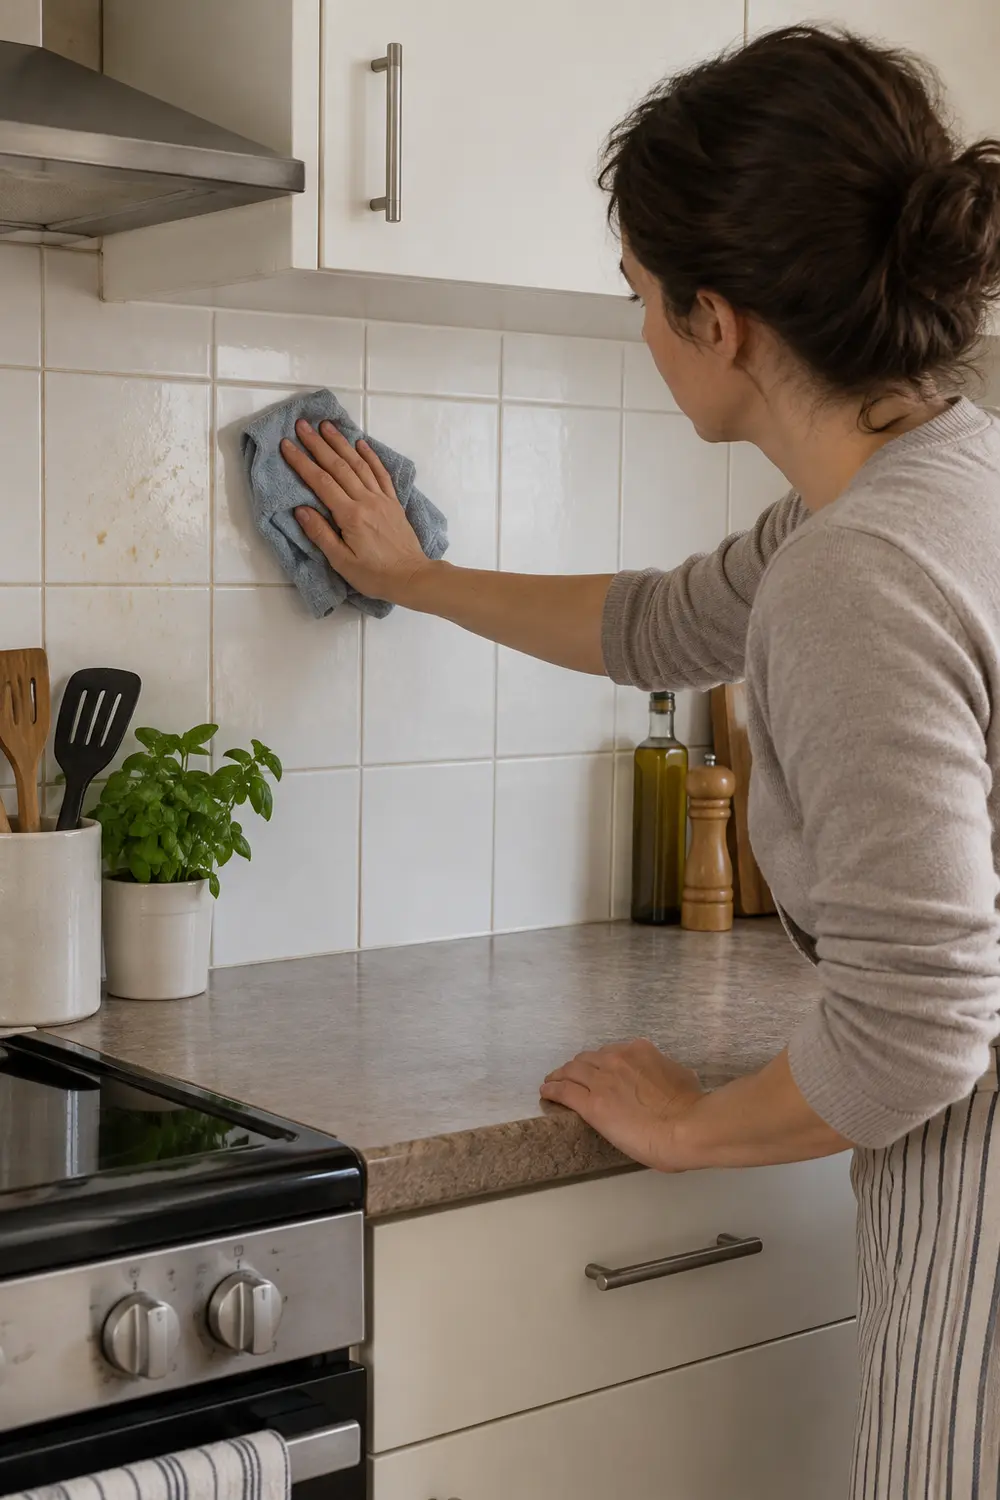
    Once the cooking area is cool, clean the backsplash, counter edge, and other nearby washable surfaces where fine grease settles. Pay attention to the cabinet pull you touch with cooking hands and the side of a freestanding shelf beside the range. Use a product and method appropriate for each finish, applying cleaner to the cloth when needed to avoid overspray.

    Person wiping a cooled backsplash beside a counter edge and cabinet pull that also collect cooking grease.

    Follow cleaner directions, do not mix products, and avoid soaking cabinet seams, controls, or outlets. Painted walls and wood finishes may need gentler treatment than tile; test an inconspicuous spot first. A short wipe-down after a splattery meal is more realistic than frequent whole-room cleaning. It removes a residue source instead of leaving it to contribute odors between meals.

    Start by identifying your hood and checking its filter-care instructions. At your next dinner, add one habit matched to the meal: cover the simmering pot, prevent oil from smoking, or remove greasy waste promptly. Build from the source before adding more equipment.

  • Your Bed Is Always in View: 10 Reversible Ways to Divide a Studio

    Your Bed Is Always in View: 10 Reversible Ways to Divide a Studio

    When your bed shares a room with your sofa, separating sleeping from living is less about constructing another room than controlling what you see. A useful boundary might hide pillows from the front door, soften the view from a chair, or close temporarily when someone visits. These ten approaches work within your studio’s existing footprint. Measure before buying or moving anything; dimensions mentioned here are approximate planning guidelines, not building-code or accessibility standards. Keep required exits, window access, ventilation, and everyday routes usable, and check rental permissions before attaching hardware.

    A curtain separates a studio bed from a compact living area beneath the headline ONE ROOM TWO ZONES.

    1. Move the Bed Out of the Entry Sightline

    Start at the front door and notice which part of the bed appears first. Sometimes rotating the bed or placing its head against an existing return wall removes most of it from that view without adding a divider. For example, a bed running along the entry axis might fit crosswise behind an existing closet projection, leaving the sofa visible when the door opens.

    The mistake is improving the doorway view while making the bed awkward to enter or blocking a closet. Map the furniture footprints with tape, then walk your normal routes carrying laundry. This approach gives directional privacy, not enclosure, and may not suit couples needing access on both sides or studios where every alternative placement obstructs a heater, outlet, or exit route.

    2. Use the Sofa Back as a Low Visual Boundary

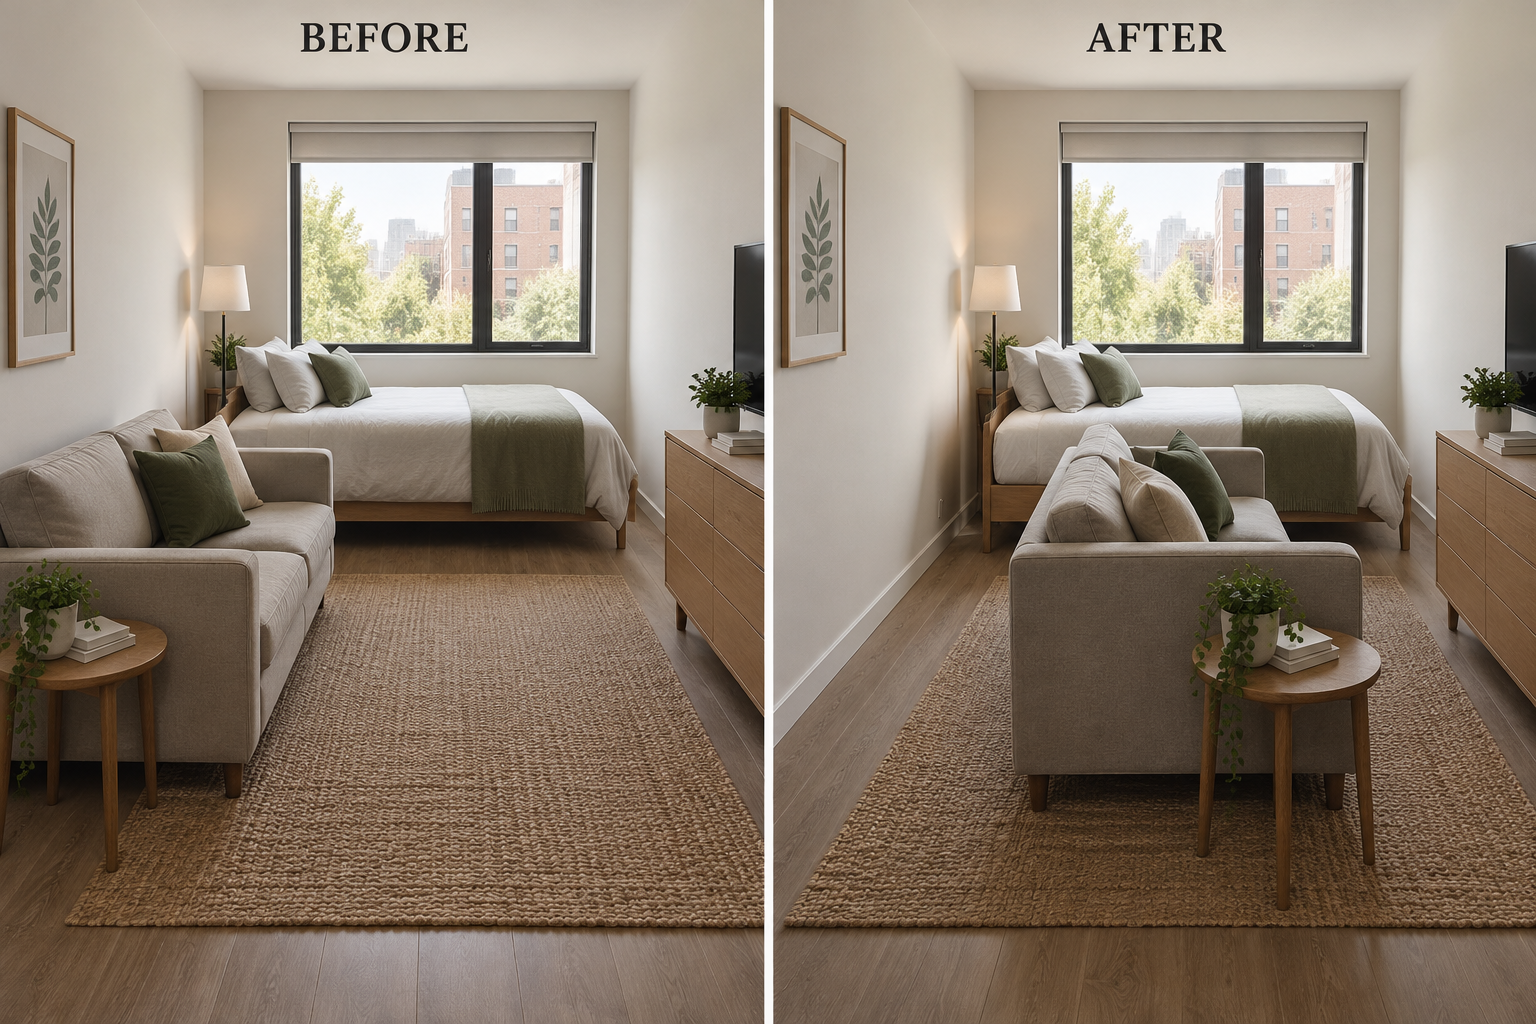
    Turn the sofa so its back faces the bed rather than placing every piece against a wall. In a rectangular studio, a compact sofa across the foot of the bed can establish a living area facing the opposite wall. Its back conceals some bedding from seated eye level while leaving the upper room open, preserving daylight and conversation across the apartment.

    Before and after views show the same sofa repositioned to create a low boundary at the foot of the bed.

    Avoid wedging the sofa directly against the mattress or adding a console simply to fill the gap. You still need space for bedding changes and comfortable passage around the grouping. A low sofa will not hide a standing person or a tall headboard, so this works best when the goal is a calmer living-room view rather than private dressing space.

    3. Hang a Curtain That Parks Completely Open

    A ceiling-track curtain offers privacy when needed and disappears into a narrow stack afterward. Run it along the exposed side of the bed, with enough fabric to close without pulling taut. In a studio with one shared window, choose a light-filtering textile so the living area still receives softened daylight when the sleeping zone is closed.

    Do not assume every ceiling accepts the same anchors, or that a tension-mounted system is suitable for any span. Get rental approval where required and follow the hardware’s installation instructions. Keep fabric away from heaters, cooking appliances, and exit paths. Sheers blur detail rather than guarantee privacy, especially when the sleeping area is brighter than the room beyond.

    4. Angle a Folding Screen Across the Exposed Corner

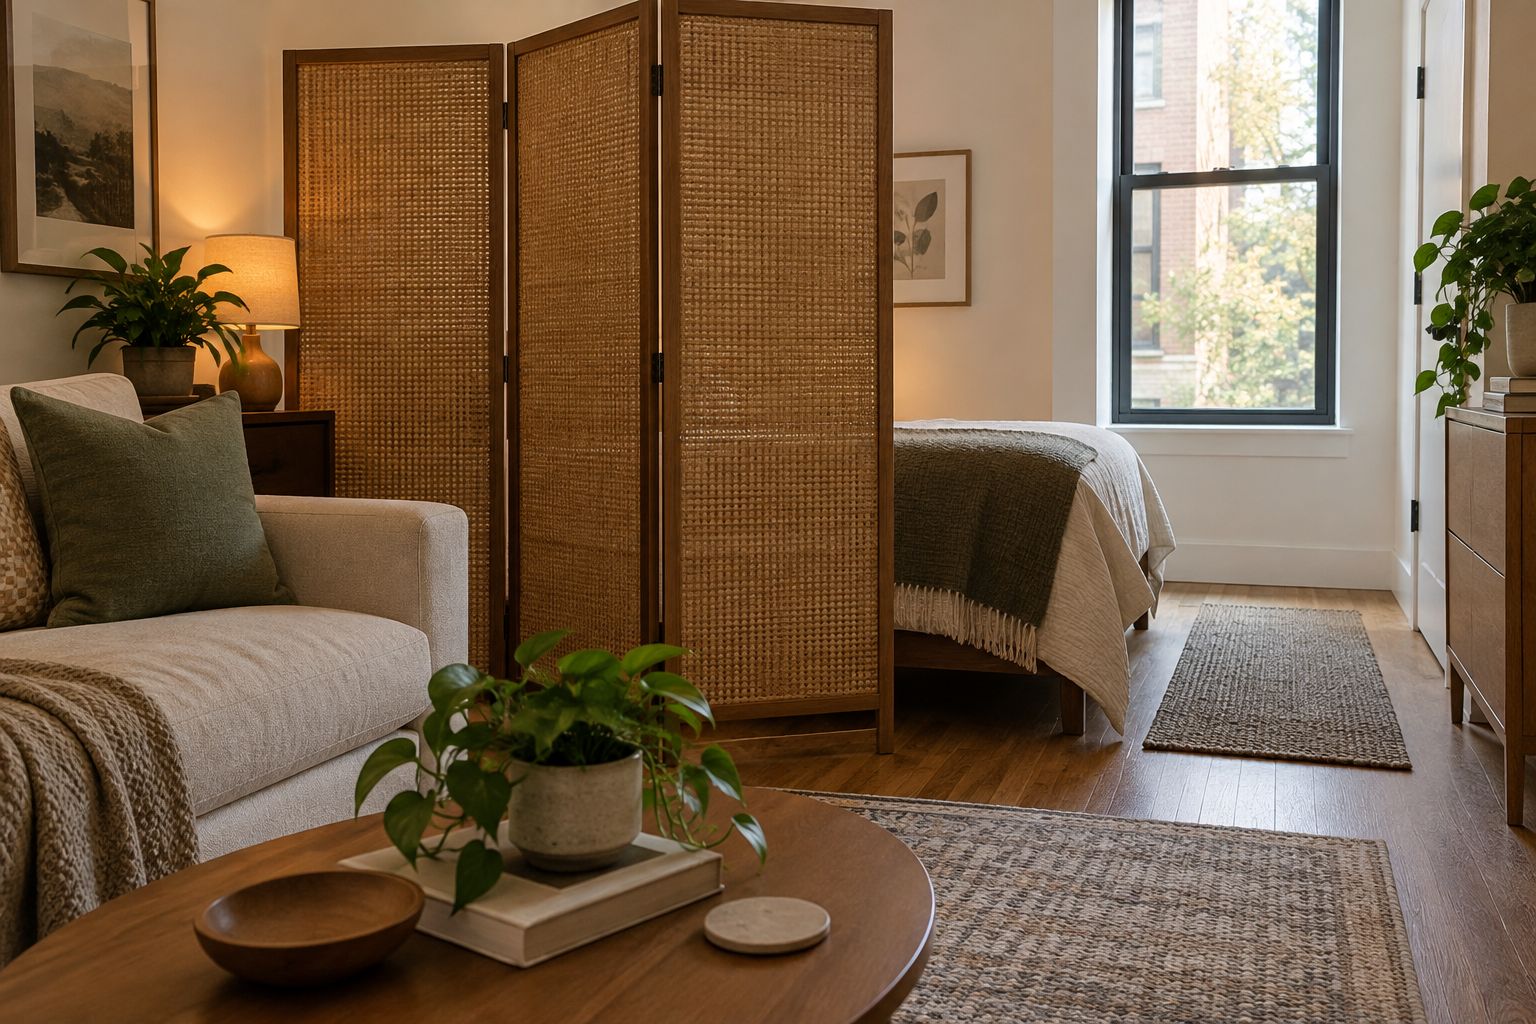
    A folding screen works best when it intercepts a specific view rather than trying to span the entire apartment. Place a stable, partially folded screen diagonally near the bed’s exposed corner to conceal the pillows from the sofa. Choose panels opaque enough for your purpose, then test the angle from your usual seat before settling on its position.

    An angled folding screen hides the pillow end of a bed from the sofa.

    Opening a screen nearly flat can make it unstable, while extending it too far can create a hallway-sized bottleneck. Follow the manufacturer’s stance guidance and account for feet or hinges projecting into the route. This is less suitable around climbing children, energetic pets, or households needing a consistently wide, obstacle-free path through the room.

    5. Filter the View With an Open Bookcase

    An open-backed bookcase can combine storage with selective screening. Position it perpendicular to a wall beside the bed, then place baskets and books around the shelf levels that interrupt the view of the mattress and pillows. Leave some upper compartments open so daylight travels through. A shallow unit may provide enough separation without taking the footprint of a deep cabinet.

    Do not treat an ordinary bookcase as a freestanding partition unless its manufacturer permits that use and the required anchoring is possible. Loading every shelf also turns a light-filtering boundary into a bulky visual block. If your lease prevents necessary securing, or the unit’s back is unfinished and exposed, choose a purpose-built divider instead of improvising.

    6. Choose Translucent Panels When Daylight Is Shared

    For a cleaner, more architectural boundary, consider a purpose-built freestanding divider with translucent rigid panels. A frosted or textured surface can obscure bedding while transmitting more light than an opaque screen. In a studio whose only window sits beside the bed, position the divider between the mattress and seating area, keeping its supporting feet out of the main walking route.

    Translucent does not mean invisible: silhouettes may become clear when a lamp is on behind the panel. Check a material sample under daytime and nighttime lighting before committing. Avoid loose glass sheets or improvised supports, and remember that wide stabilizing bases consume floor space. This option is unsuitable if those bases interfere with your household’s circulation or mobility equipment.

    7. Lower a Roller Shade Only When Privacy Is Needed

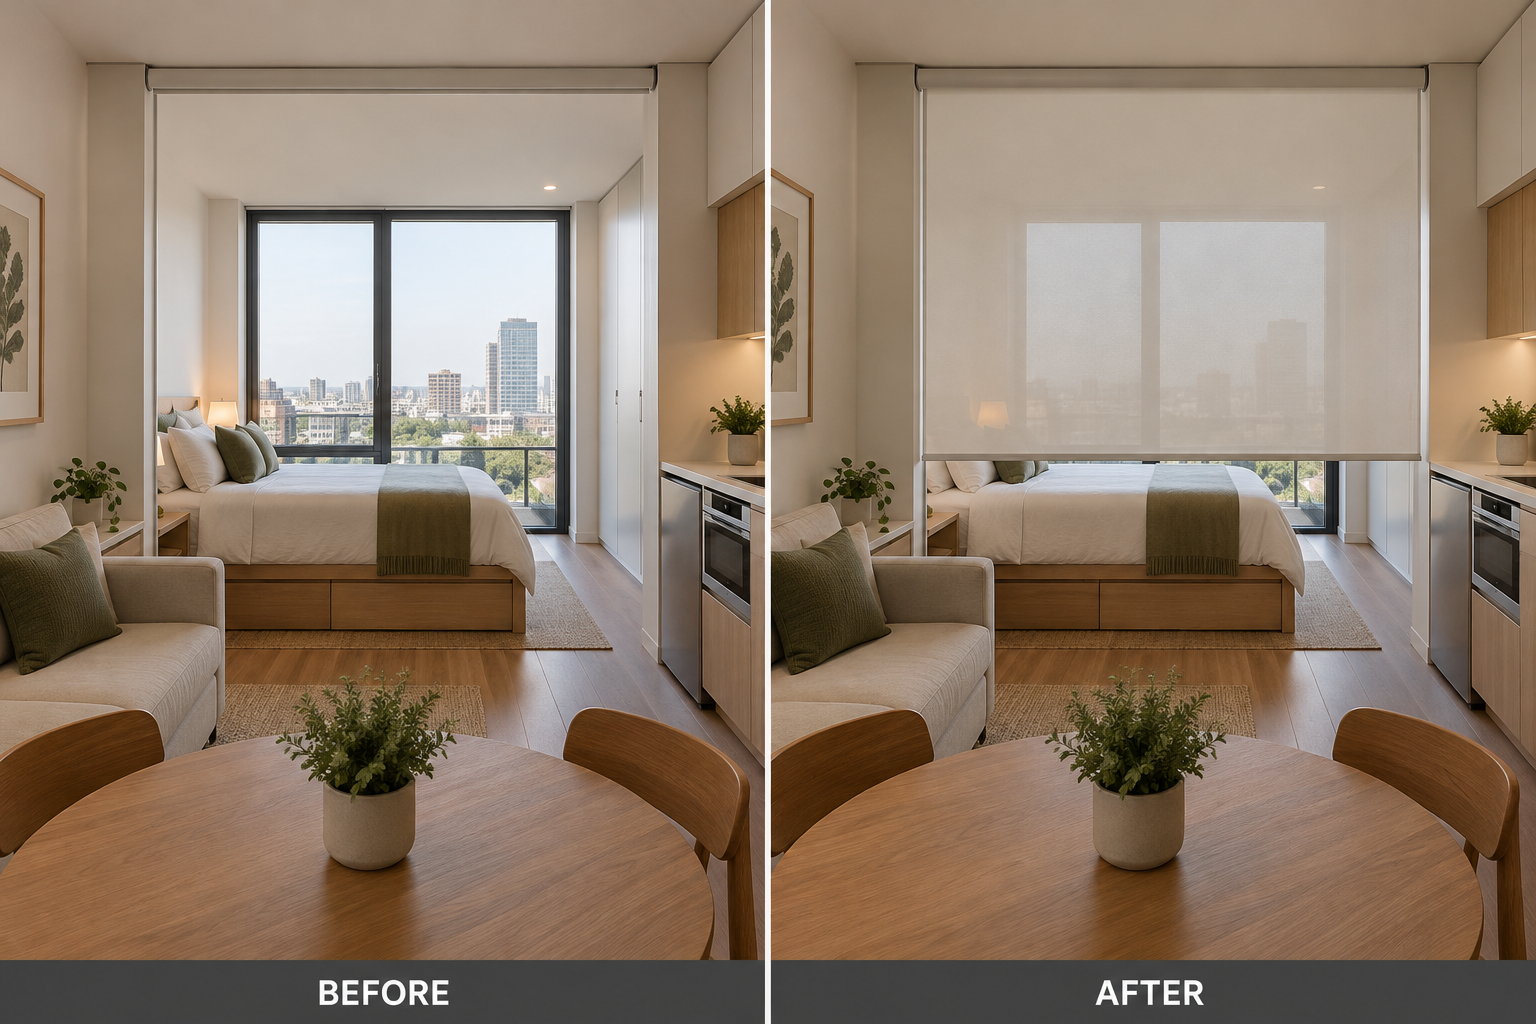
    An interior roller shade can screen one straight sightline without leaving fabric gathered beside the bed. Mount a suitable system above the bed’s exposed side using approved hardware, then lower it for guests and raise it for daylight. For example, a shade spanning the view from the dining table can hide the pillow area while leaving the foot-end route open.

    Before and after views show a roller shade lowered to hide the bed from the dining table.

    Do not assume a window shade is approved for every ceiling application or unsupported width. Confirm mounting requirements and rental permissions, and favor cordless operation, particularly around children. A lowered shade can sway and offers no sound separation. Avoid placing it across the only route out, where someone must lift or duck under it to leave.

    8. Create a Leafy Filter at Seated Eye Level

    Plants can soften a persistent bed view when complete concealment is unnecessary. Group a few upright, leafy plants in stable floor pots between the sofa’s sightline and the pillow end, using foliage rather than a continuous row of containers. In a sunny studio, overlapping leaves can make bedding less visually prominent while preserving an airy connection between the two zones.

    The common mistake is buying plants tall enough to screen the bed without checking available light or their mature spread. Foliage provides filtered views, not dependable privacy, and watering adds maintenance near bedding. Use drip protection, select species appropriate for pets and children, and skip this approach if the plants would crowd circulation or need frequent relocation to survive.

    9. Add a Bed-Attached Privacy Wing

    When the main problem is seeing pillows from one side, a compatible bed-frame-mounted headboard with a side return can provide targeted screening. Look for a manufactured design that wraps slightly around the head of the mattress rather than building a full enclosure. An upholstered wing facing the living area can hide the most recognizable sleeping details without screening the window.

    Do not lean an oversized decorative panel against the bed and call it a headboard. Confirm attachment compatibility and stability, and check whether a projecting wing makes getting in and out difficult. This solution only addresses the head-end sightline; it will not hide the mattress from across the room and may be unsuitable for beds requiring caregiver access.

    10. Make an Exposed Bed Read Like Daytime Seating

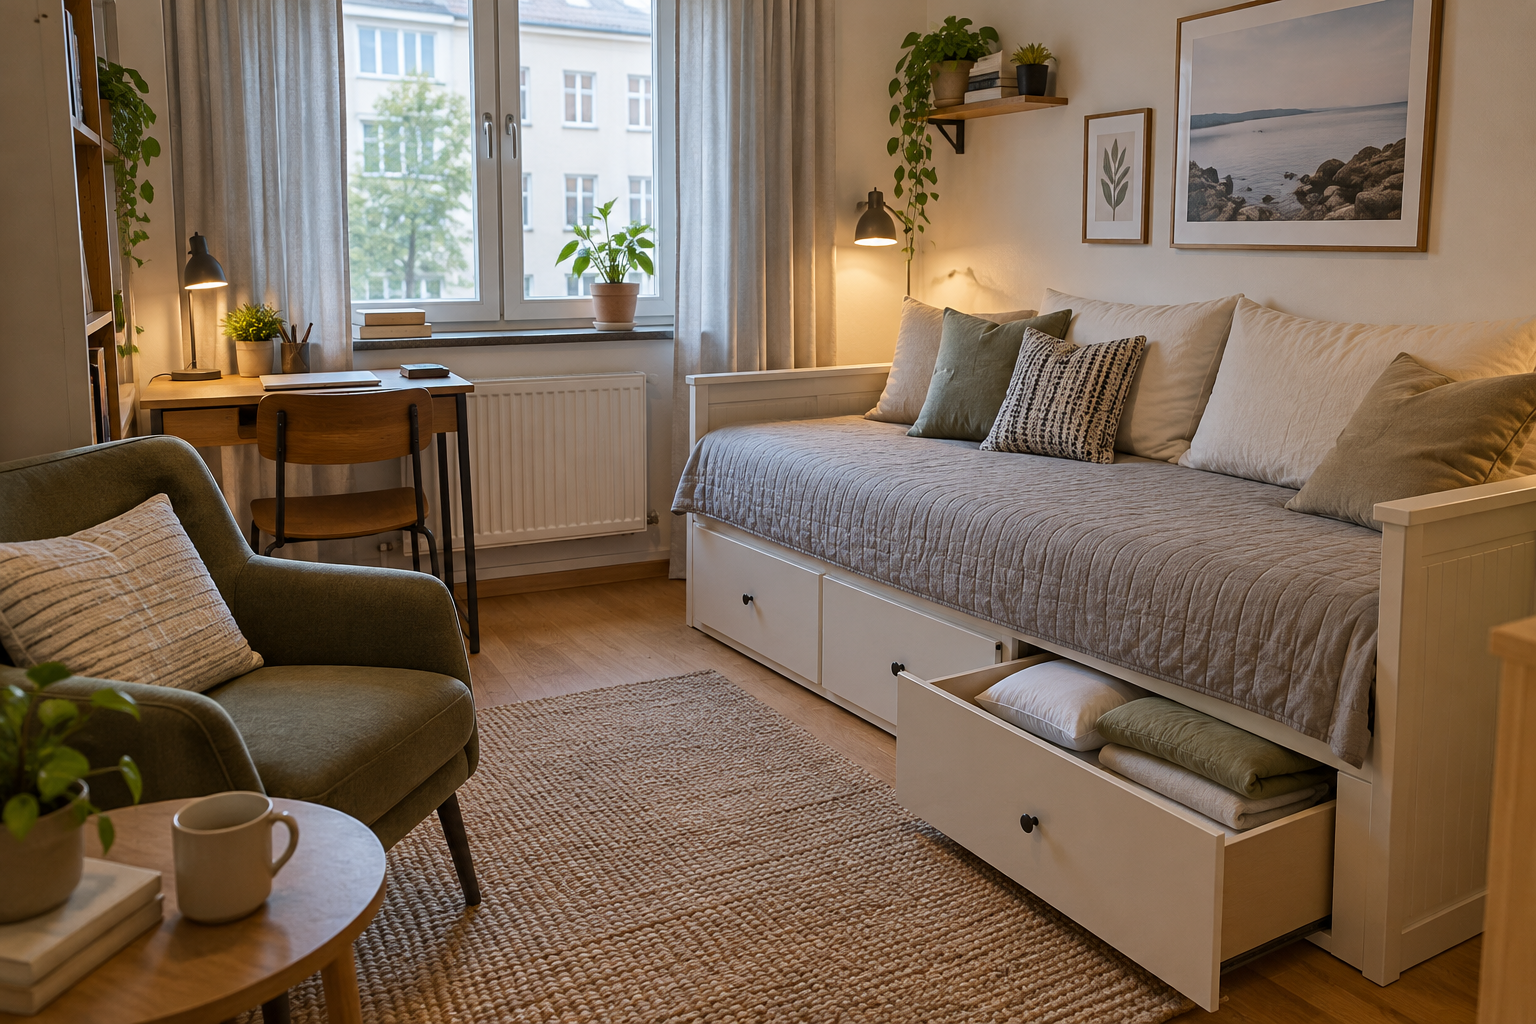
    If a physical divider would obstruct the room, reduce the bed’s visual identity instead. For a twin or daybed positioned along a wall, use a fitted daytime cover and supportive back cushions, then store sleeping pillows and the duvet in existing underbed storage. From the living area, the same footprint reads more like a lounge, giving the two daily functions a clearer transition.

    A covered daybed resembles daytime seating, with sleeping bedding stored in an underbed drawer.

    This is visual camouflage, not privacy for sleeping or changing. Avoid piling on decorative cushions that have nowhere to go at night, and be realistic about the daily reset. A deep full or queen mattress rarely functions like comfortable seating without substantial back support, so this approach is strongest for an existing daybed or narrow bed rather than every studio layout.

    Choose the smallest intervention that fixes your most bothersome view. Test it from the entrance, your favorite seat, and the bed itself, then check it again after dark. A successful studio boundary does not need to resemble a permanent wall: it should give sleeping and living distinct identities while keeping daylight, daily routines, and the way out comfortably available.

  • Nowhere to Eat? 10 Pack-Away Dining Setups for a Studio Apartment

    Nowhere to Eat? 10 Pack-Away Dining Setups for a Studio Apartment

    Eating dinner over the sink gets old, but a full-time dining set can overwhelm a studio. The better solution is a dependable surface that appears when you need it, paired with seating that has somewhere to go afterward. Start with your actual routine: breakfast alone, nightly dinners for two or occasional guests. Then measure both the stored and open arrangement, including chair movement and the route to your door. Any dimensions below are approximate planning guidelines, not code or accessibility standards; your furniture, lease and household needs come first.

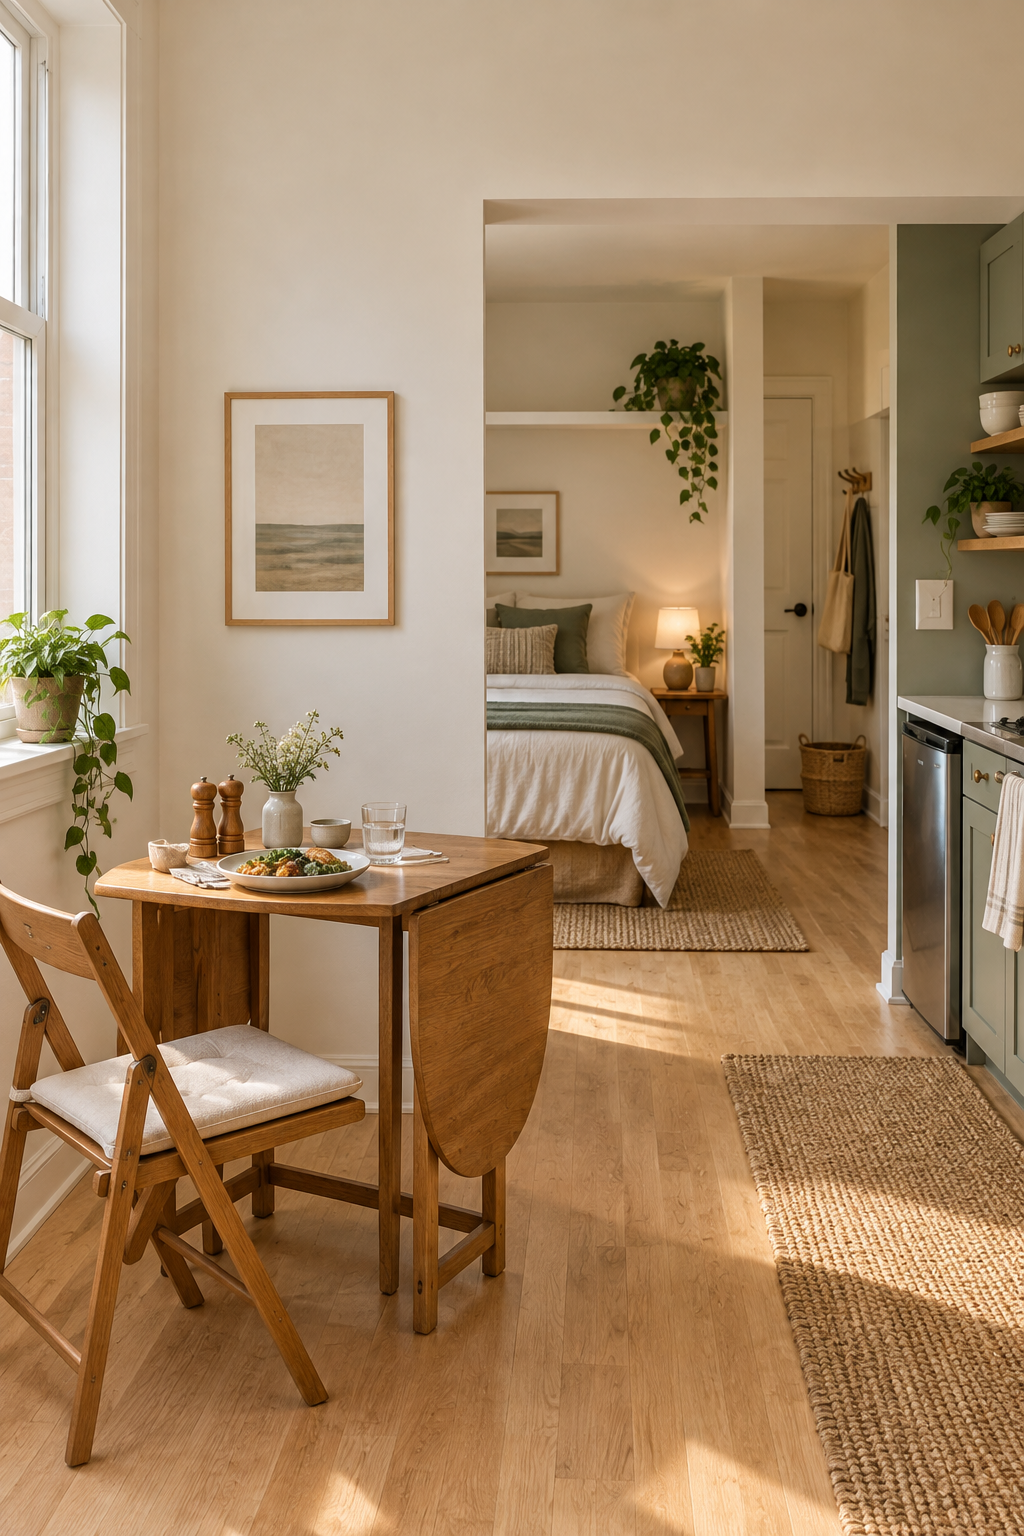
    Compact gateleg table set for one beside the kitchenette in a bright studio apartment.

    1. Open Just One Leaf of a Gateleg Table

    A gateleg table can stay narrow against a wall between meals, then open only as far as dinner requires. For one person, raise a single leaf and swing its support fully into position. Choose a model with verified storage for folding chairs, or keep a slim chair beside a dresser where it can serve as a dressing seat.

    The common mistake is measuring the folded cabinet rather than the open tabletop and its legs. Gate supports can crowd knees, especially when two people share one side. Test where your feet actually land before buying. This setup is less suitable if opening a leaf blocks the bathroom route or requires moving your bed every evening.

    2. Fold Dinner Down from the Wall

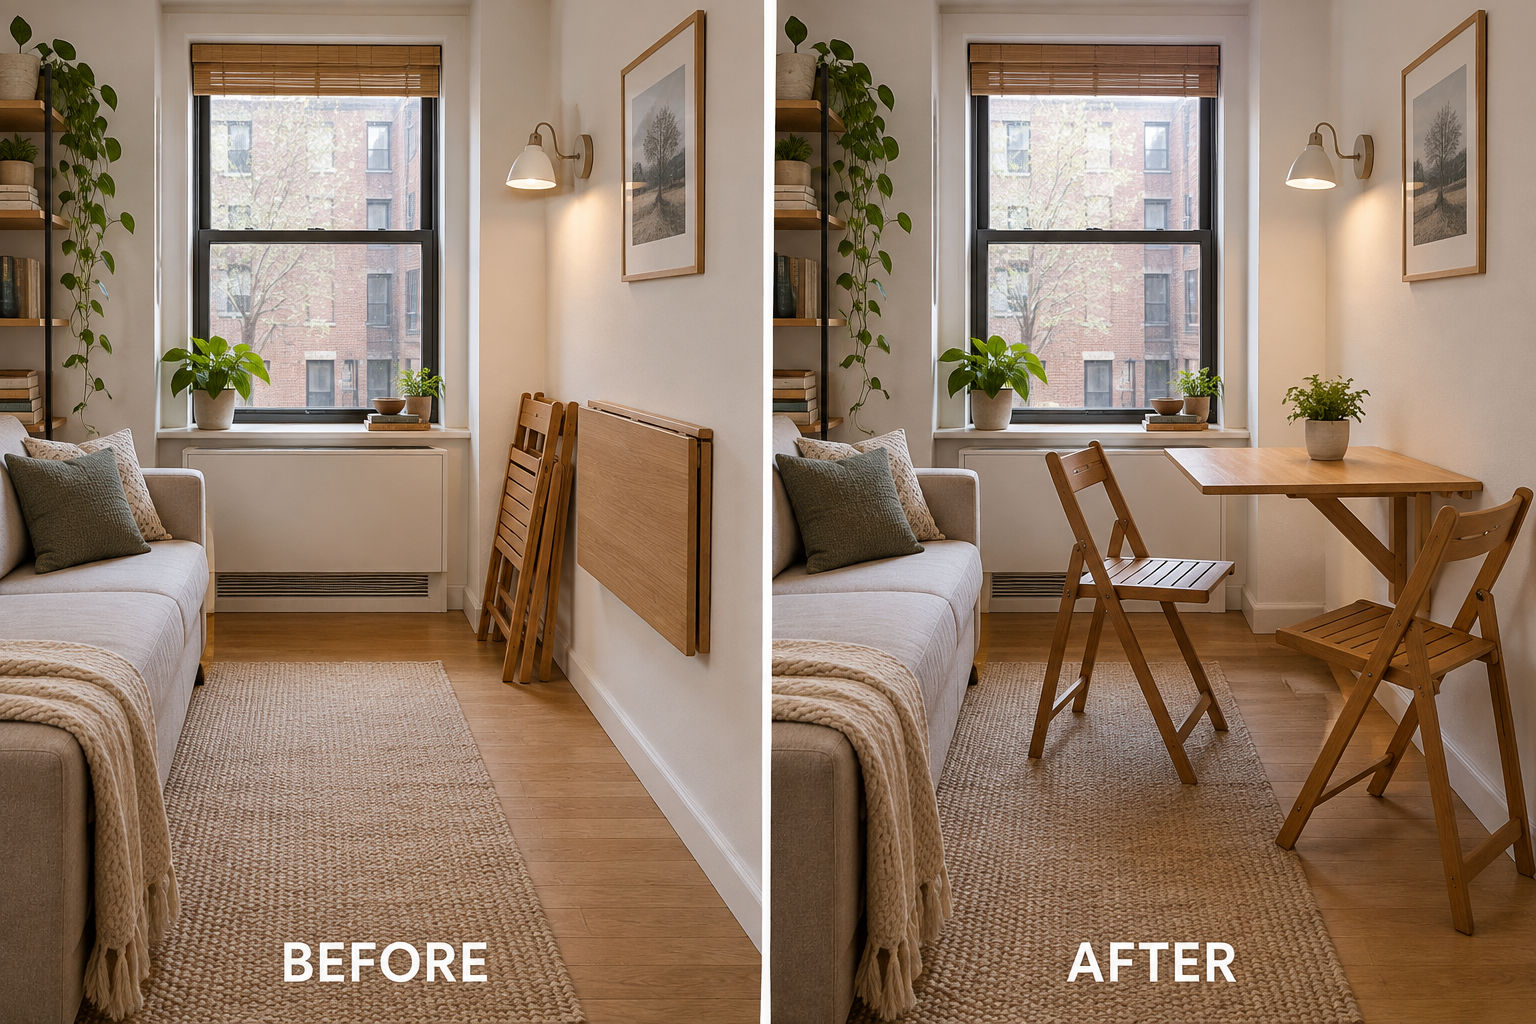
    A wall-mounted drop-leaf table keeps the floor available until mealtime. Position a manufacturer-rated dining model where its open leaf accommodates your plates without crossing a doorway. In a narrow studio, two folding chairs can rest against the adjacent wall when closed, then face each other across the deployed surface for a simple weeknight dinner.

    Before and after views show a wall-mounted table and two chairs folded away, then opened for dining.

    Do not assume drywall alone can support dinner and an accidental lean. Installation must follow the product's fastening requirements, and renters need permission before drilling or altering walls. Check that the latch holds securely when folded. Skip this approach when suitable mounting is unavailable, or when children might pull down an unsecured leaf during play.

    3. Roll a Locking Dining Cart into Place

    A rolling table designed for dining can park beside the kitchenette and move into an open area for meals. Look for a rigid frame, locking casters and a top that tolerates everyday spills. A compact model with stools stored beneath it keeps the whole setup together; roll it out, engage every specified lock and pull out a seat.

    A lightweight serving trolley is not automatically a safe dining table. Small wheels, a top-heavy frame or loose folding wings can make cutting food unpleasantly wobbly. Consider flooring transitions and rugs along its travel path, too. This option becomes frustrating if you must unload appliances before moving it, or if its parking spot obstructs a heat source.

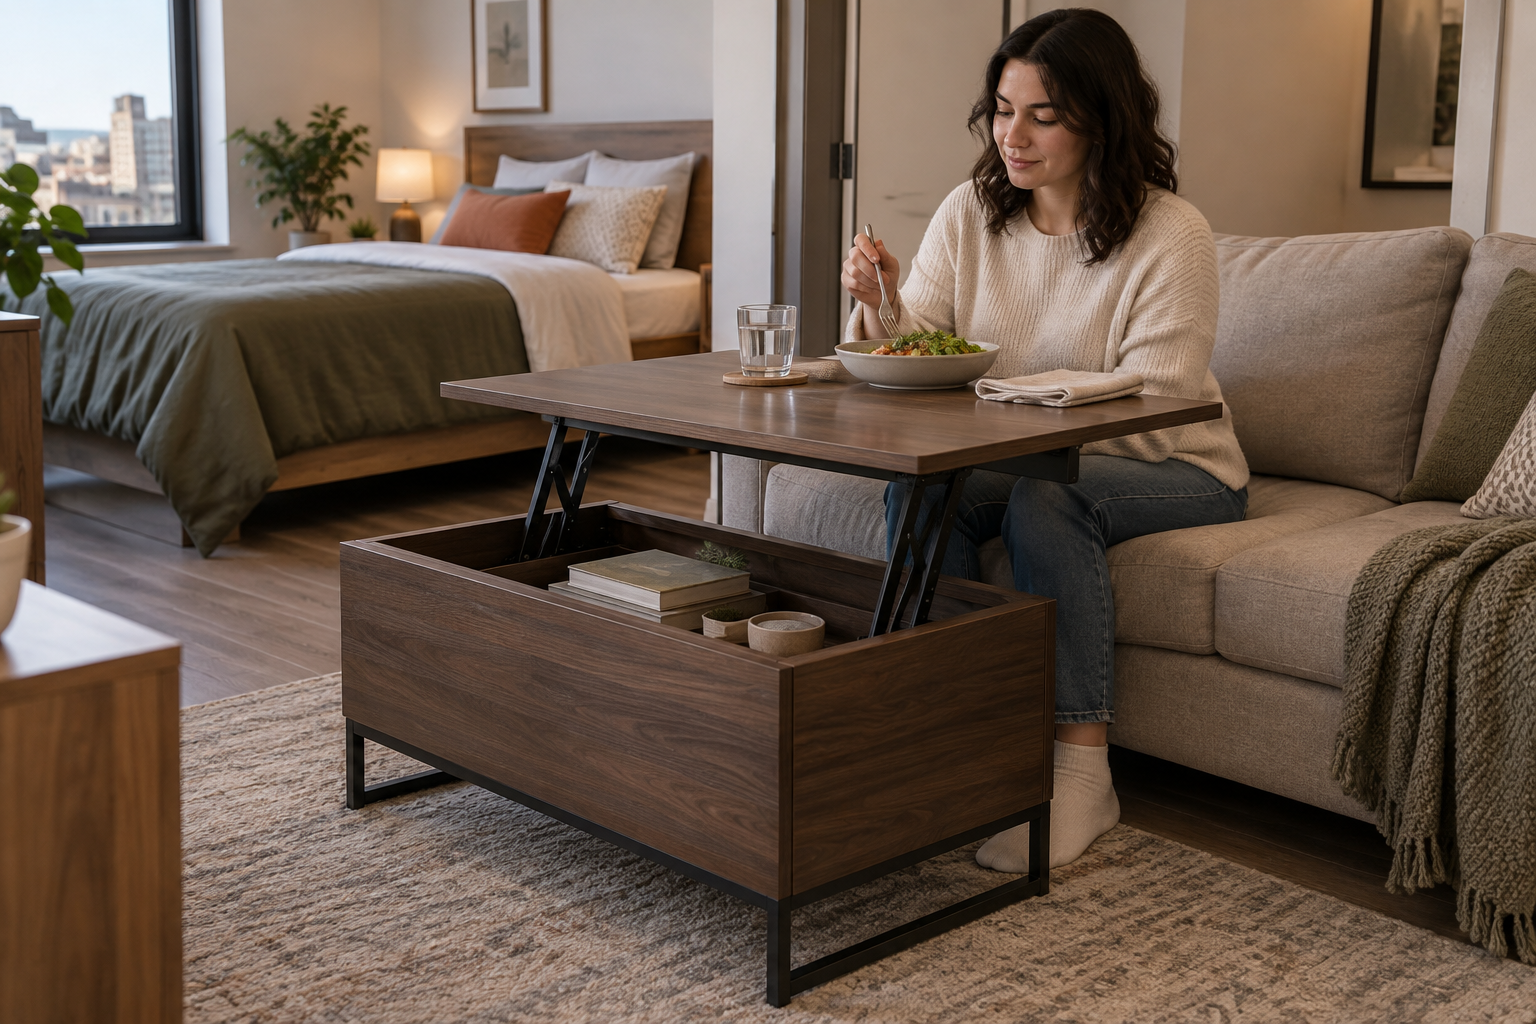
    4. Bring a Lift-Top Coffee Table to the Sofa

    If your studio already has a sofa, a lift-top coffee table can make that seat work for dinner without adding chairs. Choose a dining-capable mechanism that locks or holds firmly in its raised position. Check the raised height against your seated elbows and test the reach; your plate should come toward you rather than making you perch forward.

    Raised coffee-table top brings a dinner plate within comfortable reach of the sofa.

    Buying by storage capacity alone can leave you with a bouncy surface or a top that rises too high. Respect the mechanism's load limit and keep fingers away from moving joints. Soft, deep sofas are also poor dining seats for some bodies. If sitting upright is difficult or transfers require a different arrangement, choose a conventional-height surface instead.

    5. Let an Entry Console Expand for Company

    An expanding console earns its everyday footprint as a landing place, then becomes a dining table when someone visits. Favor a model whose extension leaves store inside its own frame. Keep two folding chairs in a nearby closet, and plan a specific destination for the keys and mail so converting the console does not begin with a major clearing project.

    Some consoles extend much farther than their closed size suggests and need several supports or loose leaves. Read the full setup sequence before committing. A useful planning allowance is roughly 30 inches behind an occupied chair, with more wherever people must pass; measure your own arrangement. This is an occasional-hosting solution if daily conversion feels like furniture assembly.

    6. Slide a Dining-Rated C-Table Beside Your Seat

    For solo meals, a sturdy C-shaped table can slide under the edge of a sofa or chair and bring a small surface close. Select one explicitly intended to support meals, not just a phone. Try your usual plate, glass and utensils on its top, then park it beside the sofa as an end table after dinner.

    The offset base makes stability especially important. Avoid leaning your body weight on the edge, and reject a model that rocks during ordinary utensil use. Sofa legs and low frames may prevent the base from sliding underneath at all. This is not a good shared table, and pets or children moving through a tight gap can make it impractical.

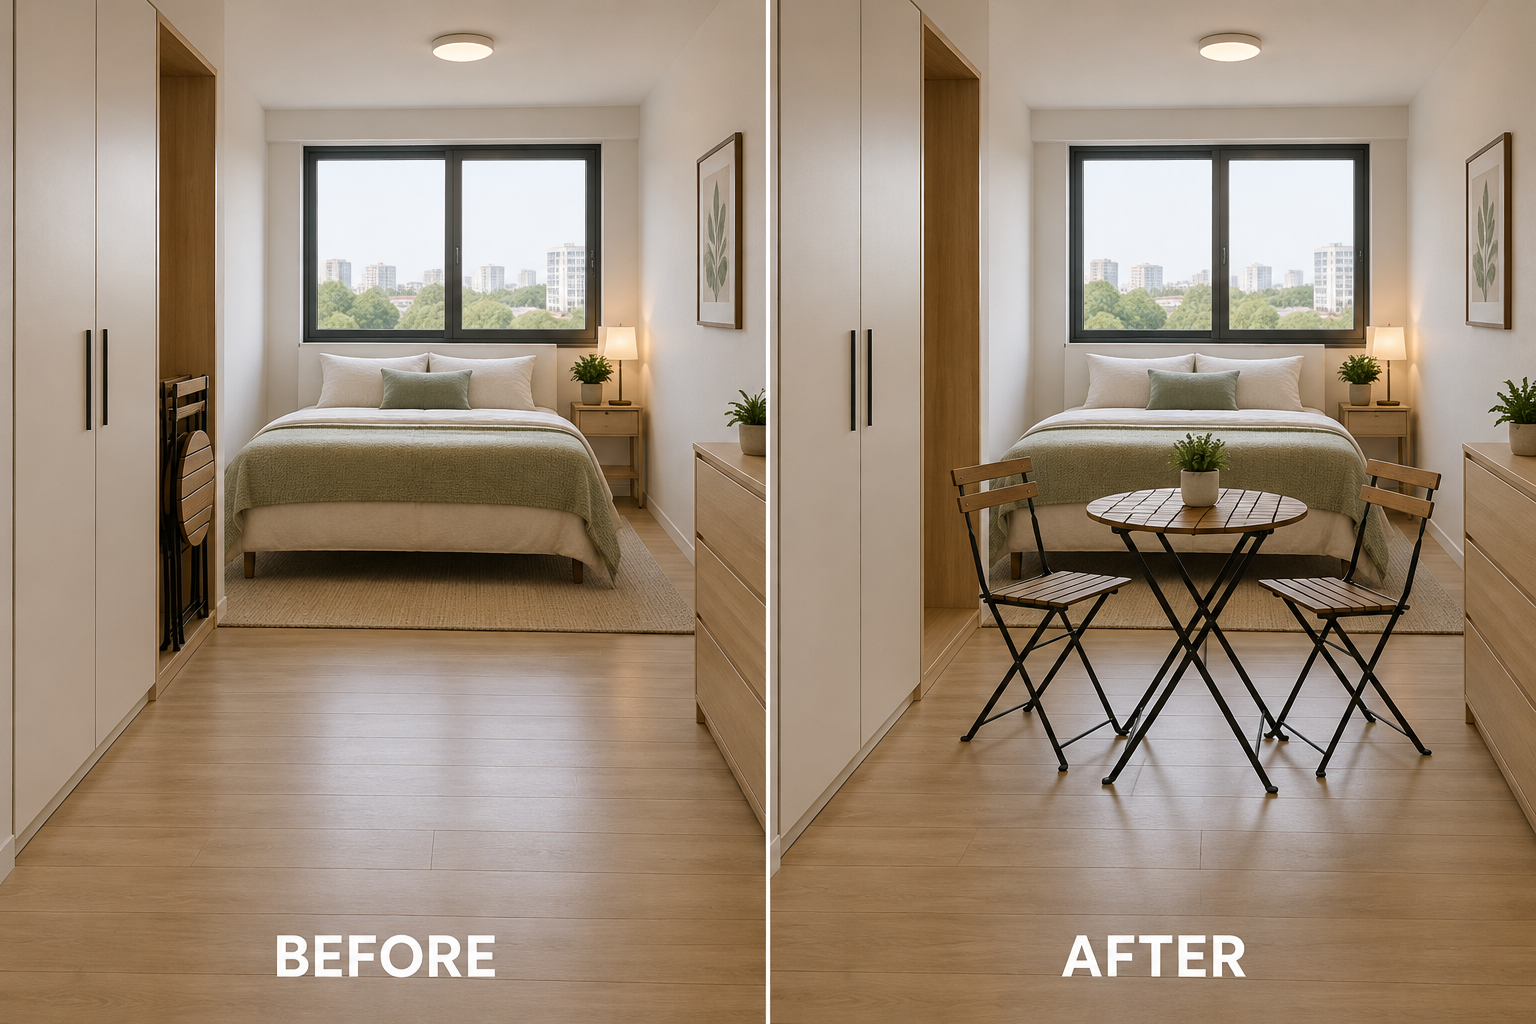
    7. Give a Folding Bistro Set a Dedicated Parking Slot

    A freestanding folding bistro set avoids permanent installation, but it needs a real storage address. Measure a slot beside a wardrobe for the folded table and chairs, keeping them stable and away from door swings. At dinner, unfold the same pieces in the studio's open area and engage their locking braces before setting out food.

    Before and after views show a folding bistro set stored beside a wardrobe, then opened for meals.

    Do not buy an outdoor-style set without checking its indoor comfort and stability. Narrow slatted tops can catch utensils, while thin folding chairs may discourage lingering over dinner. Open the chairs fully and check their locks each time. If carrying several pieces is tiring, or the storage slot requires lifting them above shoulder height, choose a simpler setup.

    8. Turn an Existing Counter into a Temporary Dinner Spot

    An existing counter overhang can become a dining station without adding another tabletop. Match a fold-flat stool to the counter height and verify that the overhang leaves comfortable knee room. After food preparation, clear and clean that section, bring out the stool and eat. Store the folded seat in a pantry-side gap once dishes are put away.

    A standard cabinet face without an overhang usually leaves nowhere for your knees; adding a taller stool does not fix that. Keep seating away from hot cooking zones, appliance doors and required manufacturer clearances. This arrangement also competes with meal preparation. It works poorly when one person cooks while another eats, or when elevated seating does not suit the household.

    9. Separate Nesting Tables for Two Individual Place Settings

    A pair of sturdy nesting tables can serve as everyday side tables, then separate into individual meal surfaces. Choose tops large enough for your actual dinnerware and heights that work with the seats you own. For two people sharing a compact sofa, place one table in front of each seat, then nest them together beside the arm afterward.

    Decorative nesting sets often sacrifice usable surface area on the smaller table. Check both pieces rather than assuming they offer equal meals. Separate tops also make shared serving dishes awkward, so plate food in the kitchen first. Avoid balancing a tray across the pair: different heights or shifting bases can turn two stable tables into one unstable surface.

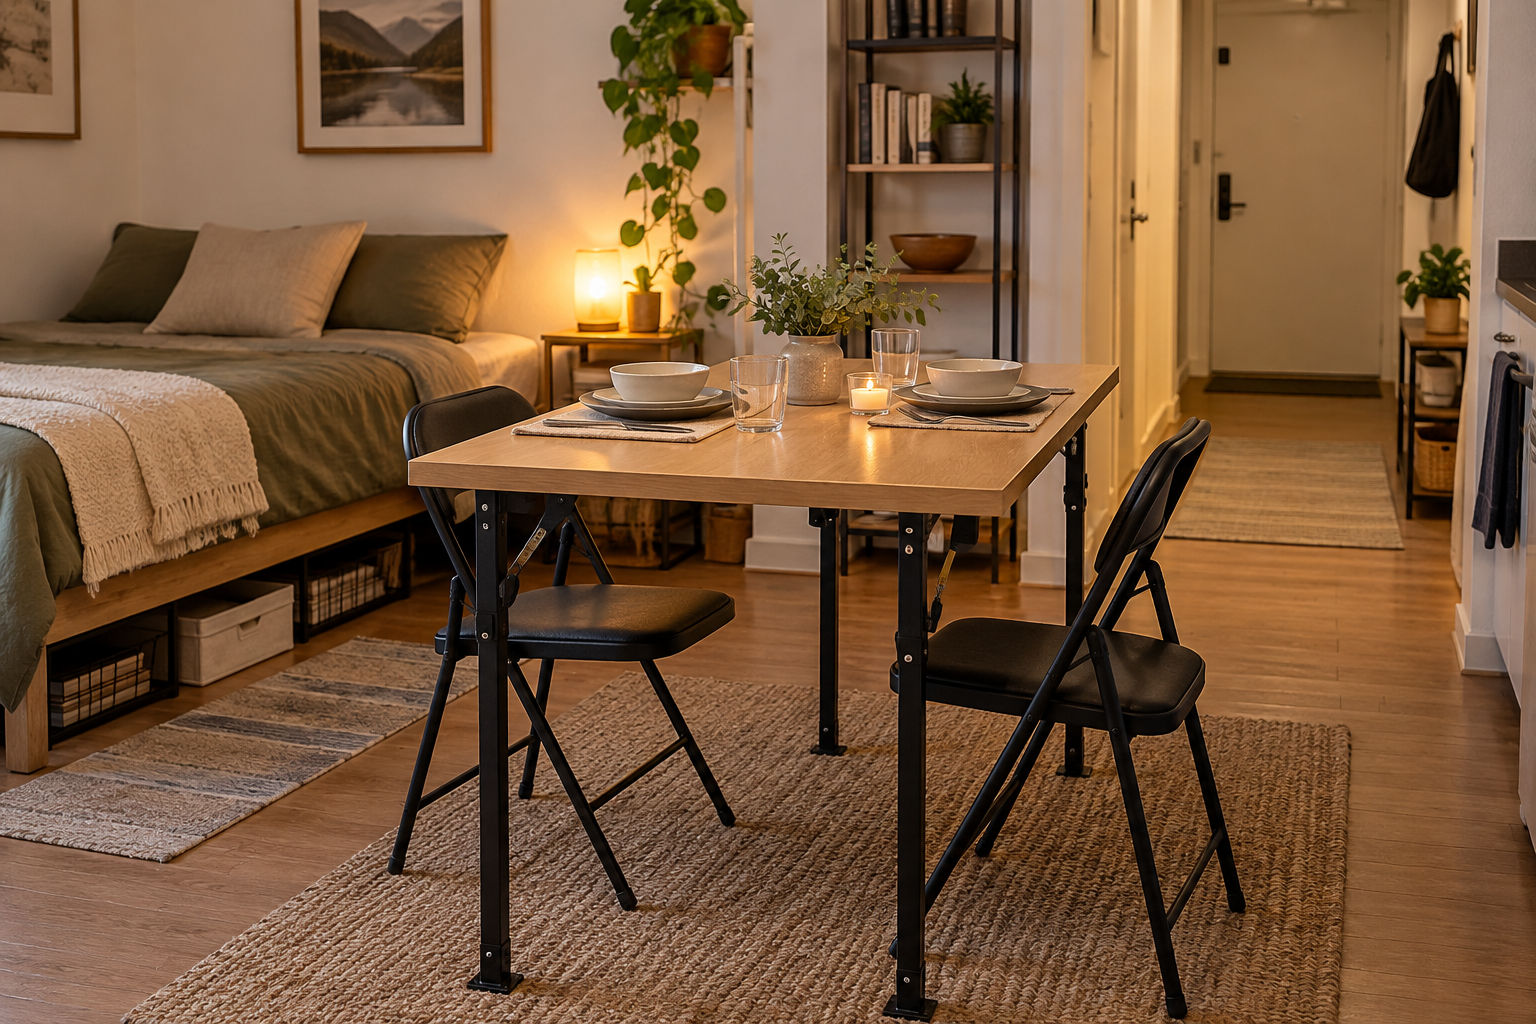
    10. Assemble a Knockdown Table for Longer Meals

    For occasional dinners that deserve a larger surface, consider a purpose-built knockdown table with a removable top and locking supports. Choose a complete compatible system rather than improvising with loose boards. A flat top can store horizontally under the bed if it fits, while folded supports and chairs occupy a low closet shelf. Assemble it before cooking begins.

    Knockdown dining table assembled for two in a studio with under-bed storage nearby.

    The tradeoff is handling several components, so check their weight, attachment method and storage dimensions before buying. Never leave a loose top resting unsecured on supports, and do not lean heavy panels where they could fall. This approach is unsuitable for frequent meals if assembly becomes a barrier, or when deployed furniture would compromise an essential exit route.

    The best studio dining setup is the one you will actually open on an ordinary Tuesday. Before buying, mark its footprint with removable tape and rehearse getting a seat, serving food and clearing dishes. Give every folded piece a stable home, and keep essential routes open in both configurations. A modest surface that supports comfortable daily meals is more useful than a bigger arrangement you rarely unpack.