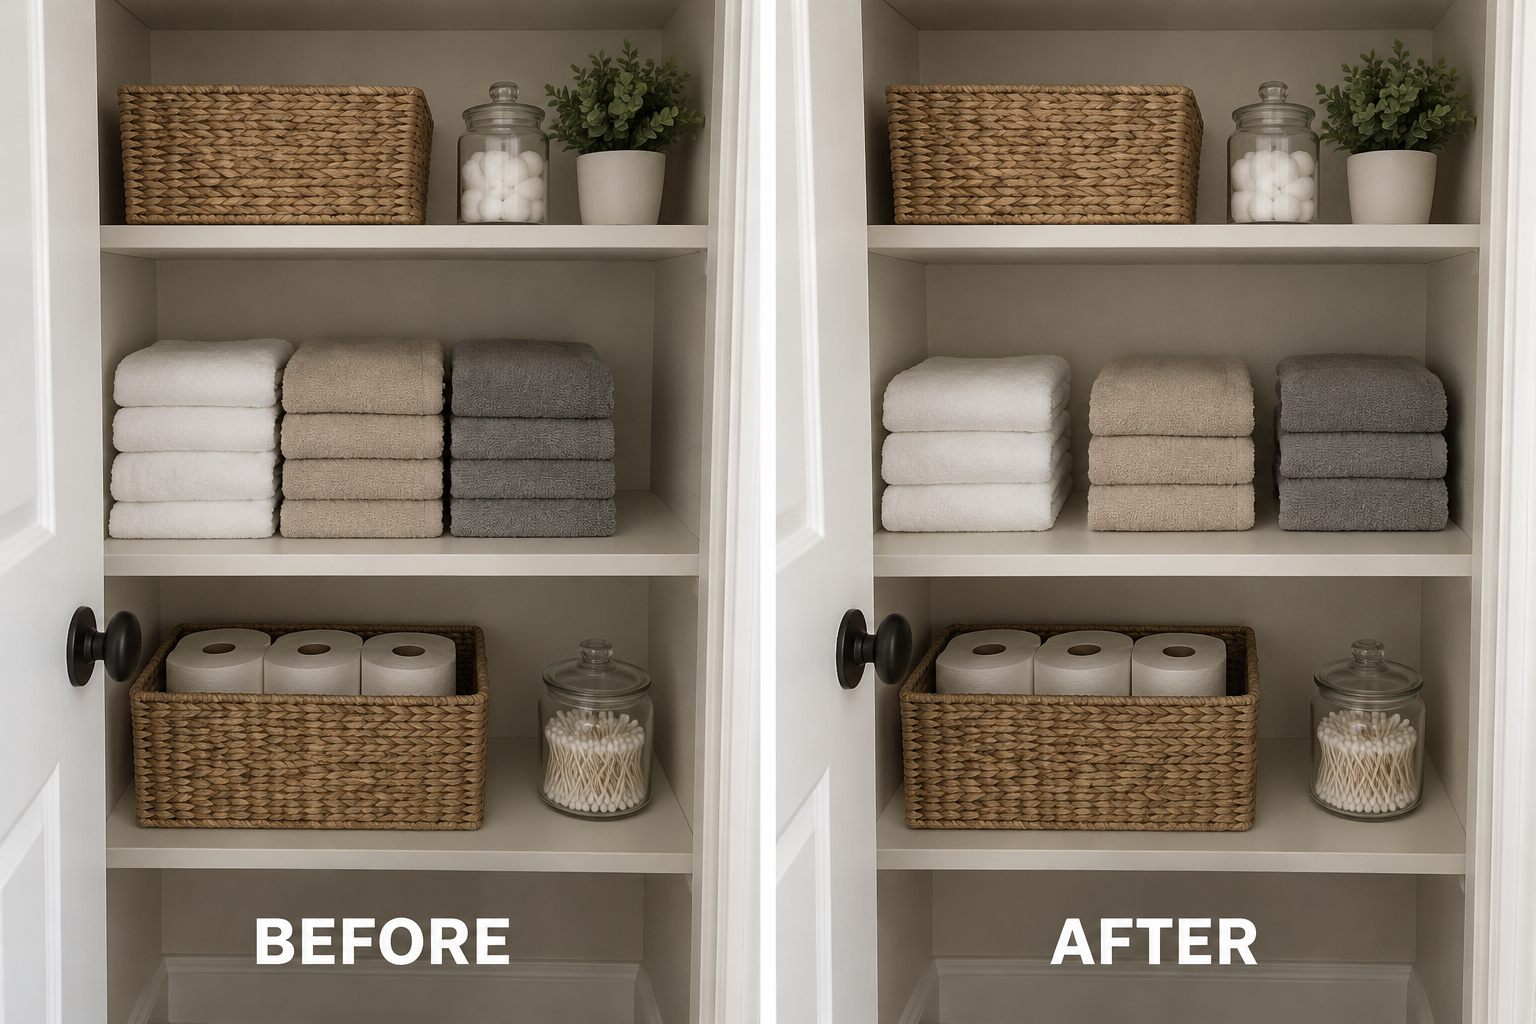
Category: Storage & Organization

  • Keeping Suitcases Useful When You Have No Spare Closet

    Keeping Suitcases Useful When You Have No Spare Closet

    The suitcase comes home from a trip and stays beside the dresser because its usual spot now holds winter bedding. Soon you’re stepping around it to reach a drawer. Before buying another storage unit, work out which bags you actually use, how much room they occupy, and how you’ll retrieve them. A workable luggage arrangement should give back everyday space without turning departure day into a furniture-moving exercise.
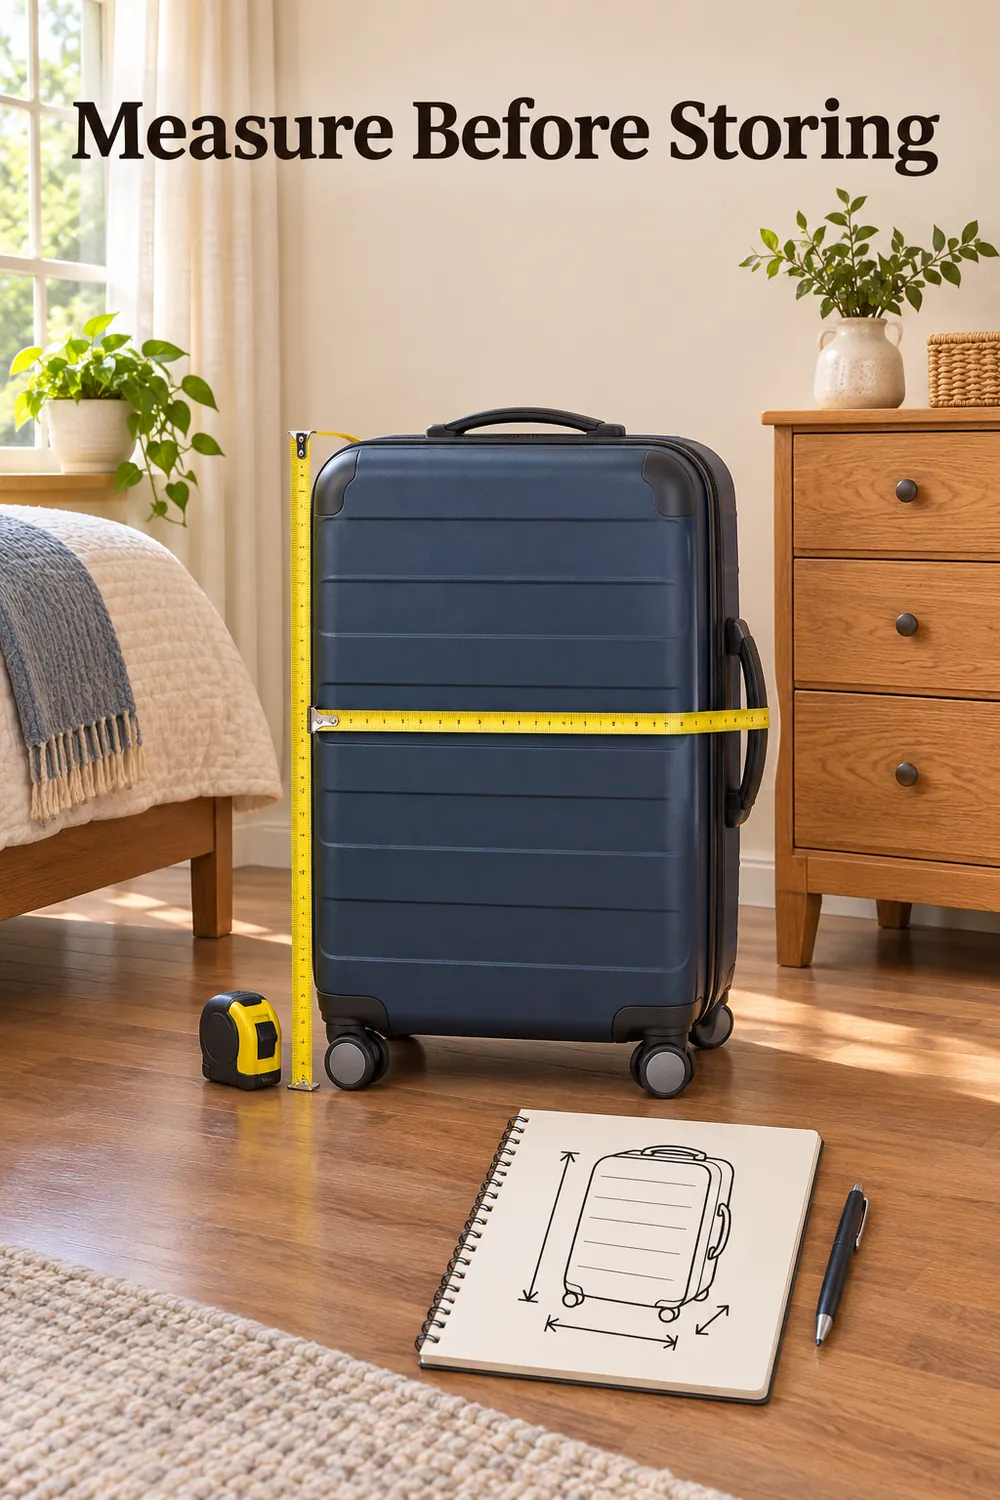
    “Measure Before Storing” above a suitcase being measured, including its wheels and fixed handles.

    1. Measure the whole case and its route

    Measure each suitcase at its widest, tallest, and deepest points, including wheels, feet, fixed handles, and bulging pockets. Retract the telescoping handle and note which way the case will lie. A bag described as 24 inches may need more storage length once its wheels are included. Keep the actual measurements in a phone note so you can check possible spaces without repeatedly carrying luggage around.

    Measure the route as carefully as the destination: the opening beneath a bed, the inside of a cabinet doorway, nearby door swings, and the floor space needed to turn the case. A roomy compartment is useless if its opening is too narrow. Use dimensions as approximate planning guides, then test the actual bag. You should be able to pull it out without moving unrelated bins or blocking an exit.

    2. Nest compatible cases with room to spare

    Two clean, completely dry suitcases can share one footprint if the smaller one fits comfortably inside the larger shell. Open both fully and check where the smaller bag’s wheels, handles, and corners meet the lining. Leave visible clearance rather than pressing a hard corner into a divider. The larger case should close naturally, without sitting on it or pulling hard on its zipper.
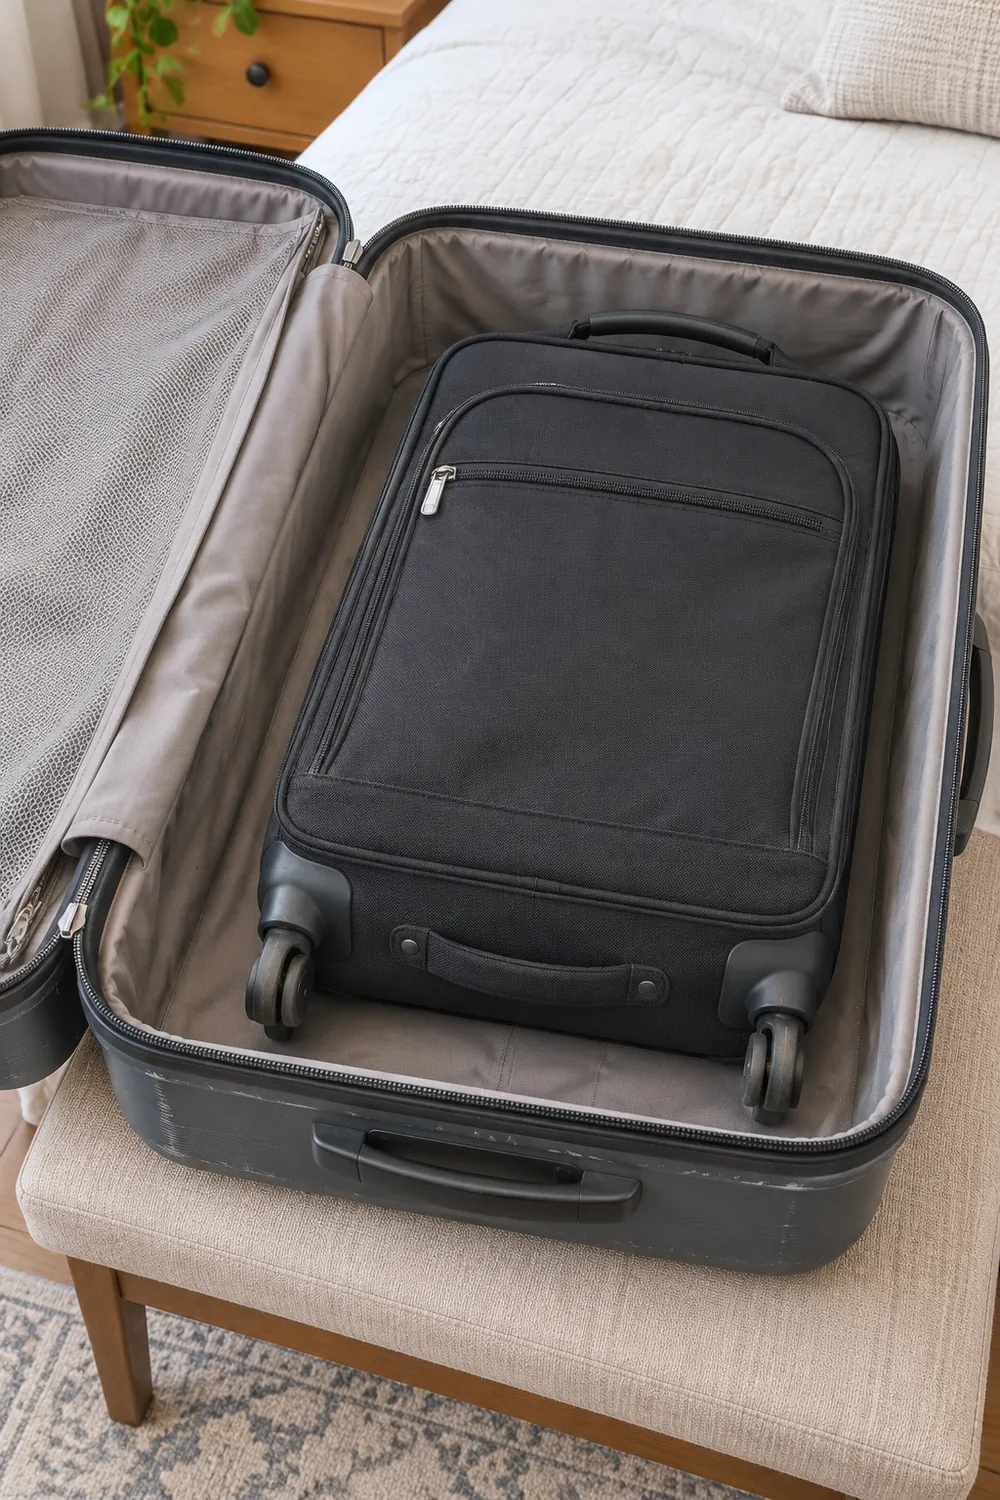
    A smaller carry-on fits inside an open suitcase with clearance around its wheels and corners.

    Nest in the order you’ll retrieve: the least-used case outside, the more frequently used one inside, provided the fit works. Keep straps tucked away from wheels and zippers. If reaching the inner bag requires lifting three cases onto the bed, limit the stack to two. Store the outer case where it can slide forward into a clear opening area; nesting saves volume but adds an unpacking step.

    3. Clean and dry luggage before putting it away

    Empty every pocket, shake out debris, and vacuum seams if the care instructions permit. Wipe wheels and exterior surfaces using the manufacturer’s recommended method; don’t soak a fabric case to remove one mark. Open dividers and pockets afterward so moisture can escape. A suitcase that looks dry outside may still have a damp lining after a spill or a rainy journey.

    Give drying a temporary, accessible spot rather than returning a damp bag to its tight storage space. An open case on a washable floor covering can work, away from heaters and household traffic. Keep it clear of children and pets, and don’t close it until all layers feel dry. If indoor humidity makes drying difficult, these small-home air-drying strategies explain how spacing and airflow help moisture escape.

    4. Make under-bed storage pass a retrieval test

    Under-bed space works only when both the case and your hands can pass beneath the frame. Check the lowest rail, center supports, and any fabric hanging underneath. Then slide the empty suitcase in and pull it all the way out. A case roughly 10 inches deep won’t work beneath a 9-inch rail, even if there’s more clearance farther underneath.
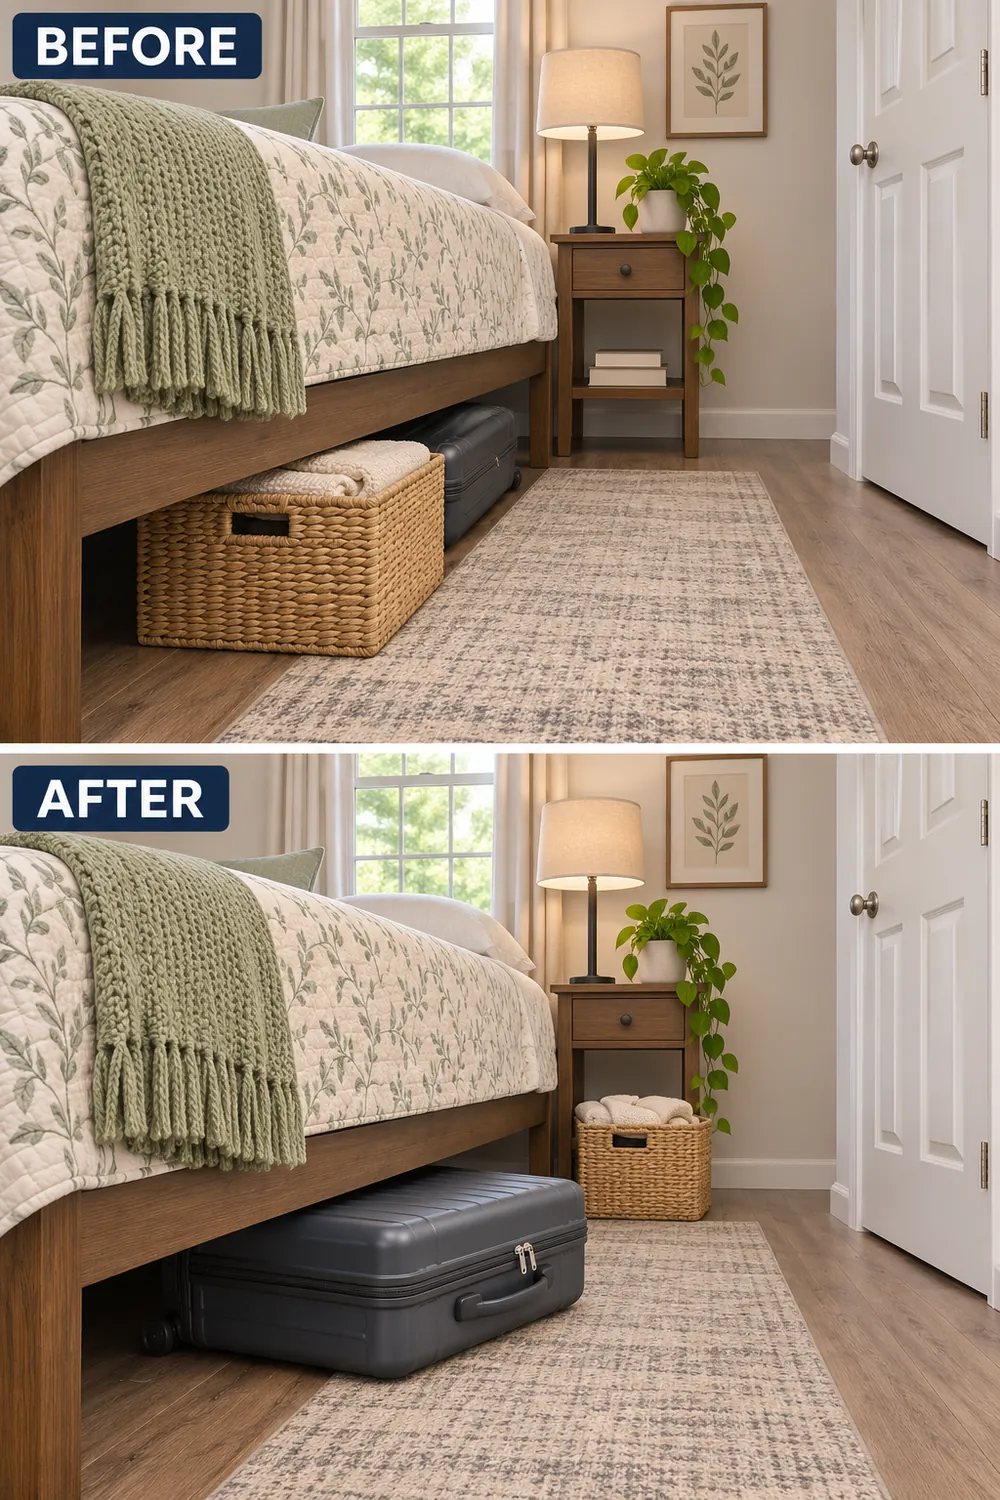
    Before, a basket blocks the suitcase; after, its handle faces a clear aisle for easy under-bed retrieval.

    Face the easiest-to-grip handle toward the aisle and reserve that strip of floor for retrieval. Don’t place shoes or another bin in front of it. If the case hits the dresser before it clears the bed, try another side rather than assuming it fits. These bedroom clearance fixes can help you assess competing access needs without sacrificing closet use.

    5. Reserve upper shelves for genuinely light luggage

    An existing upper closet shelf may suit an empty soft-sided carry-on, but it’s a poor place for a heavy nested set. Check the shelf’s condition, support, and manufacturer’s load limit where available. Keep the bag fully supported, not balanced on its wheels near the edge. If lifting it overhead feels awkward even when empty, choose a lower location.

    Leave a direct lifting path and keep the handle visible. A lightweight weekend bag on its own shelf section is easier to retrieve than one behind spare bedding. Never climb on a chair or pull a case down by a dangling strap; use appropriate stable access equipment according to its instructions. If safe retrieval requires clearing half the closet, the upper shelf isn’t earning its space.

    6. Give luggage a dedicated cabinet compartment

    A freestanding cabinet can absorb a suitcase without creating another exposed pile, especially in a living room that doubles as a bedroom. Start with furniture you own: an adjustable shelf might move upward to create a lower luggage bay. Measure inside the door opening, including hinges, and check that the doors open far enough to pass the case without scraping.

    Keep that compartment exclusive to luggage rather than setting baskets in front of it. A carry-on stored upright with its handle facing out should come free in one motion. Follow the furniture manufacturer’s loading and anti-tip instructions; don’t remove structural shelves or ignore anchoring requirements because drilling is restricted. If you cannot meet those requirements, choose a different arrangement rather than an unstable cabinet.

    7. Use the interior for lightweight travel supplies

    Store packing cubes, a travel laundry bag, luggage straps, and an empty toiletry pouch inside a case you use occasionally. These items belong with the luggage and add little weight. Group them in one removable pouch and attach a visible inventory to the suitcase handle or shelf edge: “Packing cubes, laundry bag, spare luggage tags.” You won’t need to open every case to find them.
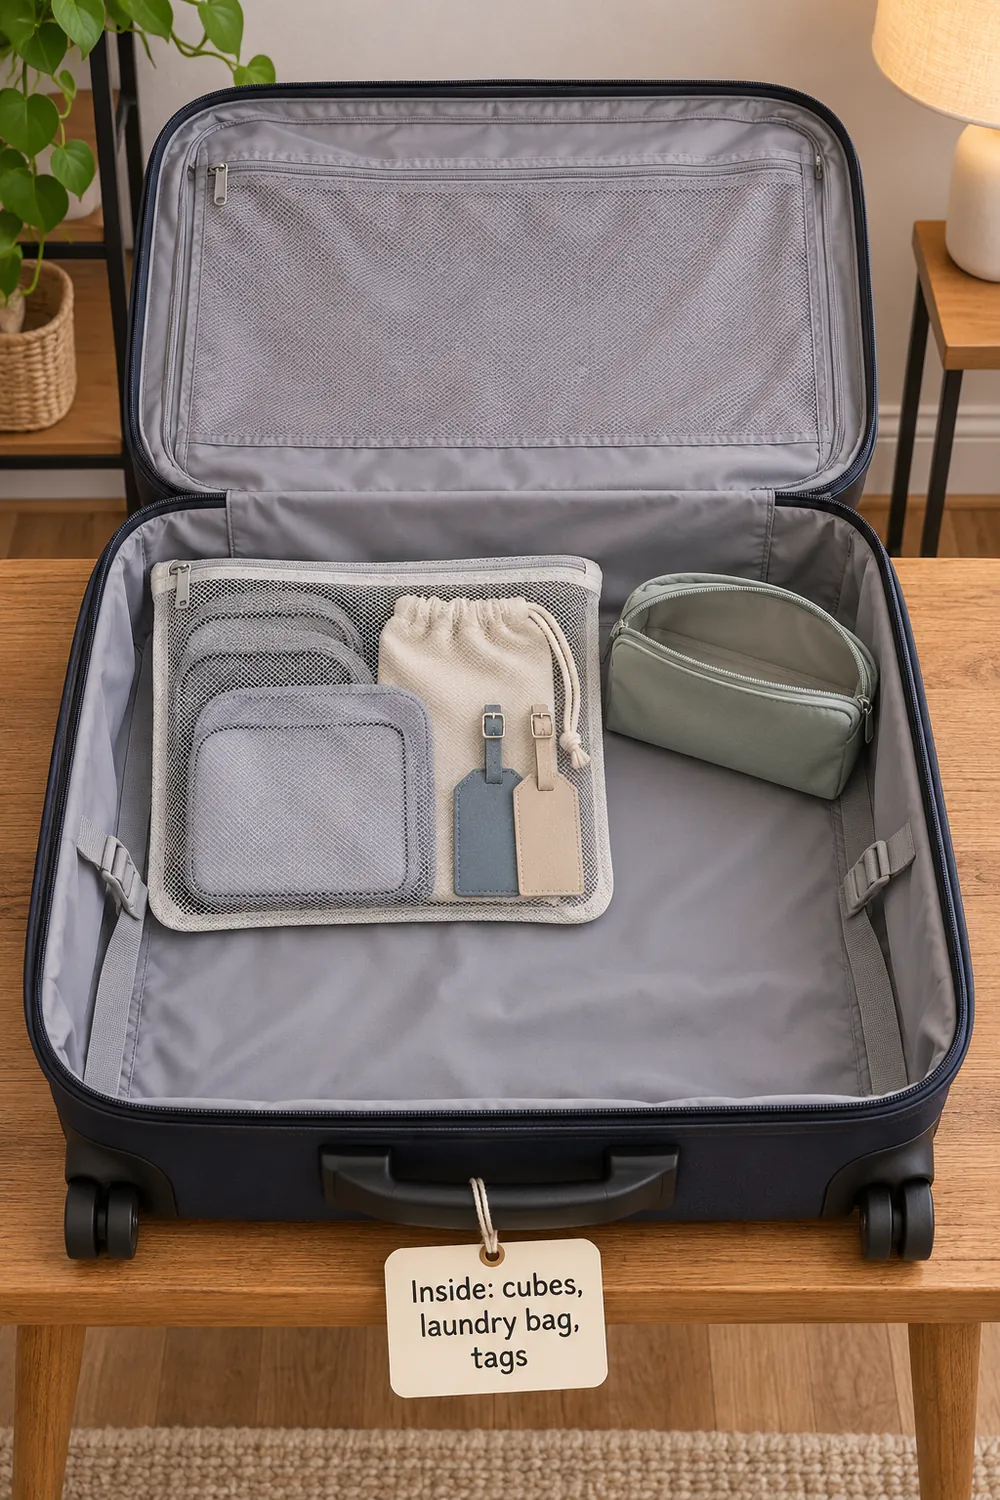
    Lightweight travel supplies sit inside a suitcase with a visible inventory card attached to its handle.

    Keep passports, medication, everyday chargers, and other essentials in their normal accessible homes. Luggage should not become a hidden drawer you open every morning. Before a trip, lift out the supply pouch and pack; afterward, return only clean, dry travel items. Avoid filling every pocket with miscellaneous storage, which makes the case heavier and turns retrieving one bag into a sorting job.

    8. Separate empty storage from a frequently used packed bag

    A bag used for weekly work travel needs a different home from an empty vacation suitcase. Give the frequent traveler a reachable lower shelf or cabinet bay, with room to open it nearby. Keeping a few clean travel-only basics packed may be practical, but don’t bury this bag inside another case. The convenience comes from access, not simply from keeping it zipped.

    In a shared bedroom, agree on a compact departure spot that doesn’t occupy the doorway or the route to the bathroom. A weekend bag might move there the night before departure, then return to its bay after unpacking. Remove food, liquids that could leak, and worn clothing between trips. A frequently used bag still needs a reset; it isn’t permanent storage for unfinished unpacking.

    9. Protect cases without burying or compressing them

    Avoid storage beside a recurring leak, against a visibly damp wall, or on a floor that gets wet. A closed suitcase is not reliable moisture protection, and a plastic cover doesn’t make a damp location suitable. Choose a dry indoor position away from heaters and ventilation openings. Investigate persistent dampness rather than concealing it behind luggage.

    Protect the case from pressure, too: don’t stack books on a soft bag or wedge a hard shell beneath a loaded shelf. If dust is the issue, use a removable cover recommended for the luggage, only after everything is dry. Leave the handle accessible and the case unburdened so retrieval means removing one cover—not unloading a tower of boxes that may also distort the bag.

    10. Make the return-from-travel reset easy to finish

    Set a simple sequence for arrival: empty the case, separate laundry, check pockets, clean as needed, and leave the luggage open until fully dry. Put wet towels or swimwear directly into an appropriate laundry or drying routine, never back into the case. A temporary drying setup beside—not across—the room’s main walking route keeps the unfinished task visible without taking over the home.
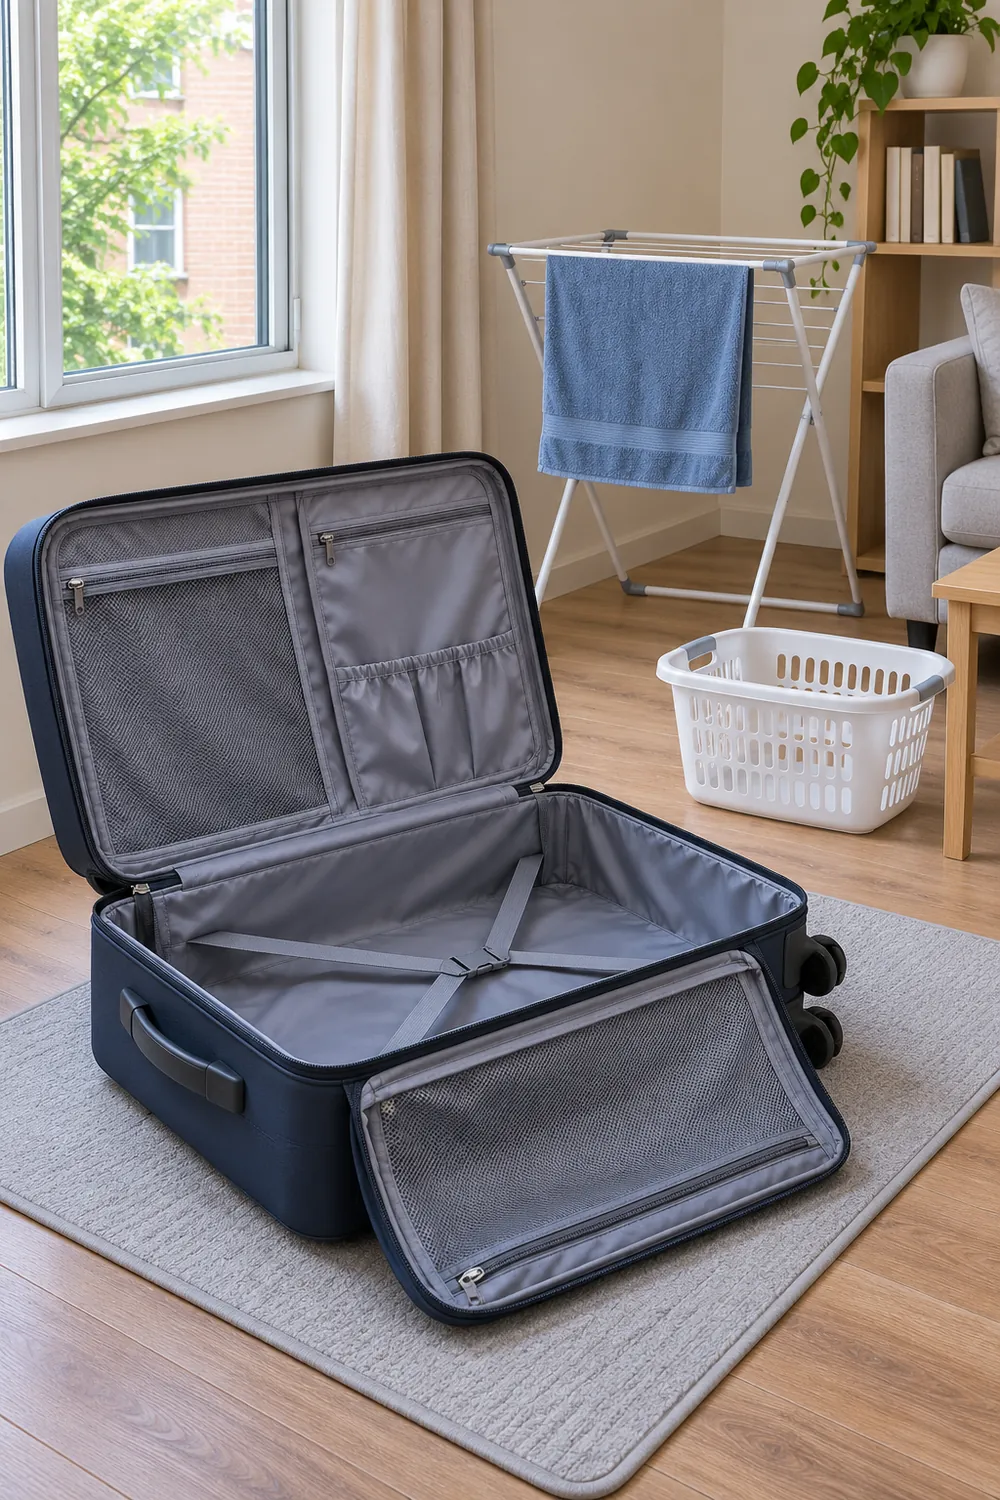
    An emptied suitcase dries with its pockets open while a travel towel hangs separately on a nearby rack.

    Once dry, return the lightweight supply pouch, update its inventory, and put the case in its assigned spot. Check that its retrieval lane remains clear before calling the reset finished. If a new pair of shoes now blocks the under-bed handle, relocate the shoes rather than postponing the problem. Repeated friction is useful information: a storage arrangement that never gets restored probably needs a simpler location.

    Start with the suitcase currently in your way. Empty it, measure it, and test one storage spot by putting it away and retrieving it again. That trial will tell you more than buying another organizer.
  • Storing Cleaning Tools When Your Small Home Has No Broom Closet

    Storing Cleaning Tools When Your Small Home Has No Broom Closet

    The broom falls when you reach for the vacuum. The mop is still damp, and its only available parking spot is beside the bath towels. Without a broom closet, cleaning equipment tends to occupy whatever gap is left. A better arrangement starts with separating tools that need hanging space, airflow, charging access, or secure storage—not trying to squeeze everything into one cupboard.

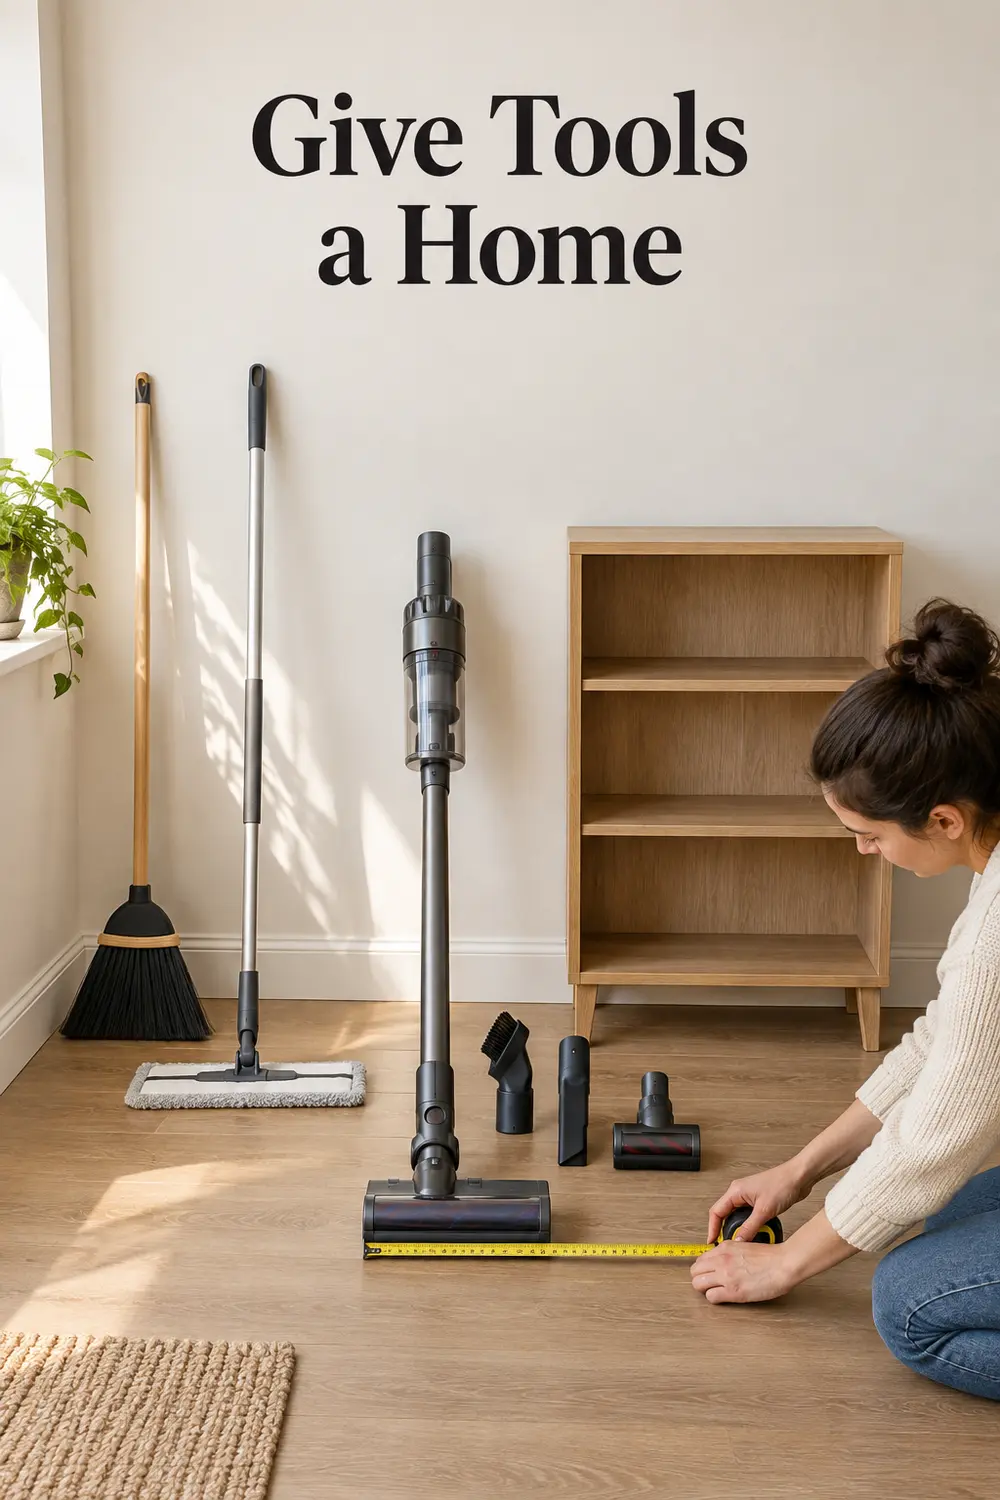
    Cleaning tools laid out for measuring beside an empty cabinet, with the headline “Give Tools a Home.”

    1. Measure the equipment before choosing storage

    Gather the tools you actually use and measure their full storage shapes. Record broom and mop lengths, handle diameters, the vacuum’s widest point, and the depth of its floor head. Include anything that sticks out: a trigger grip, hose loop, or dustpan handle can prevent a cabinet door from closing even when the main tool fits.

    Then measure the proposed space, including its opening and the route for removing equipment. A roughly 12-inch-wide gap is not useful if the vacuum head cannot turn out of it. Treat dimensions as planning information, not guaranteed fit. Retire broken duplicates, but keep specialized attachments you genuinely use; the goal is an accurate inventory, not a forced minimalist collection.

    2. Space tool grippers around the heads, not just the handles

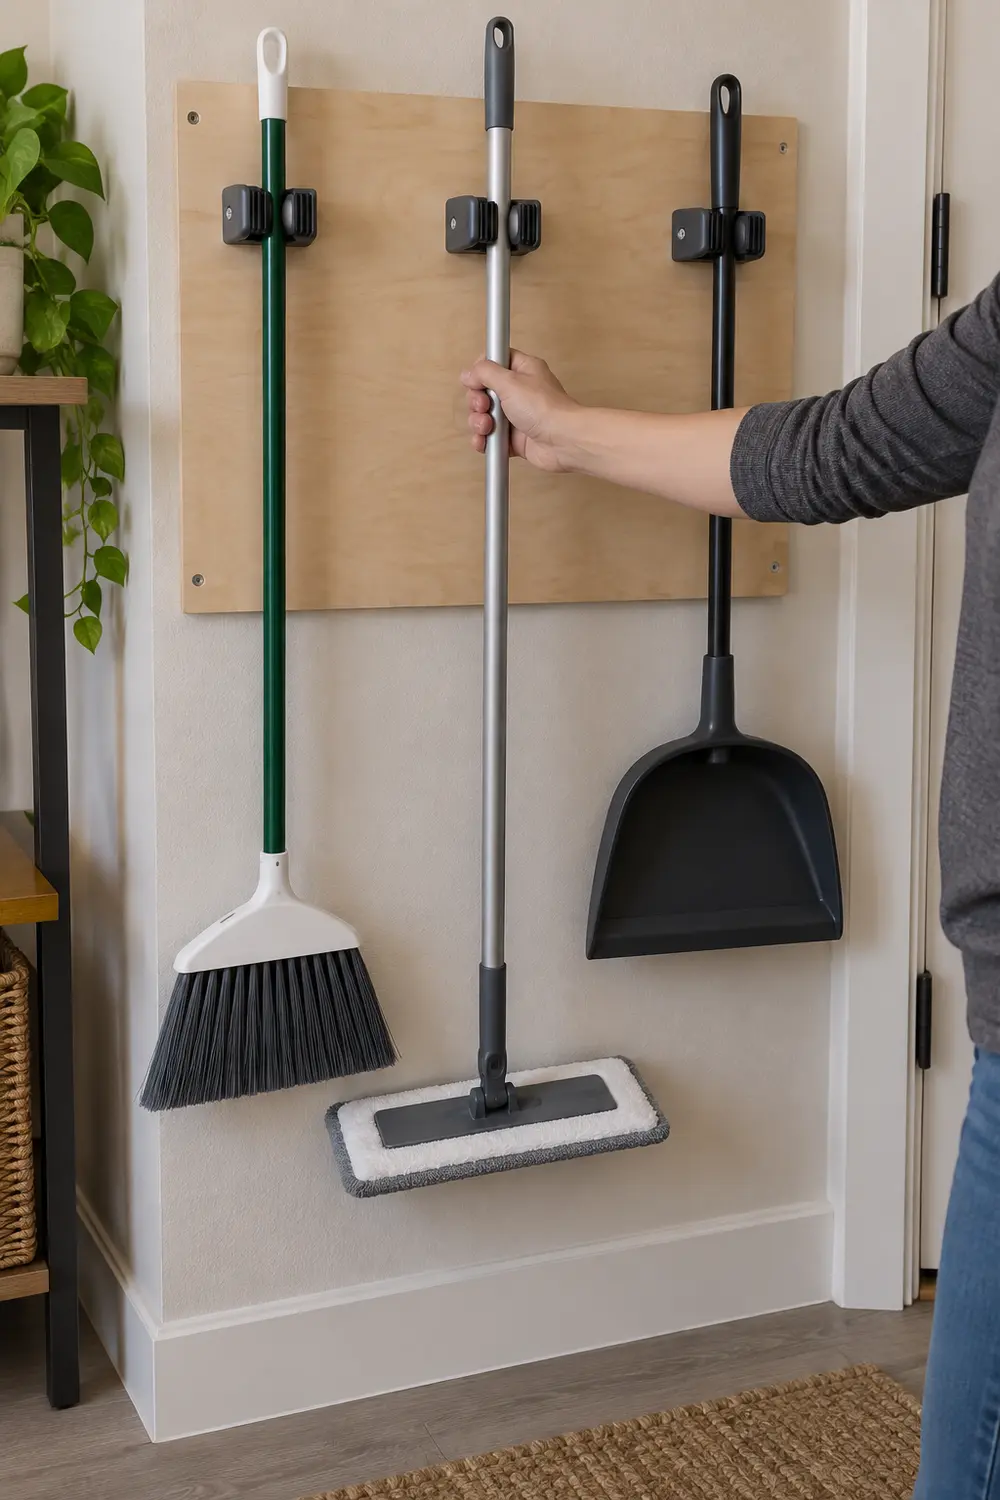
    Compatible wall grippers can lift long tools off the floor without requiring a deep cabinet. Check each gripper’s accepted handle diameter, load rating, and mounting instructions. Before installing anything, hold the broom, mop, and dustpan in position together. Their heads need room to hang without overlapping, and each handle needs enough space for your hand to release it independently.

    Spaced tool grippers let a hand remove the mop without disturbing the broom or dustpan.

    Get any required landlord permission before drilling, and use fasteners suited to the surface and rated load. Adhesive products are an option only when their instructions allow the wall finish, weight, and conditions involved. Behind-door mounting also needs a swing test; the same door-conflict thinking used in these small-bedroom closet-clearance fixes helps identify tools that would strike nearby furniture.

    3. Give cleaning equipment a dedicated utility zone

    Choose one main parking area outside food and linen storage: a laundry corner, an entry cabinet reserved for utility items, or a narrow freestanding cupboard. It does not have to hold every cleaning product. Its job is to give the daily tools an obvious destination, rather than scattering a broom behind one door and the dustpan behind another.

    Mark the proposed footprint with painter’s tape and test normal routines before moving furniture. Check door swings, walking routes, ventilation, heaters, and appliance clearances; follow furniture anchoring instructions too. A curtain can soften the view but cannot secure hazardous supplies. As with storage for daily living-room drop zones, the useful location is one you can reach without rearranging the room.

    4. Keep vacuum attachments in one visible container

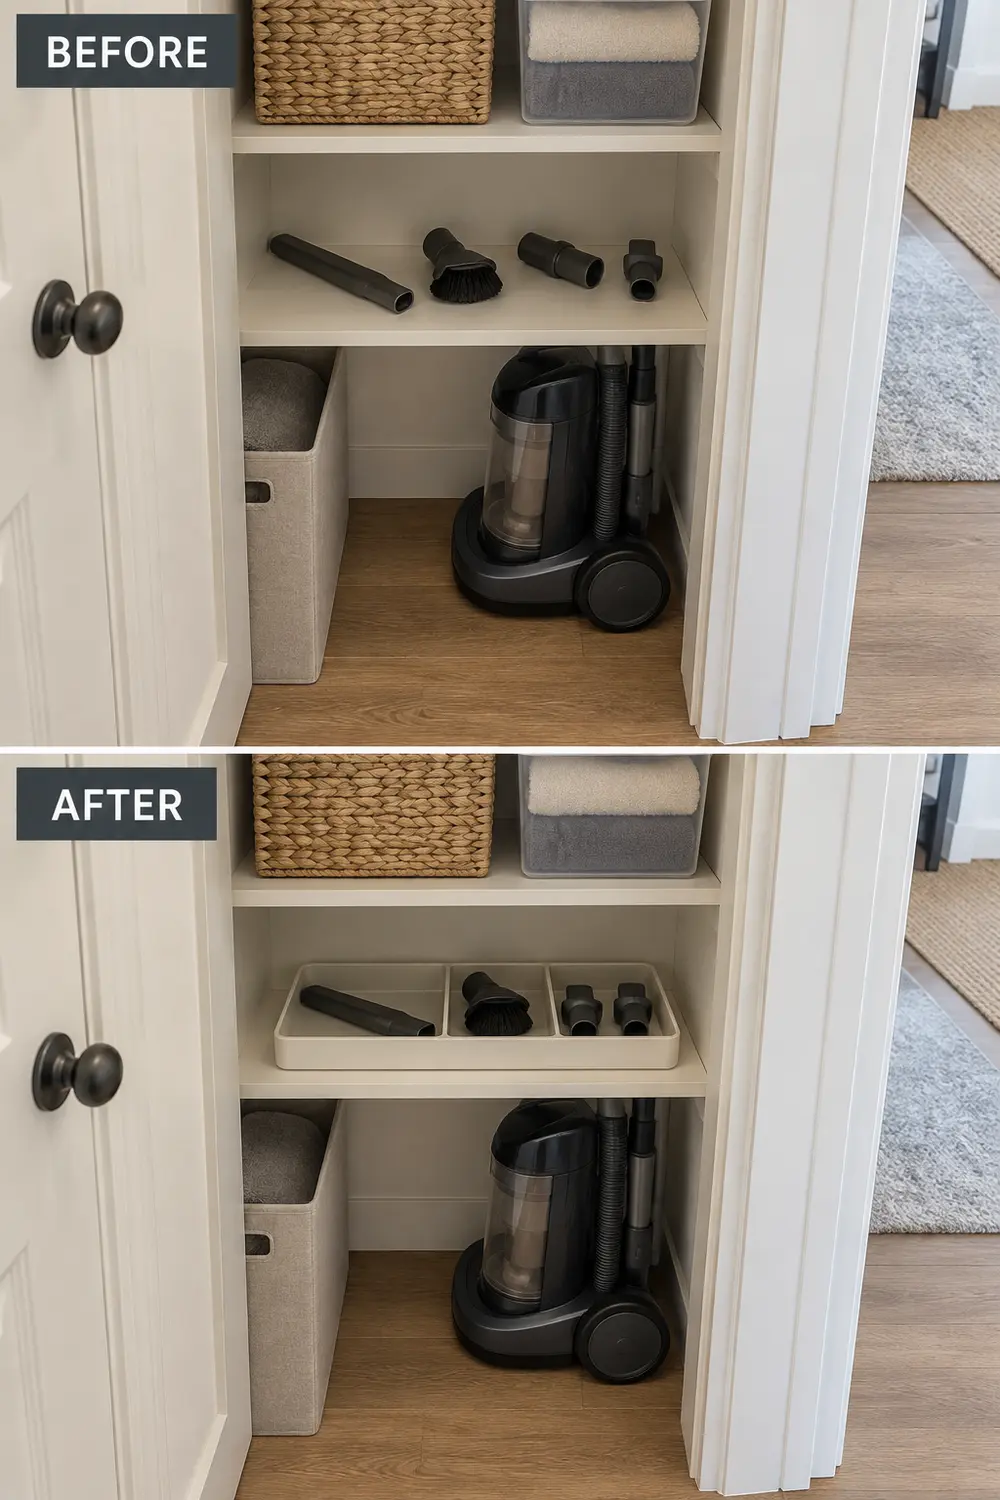
    Give the crevice tool, upholstery brush, and extension pieces a shallow bin or divided tray beside the vacuum. Arrange them so you can identify each piece without emptying the container. Long attachments may fit upright in a sturdy divider, while small brushes are easier to retrieve lying flat. Keep the bin within reach of the vacuum’s parking spot.

    Before, vacuum attachments lie scattered on a shelf; after, the same pieces sit visibly in a divided tray.

    Try a container you already own before buying a fitted organizer. A tray with excessively tall sides can hide short parts, and a deep basket tends to become a second search problem. Clean and dry attachments as their manufacturer directs before returning them. Avoid hanging accessories from the vacuum unless it has designated onboard storage; improvised bundles can obstruct controls or make it awkward to lift.

    5. Plan the charging location before installing a dock

    A cordless vacuum needs more than an empty wall. Check its instructions for the approved charger, dock mounting, charging conditions, and ventilation requirements. Choose a dry location near a suitable outlet where the cable will not cross a walking route or get pinched by a door. Confirm that the vacuum can lift off its dock beneath any shelf.

    Do not assume a closed cabinet is an acceptable charging station; use it that way only if the manufacturer permits the arrangement. If the best storage nook lacks a suitable outlet, separate storage from charging rather than improvising wiring. A model with a removable battery may offer another option, but only within its instructions. Keep the charger accessible instead of buried behind bins.

    6. Separate ready-to-use cloths from used ones

    Store clean, fully dry cleaning cloths in their own small bin, separate from bath towels, bedding, and kitchen linens. Give used cloths a different collection point so nobody has to guess which stack is ready. Two clearly labeled containers—“Clean” and “Used”—can work on separate shelves, provided used damp cloths are not shut inside a sealed box.

    For ordinary water-damp cloths, allow drying in an appropriate ventilated spot before laundry collection rather than leaving a wet pile. Cloths carrying cleaning chemicals need handling and laundering consistent with the product label and cloth instructions. Do not combine incompatible residues in one hamper. Keeping only a manageable number in circulation makes this system easier to maintain than a large, ambiguous stash.

    7. Create a temporary drying spot for mop heads

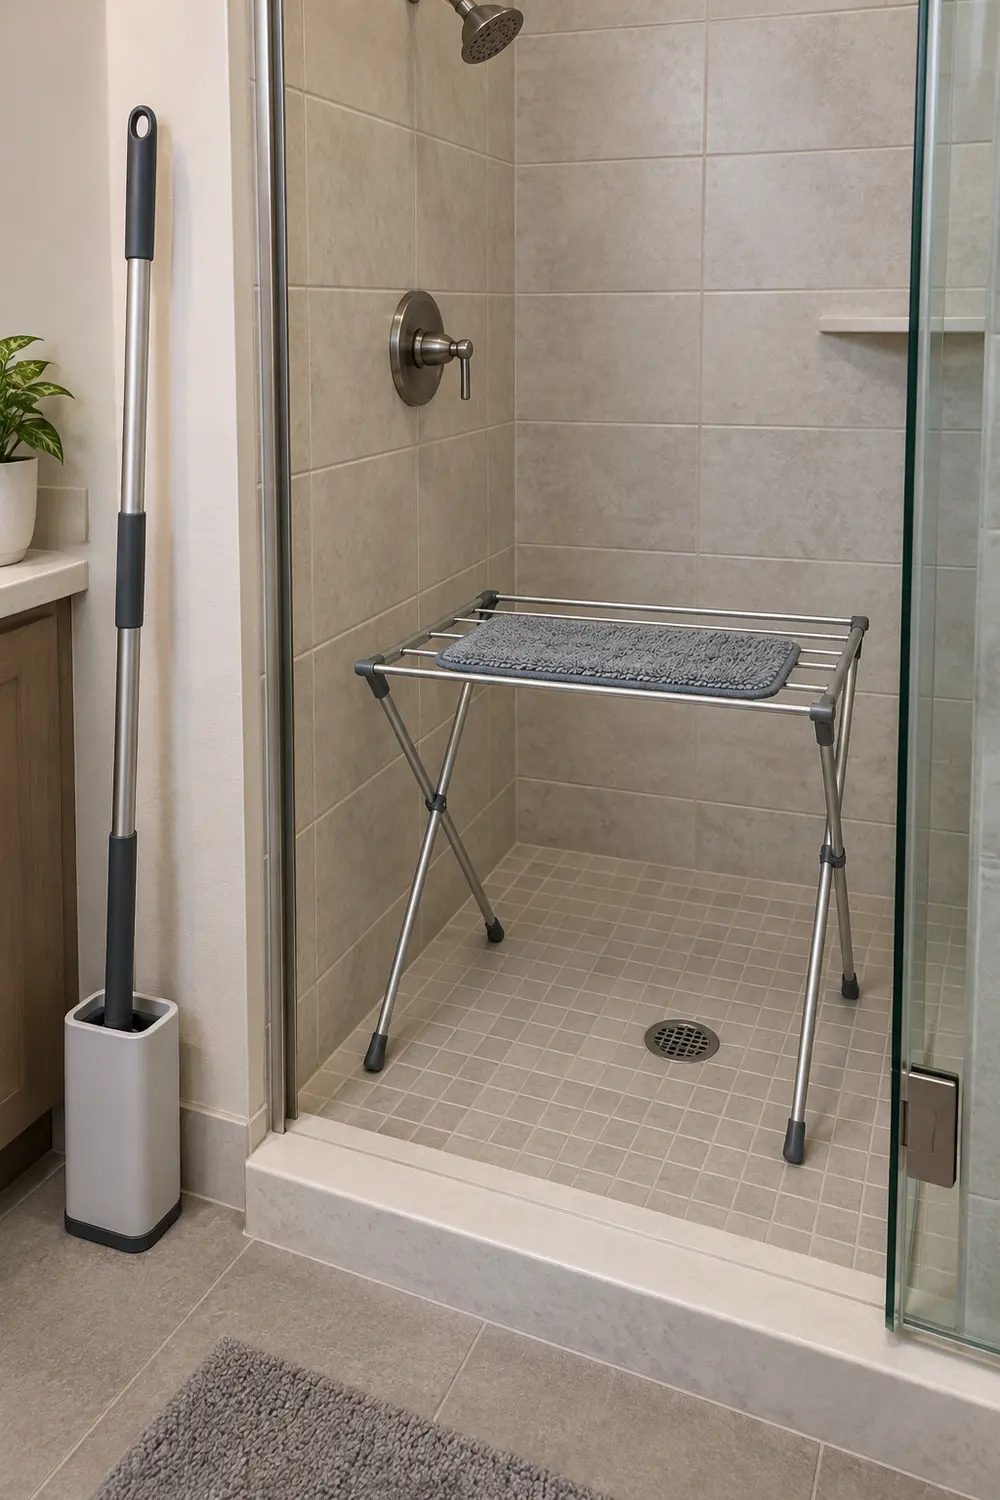
    Treat mop drying and mop storage as two separate stages. After cleaning and rinsing according to the manufacturer’s directions, place a removable pad or mop head where air can circulate and drips will land on a water-tolerant surface. A stable drying rack over a shower floor can serve temporarily, without pressing the damp material against towels or a cabinet wall.

    A removable mop pad dries across rack bars over a shower floor, separate from its stored handle.

    Once the head is completely dry, return it to the utility zone. The temporary arrangement must not obstruct an exit or leave water across a walking path; remove the rack before using the shower. If a head cannot be removed, follow the tool’s drying instructions and provide appropriate drip protection. A closed bucket is storage for a dry tool, not a substitute for drying.

    8. Keep products in their labeled containers

    Resist decanting cleaners into matching bottles just to make a shelf look calmer. Original labeled containers preserve product identity, directions, warnings, and first-aid information. Keep caps and spray mechanisms attached as intended. A shallow, compatible tray can group bottles and help contain minor drips, but it should not hide labels or force containers onto their sides.

    Before organizing bottles together, read their storage directions and any separation requirements. Never mix products to save space, top off one cleaner with another, or reuse a food or beverage container. If the collection exceeds the shelf, reduce unnecessary duplicates through proper use or label-directed disposal rather than compressing everything into one bin. A tray does not make incompatible products safe to store together.

    9. Pack a small kit for one recurring task

    A portable kit reduces trips without turning every cupboard into supply storage. Choose one task, such as bathroom cleaning, and gather only its needed products and tools in a stable handled caddy. Leave room to grasp the handle securely. Test the loaded weight before committing; a smaller kit you can carry comfortably is more useful than an overfilled tote.

    Keep bottles upright, closed, and grouped only as their labels permit. Bring clean cloths with the kit, then route used ones to their separate collection point instead of returning them beside fresh supplies. The caddy is transport, not secure storage: return products to their appropriate storage location afterward. Skip wheeled carts if their footprint would narrow the only practical route through the room.

    10. Reserve secured space for hazardous supplies

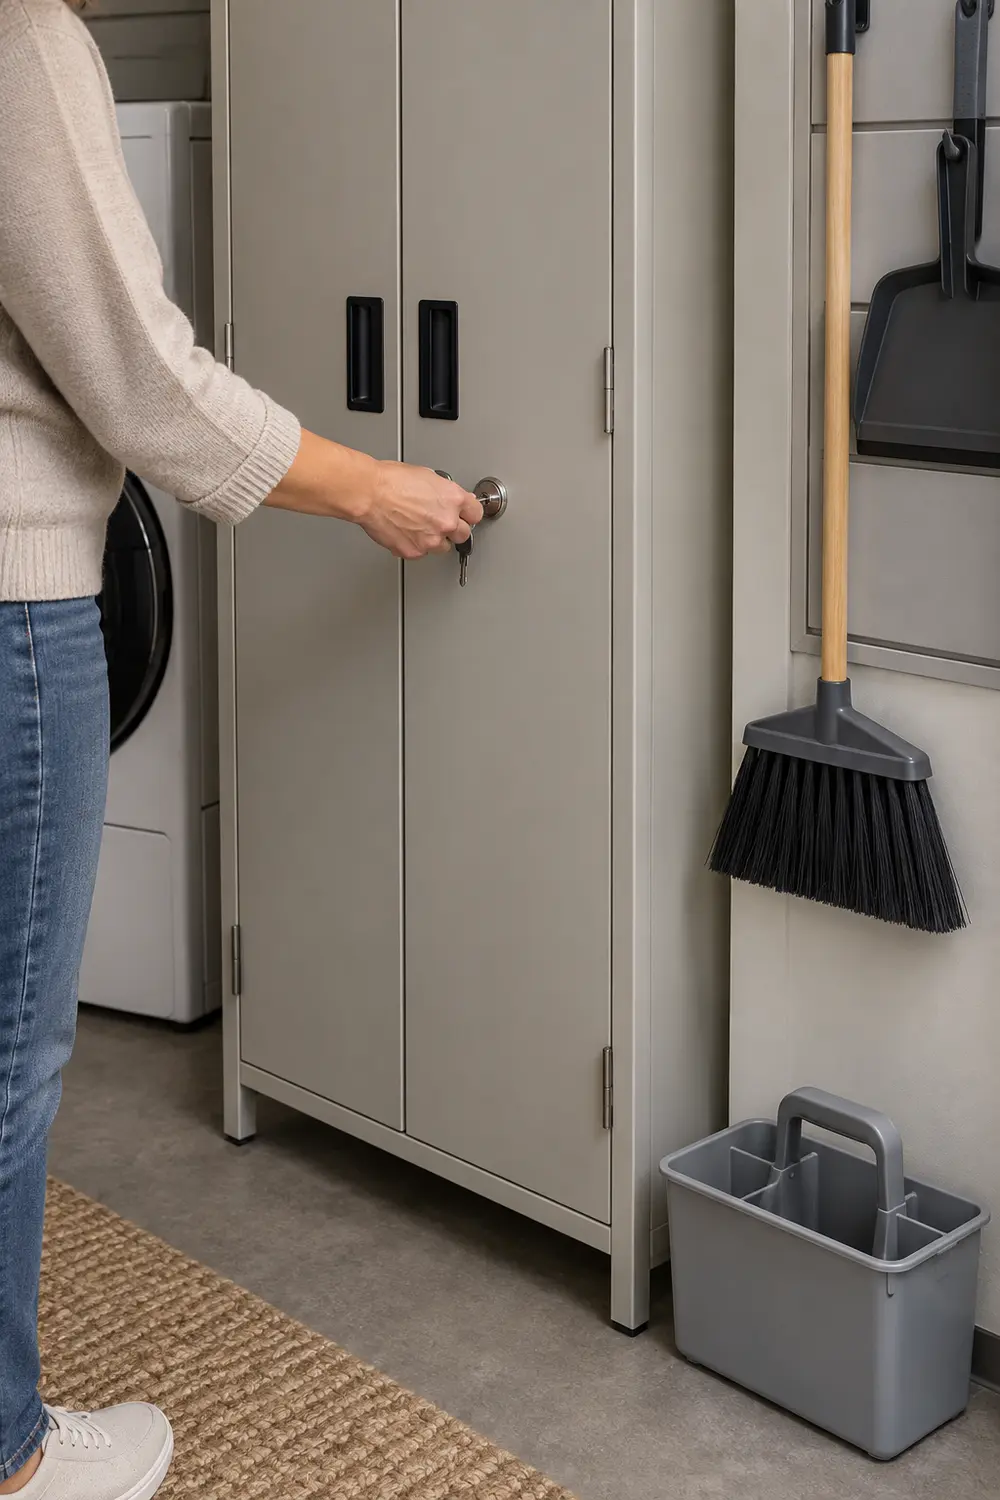
    Where children, pets, or visiting children could reach cleaning products, reserve appropriately secured storage rather than relying on a high shelf alone. A cabinet with a suitable locking mechanism can sit within the utility zone while dry tools remain outside it. Follow product storage labels and the cabinet manufacturer’s installation and anchoring directions; a lock does not address tipping or incompatible contents.

    An adult locks a utility cabinet while dry cleaning tools remain accessible on a separate panel.

    Check that the latch actually engages after each use, and keep keys or release devices inaccessible to children. Under-sink storage is not automatically suitable: plumbing leaks, reachable doors, and product temperature requirements may rule it out. If your small home lacks an appropriate location, reduce the products you keep rather than treating an open basket, curtain, or elevated caddy as a safety barrier.

    Start by measuring your largest tool and testing one possible parking spot. Solve its access first, then add attachment storage and a drying routine. Buy mounts or containers only after that trial; anything hazardous needs appropriate secured storage from the outset.

  • Air-Drying Laundry in a Small Home Without Dampening Everything Else

    Air-Drying Laundry in a Small Home Without Dampening Everything Else

    The washer finishes, but yesterday’s towels still occupy the rack. You drape a shirt over a chair, squeeze socks between damp sleeves, and wonder why the room feels clammy by dinner. Without an outdoor line or laundry room, drying needs its own plan—not just somewhere to put wet clothes. These ten changes address the bottleneck from both ends: how much water and laundry enter the room, and how comfortably that room can handle them.

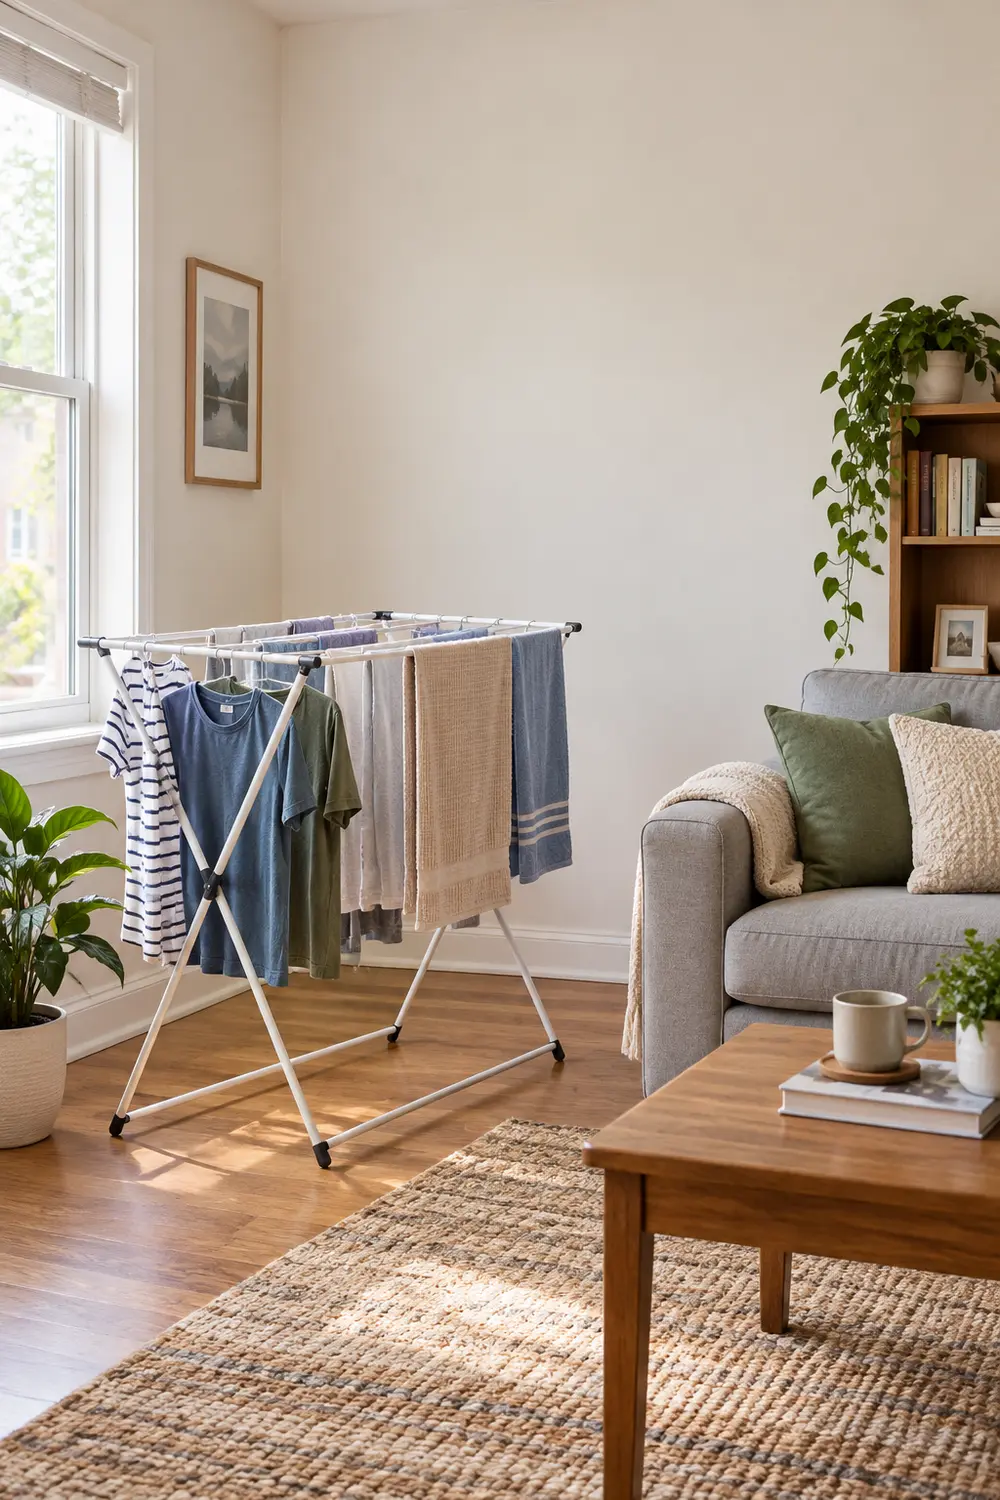
    A lightly loaded drying rack beside a sofa leaves a clear walkway beneath the headline “Room to Dry.”

    1. Size the wash to the space available for drying

    Treat your drying rack, not the washer drum, as the load-size limit. Before starting a cycle, check how many usable bars or hanger positions are actually free. A washer may accommodate sheets, towels, and everyday clothing together, while your apartment can comfortably dry only one of those groups at a time.

    Separate bulky items across laundry days: towels today, bedding after the rack clears. This means more scheduling and potentially more cycles, so use appropriate load settings and avoid running tiny loads unnecessarily. If a large blanket has nowhere to open out, an occasional laundromat dryer—when its care label permits—may be more practical than occupying every chair overnight.

    2. Choose a rack by its open footprint

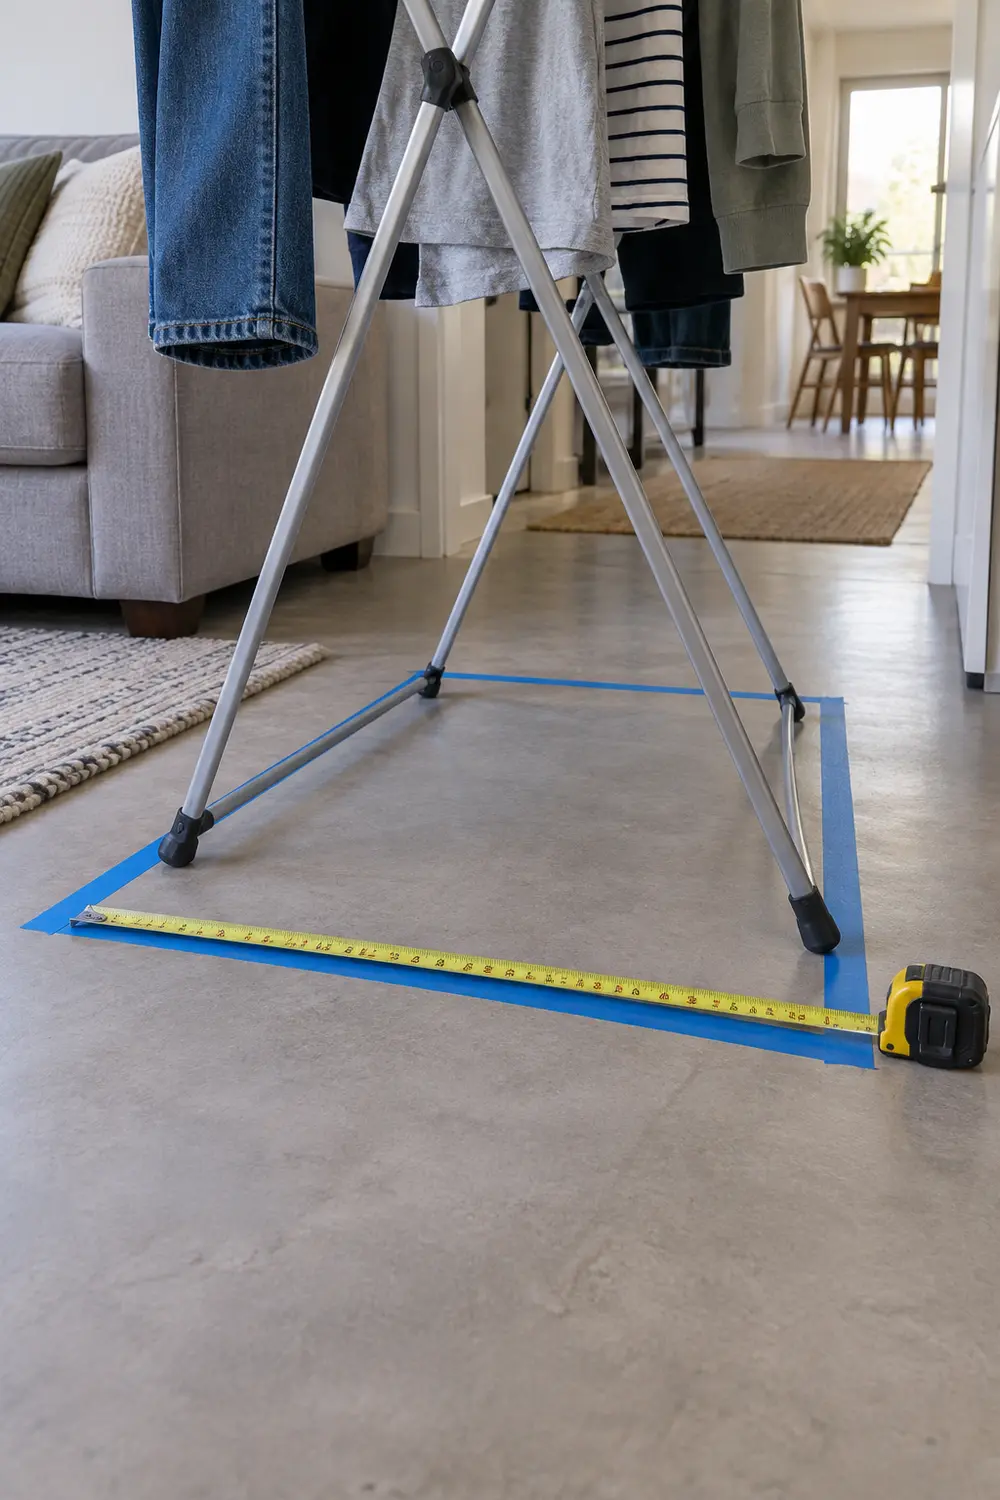
    Measure the rack fully open, including its feet and wings, rather than judging it by folded size or advertised drying length. Mark its approximate footprint with painter’s tape if your flooring permits. A rack roughly 24 inches deep and 48 inches wide may fit on paper but still block the route between the sofa and kitchen once sleeves hang over its edges.

    Painter’s tape outlines an open rack’s footprint beside a sofa, showing the walking space left around its feet.

    Check door swings, access routes, and space to walk around the loaded rack; these are planning checks, not universal clearance rules. A tall tower can save floor area but needs careful loading for stability. For a multipurpose room, the same route-first thinking used in planning a small living room for everyday activities helps you choose a drying spot that remains usable.

    3. Remove more water before clothes reach the rack

    When the fabric care label and washer instructions allow it, choose a higher spin setting or an additional spin-only cycle. Less retained water means less moisture has to evaporate into your home. This is especially useful for sturdy cotton items that emerge heavy and wet, but it is not permission to use the fastest setting on every garment.

    For a delicate washable item that cannot take vigorous spinning, lay it on a clean, dry towel, roll gently, and press without twisting, provided its care directions allow this handling. The towel absorbs water but becomes another damp item to manage. Avoid wringing sweaters or forcing an unbalanced washer load through repeated spins; redistribute the load and follow the machine’s instructions.

    4. Give each garment breathing room

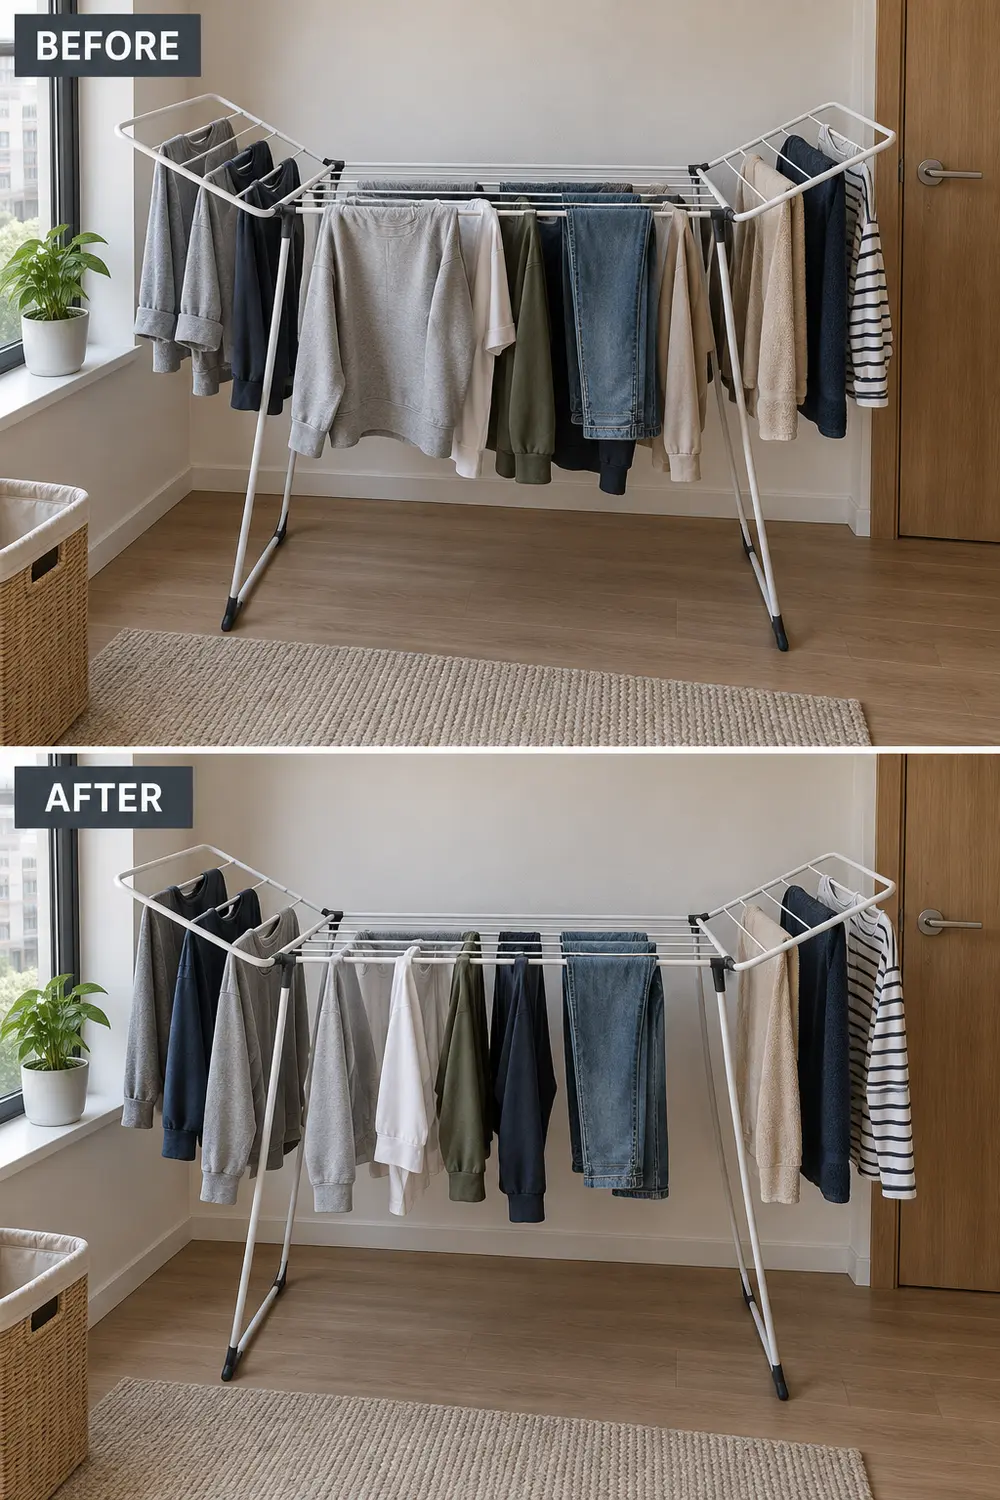
    Load the rack so wet surfaces do not press against one another. Use alternating bars for bulky pieces, unfold cuffs, and open bunched waistbands. A few inches between hanging items is a useful starting point, not a fixed requirement: thick sweatpants need more room than thin dish towels. Look along the rack from the side to spot hidden overlaps.

    Before-and-after panels show bunched laundry redistributed on the same rack so sleeves and thick garments no longer touch.

    Put smaller pieces on unused outer bars without filling every gap between larger garments. Socks may physically fit beneath a wet sweatshirt, but that does not make it a good drying position. If spacing the load properly leaves a pile in the basket, the answer is a smaller next wash—not increasingly elaborate layers on the same rack.

    5. Hang shirts where their shape and access both work

    For shirts whose care labels permit hanging, use sturdy hangers that support the shoulders without stretching them. Smooth the placket, straighten the collar, and separate the sleeves from the body. Hang them from a rack’s designated rail with space between hangers; packing six wet shirts shoulder to shoulder recreates a crowded closet rather than a useful drying arrangement.

    Keep damp hems away from walls, upholstery, and finished wood. Do not improvise with sprinkler pipes, light fixtures, curtain rods, or an unverified tension rod. An over-door rail also needs a suitable door, adequate load capacity, and unobstructed operation. Hangers can reduce creasing, but heavy, stretchy garments may distort under their own wet weight and need flat support instead.

    6. Support knits flat without soaking the furniture

    When a sweater’s label says to dry flat, support its whole shape rather than folding it over a narrow rack bar. A mesh drying shelf on a stable frame lets you arrange the shoulders and sleeves without leaving them dangling. Gently reshape the garment to its intended proportions; pulling it wider to cover the mesh defeats the purpose.

    A clean towel can provide flat support, but a saturated towel slows the process and should be replaced. Use it on a suitable moisture-resistant surface, not directly on a bed, upholstered seat, or wooden tabletop. Flat drying consumes valuable horizontal space, so plan sweater washing for a time when the support can remain undisturbed by meals, children, or pets.

    7. Watch the room’s moisture, not just the clothes

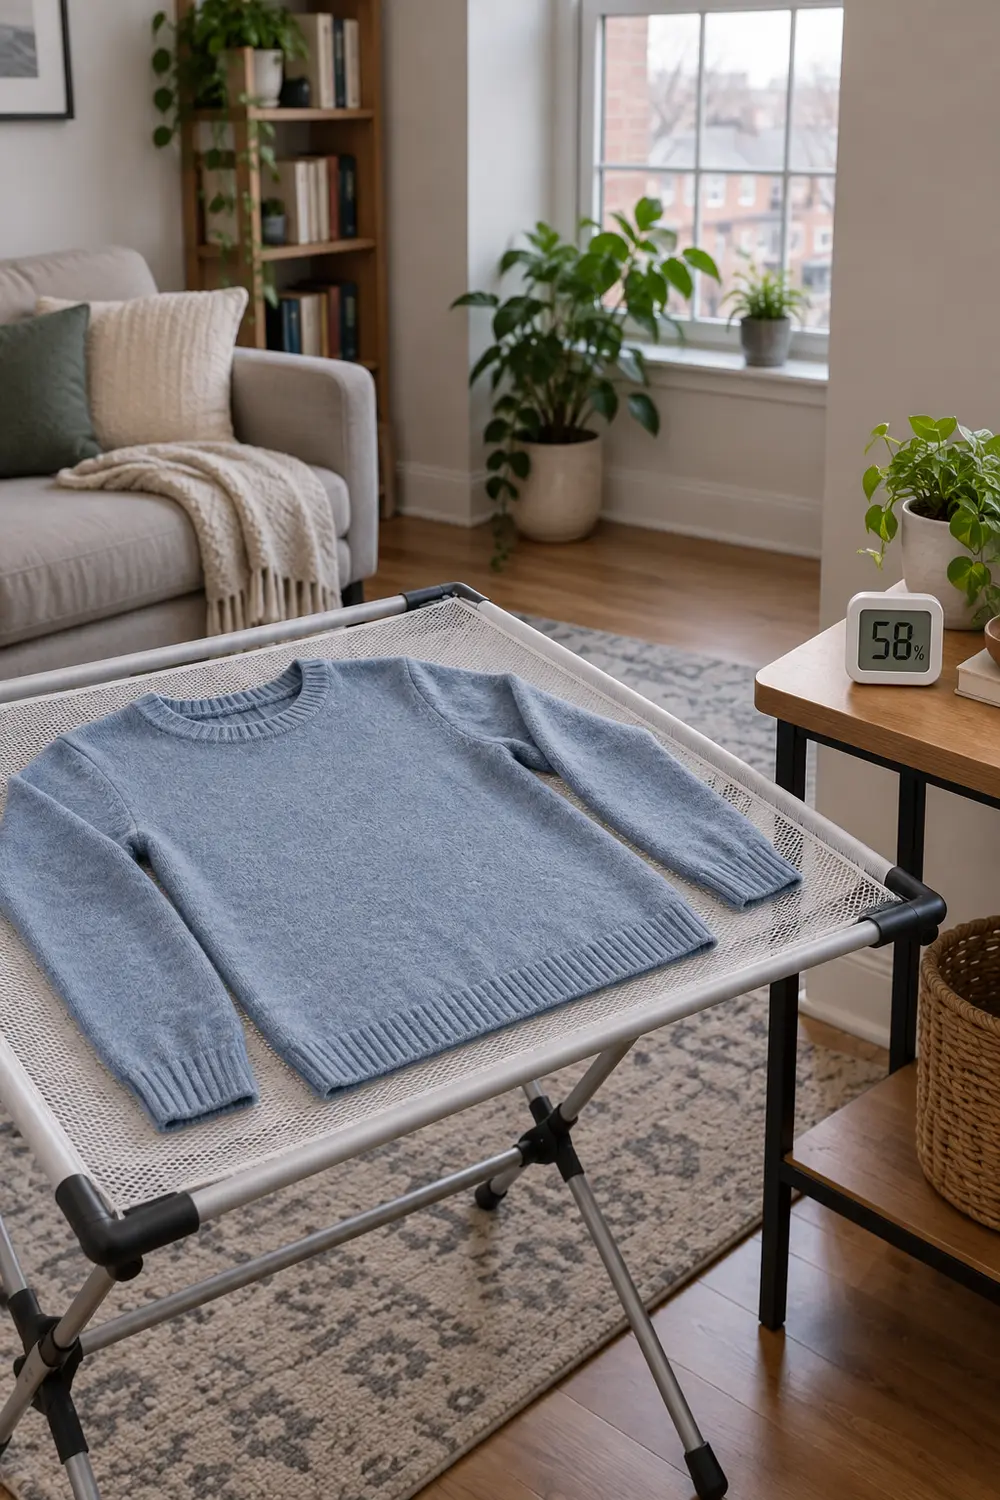
    Place a small hygrometer in the drying room, away from direct window drafts and the immediate outlet of a dehumidifier. Check the reading before hanging laundry and again while it dries. Beside a flat-drying sweater, for instance, it can help you notice whether a seemingly modest load keeps the room noticeably more humid than its usual baseline.

    A hygrometer on a dry side table monitors the room while a sweater dries fully supported on a mesh shelf.

    A single reading is less useful than a repeated pattern. Windows that remain misted, damp nearby surfaces, or moisture that lingers after the laundry is dry are reasons to change the setup. Do not assume one small device diagnoses a building problem. Persistent dampness beyond laundry days deserves investigation, including notifying the landlord when appropriate.

    8. Turn thick items and check the hidden wet spots

    Check towels, jeans, and sweatshirts partway through drying rather than leaving their original arrangement untouched. Turn a towel so the underside faces outward, reposition jeans to expose the waistband, and open a hoodie’s pocket bags where construction allows. Move folds off the same contact point on the bar so a damp stripe does not stay trapped underneath.

    Use a routine you already have—finishing dinner or starting your morning coffee—as the reminder. Before putting anything away, feel seams, pockets, waistbands, and the middle of folded areas, not just the exposed surface. This takes a little handling, and it will not rescue an overloaded rack or a damp room, but it prevents apparently dry clothes from carrying wet patches into drawers.

    9. Give evaporated moisture a way out

    Choose ventilation or dehumidification to suit the conditions. An open window can help when outdoor air is drier, but muggy weather may offer little benefit. A bathroom exhaust fan that vents outdoors may be useful if laundry can stand safely without blocking bathroom use; follow its operating instructions. A circulating fan moves air around garments, but it does not remove water from the home.

    If using a dehumidifier, follow its room-size, operating-temperature, placement, and drainage instructions, and keep its intake and outlet clear. Never drape laundry over it, a heater, or another appliance. Observe manufacturer-specified heater clearances rather than treating warmth as a drying shortcut. Dehumidifiers add noise, heat, and electricity use, so they are a practical tradeoff—not a reason to keep overloading the room.

    10. Make putting the equipment away part of laundry day

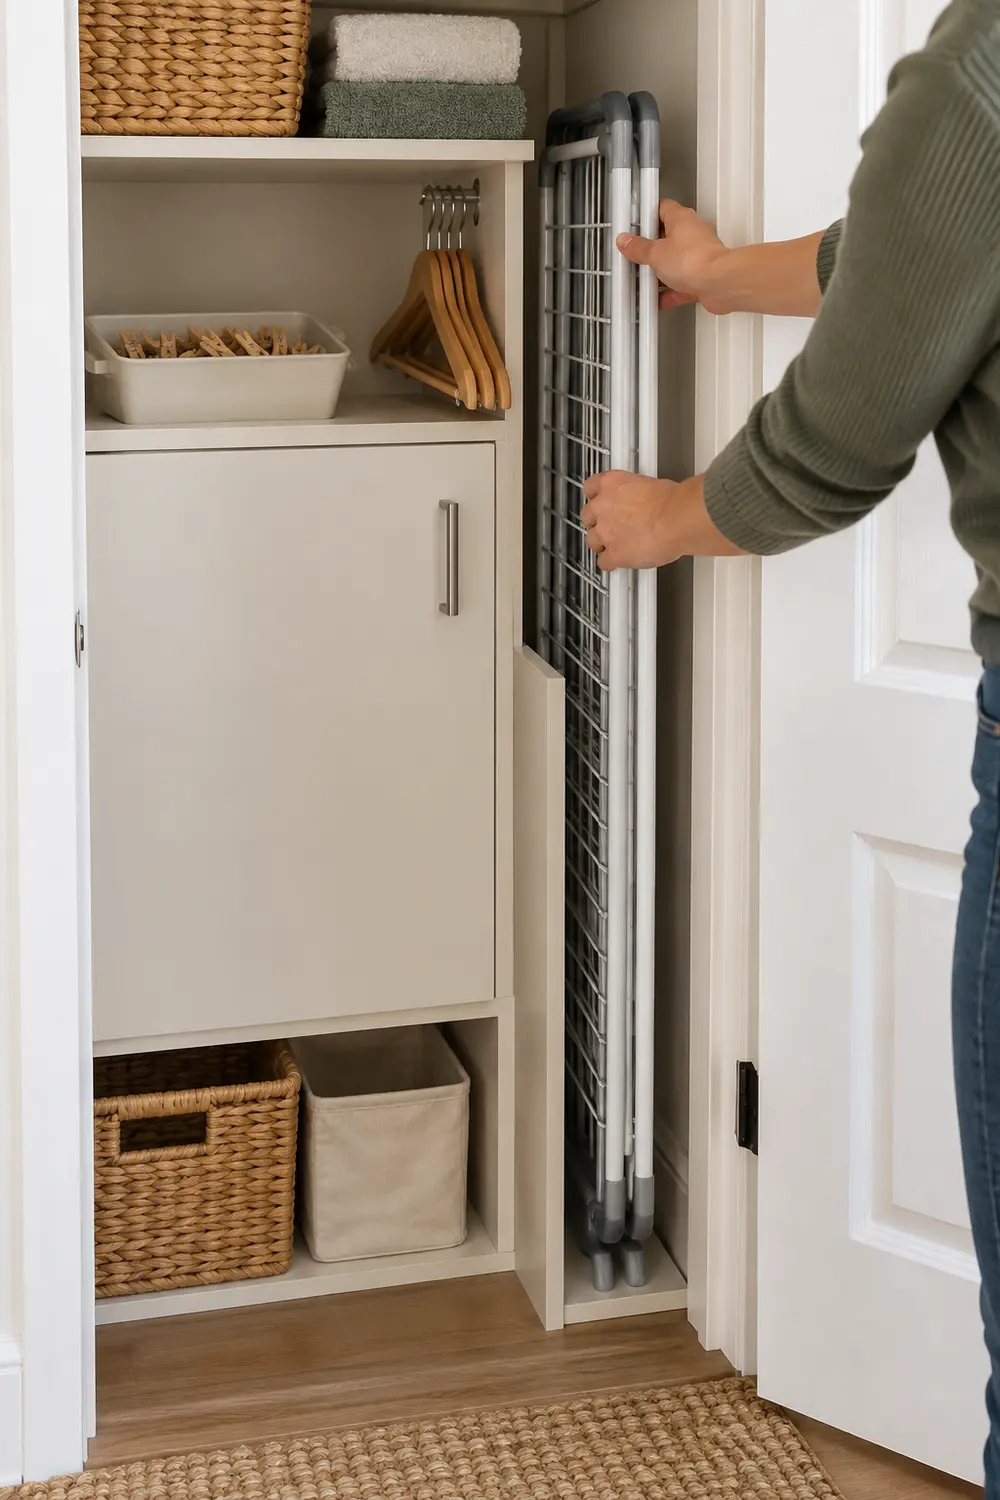
    Give the folded rack a specific home before buying it: a measured closet slot, a utility cupboard, or a dry space beside a cabinet. Check its folded height and thickness, including hinges and feet. Keep clips and spare hangers together in a small container so clearing the living room does not become a second organizing project.

    A dry folding rack slides into a dedicated closet slot beside a bin of clips and spare hangers.

    Once clothes are completely dry, put them away and let any damp rack surfaces dry before folding the equipment. Store it so it cannot fall into a walkway or become a climbing temptation. If the proposed storage spot traps a closet door, these small-bedroom clearance fixes offer a useful way to reassess the approach space rather than accepting a daily obstruction.

    Before your next wash, open the rack and decide what can fit with space between pieces. Start with that load size, then check how the room responds. Better extraction, a different arrangement, or moisture removal should solve a specific remaining problem—not compensate for a rack that was already full.

  • Shoes and Bags Blocking the Door? 10 Fixes for a Tiny Entry

    Shoes and Bags Blocking the Door? 10 Fixes for a Tiny Entry

    A tiny entry gets overwhelmed quickly: two pairs of shoes become six, a backpack lands behind the door, and muddy boots claim the walking path. The answer is not necessarily more furniture. It is giving everyday items a limited, convenient place while protecting the route outside. These ten fixes work with different layouts and budgets; choose the ones that fit your household. Any dimensions mentioned are approximate planning guidelines, not code or accessibility standards. Measure your space, door movement, and belongings before buying.

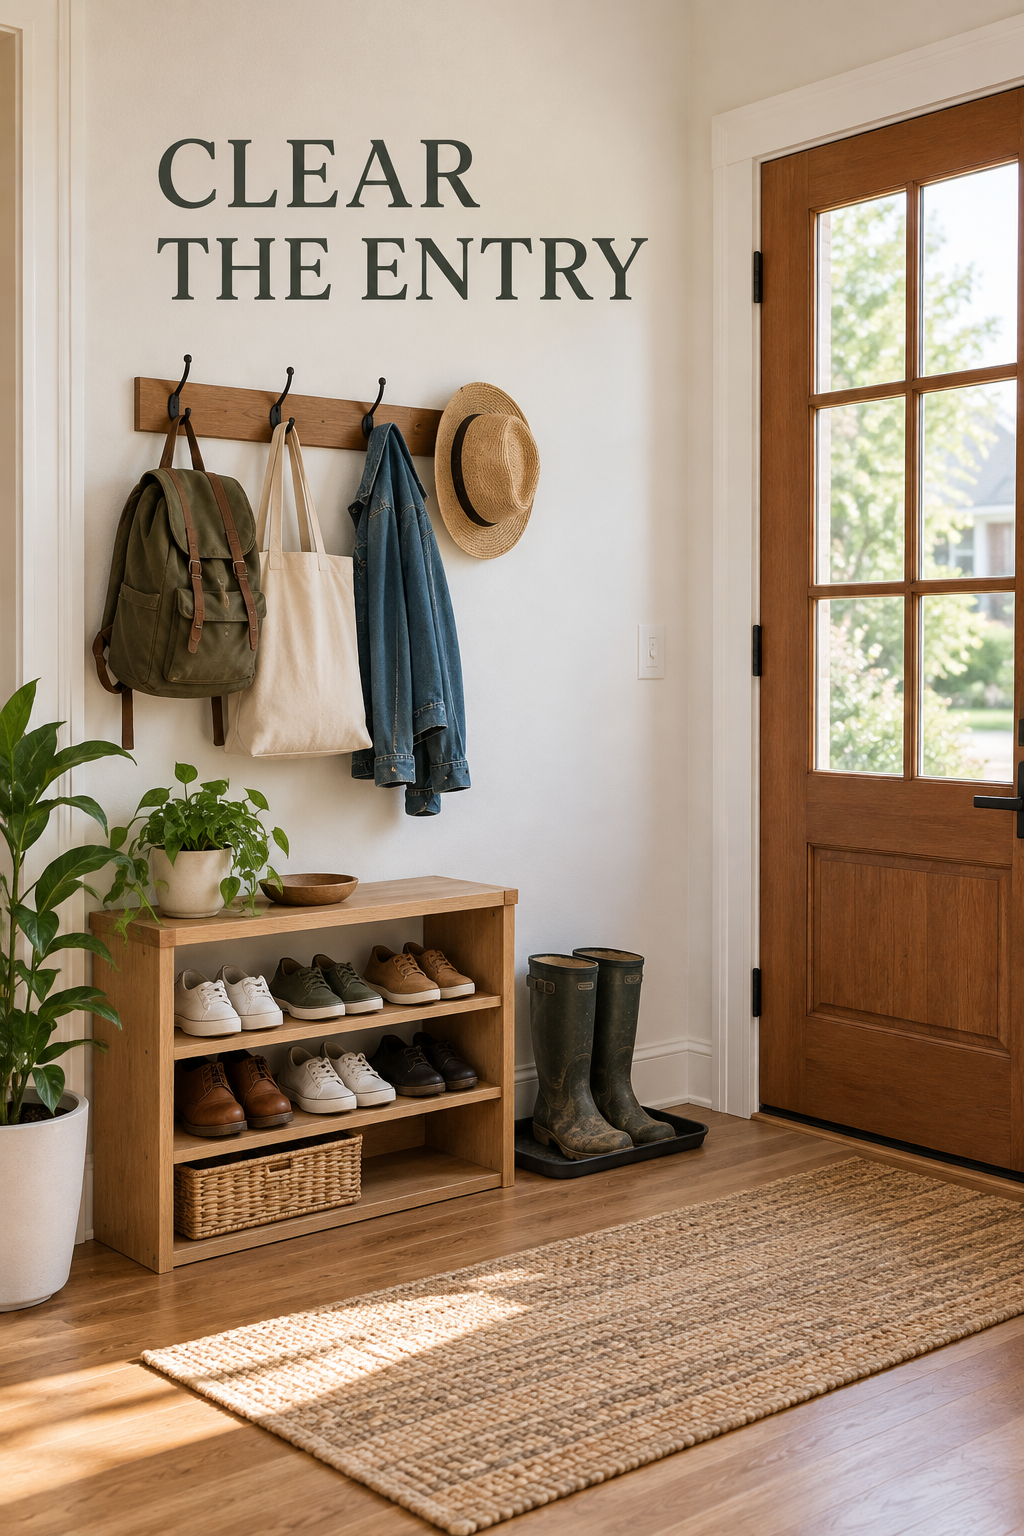
    Tiny entry with contained shoes, hanging bags, a clear doorway, and the headline CLEAR THE ENTRY.

    1. Give Everyday Shoes a Fixed Landing Spot

    Start with the shoes people actually remove at the door. Assign each person a small section of a low, open shoe rack positioned beyond the door swing. For a two-person household, that might mean four everyday pairs total, with toes facing the same direction. Choose a rack that fits your largest shoes completely so heels do not project into the walking route.

    The common mistake is buying a rack for every shoe you own rather than the available footprint. Deep sneakers and large boots can overhang shallow shelves, while stacked tiers may be awkward for someone who cannot bend easily. Skip this approach if even a small floor rack narrows the usable route; a nearby closet may be the better landing spot.

    2. Rotate Backup Shoes Out of the Entry

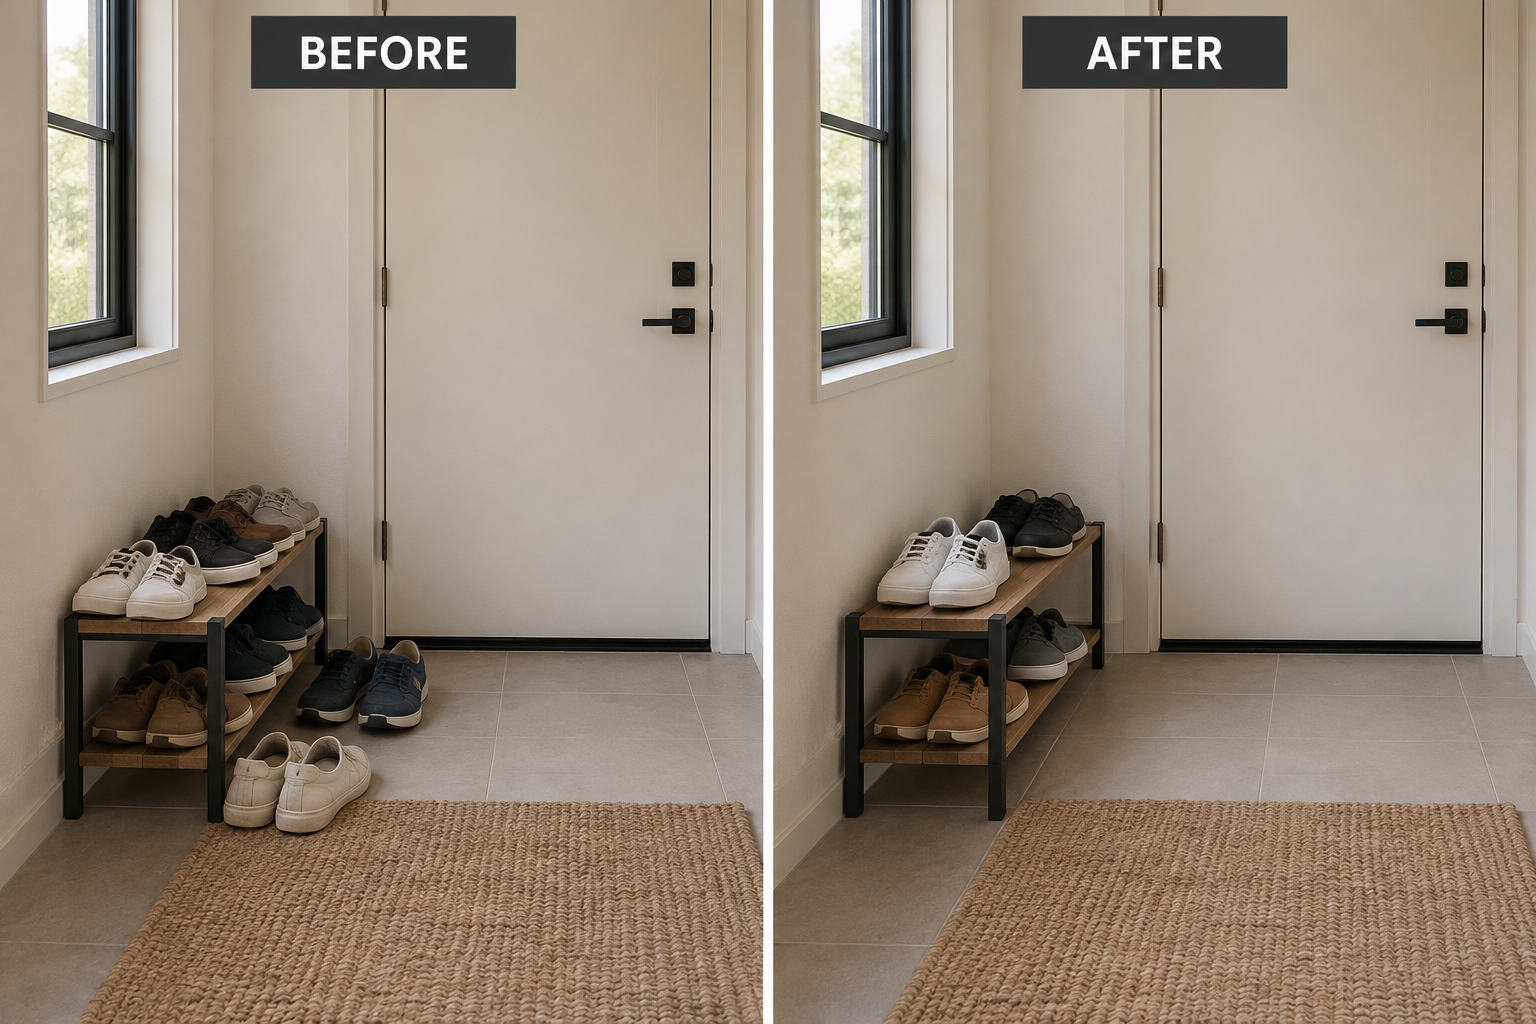
    Keep the entry rack for current-use footwear and move occasional pairs to an existing bedroom or hall closet. Set a simple swap routine: when rain boots come forward, little-used dress shoes go back. In a narrow entry with a two-tier rack, reducing eight pairs to four can eliminate the floor pile without changing the furniture or pretending the room is larger.

    Before and after comparison shows fewer shoes clearing the floor around the same entry rack.

    Do not move the overflow into a distant, packed closet where retrieving a pair becomes a project. Rotation works only when backup storage is accessible and someone maintains the limit. Households with changing work shifts, sports, or mobility needs may need more active pairs. Make the allowance realistic rather than enforcing a tidy arrangement that gets abandoned by Tuesday.

    3. Use a Shallow Shoe Cabinet Where Doors Can Open

    A shallow, enclosed shoe cabinet can contain visual clutter along an otherwise unused wall. Look at actual shoe capacity rather than the product’s pair count; bulky sneakers may occupy an entire compartment. A cabinet around 8 to 12 inches deep might suit some entries, but measure its closed depth, open compartment projection, baseboard clearance, and your shoes before committing.

    A slim profile does not make a cabinet automatically safe or suitable. Follow the manufacturer’s anchoring instructions, and obtain rental permission before drilling. Check for concealed utilities and choose fasteners appropriate to the wall. Avoid placing it where an open compartment blocks the exit, or where required access to an electrical panel, heater, vent, or other equipment would be compromised.

    4. Hang Daily Bags on a Deliberate Hook Rail

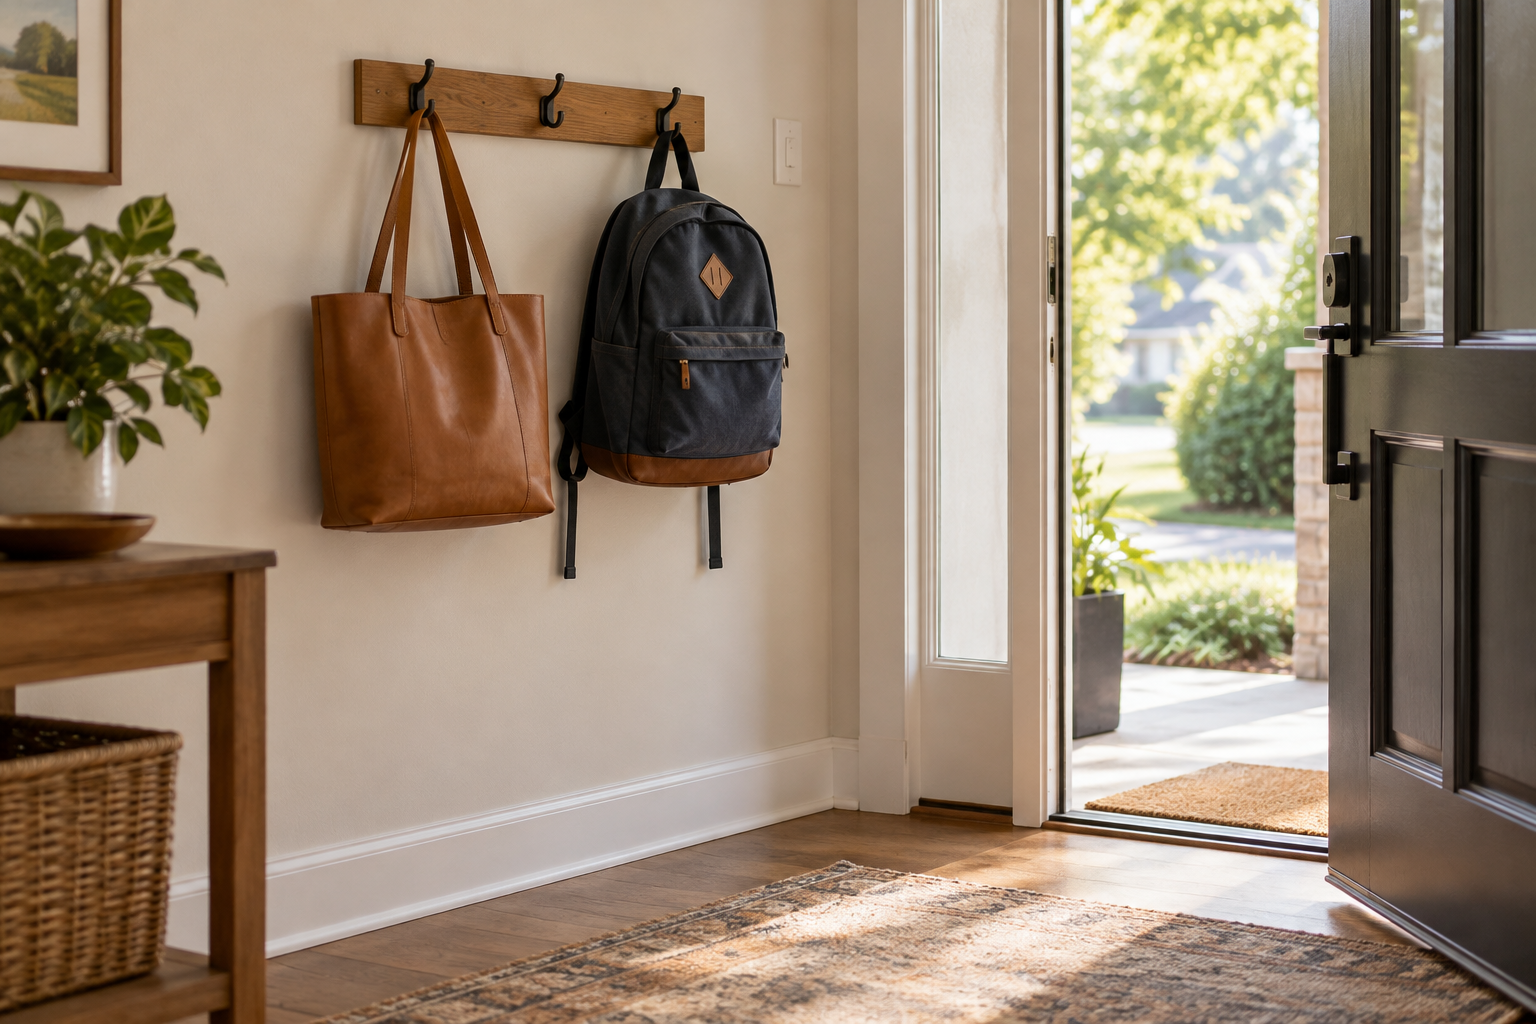
    Put everyday bags on individual hooks instead of piling them on a doorknob. Position a short rail on a side wall where loaded bags will hang outside the walking route. Test the arrangement with your fullest backpack before installation. For example, two spaced hooks can hold a work tote and school backpack without their straps tangling or either bag resting on shoes.

    A work tote and backpack hang separately on a side-wall rail outside the entry path.

    Closely packed hooks often create one large bulge rather than useful storage. Account for bag depth, not just rail length, and keep straps from dangling where feet can catch them. Use hardware rated for the loaded bags and the wall construction. Adhesive hooks may suit very light items if permitted, but they are a poor gamble for heavy daily backpacks.

    5. Choose a Shoe Bench Only If Sitting Helps

    When someone needs to sit while changing shoes, a narrow bench with open storage underneath can earn its footprint. Reserve one cubby per person and keep the seat empty. In a small recessed entry, a roughly 30-inch-wide bench might provide a useful perch and hold two shoe baskets below. Check the actual seat height, stability, and space needed for knees and standing.

    A bench becomes wasted space when bags permanently occupy the seat. It also needs more room in use than its measurements suggest, especially for someone who uses a mobility aid or needs assistance. Do not squeeze one into a passage simply because it fits against the wall. If sitting is unnecessary, a smaller shoe solution usually preserves more usable floor.

    6. File Spare Bags Upright on a Closet Shelf

    Separate the bag you carry today from the bags you occasionally choose. Use removable shelf dividers to stand spare totes and purses upright in a nearby closet, with handles tucked inside their own compartments. One shelf can hold a small selection without the unstable stack that tumbles down whenever you pull out a bag. Support soft bags lightly to maintain their shape.

    Dividers cannot rescue an overfilled shelf, and compressing leather or structured bags can distort them. Measure both shelf depth and overhead clearance before choosing organizers. This works best for dry, occasional bags within comfortable reach; it is unsuitable for damp gym bags or heavy backpacks stored overhead. Keep frequently carried items lower so retrieving them does not require stretching or climbing.

    7. Turn the Boot Tray Along the Wall

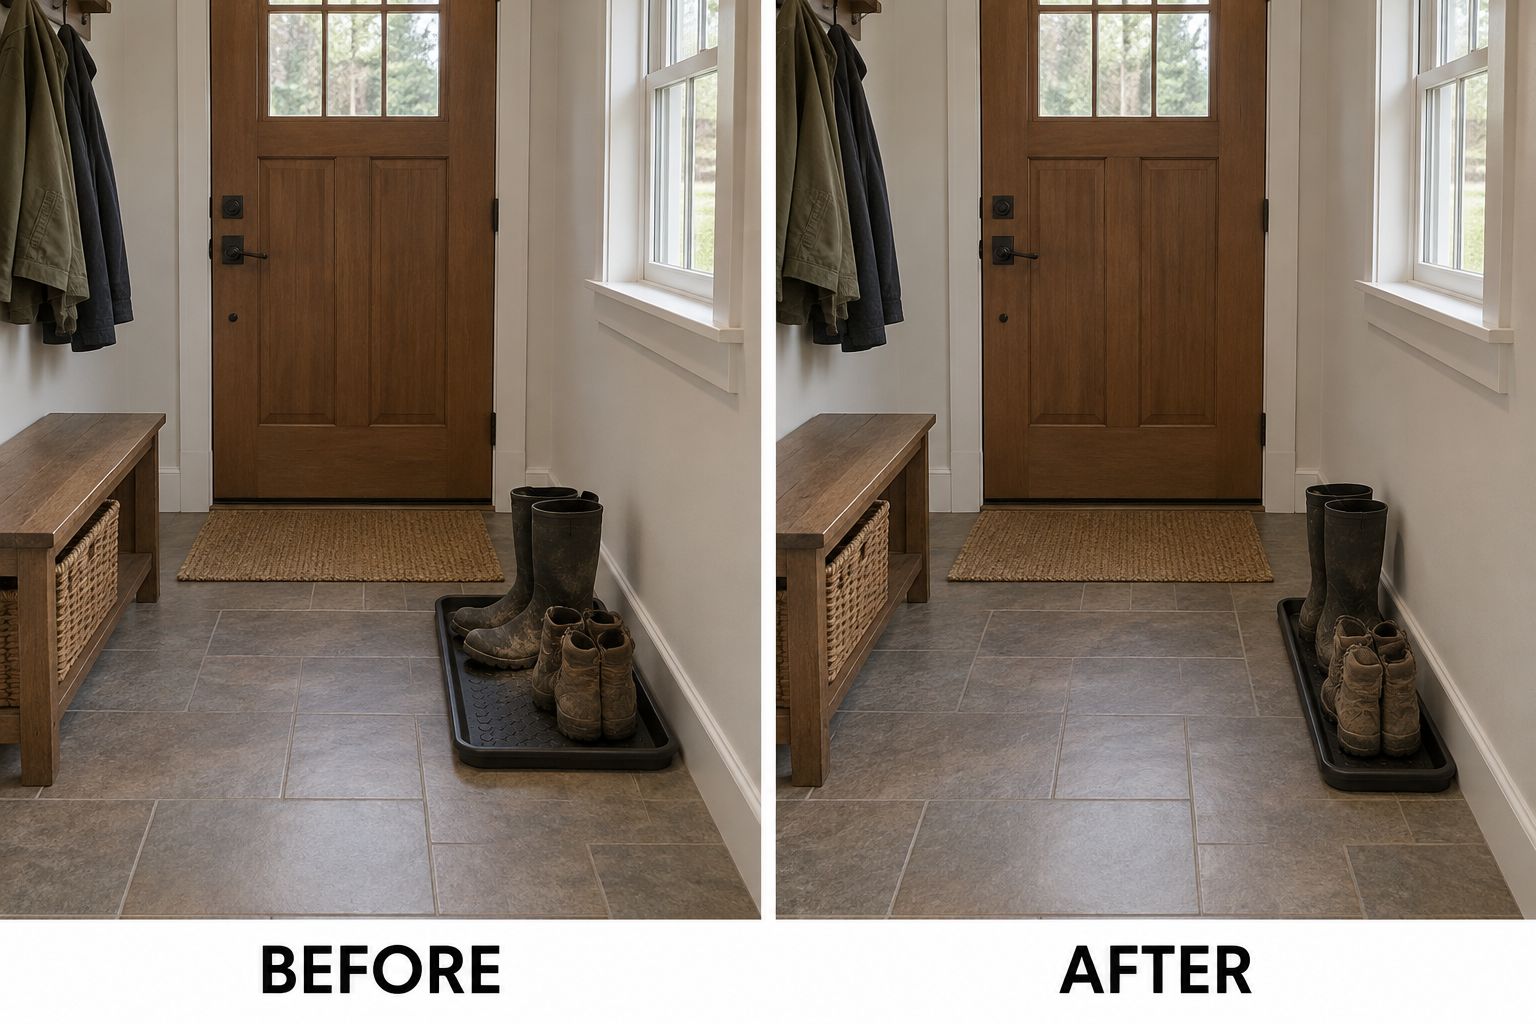
    Sometimes the existing boot tray is useful but facing the wrong way. If the wall length allows, rotate a rectangular tray so its long edge runs along the wall rather than projecting into the entry. A roughly 30-by-16-inch tray then projects about 16 inches instead of 30. Park muddy boots inside its rim, beyond the door swing, and check the remaining route in person.

    Before and after comparison shows the same boot tray rotated along the wall to reduce its projection.

    Do not assume every tray can turn successfully: nearby trim, a closet opening, or a floor register may prevent it. A tray also needs regular emptying and cleaning; standing water and grit can damage surrounding flooring. Choose a stable, low-profile rim and let footwear dry. If no orientation leaves a safe route, relocate wet-shoe parking rather than accepting a permanent obstacle.

    8. Use the Inside of a Closet Door for Lightweight Footwear

    A pocket organizer inside a nearby closet door can hold flats, slippers, and small children’s shoes without adding another floor unit. Assign lower pockets to items children can manage independently and keep heavier footwear elsewhere. Before loading it, open and close the door fully to confirm that the organizer clears shelves, hanging clothes, trim, and anything stored behind the door.

    Over-door brackets can scrape paint, interfere with latching, or strain a door when overloaded. Confirm rental rules and hardware compatibility; do not modify a fire-rated door or interfere with its closing. This is not a good home for wet boots, heavy sneakers, or damp items trapped in poorly ventilated pockets. Avoid the front exit door and use a suitable interior closet instead.

    9. Park Heavy Backpacks in a Pull-Out Floor Bin

    For backpacks too heavy for convenient hanging, use a sturdy handled bin that slides completely beneath an existing console or closet shelf. Give each loaded bag an upright slot, with straps tucked inside the bin. A student can pull the bin forward to pack, then return it to its marked-by-fit home, leaving nothing projecting beyond the furniture into the entry.

    The weak point is a bin left halfway out after someone rushes away. Choose a manageable size, test it fully loaded, and avoid free-rolling containers that can drift into the path. Do not add a console just to create this solution in an already tight entry. For anyone who cannot comfortably pull or lift a loaded bin, accessible shelf storage may work better.

    10. Create One Outgoing Tote for Tomorrow’s Errands

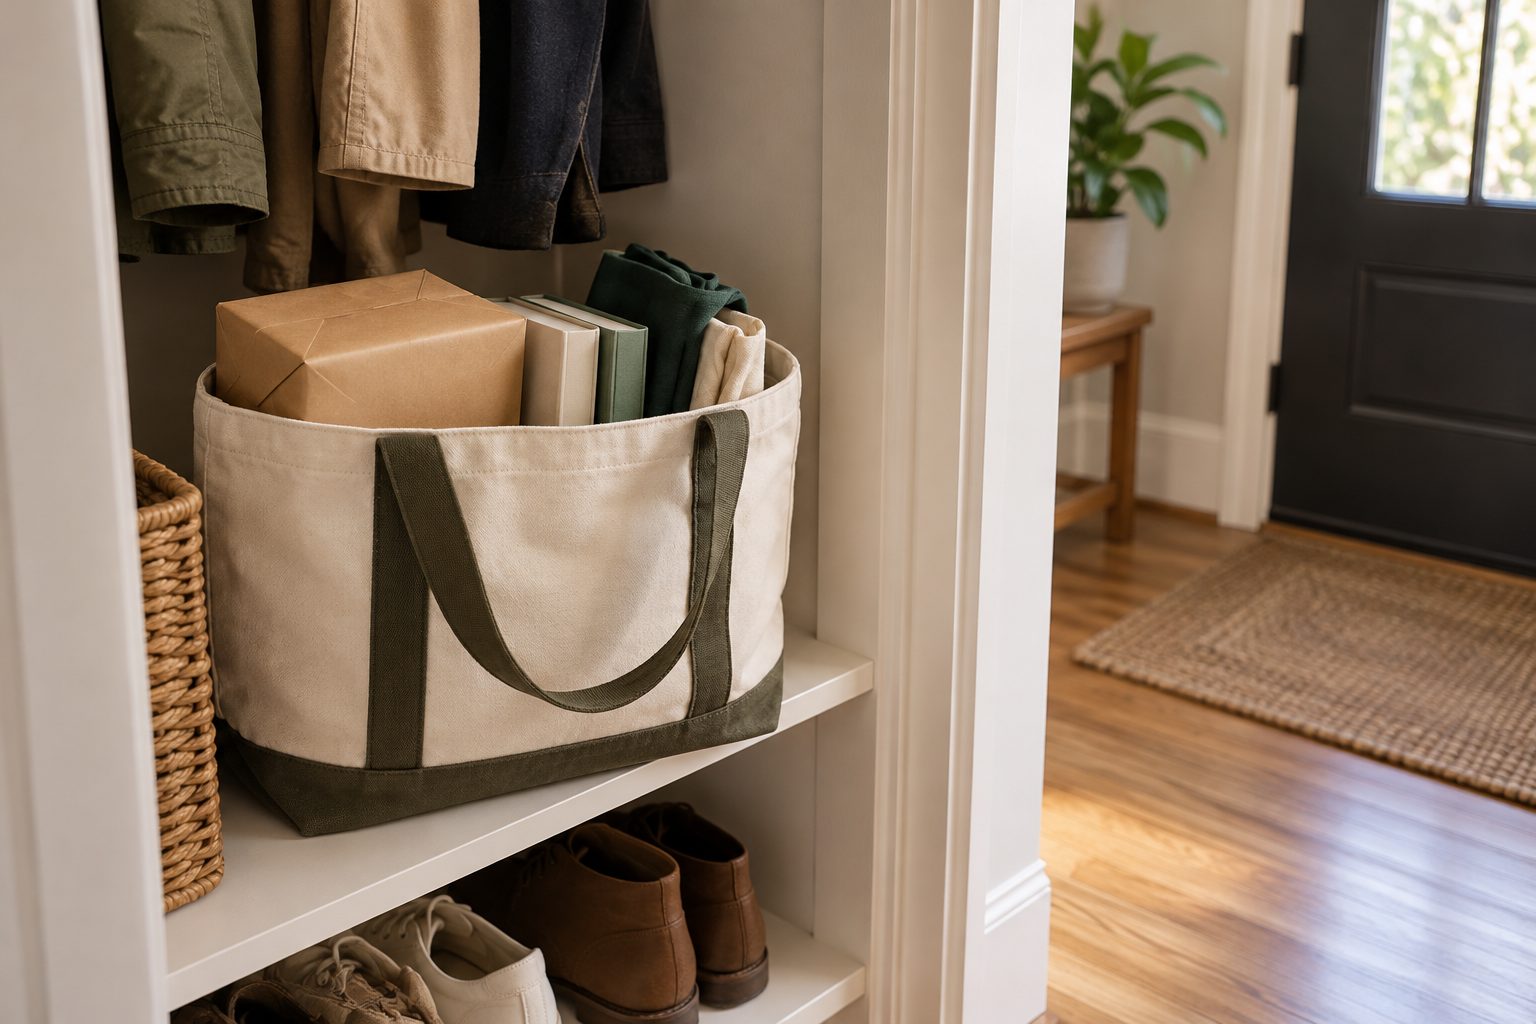
    Stop returns, library books, and reusable shopping bags from becoming separate piles beside the door. Keep one sturdy outgoing tote on a reachable shelf in the entry closet, and pack it during the evening reset. For example, place tomorrow’s return parcel inside with folded shopping bags. Move the tote into the departure routine, not onto the floor as a reminder.

    An outgoing tote on a closet shelf gathers a return parcel, books, and reusable shopping bags.

    An outgoing tote can become permanent storage if nothing actually leaves. Empty it after errands and review it during the next reset. Keep the load comfortable to carry, and store fragile, leaking, or unusually heavy items separately. This system is less useful when household members leave at different times for unrelated destinations; separate small departure bags may be clearer than one shared tote.

    A workable tiny entry gives daily shoes and bags a convenient home, contains muddy items, and leaves the exit route clear. Start with the obstruction you move most often, then test one fix through a normal week. Keep what your household actually uses, adjust what gets ignored, and let easy departures—not maximum storage capacity—be the measure of success.

  • An Overstuffed Linen Closet: 10 Ways to Make Towels and Bedding Easy to Find

    An Overstuffed Linen Closet: 10 Ways to Make Towels and Bedding Easy to Find

    A linen closet can hold plenty and still make a clean pillowcase surprisingly hard to find. The problem is often a mismatch between shelf depth, folded sizes, and what your household actually uses. Start with the closet you have, not a shopping list of organizers. These ten changes create clearer storage for towels and bedding without demanding matching linens or a larger home. All dimensions below are approximate planning guidelines; measure your shelves, door opening, and comfortable reach before making changes.

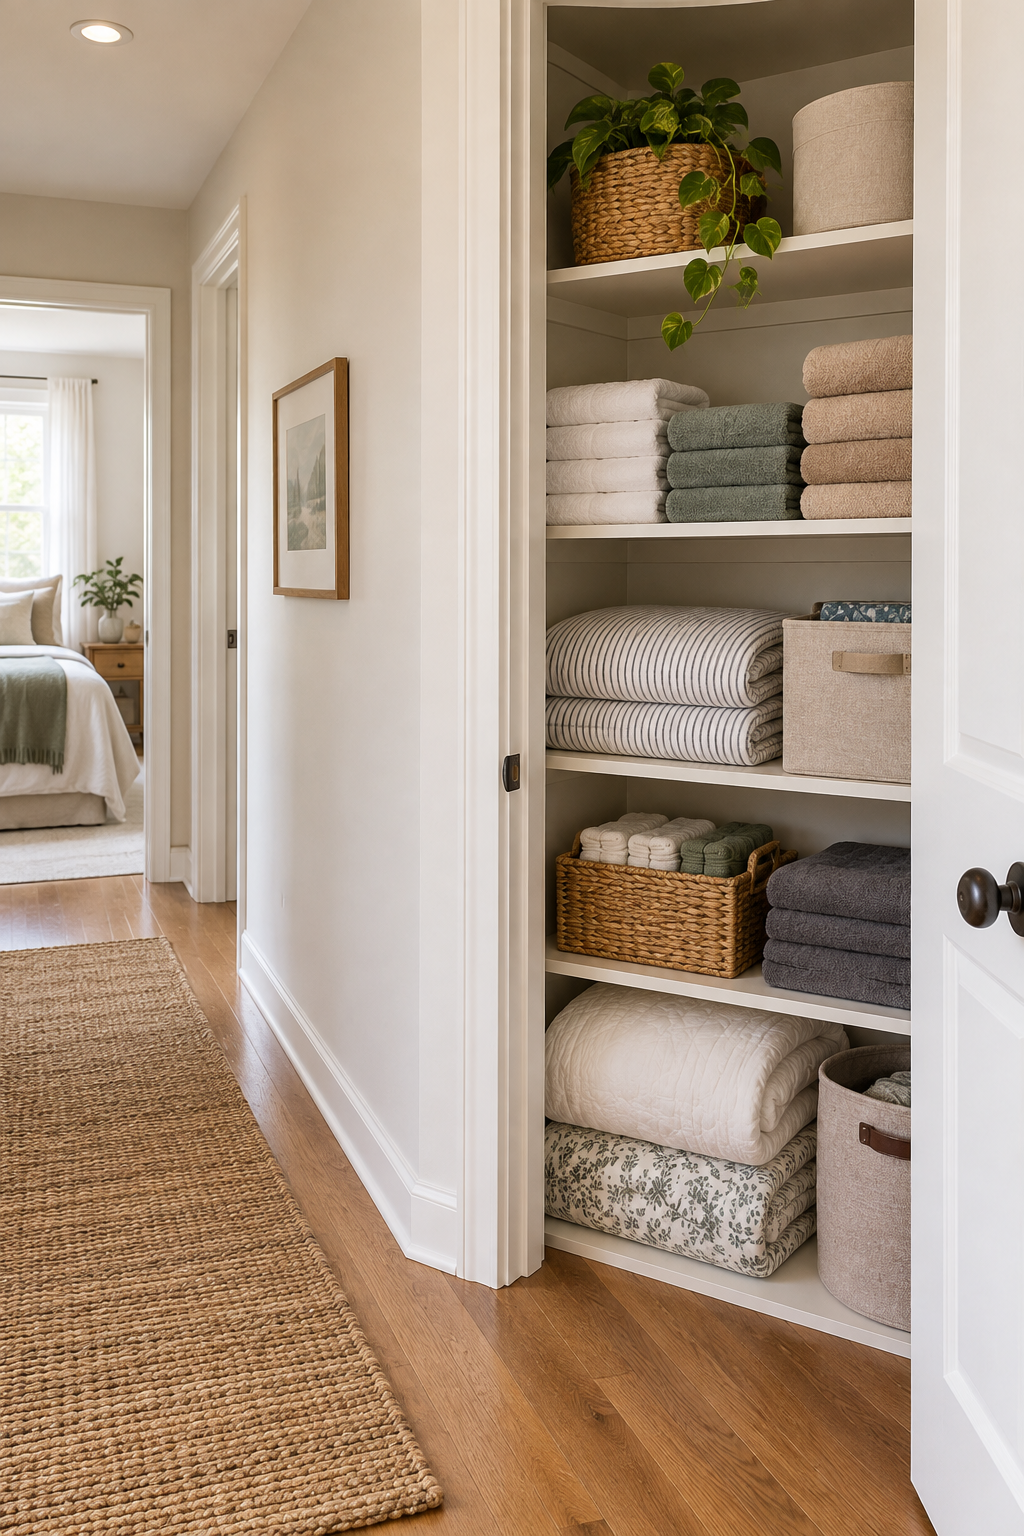
    Organized hallway linen closet with folded towels, bundled bedding, and open space between stacks.

    1. Set Inventory Limits Around Your Laundry Routine

    Empty one shelf at a time and count complete, usable linens by bed and person. Set a working limit that reflects laundry frequency rather than an idealized minimum. For example, a household that washes sheets weekly might keep one set on each bed and one clean replacement, then add extras for overnight guests, illness, or children who need frequent changes.

    The mistake is treating every extra as clutter or keeping everything for an undefined emergency. Keep a deliberate buffer where household needs justify it, and separate worn cleaning towels from bathing towels. Aggressive limits are unsuitable when laundry access is unreliable or care needs create frequent changes. The goal is a manageable inventory, not a closet that looks nearly empty.

    2. Turn Deep Shelves Into Pull-Forward Storage

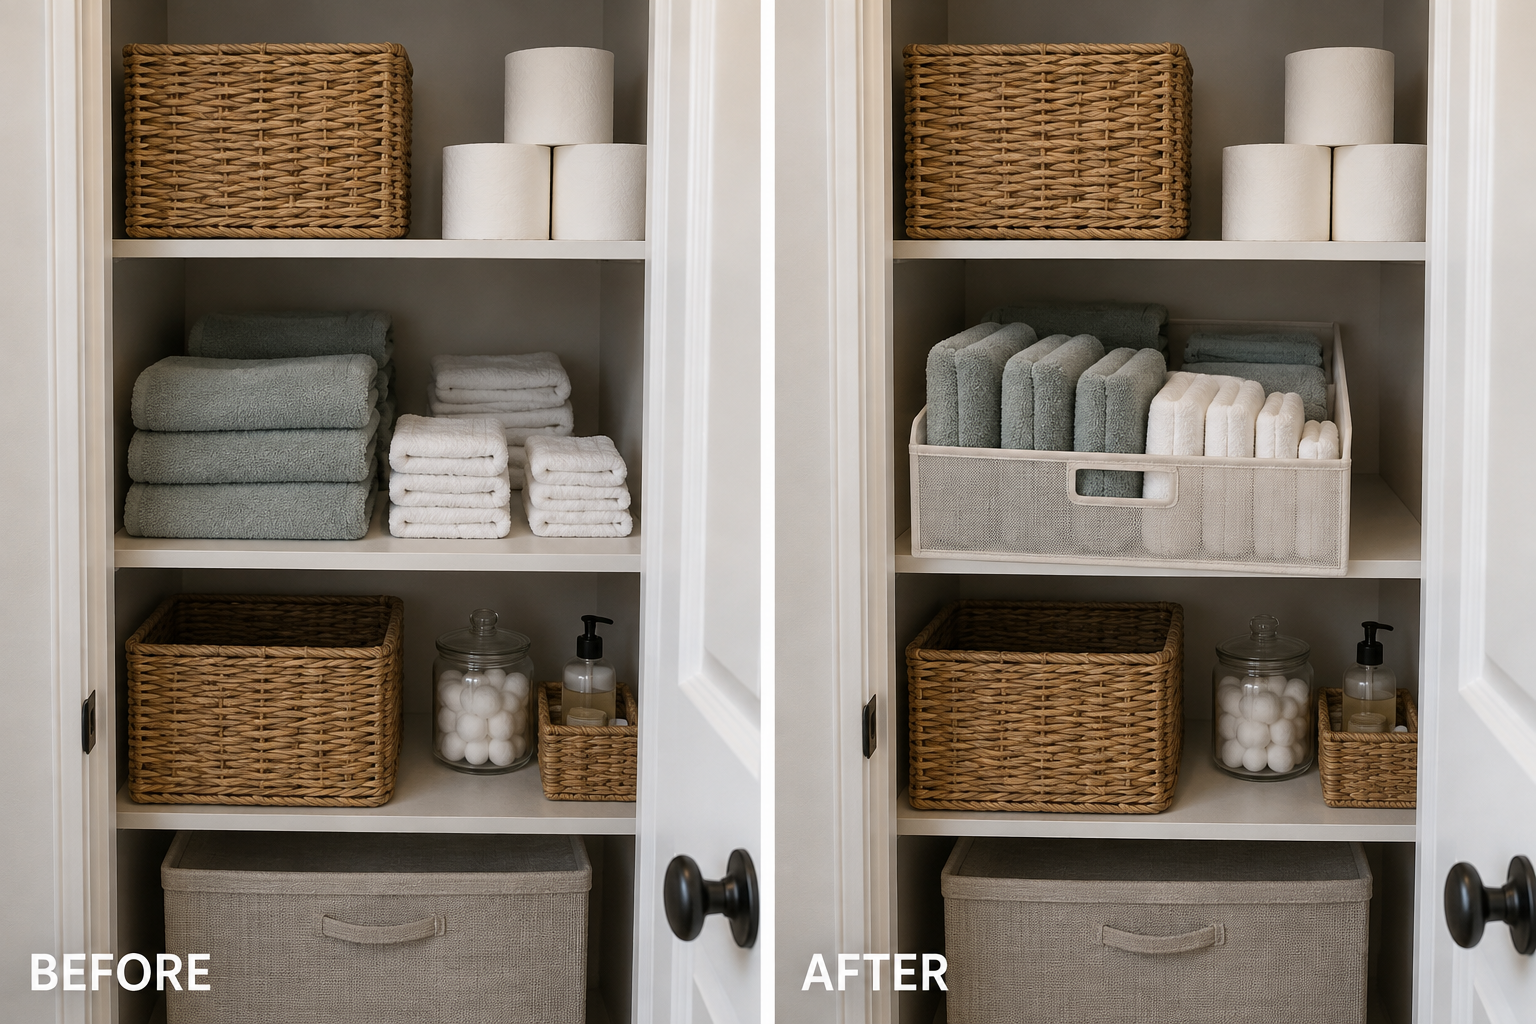
    Measure shelf depth and the usable door opening, including hinges. On a deep shelf, use a lightweight open bin that brings the back contents forward in one motion. A bin roughly 16–20 inches deep may suit some closets, but dimensions vary. For example, keep washcloths and hand towels upright in one removable bin instead of losing them behind bath towels.

    Before and after showing loose towels on a deep shelf organized in a pull-forward bin.

    Avoid buying containers based only on shelf width. A bin can fit inside yet catch on the door frame when pulled out. Full-depth containers also become awkward when packed with heavy bath sheets. Choose easy-grip sides and manageable loads; skip this approach where the opening is too narrow or pulling a loaded bin feels unstable.

    3. Fold to the Shelf Footprint

    Choose the finished fold by measuring the storage space, not by copying a universal towel fold. On a shelf about 12 inches deep, test a bath towel folded into thirds lengthwise and then into a compact rectangle. Adjust until it sits fully supported, with its folded edge visible. Use that towel as the template for the rest of the stack.

    Overly elaborate folds waste time if nobody repeats them after laundry day. Thick towels may need a different fold from thin ones, and rolling can create unstable pyramids on open shelves. Favor a simple, repeatable shape over perfect uniformity. If a fold requires compression to fit, reduce the stack or choose another shelf rather than forcing the door closed.

    4. Give Everyday Linens Your Easiest Reach

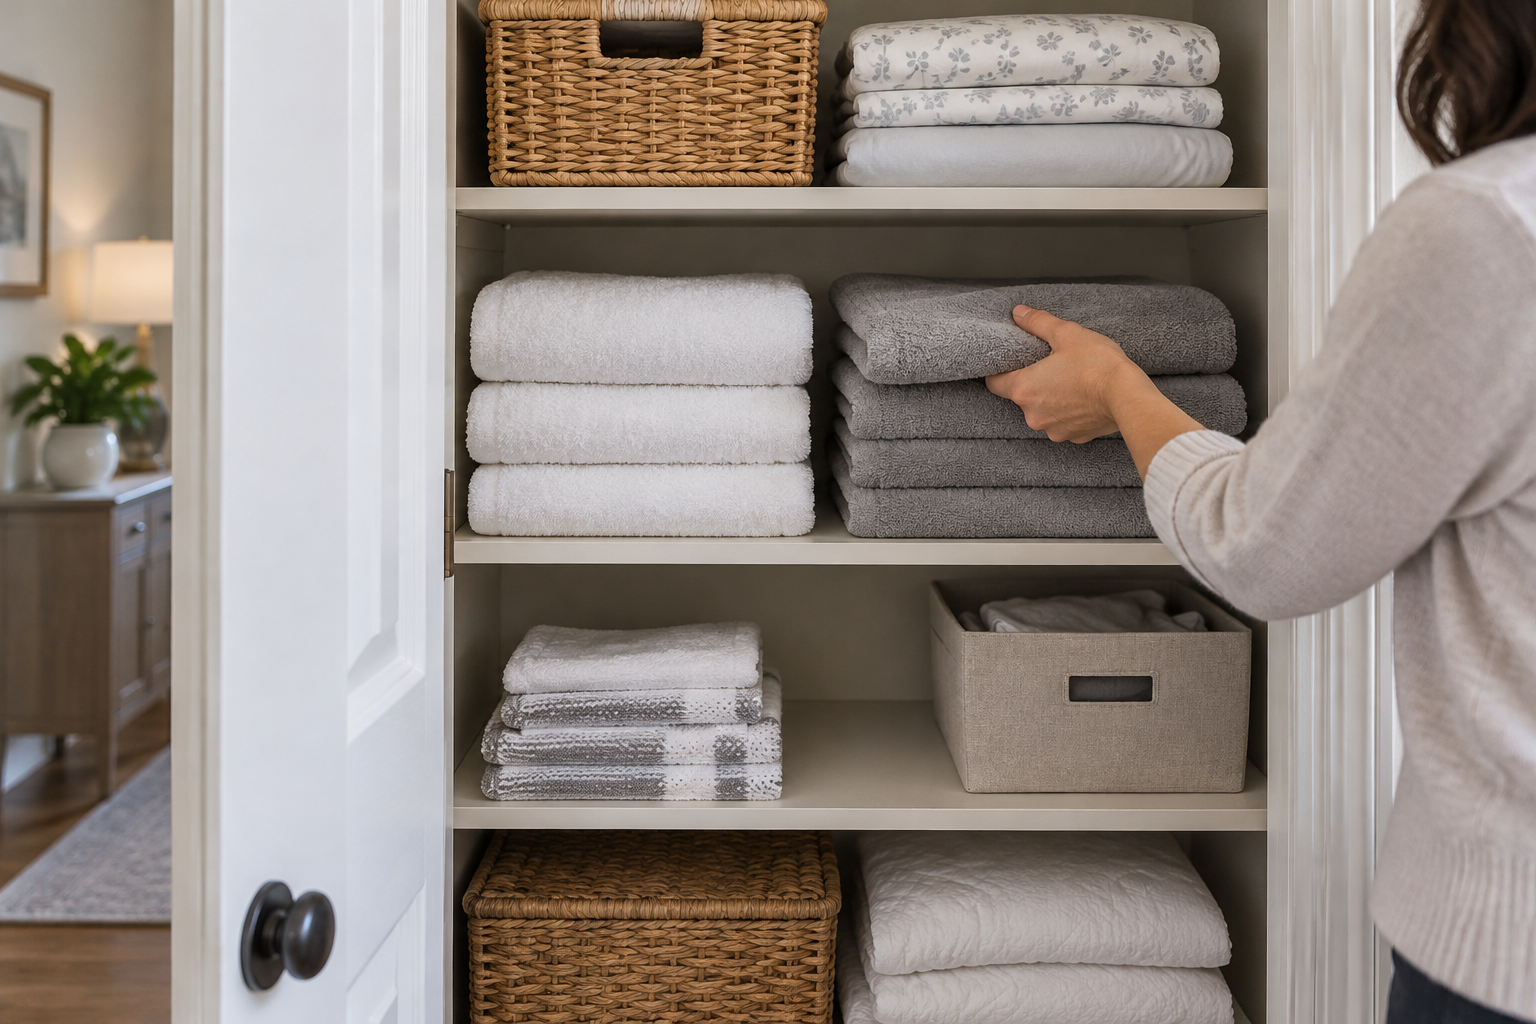
    Place frequently used towels and replacement sheets where the people using them can retrieve them comfortably. For many adults, that means shelves between roughly waist and shoulder height, but test your own reach. A family might give children a lower towel shelf, keep everyday sheets in the middle, and reserve the highest shelf for lightweight, rarely needed guest linens.

    Everyday towels and sheets stored on easy-to-reach middle shelves.

    Do not use the highest shelf for heavy stacks simply because it has spare room. Overhead lifting can turn a routine change into a balancing act. These zones are personal planning choices, not accessibility standards. If upper storage requires a step stool, use a stable one on a clear floor; never climb shelves or leave a stool blocking the hallway.

    5. Keep Each Sheet Set Together

    Fold a fitted sheet, flat sheet if used, and matching pillowcases into one bundle. Slip the pieces inside one pillowcase, leaving the opening loosely tucked rather than stretched tight. For example, place two queen sets side by side so either comes out as a complete package. Separate different bed sizes with distinct shelf positions or simple shelf-edge labels.

    Bundling fails when unrelated spare pillowcases get stuffed into every available opening. Keep unmatched extras in their own small section. Deep-pocket sheets and multiple king pillowcases may make a pillowcase bundle too bulky; use a loose fabric wrap or a dedicated shelf space instead. Whatever the method, dry every piece thoroughly before enclosing it, especially at seams and elastic edges.

    6. Divide Wide Shelves Into Stable Stacks

    Use removable shelf dividers to stop neighboring stacks from leaning into each other. Give bath towels one bay and hand towels another, leaving enough room for fingers at each side. Start with stacks of about four bath towels and test retrieval. If removing the bottom towel topples everything, shorten the stack or add a compatible freestanding shelf insert.

    A divider organizes sideways movement; it does not strengthen a sagging shelf. Check that clips suit the shelf thickness and will not damage a rental finish. Inserts also consume vertical space and may not suit thick quilts. Avoid tall, narrow freestanding arrangements that tip during use, and follow anchoring instructions for any storage unit that requires attachment.

    7. Leave Air Paths Around Stored Linens

    Leave small gaps between stacks and keep fabric from pressing against the back wall. About an inch of rear clearance is a useful starting point where depth allows. For example, spread three towel stacks across a shelf rather than clustering them tightly in one corner. In a humid home, breathable containers and fully dry linens matter more than squeezing in another layer.

    Before and after showing the same towel stacks repositioned with gaps around them.

    Gaps cannot fix an active leak, condensation, or persistent dampness. Investigate those conditions before putting clean textiles back. Avoid airtight packaging for routine storage unless the linens are completely dry and conditions are appropriate. Leaving the door open briefly may help air exchange, but it is unsuitable if the door obstructs a passage or creates a household hazard.

    8. Create a Separate Landing Spot for Used Towels

    Keep the clean linen closet from becoming temporary storage for damp towels. Give used towels a drying spot in the bathroom or laundry area, then move them to the hamper when dry. For example, a freestanding towel rack can handle towels awaiting laundry while a small basket elsewhere collects dry, worn linens. This protects clean inventory from accidental mixing.

    Hooks are convenient, but several wet towels layered on one hook dry poorly. A rack also needs floor space and should not narrow an exit path or crowd a heater. In rentals, get permission for drilled hardware and check surface requirements for removable products. If no safe drying spot exists, adjust laundry timing rather than stuffing damp textiles into the closet.

    9. Use the Door Only for Lightweight Small Linens

    A shallow door organizer can move washcloths or spare pillowcases off crowded shelves. Measure the gap between the closed door and shelf fronts before choosing one, then test the door through its full swing. For example, a slim fabric pocket panel may hold rolled washcloths while leaving the shelves available for larger towels and bedding.

    Over-door hooks can scrape trim, prevent latching, or place too much weight on the door. Keep loads light and follow hardware limits; do not assume every hollow-core door accepts screws. Rental approval may be needed. Skip door storage when it interferes with closing, swings into a tight passage, or hides contents from someone who needs a simpler system.

    10. Give Bulky Bedding One Measured Home

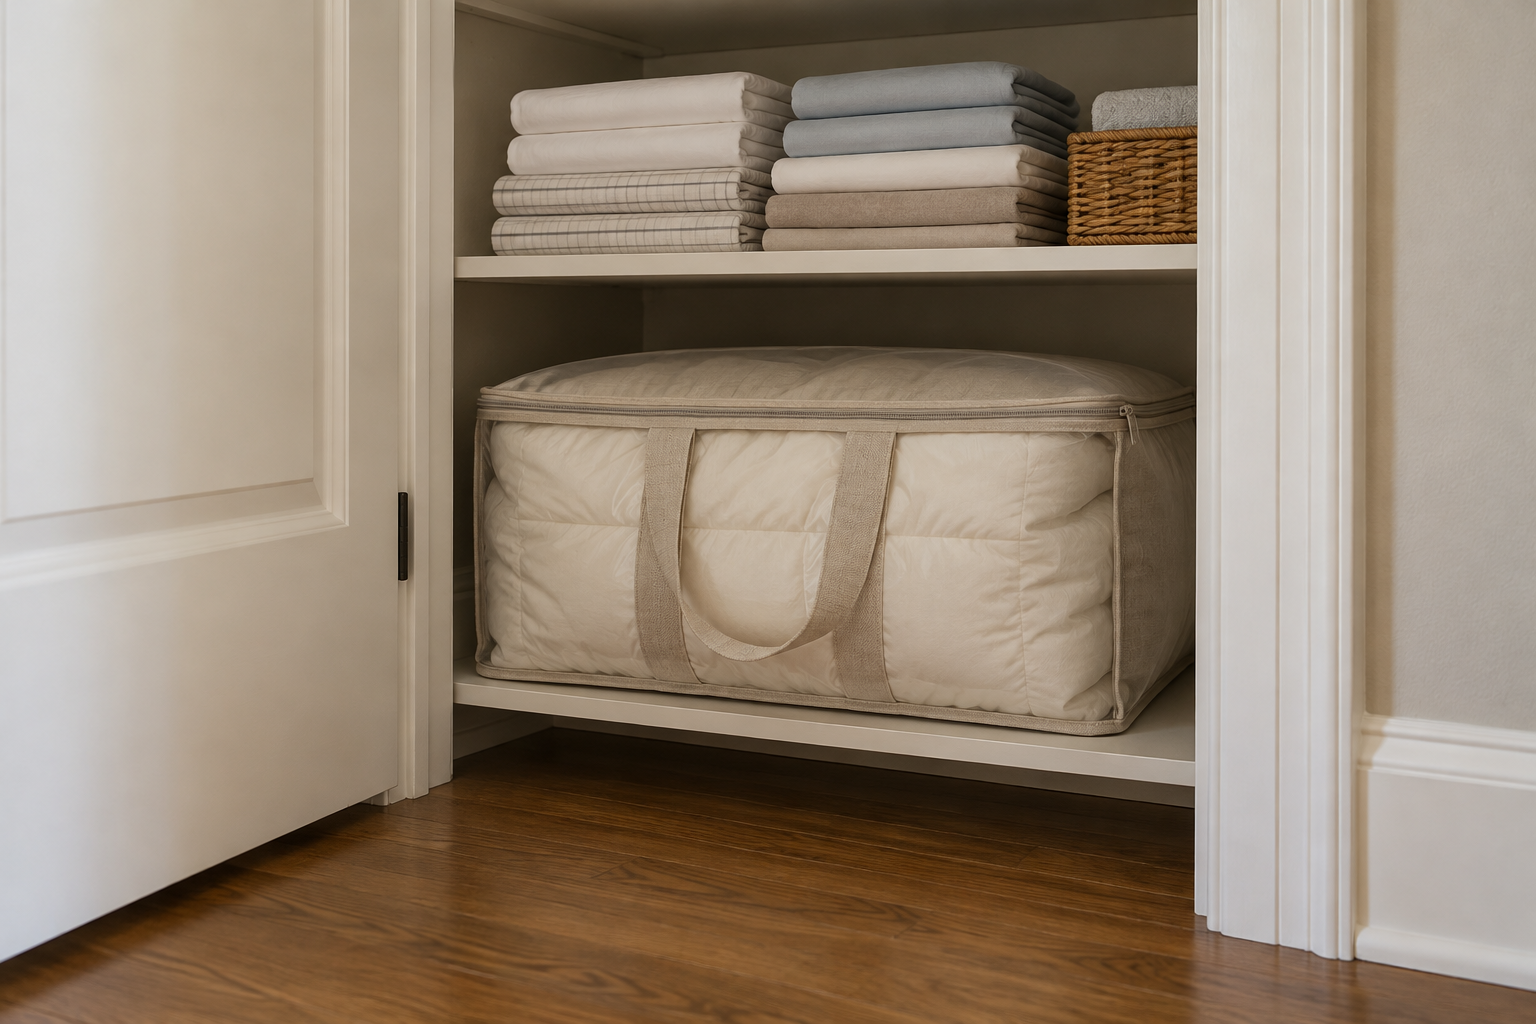
    Reserve a defined lower shelf for a spare comforter or seasonal blanket in a breathable zippered bag with handles. Measure the filled bag, not its empty packaging dimensions, and leave room to pull it straight out. For example, one guest comforter can occupy a single bag while its matching sheets stay in the everyday sheet zone.

    A guest comforter stored in a handled fabric bag on a lower shelf.

    Do not turn that shelf into a compressed tower of every blanket in the house. Vacuum bags save volume but can leave bedding creased, and some fills need gentler storage; follow care guidance. A heavy bag may be unsuitable for someone who cannot lift from a low position. Move it to another measured, dry location rather than blocking the closet floor.

    A useful linen closet lets you take one item without rearranging five others. Start with inventory, then test shelf depth, folding, and reach before adding organizers. After the next laundry cycle, notice what was easy to put away and what resisted. Keep the changes your household can repeat, with enough breathing room for both the linens and the routine.