Category: Small Kitchens

  • Keeping a Small Refrigerator Safely Cold When Groceries Fill Every Shelf

    Keeping a Small Refrigerator Safely Cold When Groceries Fill Every Shelf

    The grocery bags are unpacked, but now the yogurt is pressed against the back wall and the refrigerator door needs a push to close. A full shelf does not automatically mean unsafe food; the problem is whether cold air can circulate and food stays cold enough. These ten measures help you distinguish a storage squeeze from a cooling problem—without buying an elaborate organizer system.
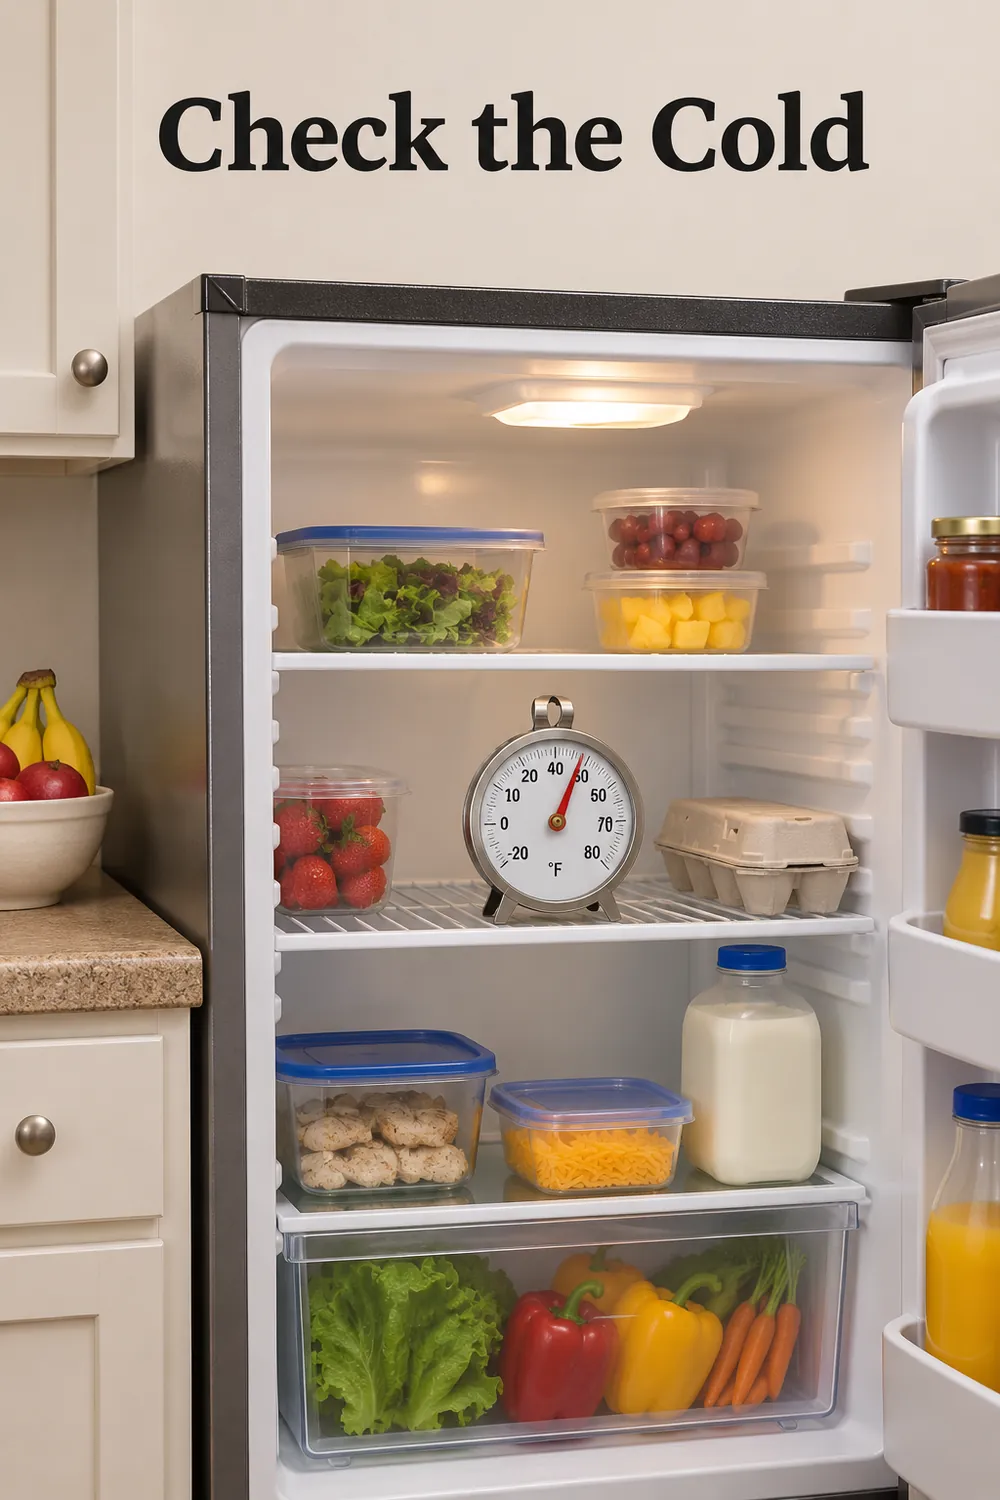
    Check the Cold headline above an appliance thermometer in a compact refrigerator.

    1. Measure food-storage temperatures, not just the dial setting

    Keep the refrigerator at 40°F or below and the freezer at 0°F or below. Use an appliance thermometer rather than guessing from how cold a carton feels. A control marked 1 through 5 usually indicates a setting, not an actual temperature. Place the thermometer in the refrigerator’s central storage area, away from the door and walls, unless its instructions specify otherwise.

    Check after the door has stayed closed and temperatures have stabilized; a reading immediately after unpacking groceries can be misleading. Follow the appliance manual’s waiting period after changing settings. Check other food-storage areas if you suspect warm spots, and use a separate freezer thermometer. A reassuring center reading cannot explain milk repeatedly warming in the door or produce freezing against the back wall.

    2. Find the cooling vents before rearranging groceries

    Look up the refrigerator’s model number and locate its air outlets and return openings in the manual. Depending on the design, they may be at the back, along a side, or near the freezer connection. Move the spinach tub or tall carton blocking them. The useful change is a clear air path, not an arbitrary gap measured the same way in every appliance.
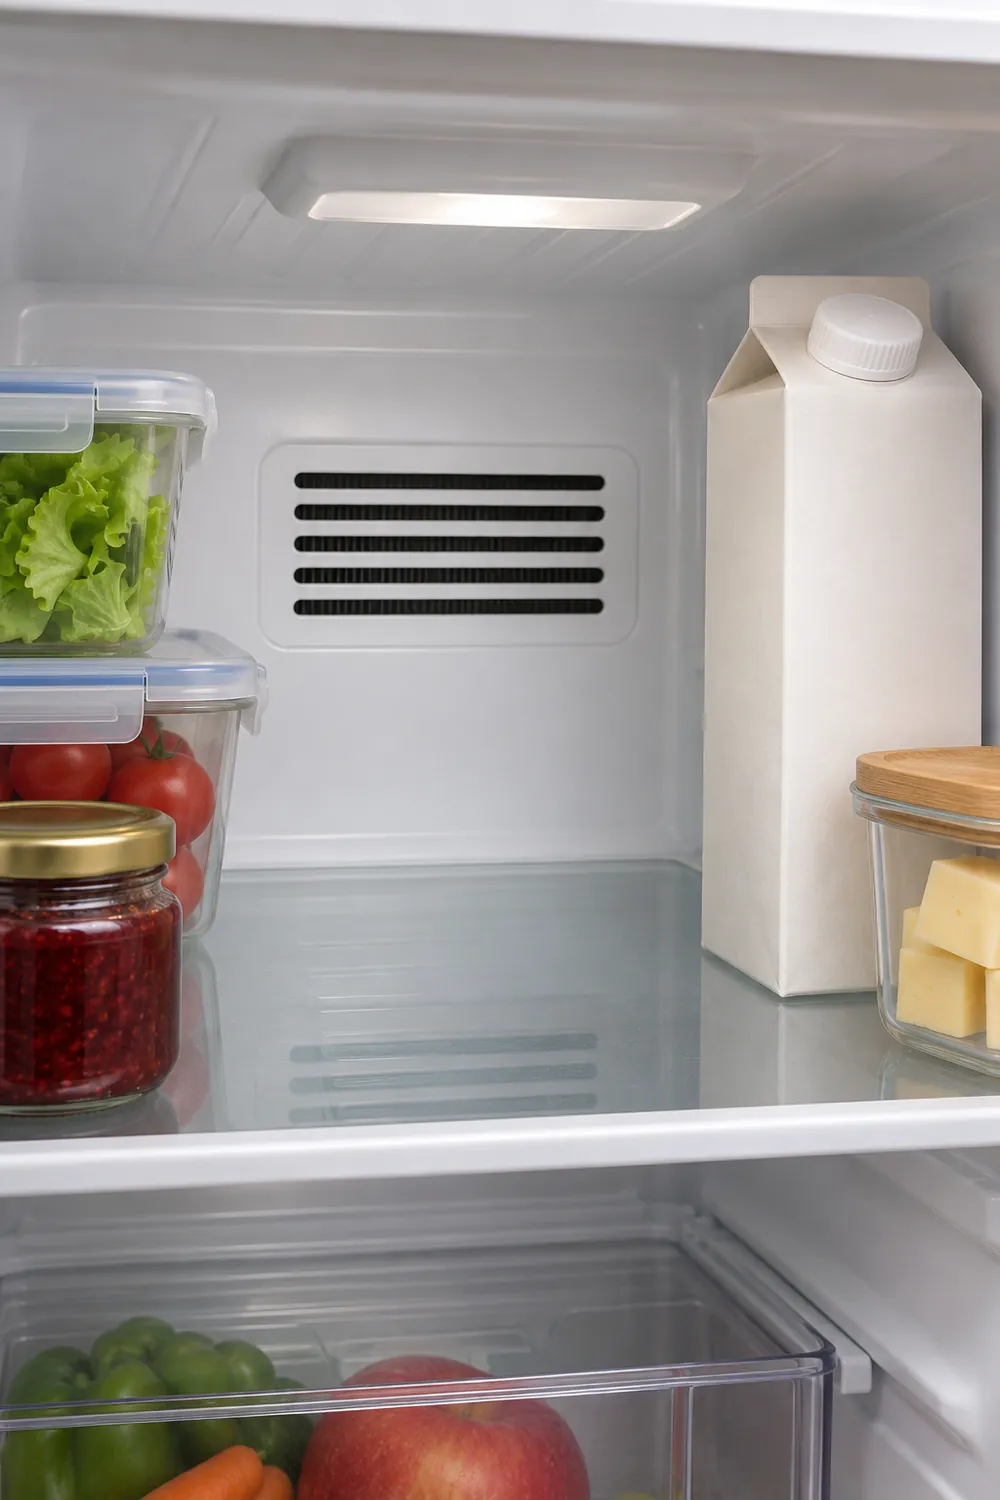
    Clear shelf space around a refrigerator cooling vent.

    Check again after the next grocery delivery: flexible bags slump, and large clamshells slide backward. Avoid covering vented surfaces with liners or placing a large organizer directly in front of an opening. If the appliance uses a different cooling arrangement, follow its instructions rather than searching for vents it does not have. Do not remove interior panels to create more storage room.

    3. Adjust shelves around groceries without building solid walls

    An adjustable shelf can make room for an upright milk carton without forcing it into the door. Before moving glass shelves, unload them and follow the manual’s removal instructions. Group shorter containers together so one tall bottle does not dictate the height of an entire shelf. Keep packages from forming a tightly packed barrier across the refrigerator’s interior.

    Leave room to remove a container without dismantling a stack. A few small bins can help, but a refrigerator lined edge to edge with deep, solid-sided boxes may restrict circulation and conceal spills. Measure usable shelf width, depth, and door clearance before buying anything. Adjusting what you already own is often more effective than adding another layer of plastic.

    4. Contain raw foods below ready-to-eat food

    Put raw meat, poultry, and seafood in sealed containers or leak-containing trays, below ready-to-eat foods. A wrapped chicken package can still leak, so the grocery-store wrapping should not be your only protection. Choose a washable tray with raised sides that fits the package without tipping, and position it in a suitable low storage area without blocking vents.
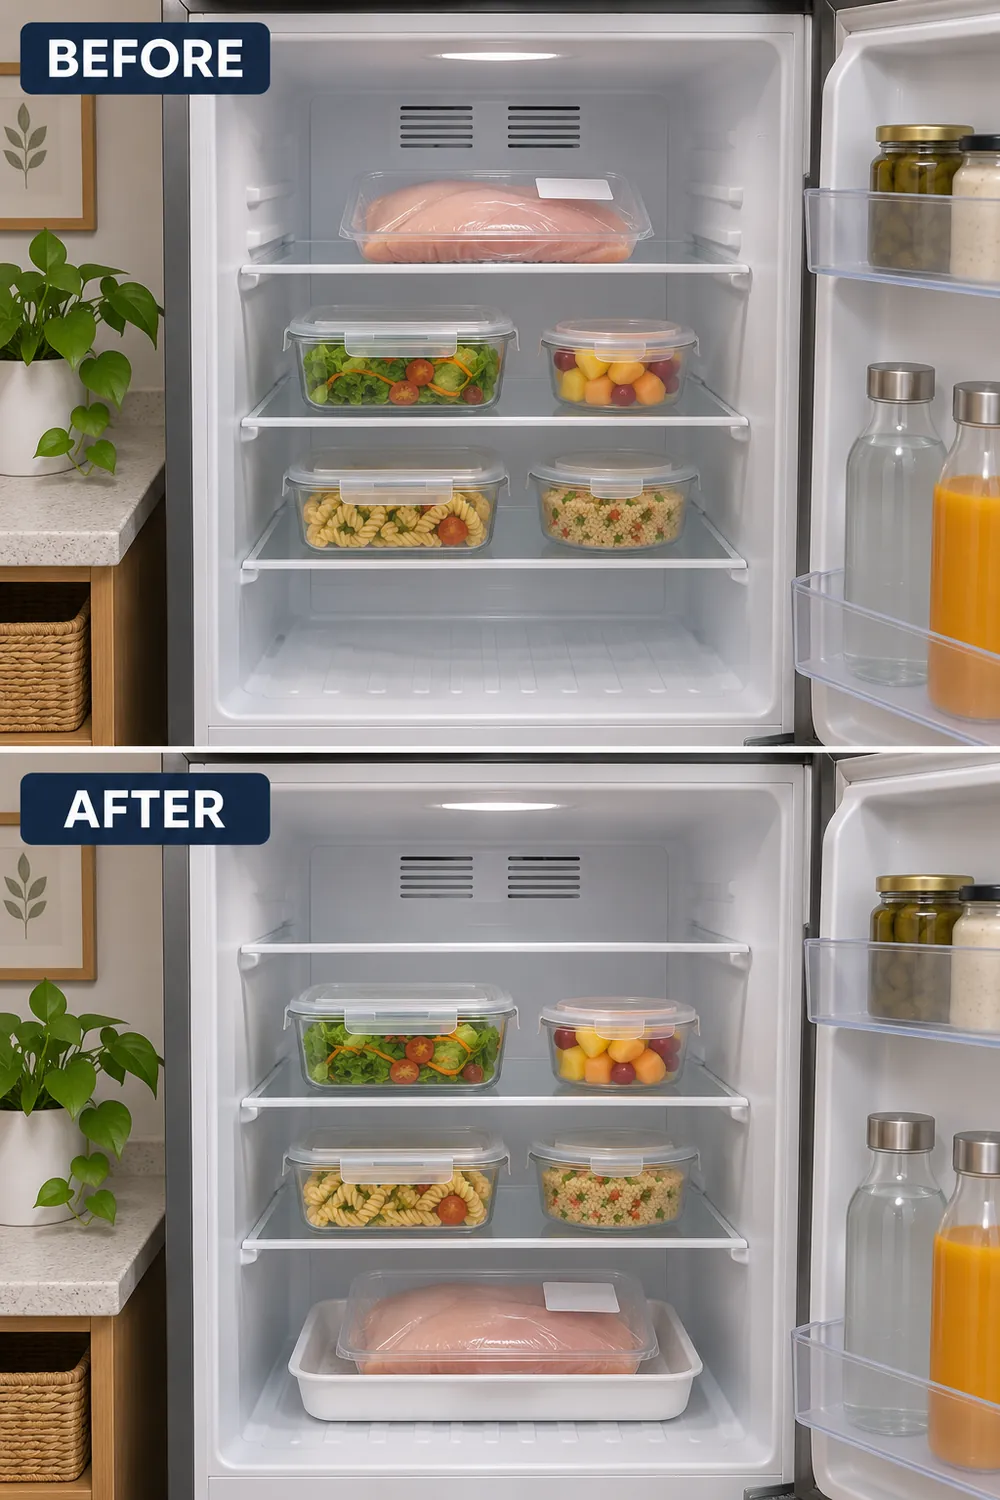
    Before and after moving raw chicken to a covered tray on a lower refrigerator shelf.

    Keep yogurt, washed fruit, and cooked leftovers above the raw-food area. If your refrigerator’s lowest compartment is a produce drawer, do not assume it should become a meat drawer; check the manual and use the lowest suitable shelf instead. Wash the tray after a leak and clean affected surfaces. Containment prevents drips from spreading, but it does not compensate for unsafe temperatures.

    5. Reserve the door for less temperature-sensitive items

    Move milk, eggs, and other temperature-sensitive perishables onto interior shelves where temperatures are steadier. Door shelves experience more warming when opened, especially in a shared kitchen where someone is always reaching for a drink. Store eggs in their carton on an interior shelf rather than in a molded door rack, even if the rack looks purpose-built.

    Use the door for products suited to that location, such as many condiments, while following package storage directions. Their presence in the door does not excuse an overall refrigerator temperature above 40°F. If moving a gallon jug inward overwhelms the shelf, buy a smaller container next time. That means more frequent shopping, but avoids making the warmest location carry your most vulnerable groceries.

    6. Buy for refrigerator capacity and load the freezer differently

    Before shopping, identify actual usable cold-storage space after vents and raw-food containment are accounted for. If a family-size salad box would occupy the only open air path, choose a smaller quantity or a different meal plan. Move foods that do not require refrigeration to appropriate pantry storage; making deep kitchen cabinets easier to use can help those shelf-stable groceries stay accessible.

    Do not apply the refrigerator’s loading approach wholesale to the freezer. A well-filled freezer retains cold better than a sparsely filled one, but vents must remain clear and the door must close. Follow the manual’s freezing-capacity limits when adding unfrozen food; packing it with warm groceries can overwhelm cooling. Freeze suitable extras while they are still safe, not as a rescue for temperature-abused food.

    7. Cool cooked food promptly in shallow portions

    Refrigerate perishable cooked food within two hours, or within one hour when the surrounding temperature is above 90°F. Do not leave a stockpot on the counter until it reaches room temperature. Divide soup, rice, or casserole into smaller, shallow containers so heat can escape more quickly. Small portions of hot food can go directly into the refrigerator.
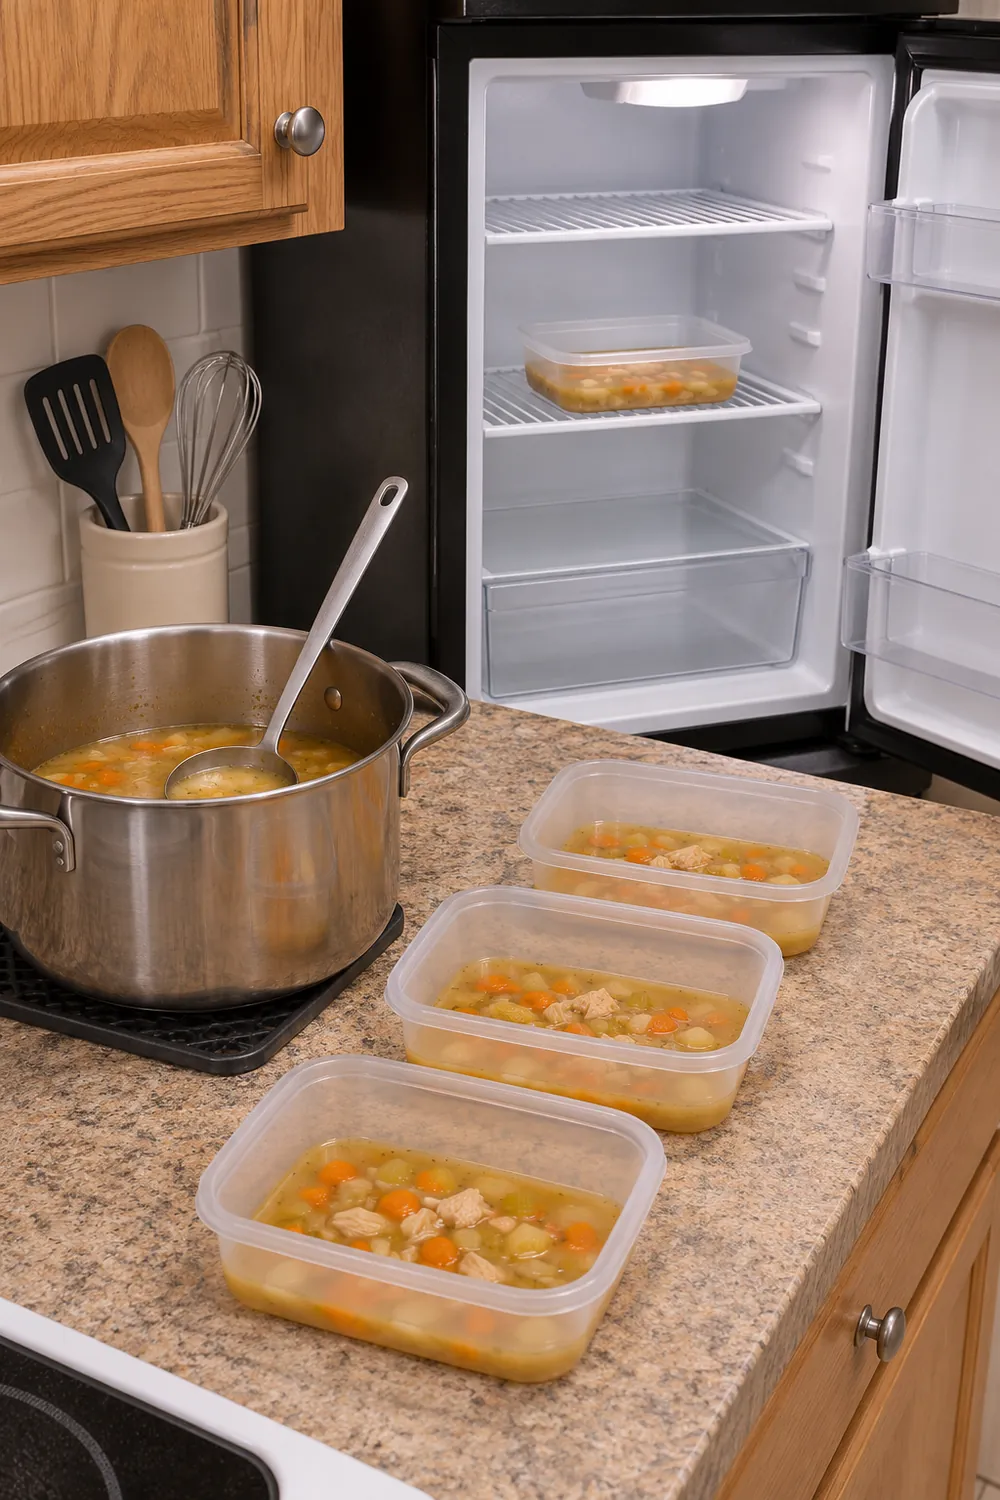
    Soup is divided among shallow containers beside an open refrigerator.

    For a large batch, an ice-water bath with stirring can help cool food before refrigeration; it is not permission to exceed the time limits. Leave circulation space around cooling containers rather than stacking them tightly while hot. Plan that space before cooking a big pot of chili. A compact refrigerator may simply lack capacity for several large batches at once.

    8. Use produce drawers according to their actual controls

    Check what the drawer sliders control before moving them. Many adjust humidity, not temperature, and appliance designs vary. Follow the manual’s produce guidance rather than assuming that every drawer works identically. Leafy greens and apples may benefit from different settings, but neither should be packed so tightly that the drawer catches or its openings become obstructed.

    Keep produce below the drawer’s usable fill level and remove spoiled items promptly. A cabbage wedged against the shelf above can prevent full closure and interfere with nearby airflow. Do not treat a humidity setting as a fix for vegetables that repeatedly freeze or feel warm. Check temperatures and placement instead; drawer controls cannot correct a broader cooling fault.

    9. Recognize when rearranging is no longer enough

    If temperatures remain above 40°F after sensible loading changes and the manufacturer’s stabilization period, investigate rather than repeatedly turning the dial colder. Check the recommended room-temperature range and exterior ventilation clearances. Persistent frost, poor recovery, or repeated warming deserves service. Renters should report readings and symptoms to the landlord; homeowners can give the same record to a repair technician.

    Protect the food while arranging repairs. Move perishables to a working refrigerator or an ice-filled cooler that stays at 40°F or below. Discard refrigerated perishables known to have been above 40°F for more than two hours; never taste them to judge safety. If the duration is unknown, do not assume the food is safe because it still feels cool.

    10. Check the door seal and everything that can stop closure

    Inspect the flexible gasket around the door for crumbs, sticky residue, tears, or sections pulling away. Clean it using the method recommended in the manual, then close the door and look for uneven contact. A paper strip closed between the gasket and cabinet can help reveal an unusually loose spot, but it is only a screening check, not a complete diagnosis.
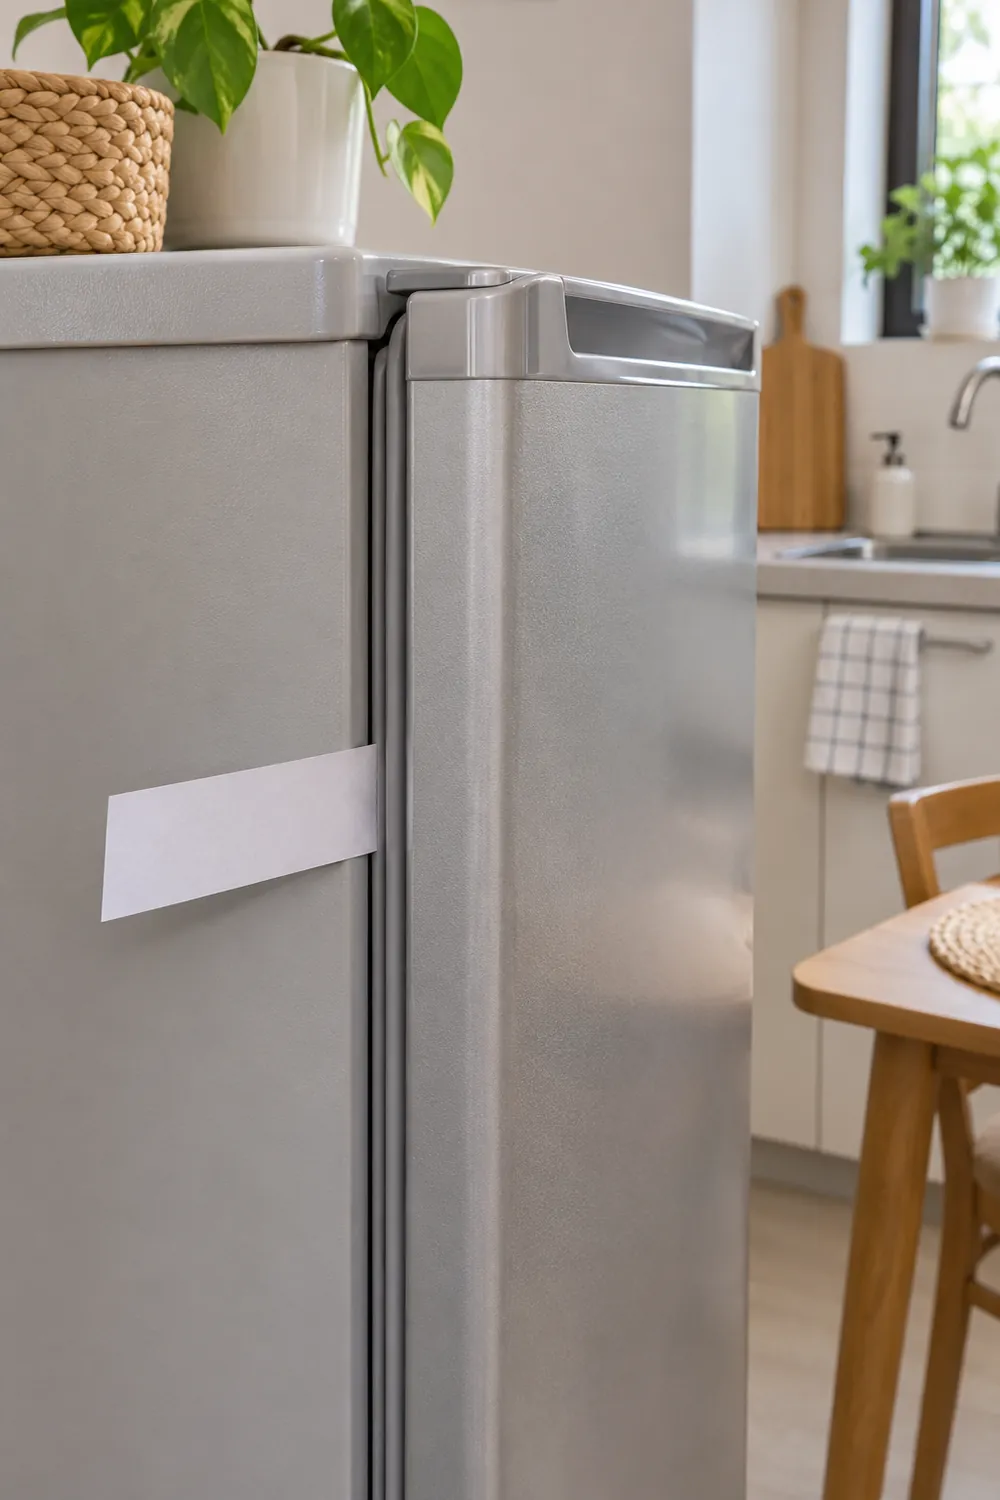
    A paper strip rests in a closed refrigerator door to illustrate a seal check.

    Before blaming the gasket, look for a drawer left slightly open, a bottle projecting past its shelf, or a package caught behind a bin. Check that nearby furniture does not stop the door from closing. Measure door swing and access space before relocating the appliance, maintain manufacturer-required clearances, and request service for damaged seals or hinge problems rather than improvising repairs.

    Start with an appliance thermometer and one cleared cooling path. Those two checks tell you whether the next step is rearranging groceries, buying smaller quantities, or getting the refrigerator serviced—not purchasing more organizers.
  • Trash, Recycling, and Food Scraps in a Kitchen With No Bin Cabinet

    Trash, Recycling, and Food Scraps in a Kitchen With No Bin Cabinet

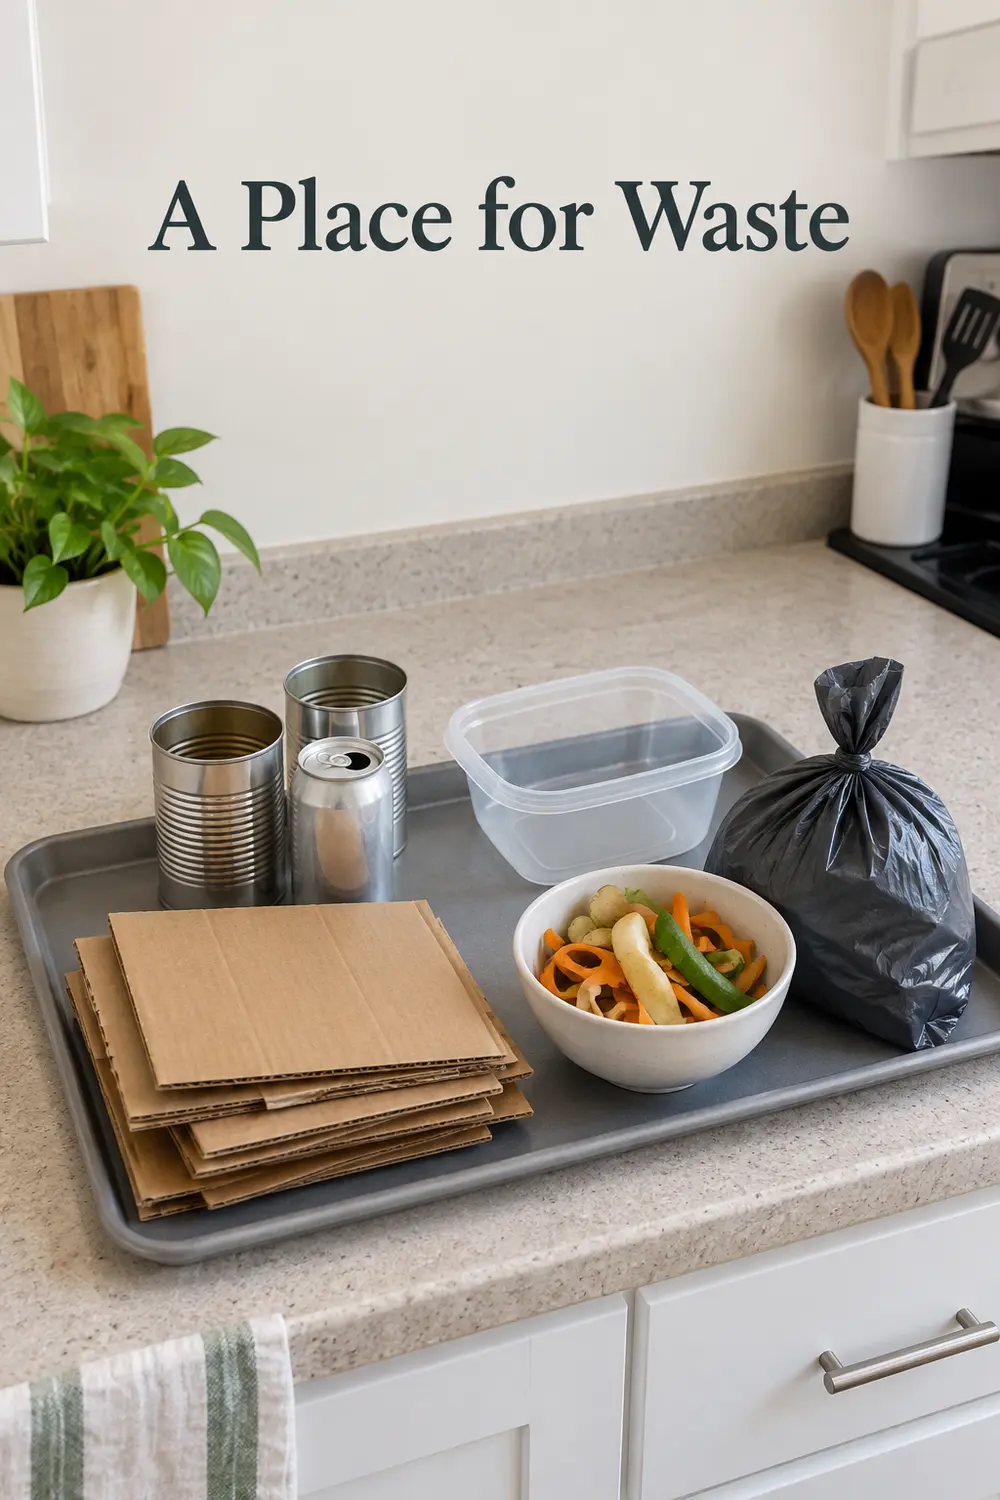
    The recycling bag leans against the refrigerator, dinner scraps sit in a bowl, and opening the trash can means stepping into the hallway. Without a dedicated bin cabinet, waste can spread across a kitchen surprisingly quickly. The answer isn’t necessarily a larger can. It’s a small, deliberate system: separate only what your collection service accepts, give each stream a workable container, and decide when it leaves the kitchen.

    A small kitchen waste audit separates packaging, food scraps, and trash beneath the headline “A Place for Waste.”

    1. Audit what actually leaves your kitchen

    For three ordinary days, note what you discard as you cook and unpack groceries. Count bulky items separately from messy ones: cereal boxes occupy space differently from coffee grounds. Include takeout nights and pet-food packaging if those are regular parts of your household. A paper tally is enough; you don’t need to save waste or spread used trash across the counter.

    Use that record to identify your real streams before choosing containers. One household might need trash, accepted recycling, and food scraps; another also needs a small returnables tote. If cardboard accounts for most of the apparent volume, a bigger trash can won’t solve the problem. Keep batteries, chemicals, and other special-disposal items out of this kitchen sorting experiment, and check their separate disposal instructions.

    2. Check collection rules before assigning space

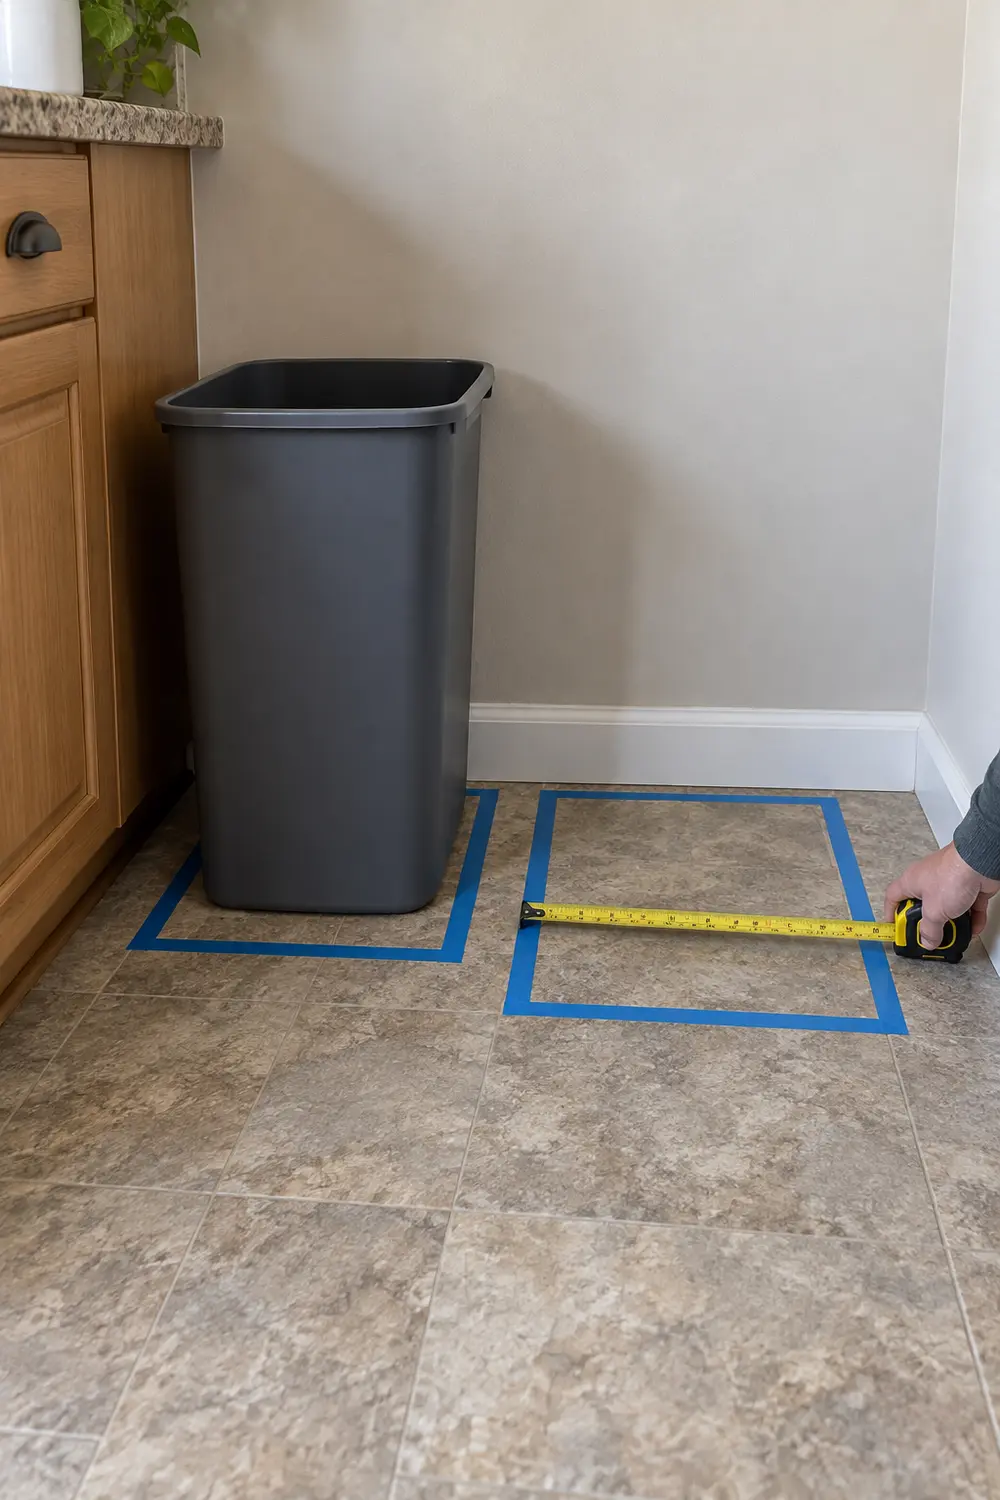
    Check your municipal or hauler instructions and your building’s actual collection setup before reserving floor space. Confirm accepted materials, whether recycling must be loose, and whether food-scrap collection exists. Then tape out tentative container footprints along an unused wall. A single recycling outline might be enough; separate glass collection could require another. Don’t assume a symbol on packaging guarantees local acceptance.

    Tape outlines reserve space for two sorting containers beside a kitchen wall, with one footprint being measured.

    Look up preparation requirements too: emptying, rinsing, drying, caps, and liners can be treated differently by different programs. If your building’s signs conflict with published instructions, ask management or the collector for clarification. Put a short, locally accurate reminder near the station. Avoid a generic recycling poster that encourages everyone to toss in items your service cannot take.

    3. Size containers around volume and emptying frequency

    Choose capacity from your audit and the trips you can realistically make. A slim 4- to 8-gallon trash can may suit a household that empties it frequently, but those sizes are only starting points. Check exterior dimensions, not gallons alone: two containers with the same capacity can have very different bases, handles, and lid overhangs.

    Mock up the proposed footprint with a cardboard box before buying anything. Walk past it carrying groceries, open the oven and dishwasher, and check the refrigerator door. Measure your room, appliance swings, and route to the exit. A narrow can that needs daily emptying is sometimes the better compromise; one that repeatedly overflows is undersized, regardless of how neatly it fits.

    4. Choose a lid you can open in its actual location

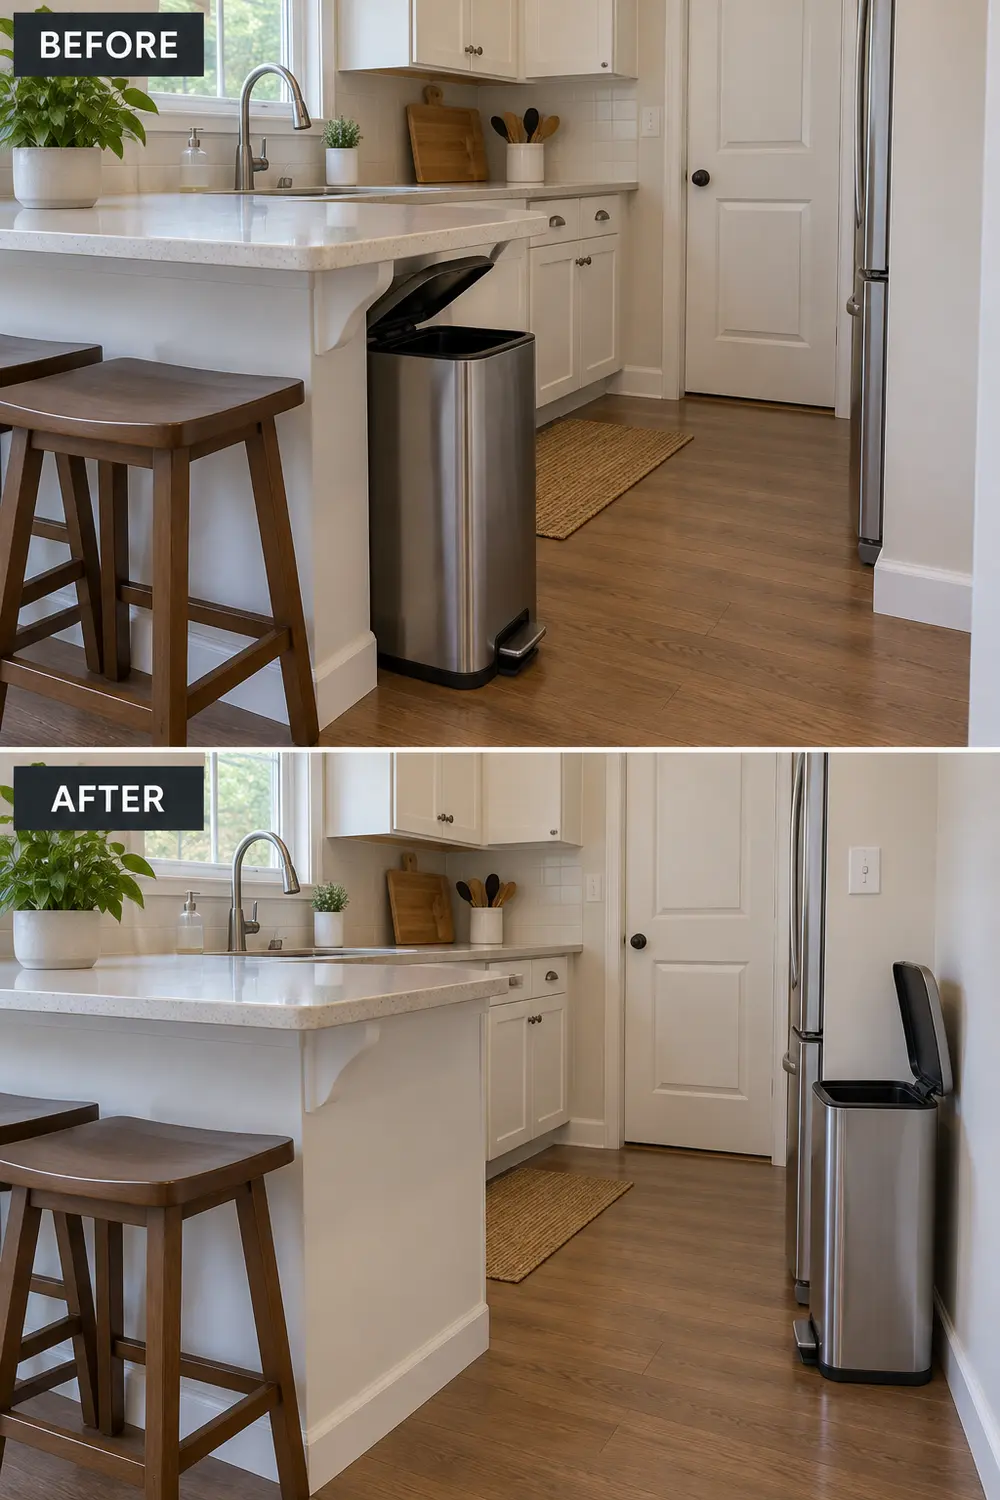
    Test lid movement where the can will stand, not in open space. A hinged lid beneath a counter overhang may hit the underside before opening far enough to accept a dinner plate’s scraps. Measure the container’s fully open height and any rear clearance specified by the manufacturer. Moving it to a nearby unobstructed wall can make the same can usable without changing its size.

    Before, a trash-can lid hits a counter overhang; after, the same can opens fully beside an unobstructed wall.

    Match the mechanism to the people using it. A pedal requires room for a foot and a stable stance; a push flap can get messy when food brushes against it. Try the motion with an empty container first. In homes with curious pets or children, prioritize a closure they cannot readily open, and don’t mistake a lightweight swing lid for secure containment.

    5. Make one compact station outside the aisle

    Group the everyday containers on a short wall, beside the end of a counter, or on the bottom shelf of a stable freestanding unit. Keep trash easiest to reach and less-used streams slightly farther away. A washable tray can define the station and catch small drips, provided its edge doesn’t become a trip hazard or interfere with the pedal.

    Don’t squeeze bins between the cook and an open appliance, against a heater, or across an exit. Follow appliance clearance instructions and preserve ventilation. If the only apparent location is your chopping surface, first reconsider the layout using these ways to create a practical prep zone. A station is useful only if cooking and carrying out the waste remain straightforward.

    6. Reduce clean packaging before it reaches the bin

    Flatten accepted paperboard boxes as you empty them rather than balancing whole boxes on top of the recycling. Keep larger flattened cardboard together in a narrow reusable tote if your collection rules allow it. Check instructions before crushing cans or bottles; some return systems need containers intact. The aim is less trapped air, not indiscriminate compression of every material.

    Empty packaging and prepare it as your collector specifies before adding it to storage. Drain rinsed containers so the recycling station doesn’t become a puddle. Don’t flatten greasy packaging into clean cardboard simply to hide it; check whether it belongs in trash or an accepted organics stream. Avoid creating sharp edges or stacking cardboard against cooking equipment while waiting for collection.

    7. Contain wet food scraps separately

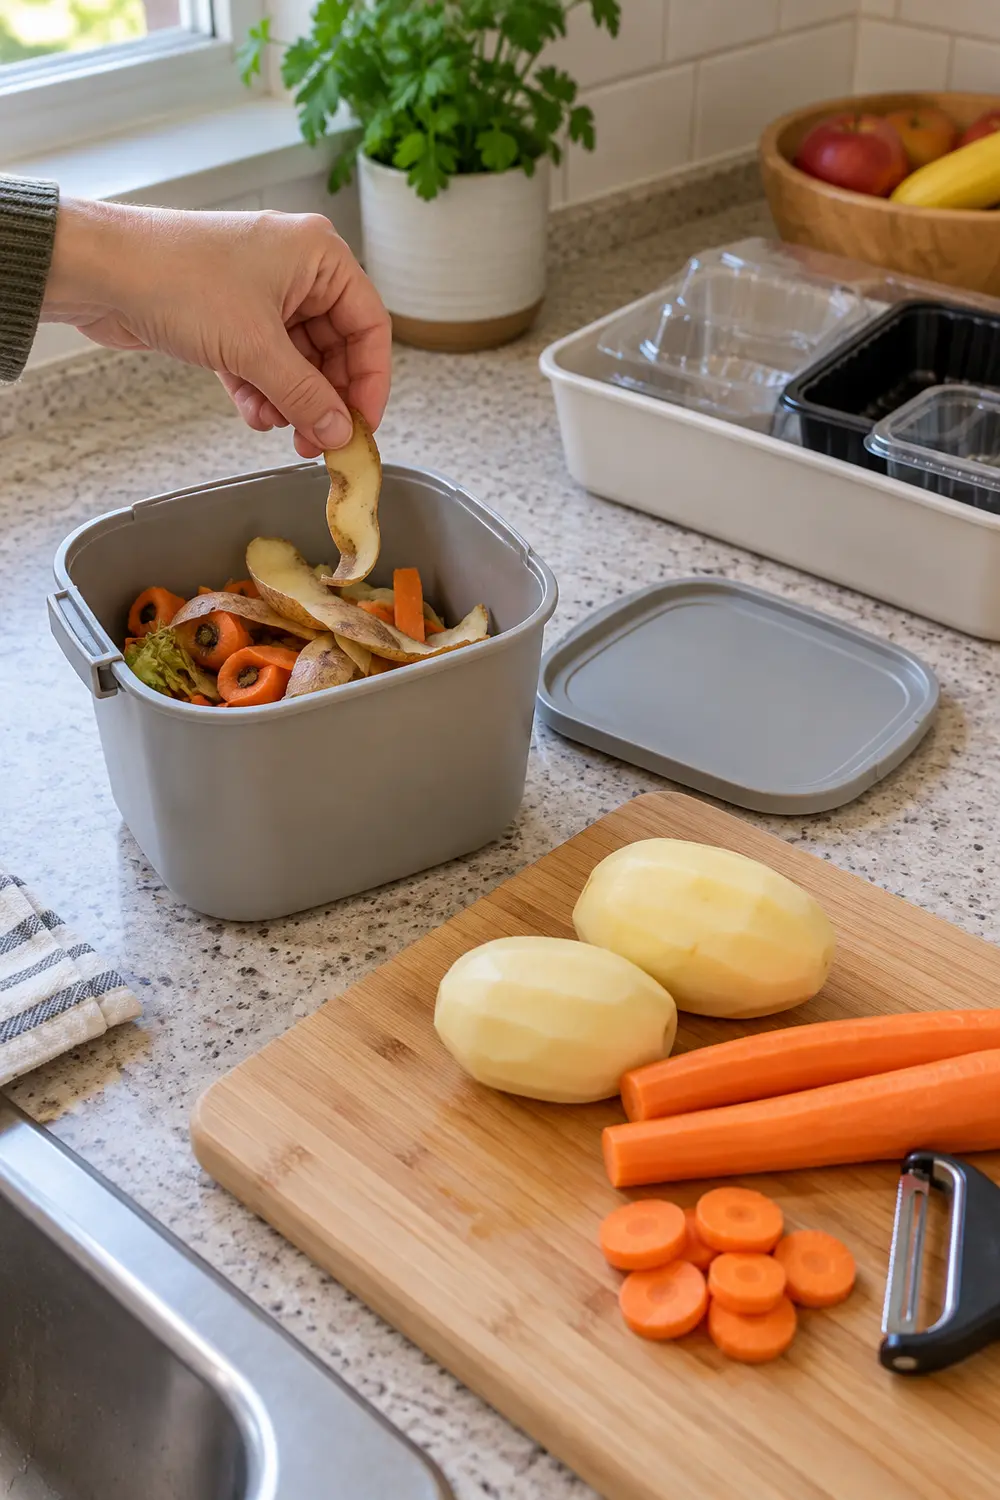
    Use a small, washable, lidded container for scraps accepted by your collection or drop-off program. During prep, place it beside the cutting board, then close it and return it to its storage spot. A modest container holding one evening’s peelings is easier to empty promptly than a large bucket that quietly accumulates several meals. Keep its exterior and handles clean.

    Vegetable peelings go into a small washable scrap container, separate from prepared food and empty packaging.

    If pickup is infrequent, a sealed, clearly identified freezer container can hold accepted scraps until removal, if you have room. That trades freezer space for less time at room temperature; it doesn’t change what the program accepts. Use liners only when permitted. Without an organics option, contain wet food waste within your trash system and remove it promptly rather than maintaining an unused compost bucket.

    8. Give returnable containers a separate limit

    If you redeem eligible beverage containers, store them separately from routine recycling so they don’t need to be sorted twice. Empty and drain them, then use a washable tote with handles. Confirm the return program’s requirements before removing labels or crushing containers. A tote that fits the trip—car, bus, or walk—is more useful than a large sack you struggle to carry.

    Choose a firm capacity limit, such as one tote, and schedule the return when it fills. Storing another month’s worth behind the first bag usually shifts the problem into a doorway or closet. If redemption trips are impractical, investigate locally permitted alternatives rather than assuming every deposit container belongs in curbside recycling. Sticky residue still needs attention even when the containers have cash value.

    9. Set removal triggers that everyone understands

    Agree on visible triggers: trash leaves before it prevents the lid from closing, recycling leaves at the marked fill line, and the scrap container is checked after dinner. Wet or strong-smelling waste may need an earlier trip. Tie removal to an existing routine, such as the evening dog walk, only if the collection point is accessible and the bag can be carried safely.

    Assign responsibility rather than relying on whoever notices first. Keep spare liners nearby, but don’t bury them behind appliances or pantry overflow. These ways to make deep kitchen cabinets easier to reach can help you give supplies an accessible home outside the sink cabinet. Never compensate for missed trips by leaving extra bags in the hall, where they obstruct movement and invite pest access.

    10. Clean the whole station, not just the liners

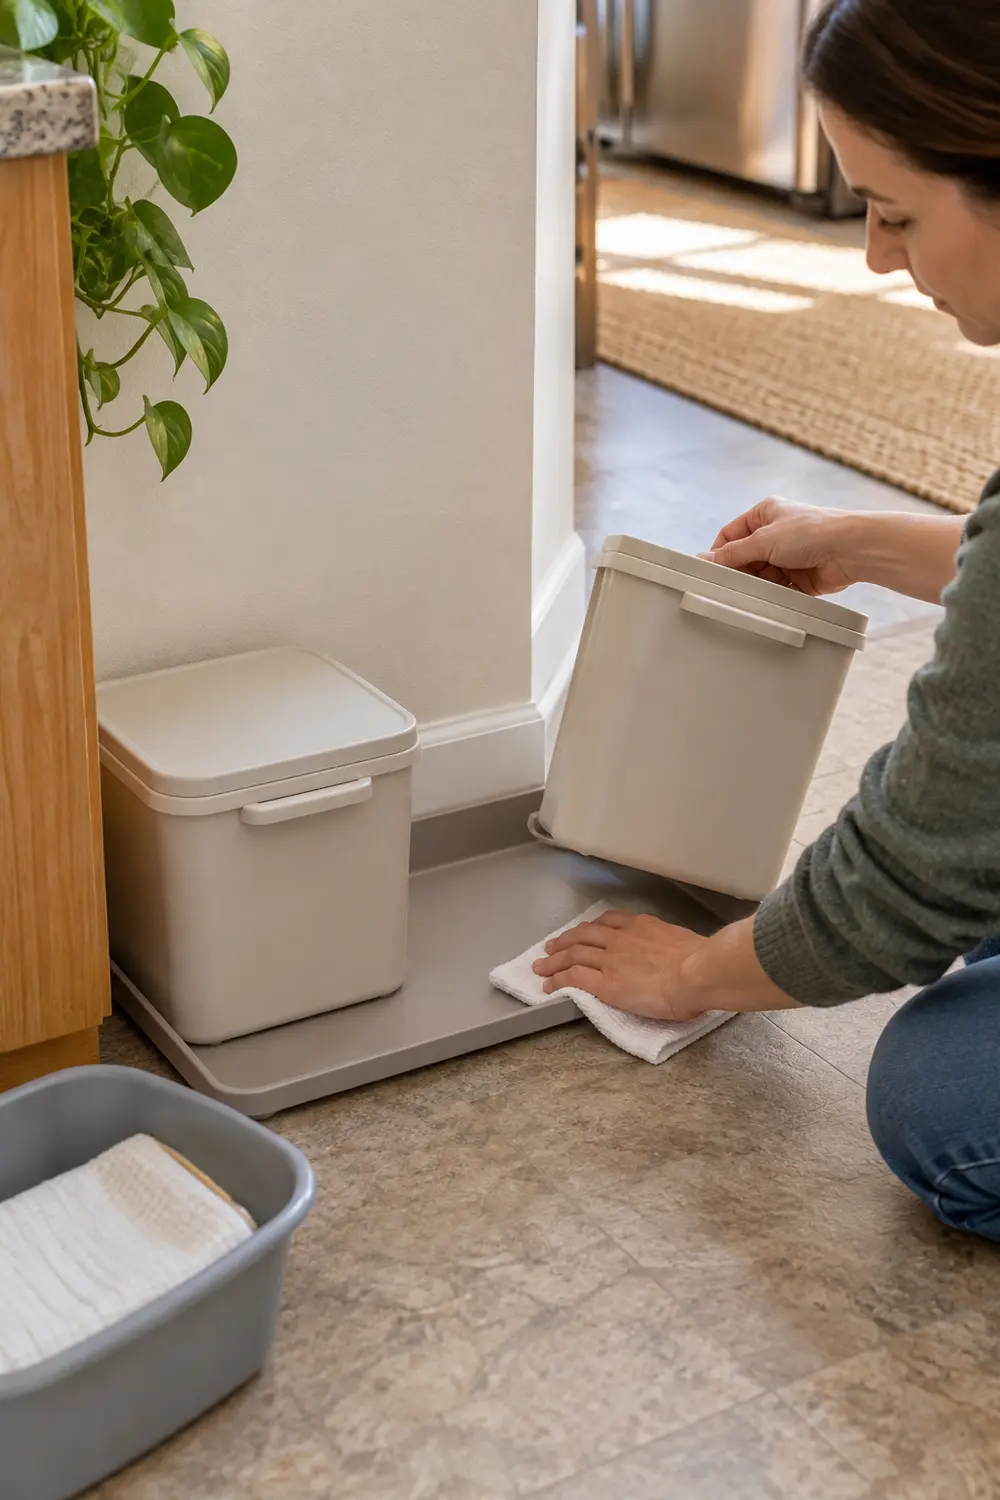
    When a bag leaks, remove the bin and clean both it and the surface underneath. During a regular weekly check, wipe lids, handles, pedals, and the nearby wall or cabinet side; wash the tray as needed. Use a cleaner appropriate for each material and follow its label. Let washed containers dry before relining so moisture isn’t trapped beneath the next bag.

    A container is lifted from a shallow sorting tray so the surface underneath can be wiped clean.

    Inspect lid edges, seams, and the floor behind the station for residue or signs of pests. Closed lids help limit access, but spills, overfilled bags, and stored cardboard can undermine the setup. Remove problem waste and clean promptly; report persistent pest activity or gaps around building services to your landlord or an appropriate professional. A fragrance insert cannot replace cleaning or timely removal.

    Start with a three-day waste tally and your local collection instructions. Then mock up one station with containers you already own. If the doors open, the lids work, and everyone can empty it comfortably, you’ll know which—if any—new containers are worth buying.

  • Hand-Washing Dishes in a Tiny Kitchen Without Losing the Sink

    Hand-Washing Dishes in a Tiny Kitchen Without Losing the Sink

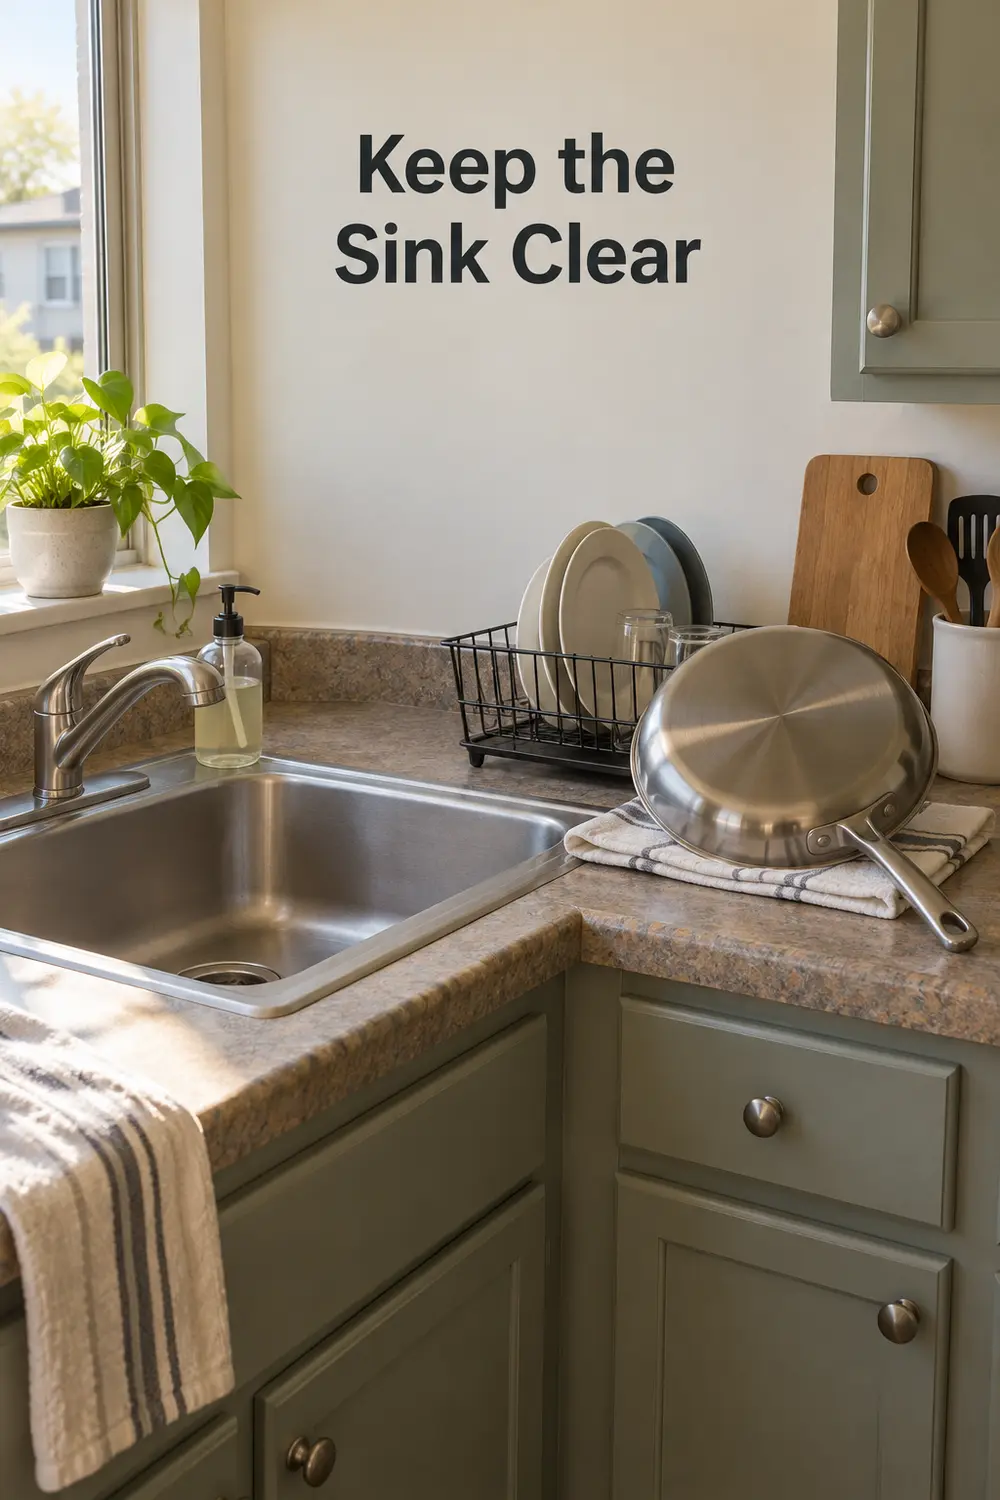
    Dinner is over, but the skillet is blocking the drain, glasses are balanced on plates, and there’s nowhere to rinse a spoon. In a single-basin kitchen without a dishwasher, the problem isn’t always too many dishes. It’s that washing, rinsing, and drying are competing for the same few inches. A workable sequence gives each job a temporary place—including the oversized pan that needs its own drying spot—then returns the sink and counter to everyday use. Keep food preparation separate from this dirty-dish circuit.

    “Keep the Sink Clear” above a compact dishwashing setup with a skillet drying separately beside the rack.

    1. Scrape dishes before they reach the stack

    Make scraping the first stop, not something you do over a sink already full of dishes. Move leftovers into storage containers and scrape scraps into the trash or your accepted food-scrap collection. An old silicone spatula can lift rice and sauce from plates without sending everything toward the drain. Empty drinks before stacking cups, too.

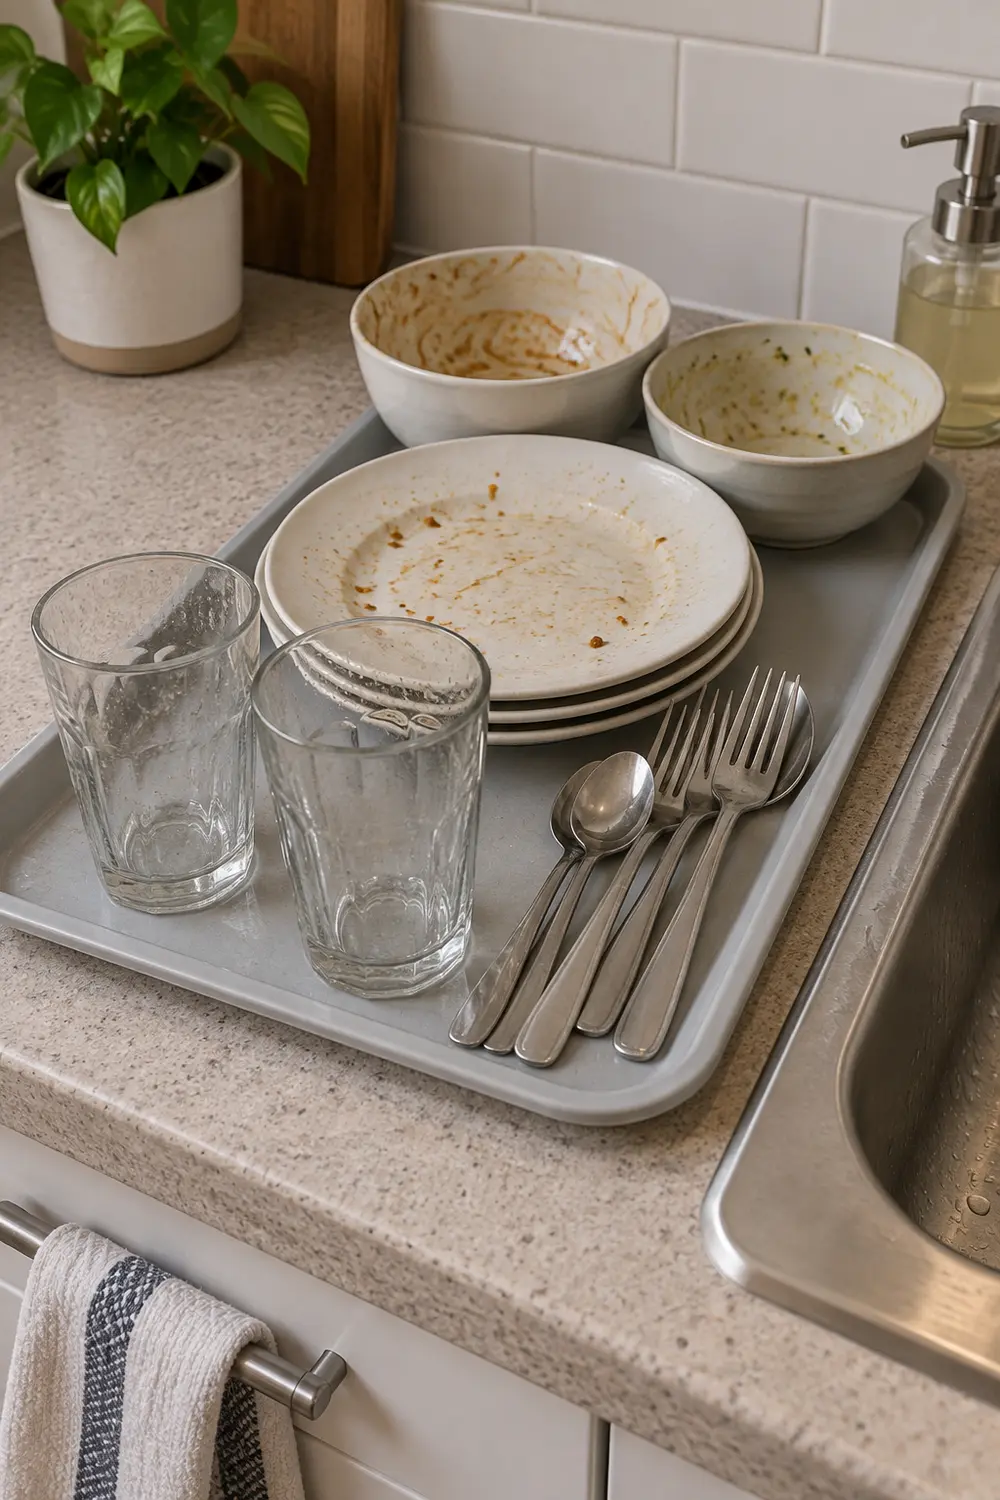
    Set the scraped dishes on a tray beside the sink rather than across its bottom. This keeps the drain reachable and lets you use the faucet before washing begins. A sink strainer catches stray bits, but it isn’t a substitute for scraping. Keep the dirty tray off your cutting board, and finish food preparation before that counter becomes the dish landing zone.

    2. Sort a small queue in washing order

    Group dishes by the order you’ll wash them: glasses and lightly soiled cups first, then flatware and plates, with greasy bowls and utensils later. Keep sharp knives visible and separate rather than hidden under dishes or in cloudy water. Two mugs nested beside a short plate stack are easier to work through than one unstable tower.

    Glasses, flatware, plates, and greasy bowls grouped separately on a tray beside the sink.

    The queue should fit the counter you actually have. If dinner produced eight place settings but only four fit safely, leave the second batch on a separate washable tray at the dining table until needed. Don’t spread dirty dishes through an active prep area. Washing cleaner items first helps keep the wash water useful, but replace it when it becomes greasy or dirty.

    3. Give cookware a separate washing round

    Keep the stockpot and skillet out of the plate queue. Wash the smaller dishes first, move them to the rack, and then tackle cookware one piece at a time. A pot filling the basin can hide utensils, block the drain, and force you to maneuver fragile glasses around a heavy rim.

    For stuck-on oatmeal, add a little water to the pot and let it loosen while you wash cups; set it on a stable, heat-safe surface out of the prep area. Let hot cookware cool before washing and follow its care instructions. Cookware or utensils used with raw meat should stay separate from the cleaner queue and be washed before that dirty landing area is cleaned.

    4. Use a removable basin to make wash space temporary

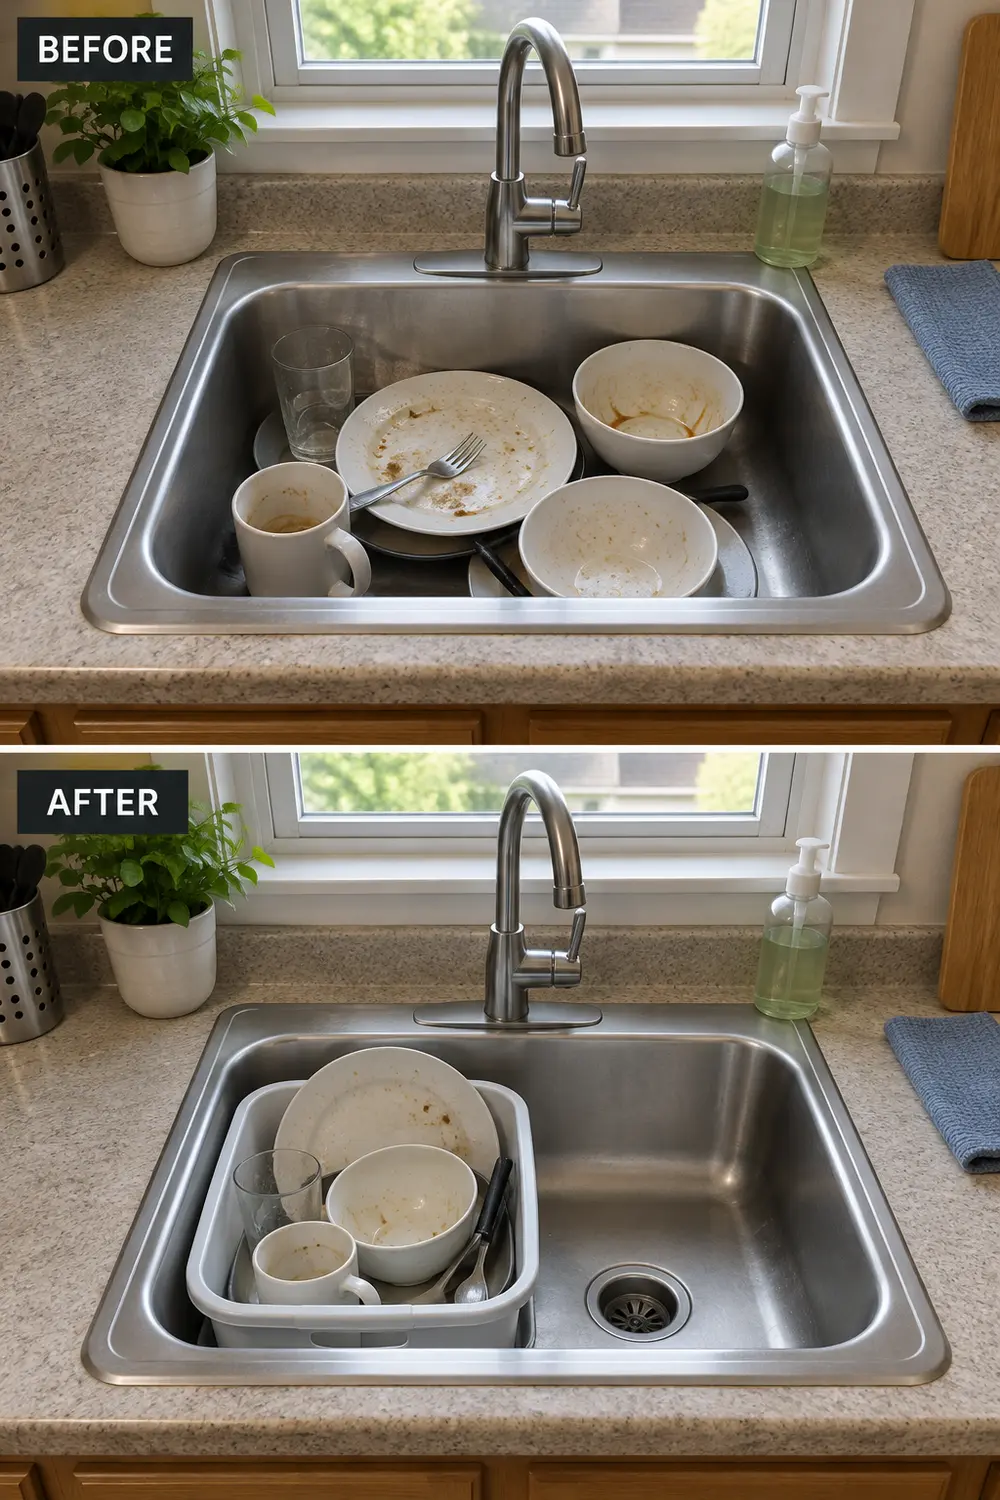
    A removable dish basin can hold warm, soapy water while leaving part of the sink available for rinsing. Measure the sink’s interior and faucet reach before choosing one; nominal sink dimensions won’t tell you whether it fits. In a roughly 22-inch-wide basin, a wash tub around 12 inches wide might leave a useful rinse channel, but test your actual arrangement.

    Before, dishes occupy the sink bottom; after, a removable wash basin leaves a clear channel for rinsing.

    In a narrower sink, alternate tasks instead: wash a small batch in the tub, lift it onto a stable, water-resistant counter, and rinse over the empty sink. Don’t carry a heavy, brimful basin across the kitchen. The tub also needs a storage home after use; if it permanently occupies your only counter, it may create more trouble than it solves.

    5. Rinse in small batches without flooding the wash water

    Wash a few items, then rinse them under a controlled stream directed into the open sink—not into the soapy tub. Check where the faucet actually lands before starting. If you cannot keep rinse water out of the basin, use the lift-out sequence rather than repeatedly diluting and overflowing your washing water.

    Keep the drain clear so rinse water leaves promptly instead of pooling around dishes. Three plates are often a more manageable batch than an entire dinner service, especially with a fixed faucet. Turn the water off while scrubbing, and change the wash water as needed. Don’t save used dishwater for rinsing produce or combine food preparation with the dirty-dish process.

    6. Choose a rack around the dishes you actually own

    Measure the available counter depth, the space beneath upper cabinets, and the rack’s full footprint, including its drain spout. Then consider your everyday dishes. Deep cereal bowls may occupy two plate slots; wide mugs may not fit tiny cup hooks. A compact rack that holds your usual meal’s dishes is more useful than one with an impressive capacity claim.

    Lay out a paper rectangle matching a prospective rack before buying it, and check cabinet doors, faucet movement, and nearby appliance access. Over-sink racks save counter space but can block the very basin you’re trying to recover. If you already own a usable rack, try fewer dishes per batch before replacing it. Don’t balance heavy cookware on narrow glass supports.

    7. Give every drip a route back to the sink

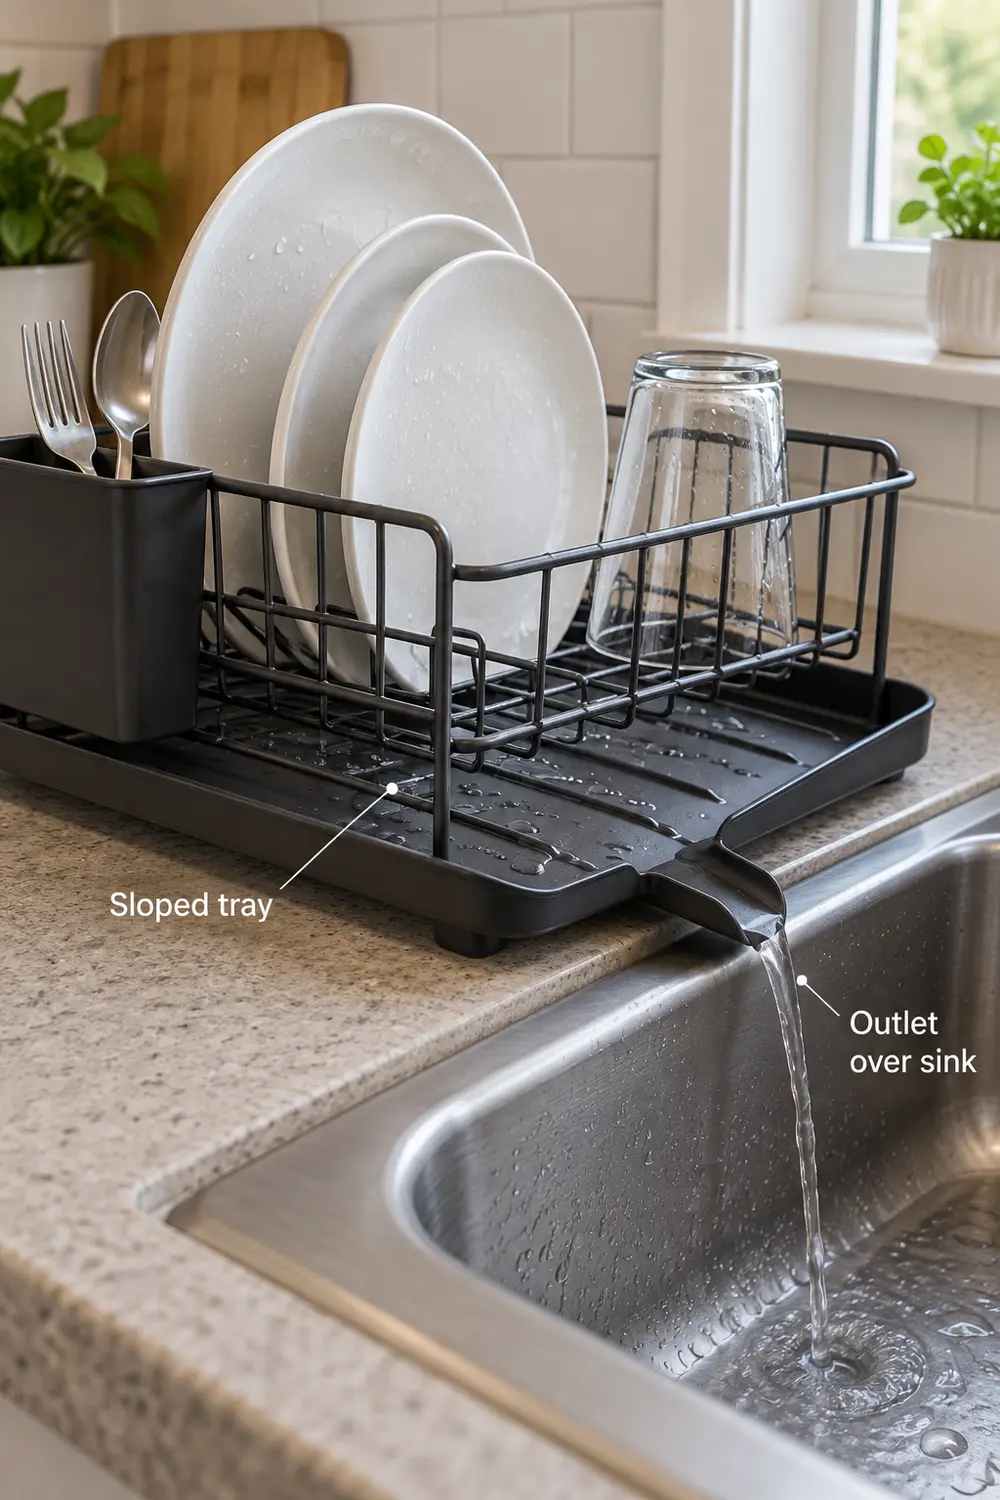
    A draining rack needs more than a tray underneath: its outlet must actually reach the sink. Place the spout over the basin edge and check that water travels toward it rather than collecting in a low corner. Pour a small amount of clean water into the empty drainboard to see where it goes before loading dishes.

    A sloped drainboard directs drips through an outlet positioned over the sink edge.

    A thick sink rim can interrupt that route, so check compatibility rather than propping the rack on loose blocks. Choose a drainboard designed for the arrangement, or use a washable absorbent mat and replace it when wet. Mats contain drips but don’t drain themselves. Look beneath either setup after washing, especially near countertop seams and the wall.

    8. Dry oversized pieces outside the main rack

    A baking sheet laid across the rack can cover every plate and send water onto the counter. Give oversized pieces a separate, temporary spot on a clean drying mat or folded dish towel. Set a skillet securely with its handle fully over the counter, or stand a sheet pan in a support intended to hold it.

    Don’t lean a heavy pan against a faucet or balance it at the counter edge. If there’s no safe drying footprint, towel-dry that piece with a clean, dry towel and put it away immediately, following its care instructions. This adds hands-on work, but frees the rack. Avoid making the stovetop your default drying area, where cookware can obstruct cooking or encounter residual heat.

    9. Clean the tools instead of leaving them in the water

    When the dishes are done, rinse debris from the brush, sponge, and reusable cloth rather than leaving them submerged in the basin. Clean each according to its care instructions, squeeze out excess water where appropriate, and give it an open drying position. A brush resting with its bristles in a puddle keeps the washing station wet.

    A small washable holder with drainage is easier to maintain than a crowded caddy containing three old sponges. Empty and clean the holder too. Launder reusable cloths according to their care labels and let them dry completely before storage; replace tools that are worn out or remain unpleasant after cleaning. Keep dishwashing cloths separate from those used for floors or pet messes.

    10. Close the drying station after unloading

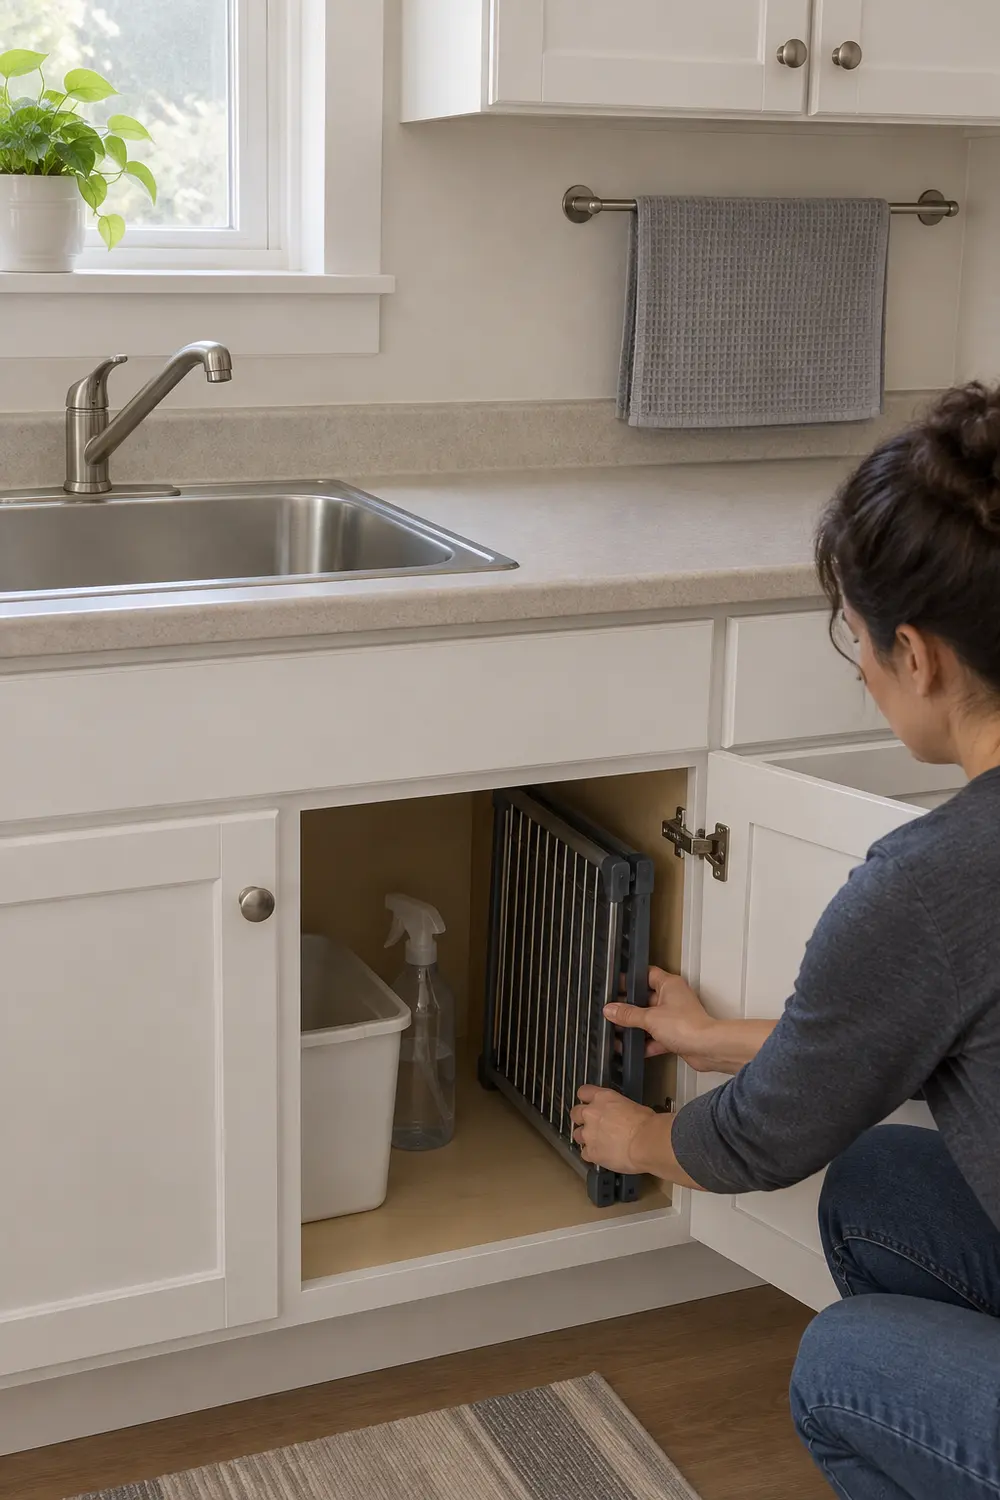
    Once dishes are dry, unload them, empty the drain tray, and clean and dry the sink and surrounding counter. Hang the mat to dry or store the dry rack if it is designed to fold. The endpoint is a usable sink and a recovered work surface—not a permanent display of clean dishes waiting to be put away.

    A dry folding rack is put away, leaving the single sink and adjacent counter clear.

    Give the rack an accessible storage slot, not a buried spot behind stockpots. If that means rearranging a lower cabinet, these ways to make deep kitchen cabinets easier to reach can help keep daily equipment near the front. A fixed rack is fine if you lack storage; unload it and dry underneath rather than forcing a daily packing routine you won’t maintain.

    Start tonight by keeping the skillet out of the sink and sorting the smaller dishes into one manageable batch. Then watch where the process stalls: washing space, rinse access, or drying capacity. Fix that bottleneck first, using what you already own before adding another piece of equipment.

  • No Counter Space to Cook? 10 Ways to Build a Practical Prep Zone

    No Counter Space to Cook? 10 Ways to Build a Practical Prep Zone

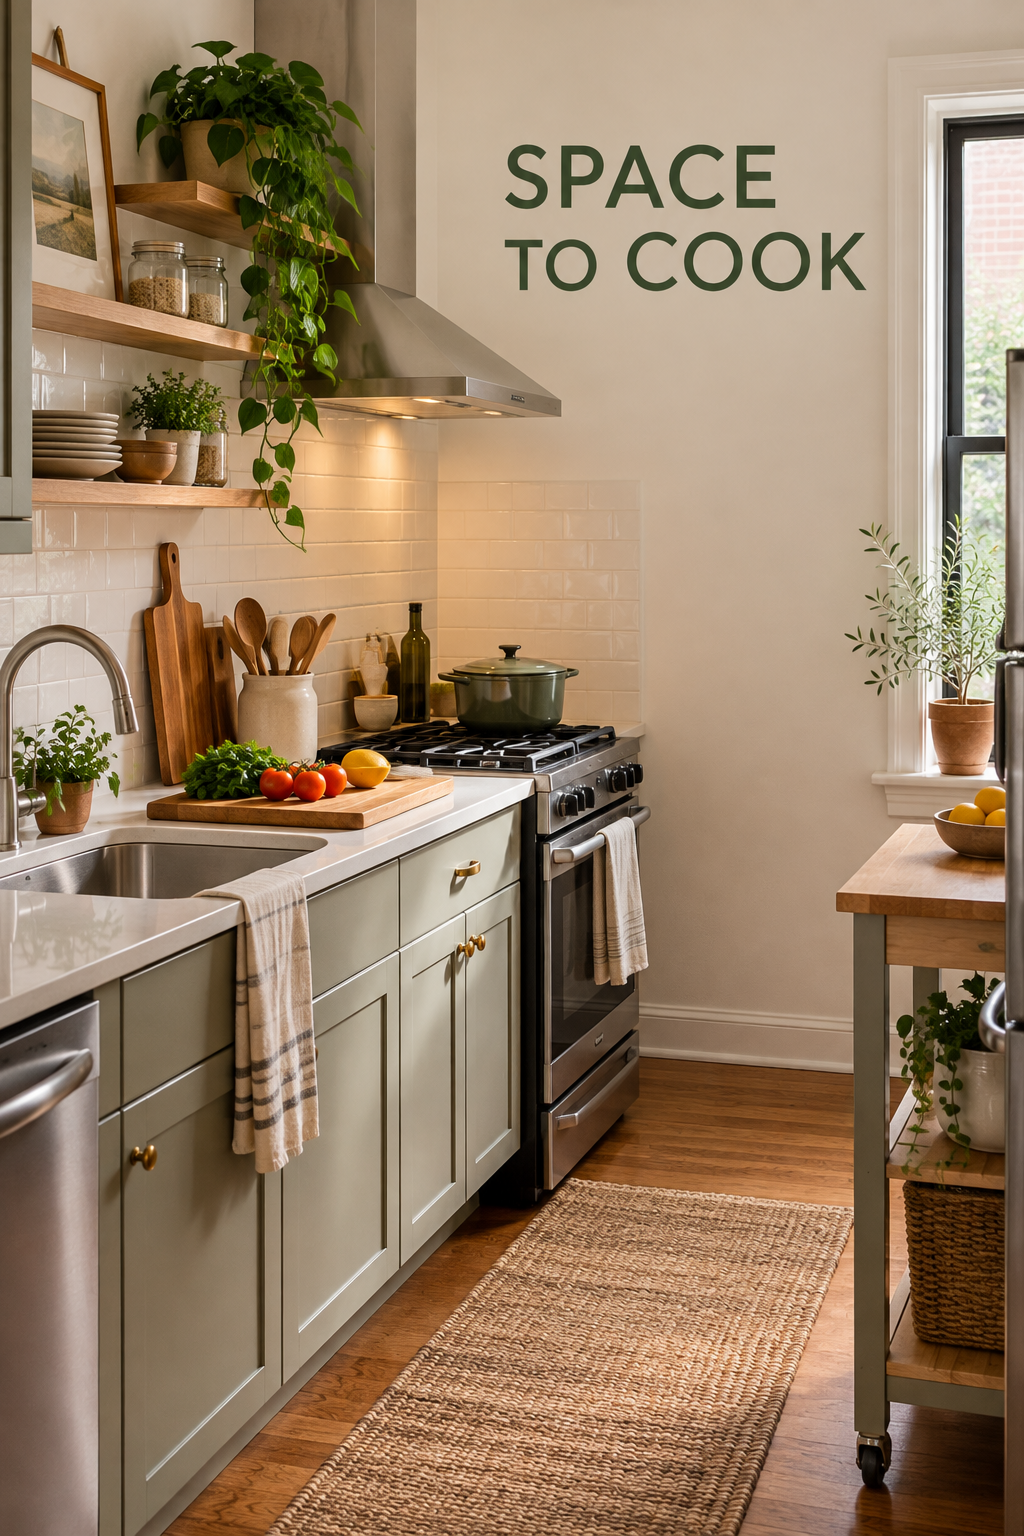
    A small kitchen can have enough room to cook without having much permanent counter space. The trick is to protect one useful preparation surface, then give appliances, ingredients, and dirty dishes somewhere else to go. Start with your actual routine: take food out, wash it, chop it, cook it, and clean up. These ten changes support that sequence without assuming you can renovate. Measure your room, equipment, and door swings first; any dimensions you use for planning are not a substitute for code, accessibility, or manufacturer requirements.

    Small kitchen with a clear cutting-board prep area and a narrow cart parked nearby.

    1. Protect One Surface for the Whole Prep Sequence

    Choose your best uninterrupted surface and make it the default chopping spot, even if it currently holds the mail. Arrange the next meal around a simple progression: ingredients come out, produce gets washed, food moves to the board, and prepared ingredients travel to the stove. For vegetable pasta, place washed vegetables beside the board and a bowl for chopped pieces on the stove-facing side.

    The mistake is treating this surface as both the clean workspace and the dirty-dish landing area. Keep dirty dishes in a separate spot that does not block sink access. Prepare ready-to-eat foods before raw meat, then wash and sanitize the board, tools, and surface as appropriate. If several people cook together, agree on handoff points rather than squeezing everyone around the same board.

    2. Store Occasional Appliances Away From the Prep Counter

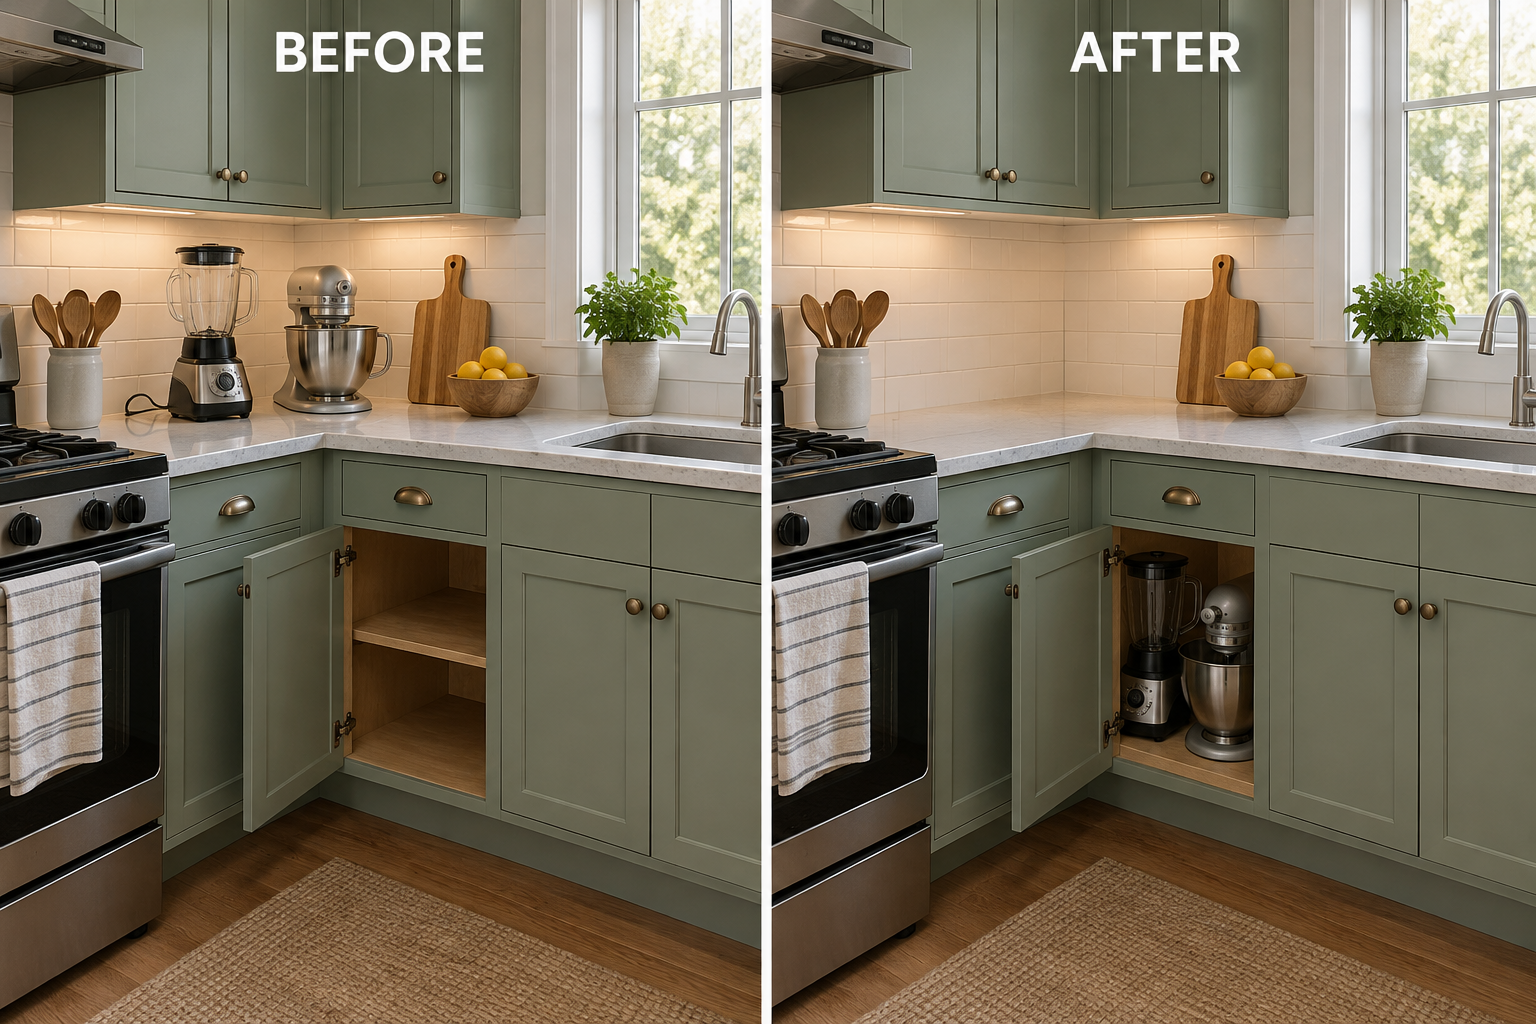
    Reclaim counter space by giving occasional appliances a dry storage home. A blender used on weekends or a mixer used monthly can live on an accessible cabinet shelf instead of beside the sink. Measure the appliance with its attachments, then test the lift before committing. Keep the cleared counter available for daily prep rather than filling it with another decorative or storage item.

    Before and after comparison showing a blender and mixer moved from the counter to a lower cabinet.

    Do not turn a storage cabinet into an operating appliance garage unless the installation and appliance instructions specifically allow it. Unplug appliances and let heated equipment cool before storing; avoid putting a heavy machine overhead or where retrieving it requires an awkward twist. This approach is less useful for equipment used every day, especially when lifting is difficult. Prioritize an easy, repeatable routine over an entirely bare counter.

    3. Bridge Part of the Sink With a Fitted Board

    A sink-spanning cutting board can create a temporary chopping area without adding furniture. Choose a food-contact-safe board designed to fit your sink securely, with supports that prevent rocking or sliding. In a double-bowl sink, cover only one bowl so the other remains available for handwashing and rinsing. Wash vegetables first, drain them, and then set up the board for chopping.

    An oversized loose board balanced on the rim is not an equivalent solution. Check stability before every use, and keep the underside away from dirty dishes or standing water. Remove, wash, and dry the board after prep. Skip this option if it blocks your only practical handwashing access, cannot sit securely, or forces you to reach uncomfortably around the faucet.

    4. Add a Locking Cart That Parks Out of the Way

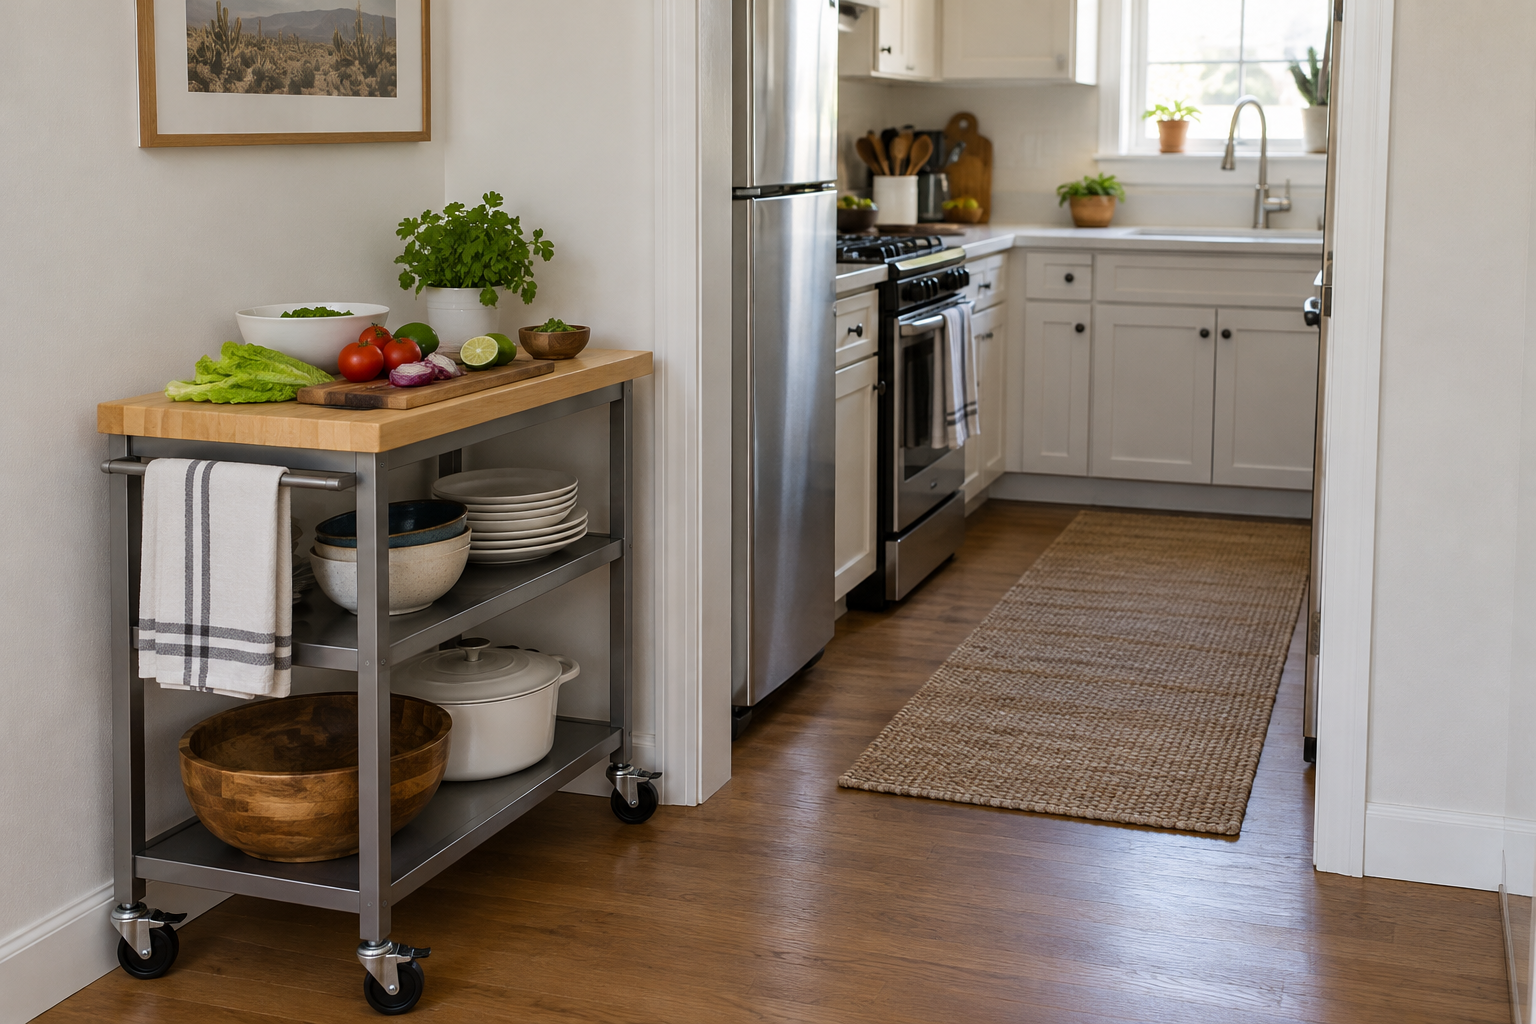
    A small kitchen cart works best when it has both a cooking position and a parking position. Pick a stable model with locking casters and a washable, food-safe preparation top, or use a separate cutting board. For taco night, roll it beside the kitchen entrance, lock it, and chop toppings there. Store bowls underneath so the top remains available rather than becoming another shelf.

    Locking kitchen cart provides a chopping surface without blocking the kitchen entrance.

    A cart that technically fits can still block the refrigerator, dishwasher, or route out of the room. Measure it with doors open and account for everyone who uses the kitchen, including mobility aids. Never use it as a rolling platform for hot pans, and do not operate heat-producing appliances on it unless their instructions permit the setup. Skip it if no safe parking spot exists.

    5. Install a Fold-Down Prep Ledge Where It Can Open Safely

    A wall-mounted folding table can turn an unused wall into a temporary prep zone. Choose hardware and a top rated for the intended load, and have the mounting matched to the wall construction. A renter might request written permission before installation. Open the ledge for assembling sandwiches or portioning ingredients, using a washable cutting board rather than cutting directly on an unsuitable tabletop.

    The folded depth is only half the decision: measure the open table and the space occupied by the person using it. Avoid locations that obstruct exits, crowd hot appliances, or interfere with doors. Lightweight decorative brackets may not withstand chopping pressure. This is unsuitable when secure mounting is unavailable, rental permission is denied, or another household member needs the passage kept open continuously.

    6. Use a Purpose-Built Pull-Out Work Surface

    A cabinet-compatible pull-out worktop can provide a small station for measuring ingredients or assembling lunches. Look for a system specifically designed as a work surface, with suitable supports, stops, and a stated load rating. For example, a professionally fitted pull-out beneath the counter can hold a cutting board and sandwich ingredients, then disappear once it has been cleaned and dried.

    Do not balance a board across an ordinary open drawer; drawer slides and boxes may not tolerate downward or sideways prep forces. Even a purpose-built surface can reduce cabinet storage and require a clear standing area. Follow its limits, avoid leaning on it, and obtain permission for cabinet alterations in a rental. It is a poor match for vigorous kneading unless expressly designed for that work.

    7. Lift Everyday Tools Onto a Reachable Wall Rail

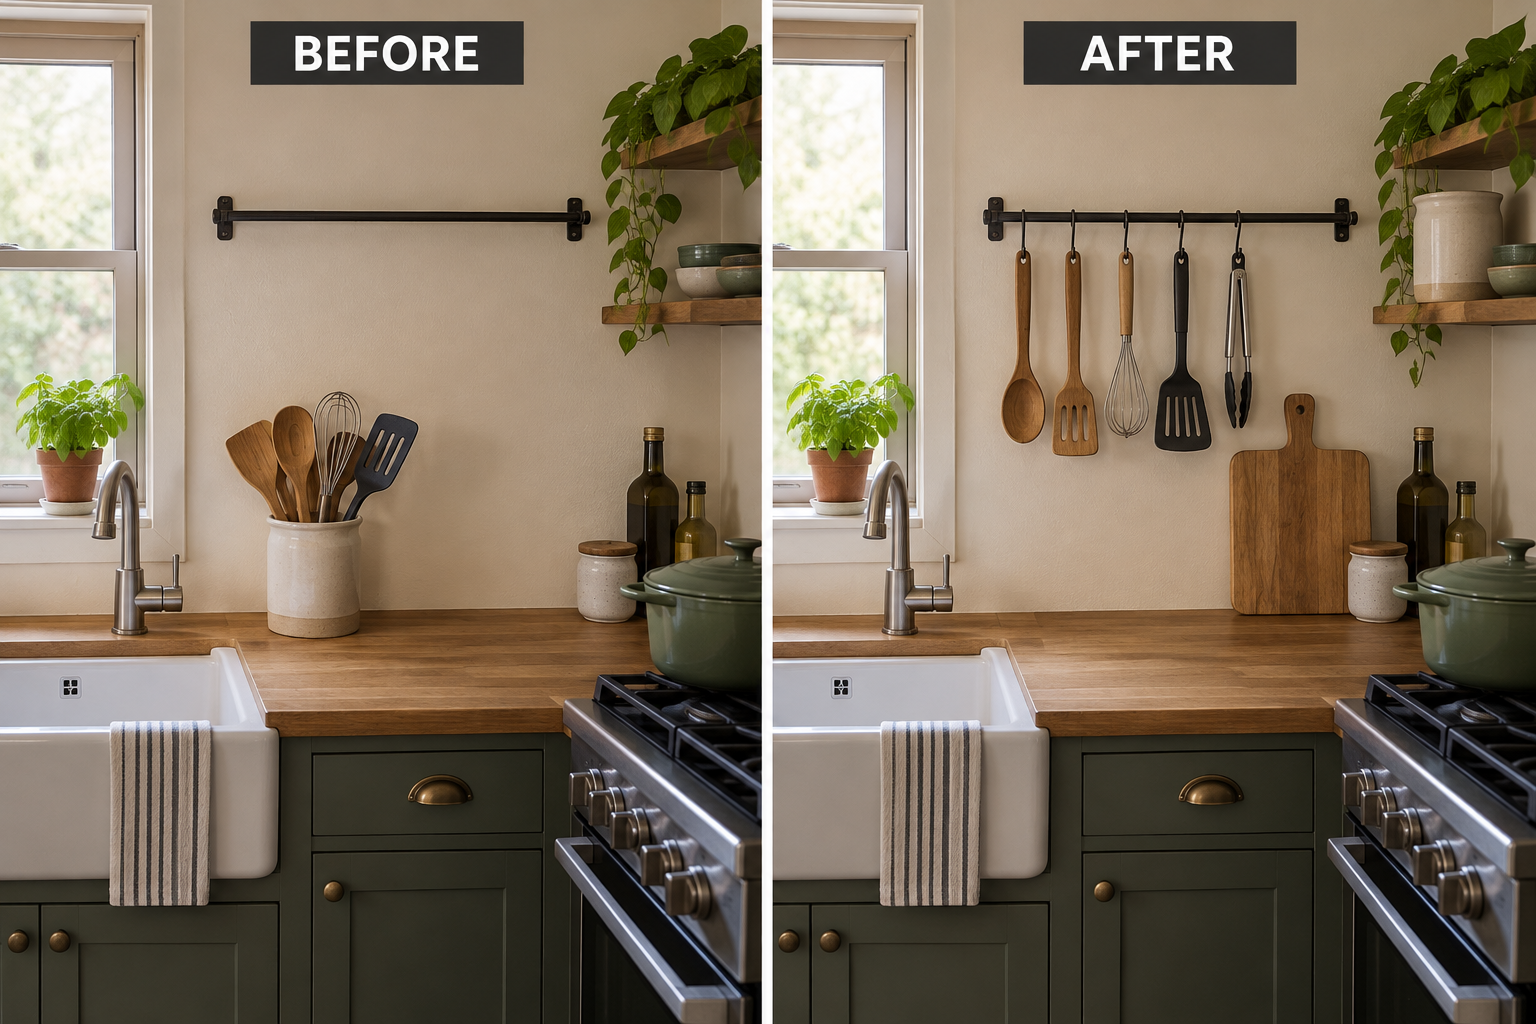
    A short utensil rail can free the counter footprint occupied by a crowded crock. Mount it on a suitable wall away from the cooking heat and splash zone, using appropriate fixings and rental permission where needed. Hang only frequently used, fully dry tools within comfortable reach. Move the empty crock to an existing storage shelf, leaving the newly cleared counter edge available for your cutting board.

    Before and after comparison showing utensils moved from a counter crock onto an existing wall rail.

    More hanging storage is not always better. Tools that dangle into the working area, collect cooking grease, or require reaching across a burner create new problems. Avoid hanging sharp knives where children can reach them, and do not assume adhesive hooks can carry a loaded rail. If drilling is prohibited or the wall location is awkward, keep fewer tools in an accessible drawer instead.

    8. Borrow the Dining Table for Clean Preparation Tasks

    A nearby dining table can become a second prep station for tasks that do not need the sink. Clear it completely, clean the surface, and set down a stable food-safe cutting board. Use it to tear greens, assemble wraps, or portion cooled ingredients into containers. Carry supplies in a tray so you can set up and restore the table without repeated trips.

    Do not prepare food directly on a decorative table protector or porous craft mat. Keep homework materials, pet items, and household cleaners out of the setup. Table height may be uncomfortable for prolonged chopping, and raw meat preparation adds sanitation demands far from the sink. This option works best for short, clean tasks when the household can spare the table until prep is finished.

    9. Right-Size the Board and Contain the Scraps

    A cutting setup can waste space even when the counter is clear. Choose a board large enough for the food you actually prepare but small enough to sit fully supported. Set a compact scrap bowl beside it and transfer chopped ingredients into a mixing bowl as you work. For soup, process one vegetable at a time instead of spreading every ingredient across the counter.

    Shrinking the board too far makes knife work cramped, while piling ingredients around its edges defeats the purpose. Match the board to the task: a large squash needs more support than herbs do. Keep scraps separate from usable food, empty the bowl before it overflows, and use a separate clean container for finished ingredients. If a task requires more room, switch to a larger safe surface.

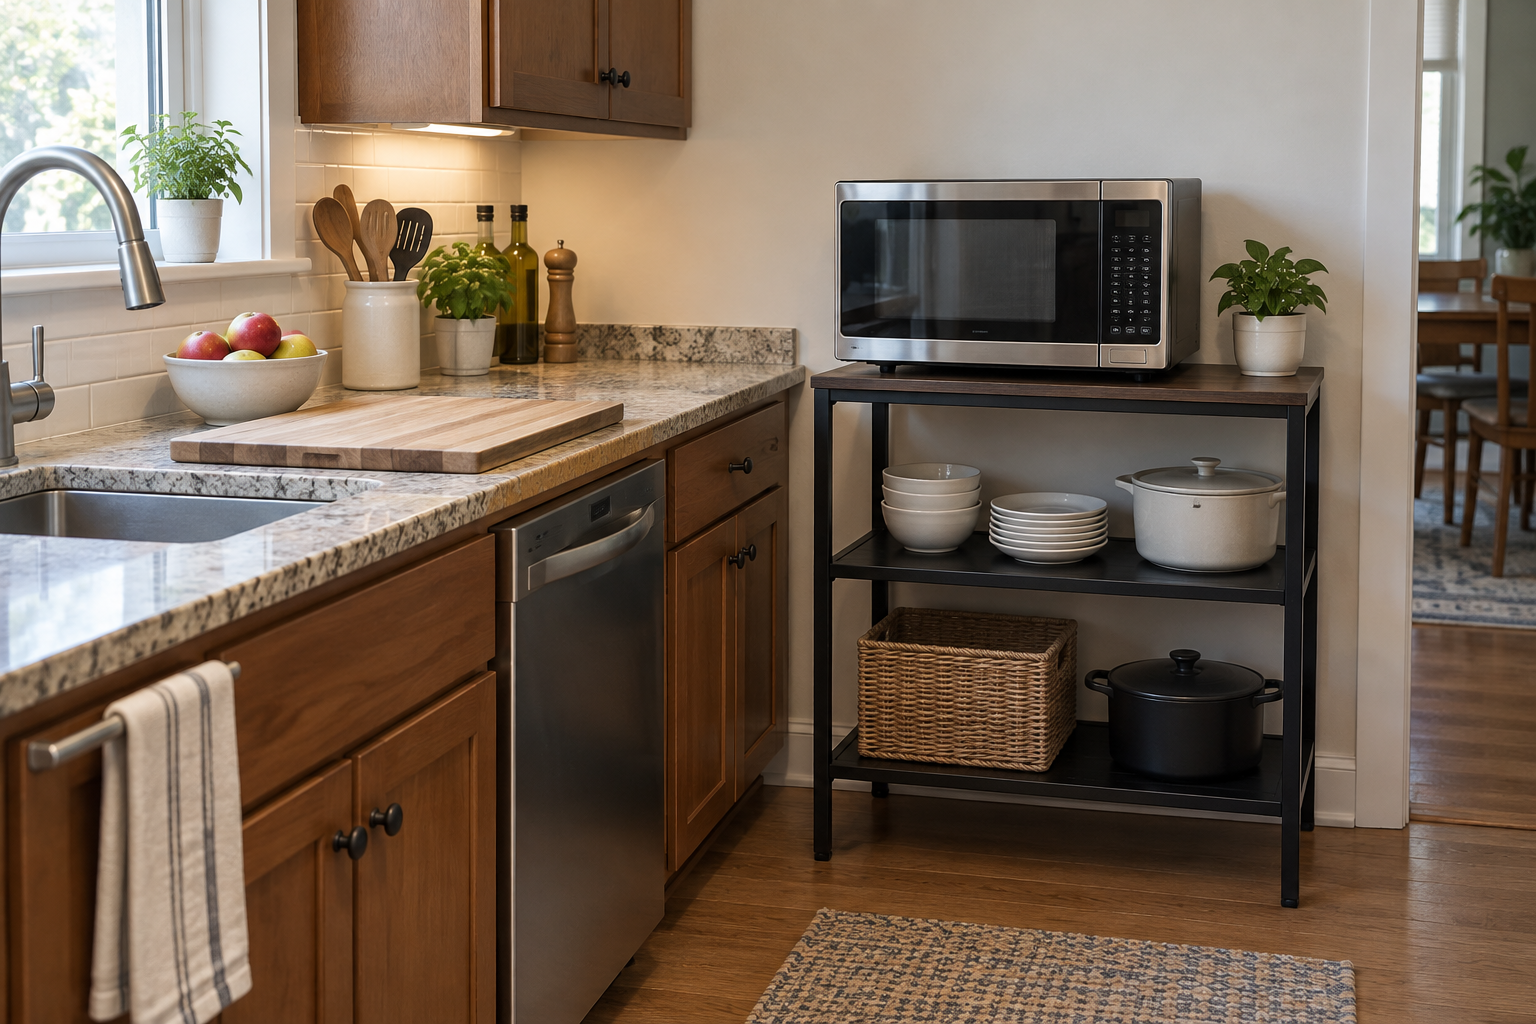
    10. Give the Microwave a Safe Operating Home Off the Counter

    If the microwave occupies your only useful prep stretch, consider a purpose-built stand or an approved shelf installation nearby. Check the exact model’s ventilation requirements, support needs, door movement, and electrical instructions before choosing a location. A stable stand can free the original counter for chopping while keeping the microwave at a comfortable height with a nearby heat-safe place to set down a dish.

    Microwave on a dedicated open stand leaves the kitchen counter available for chopping.

    An ordinary crowded bookcase is not automatically a suitable appliance station. Do not enclose a countertop microwave, substitute extension cords for a suitable electrical setup, or place it where lifting hot liquids becomes awkward. Follow the manufacturer’s clearances and anchoring requirements, and seek qualified installation help where necessary. If the only alternative compromises ventilation, stability, or safe handling, keep it on the counter and reclaim space elsewhere.

    You do not need to use every solution. Start by clearing one prep surface and testing a complete meal there. Add a movable or temporary surface only if a specific task still lacks room. The best small-kitchen setup makes clean preparation, safe cooking, and everyday cleanup easier without turning the room into an obstacle course.

  • Food Gets Lost in Deep Kitchen Cabinets: 10 Ways to Bring It Within Reach

    Food Gets Lost in Deep Kitchen Cabinets: 10 Ways to Bring It Within Reach

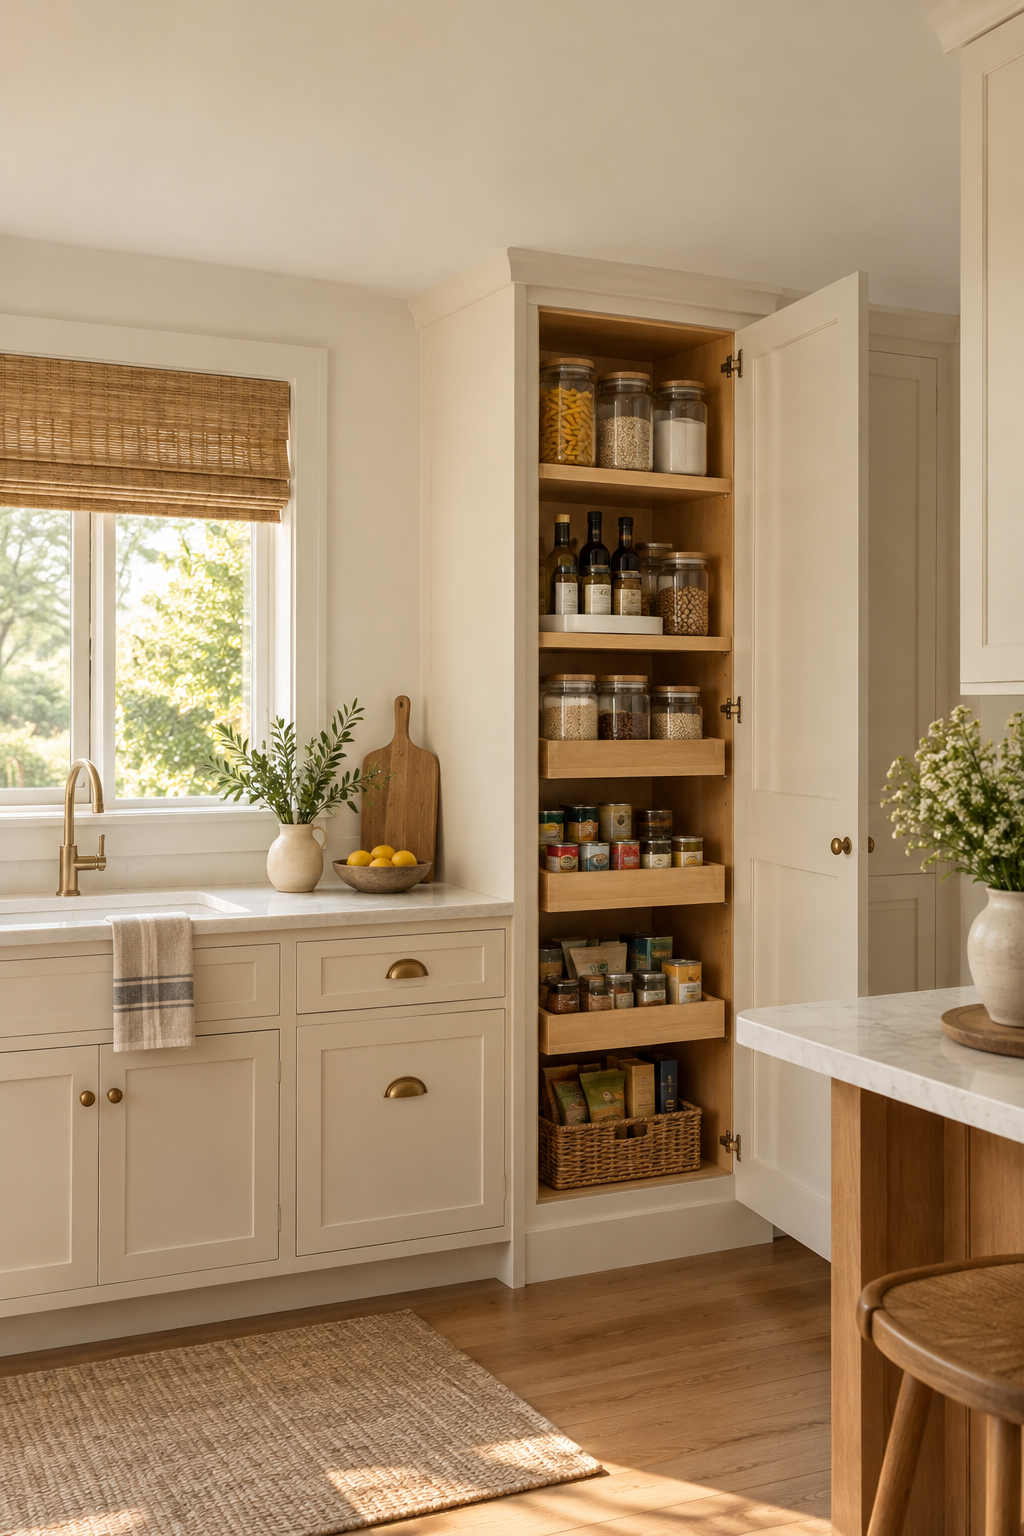
    A deep kitchen cabinet can hold plenty and still feel impossible to use. Crackers disappear behind cereal, cans collect in dark corners, and finding dinner ingredients requires unloading half a shelf. The answer isn't necessarily more storage; it's making existing storage easier to see, reach, and reset. These ten approaches work without renovation, and most can start with supplies you already own. Measure cabinet openings, interior depth, hinges, and shelf clearance before buying organizers; any dimensions mentioned are approximate planning guidelines, not compliance standards.

    Open deep kitchen cabinet with grouped food and accessible organizers in a compact kitchen.

    1. Give the Front and Back Different Jobs

    Assign cabinet depth according to how often you actually use something. Keep breakfast foods and everyday dinner ingredients at the front, with unopened duplicates directly behind their matching products. For example, place the open oatmeal container near the shelf edge and its replacement behind it. Put occasional baking supplies farther back, but keep their category visible from the doorway.

    The common mistake is calling the back a reserve zone and filling it with unrelated leftovers. That simply creates a second hiding place. Keep each front-to-back lane specific, and avoid stacking so deeply that checking quantities becomes difficult. If reaching the rear requires climbing or stretching, store lightweight, infrequently used goods there rather than heavy jars or daily staples.

    2. Pull Out a Whole Food Category in One Bin

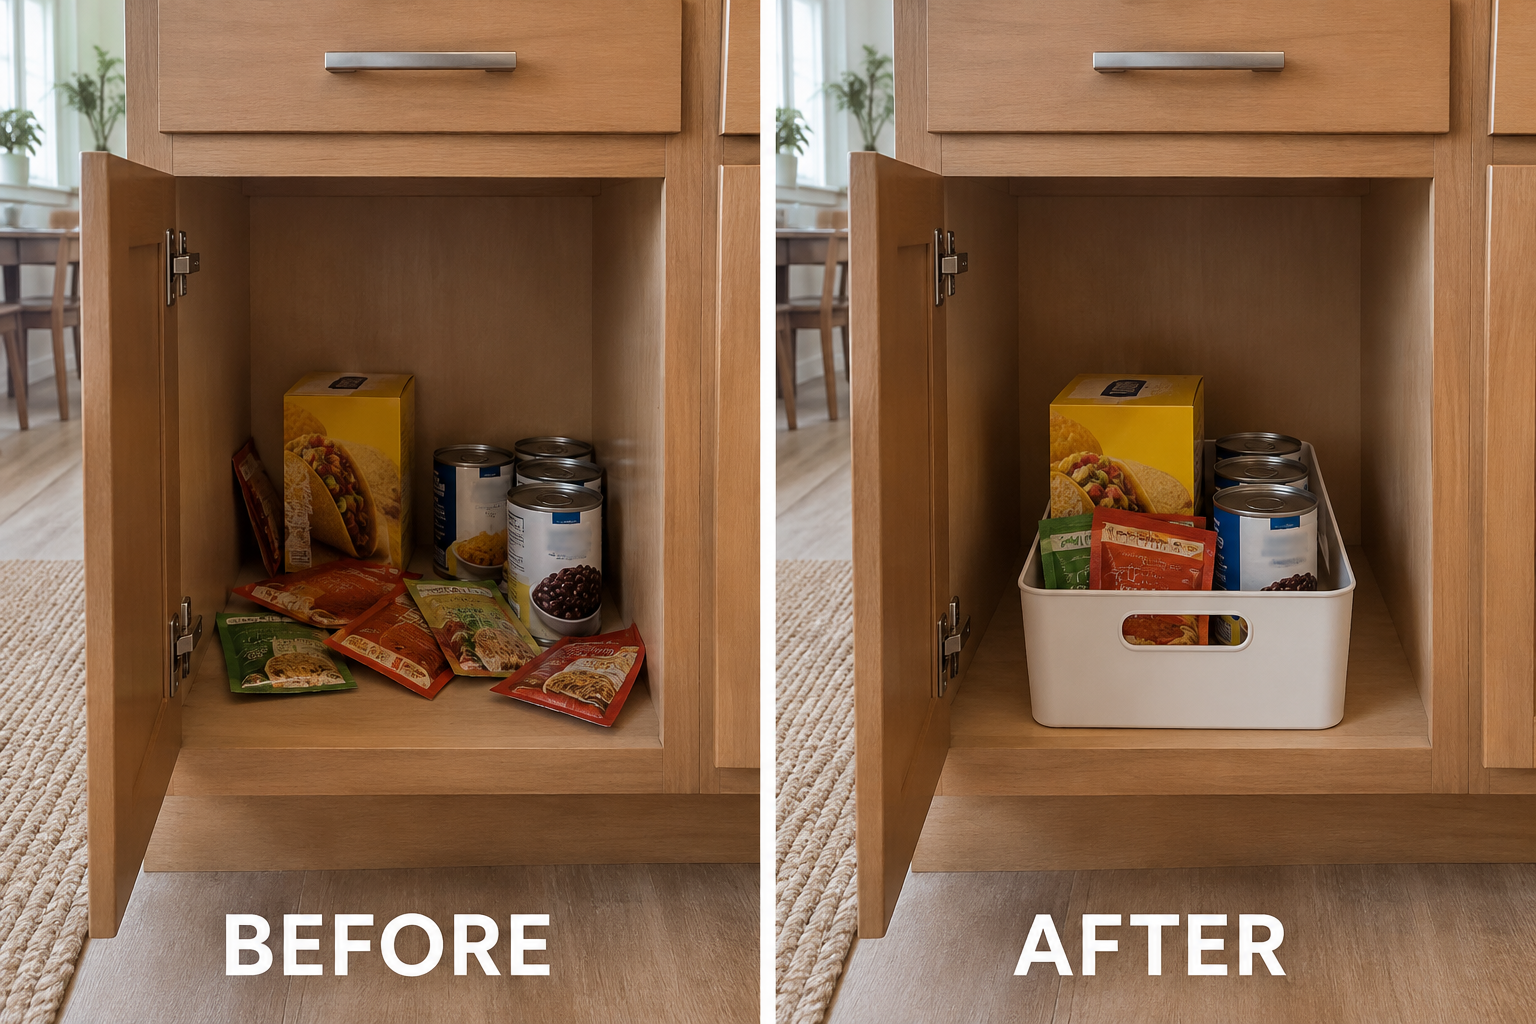
    Use a narrow, handled bin to turn a deep shelf into a removable drawer. Group foods used together, such as taco shells, seasoning packets, and canned beans, so one pull brings the meal components forward. Choose a bin that clears the hinges and leaves room for your hand. Test the fit with an empty cardboard box before purchasing anything.

    Before and after showing loose taco ingredients grouped into one removable handled bin.

    A giant bin can become as awkward as the cabinet itself, especially when loaded with cans. Use several manageable categories instead of one shelf-wide catchall, and check the organizer's load guidance. This approach is unsuitable if you cannot comfortably lift the loaded bin or lack a nearby landing spot; a smaller container may solve both problems.

    3. Rotate Small Bottles Into View

    A turntable works well for small bottles that otherwise form several hidden rows. Place oils, vinegars, or sauces on a stable model with a raised rim, keeping taller bottles toward the center and shorter ones outside. Measure the full turning circle inside the cabinet, including hinge intrusions, and test rotation with the door in its normal open position.

    Don't assume a round organizer uses every inch efficiently. It leaves unused corners and can waste space when filled with rectangular packages. Heavy glass bottles also make rotation harder and spills messier. Skip it on unstable shelves or where bottle height leaves too little clearance; shallow category trays are often better for bulky cartons and bags.

    4. Raise Rear Cans Above the Front Row

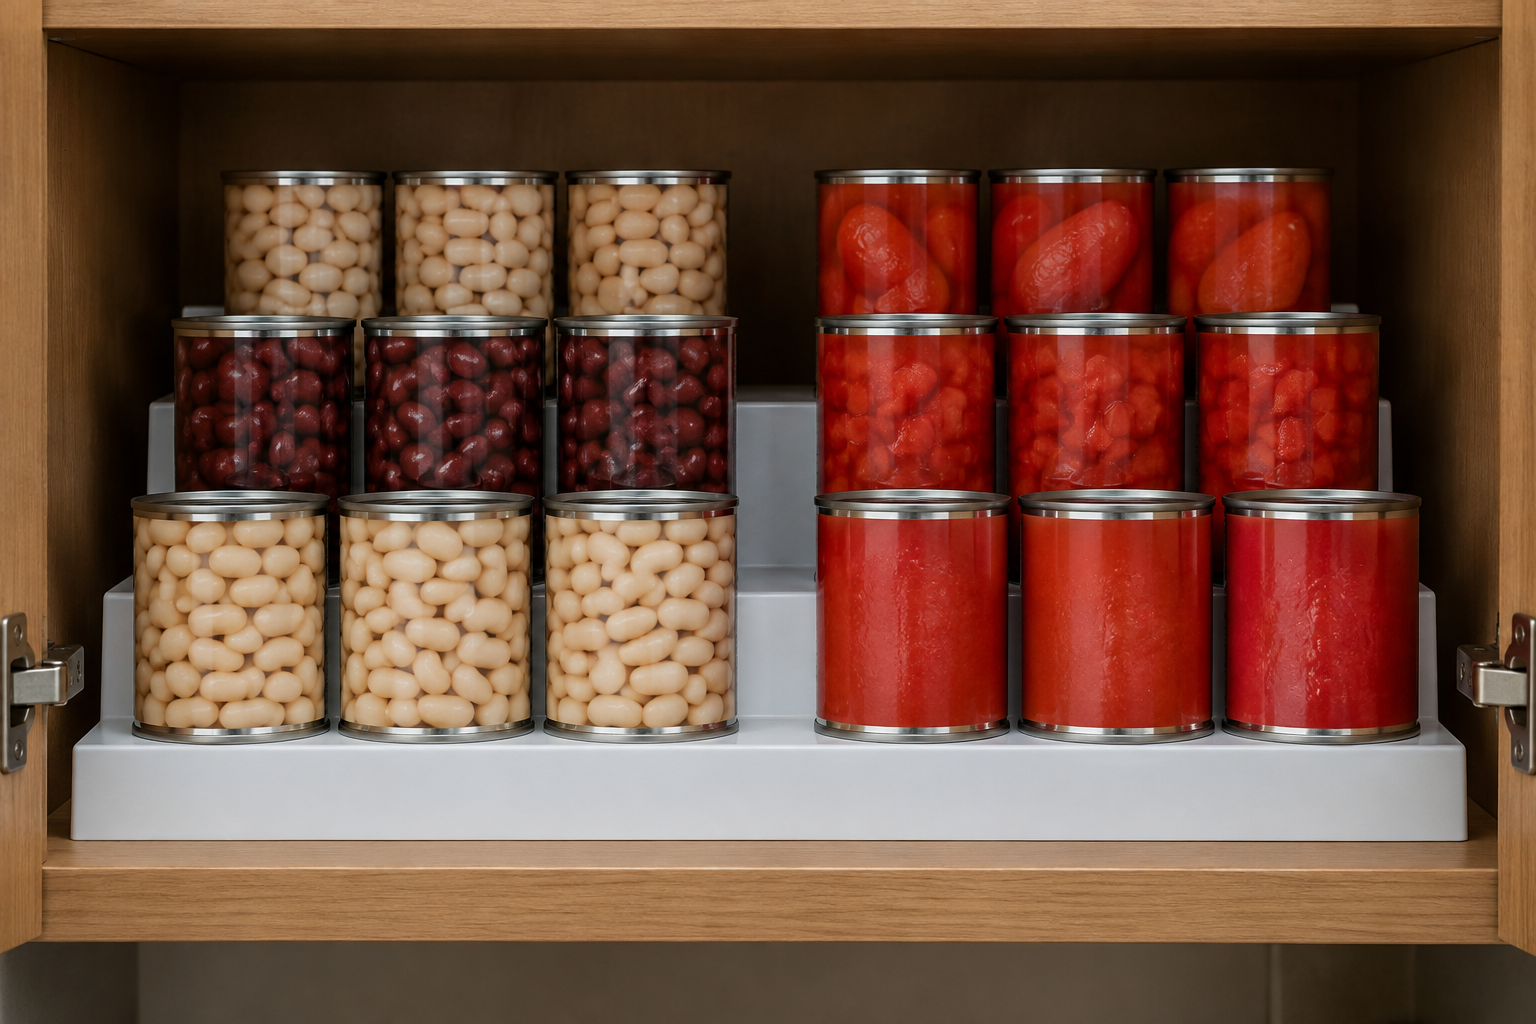
    A sturdy stepped riser reveals the tops and fronts of canned goods without requiring a full cabinet unload. Arrange one row per step, grouping beans together and tomatoes together rather than mixing everything by can size. Choose shallow enough steps that you can grasp each can securely. Measure loaded height, not just the empty organizer, before settling on a shelf.

    Stepped cabinet riser showing three visible rows of canned beans and tomatoes.

    Stacking extra cans on every step defeats the visibility benefit and can make the arrangement unstable. Risers also lift weight higher, so check both shelf capacity and organizer guidance. They are less useful for mixed-height jars or for anyone who finds elevated rear items difficult to grasp. Keep heavy cans on a comfortably reachable shelf, not overhead.

    5. Stand Flat Food Packages Upright

    Store rice pouches, seasoning envelopes, and thin baking mixes upright in a divided file-style organizer. Their top edges stay visible, and removing one packet won't collapse a horizontal stack. Use adjustable dividers to separate dinner grains from baking ingredients. Keep the organizer near the front so you can flip through its contents rather than reach over a pile.

    Overfilling the compartments makes packets difficult to browse and can hide small envelopes between larger pouches. Leave enough looseness to separate items with your fingers. This method isn't suitable for leaky bags or packages that slump unless supported. Keep opened powders tightly sealed, and avoid placing sharp divider edges against thin packaging that could tear.

    6. Add a Retrofit Pullout Where Lifting Is Awkward

    For a lower cabinet holding heavier food, a retrofit sliding basket can bring the entire shelf forward without lifting a bin. Measure the opening at its narrowest point, including hinges and any center stile. Check required mounting surfaces and extension space. A pullout holding flour, sugar, and rice can make a deep base cabinet considerably easier to use.

    These organizers often require screws, so renters should obtain permission before installation. Follow the manufacturer's mounting and load instructions; a poorly secured pullout can tip or damage cabinetry. Hardware also reduces usable width and height. Skip this option if the cabinet structure is unsuitable or the extended basket would obstruct a doorway, appliance, or essential walking route.

    7. Decant Only the Foods Visibility Will Help

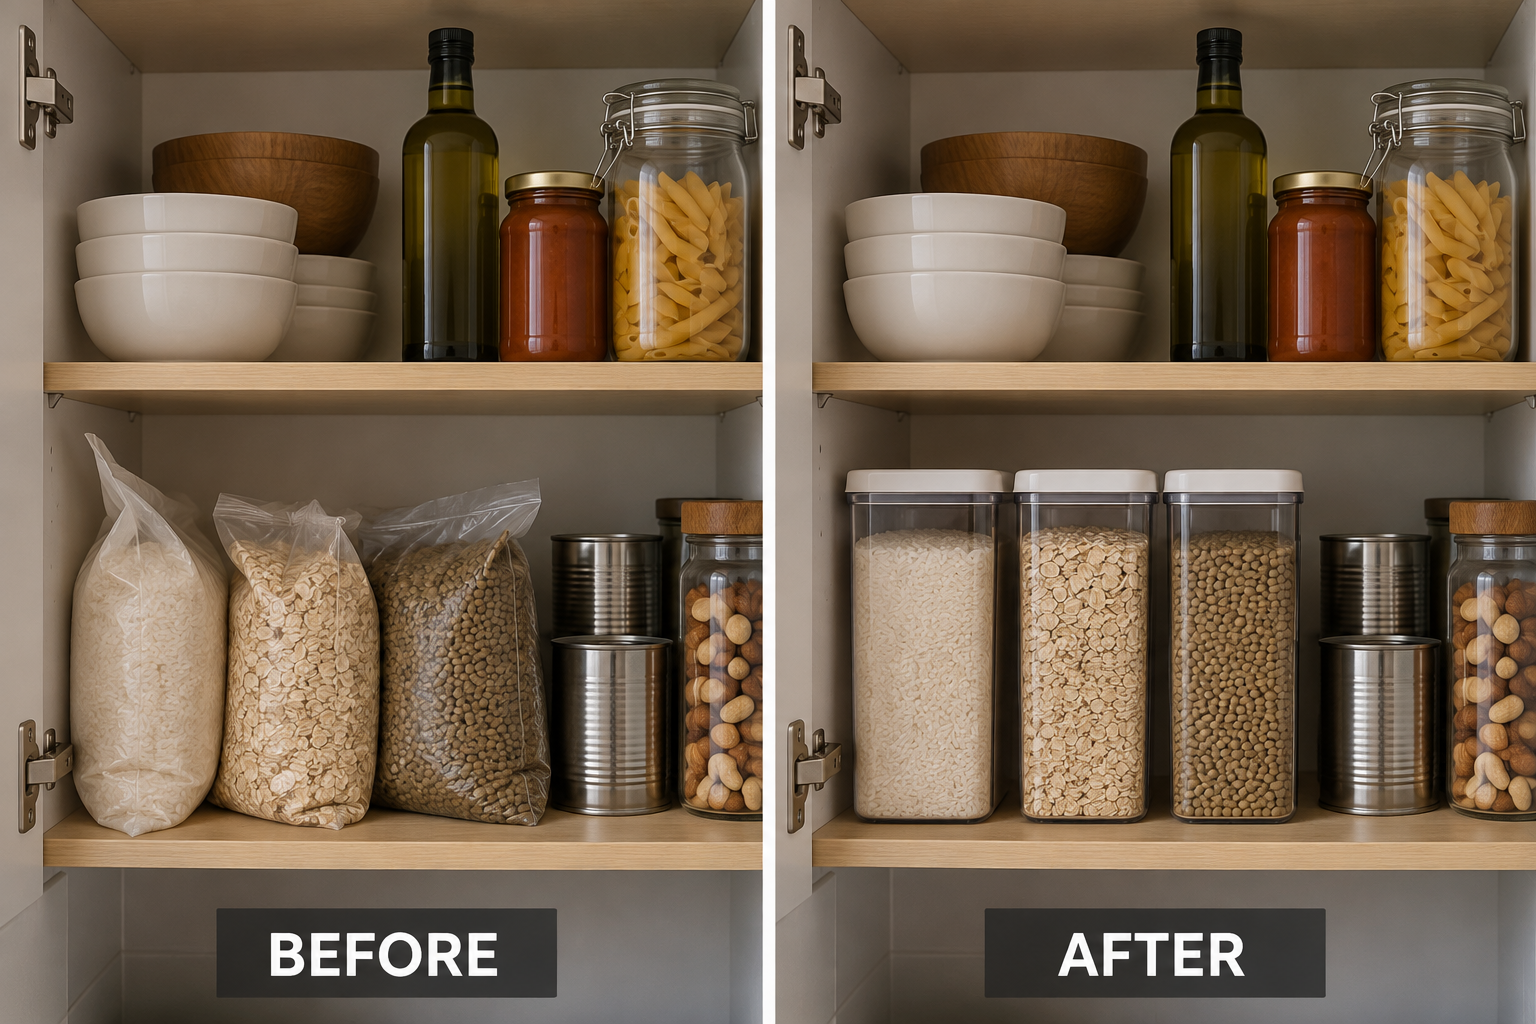
    Transfer frequently used dry staples from floppy, opaque bags into clear, food-safe containers. Straight-sided containers make remaining quantities obvious and can prevent a half-empty bag from disappearing behind another package. Start with two or three foods, such as rice, oats, and lentils. Choose sizes that hold your usual purchase while fitting the shelf's depth and overhead clearance.

    Before and after showing three dry staples moved from opaque bags into clear containers.

    Decanting everything creates extra washing and can separate food from cooking directions, allergen information, and dates. Retain those details with each container, and don't top off old food indefinitely. Wash and thoroughly dry containers between batches. Keep products in original packaging when household allergy management, identification needs, or infrequent use makes transferring them more trouble than help.

    8. Use the Empty Air Beneath a Shelf

    A shallow under-shelf basket can give lightweight food its own visible level instead of letting it disappear behind taller goods. Try it for tortillas, small snack packets, or unopened flatbread. Measure the basket's drop and the thickness of the shelf it clips onto. Position it toward the front, leaving the foods below easy to see and remove.

    The mistake is treating this added level as free capacity. A basket can block tall containers, interfere with the door, or strain an unsuitable shelf edge. Follow its load limit and reserve it for lightweight items, not cans or jars. Avoid clip-on models where the fit is loose or where the supporting shelf is damaged.

    9. Light the Back Without Adding Clutter

    Sometimes food isn't poorly organized; it's simply in shadow. A removable, rechargeable cabinet light can reveal rear contents without taking up shelf space. Mount it near the front underside of the shelf above, aimed inward so tall packages don't immediately block it. Test placement temporarily before attaching it, and choose a model intended for the cabinet environment.

    Lighting won't fix overcrowding, and a fixture hidden behind cereal boxes does little good. Adhesive mounts can damage rental finishes, so check permissions and product instructions first. Keep lights away from moisture and heat, maintain appliance clearances, and avoid trailing charging cords through doors. Skip lights that require awkward removal or charging you are unlikely to maintain.

    10. Build a Quick Shelf Sweep Into Grocery Day

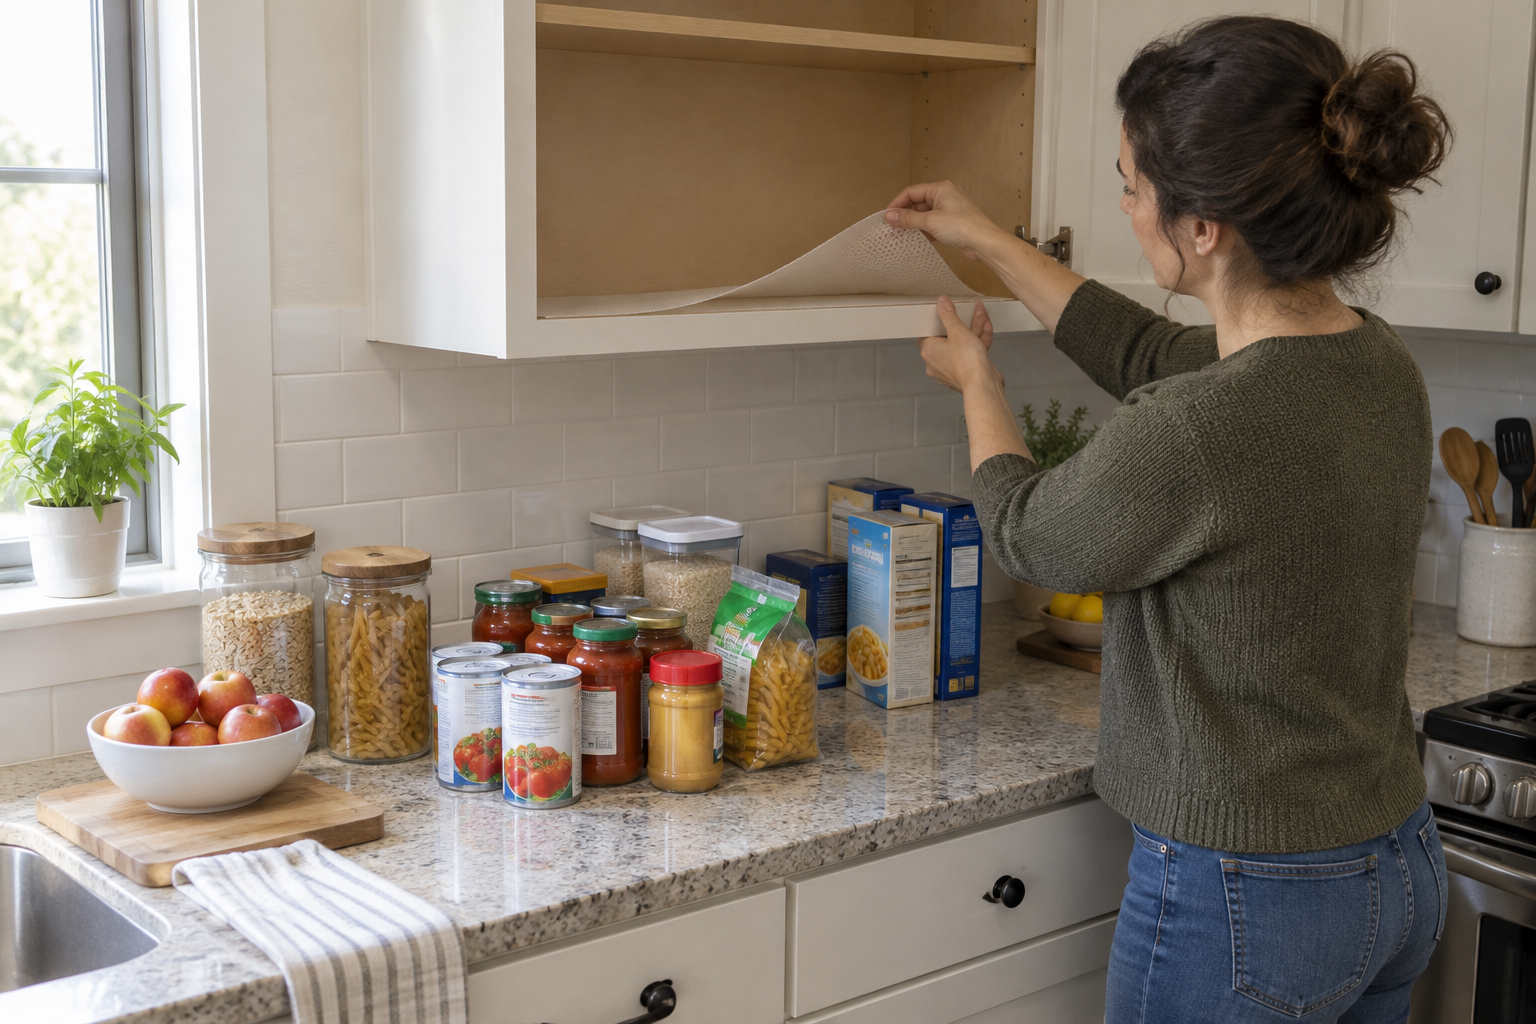
    Before putting groceries away, bring the contents of one deep shelf onto a clear counter. Check the back, wipe crumbs with a suitable cleaner, dry the surface, and return older matching products in front of new ones. Work through a different shelf each shopping trip. A fitted, removable, washable liner can simplify cleanup if the cabinet finish permits it.

    One cabinet shelf emptied for cleaning with its food grouped on the adjacent counter.

    Don't empty the entire kitchen at once or leave food across a busy walkway. A small, repeatable sweep is more useful than an exhausting overhaul. Avoid thick or curling liners that catch containers, and let surfaces dry before restocking. If counter space is scarce, use a cleared table or clean tray and finish one section before starting another.

    Start with the cabinet that causes the most frustration, not a shopping list of organizers. Decide what belongs at the front, reveal what hides behind it, and choose one access tool that suits the food and your household. Leave enough room to grasp, remove, and clean around everything. A deep cabinet becomes useful when you can find what you have and put it back without a struggle.