Author: Cozyana-admin

  • Your Bed Is Always in View: 10 Reversible Ways to Divide a Studio

    Your Bed Is Always in View: 10 Reversible Ways to Divide a Studio

    When your bed shares a room with your sofa, separating sleeping from living is less about constructing another room than controlling what you see. A useful boundary might hide pillows from the front door, soften the view from a chair, or close temporarily when someone visits. These ten approaches work within your studio’s existing footprint. Measure before buying or moving anything; dimensions mentioned here are approximate planning guidelines, not building-code or accessibility standards. Keep required exits, window access, ventilation, and everyday routes usable, and check rental permissions before attaching hardware.
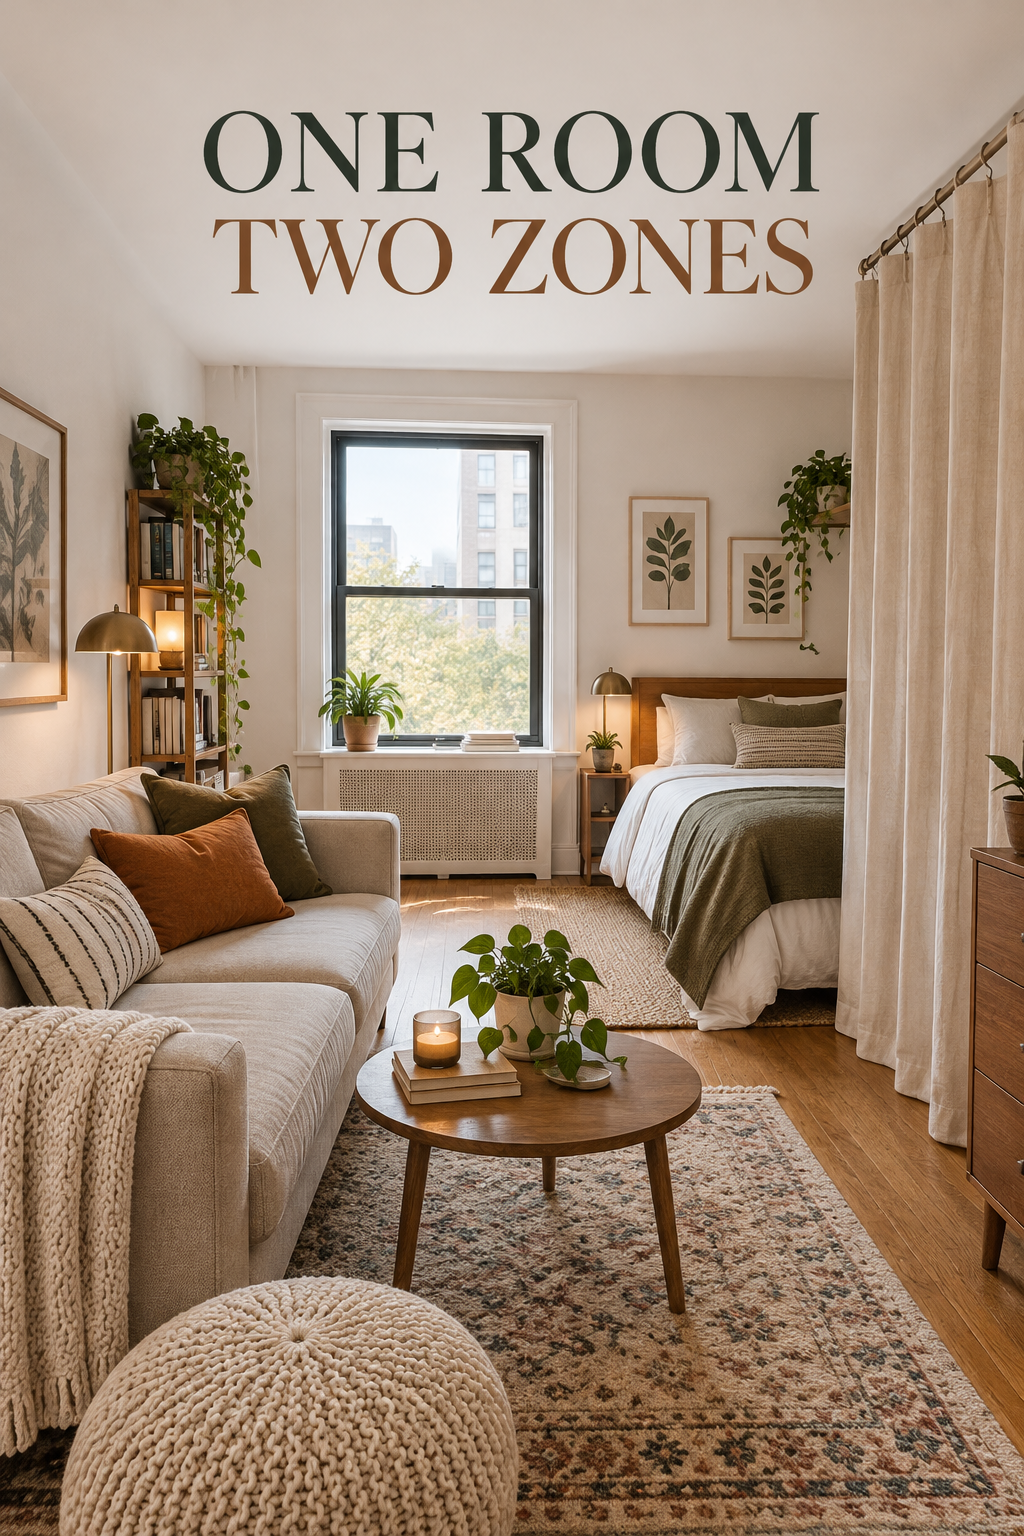
    A curtain separates a studio bed from a compact living area beneath the headline ONE ROOM TWO ZONES.

    1. Move the Bed Out of the Entry Sightline

    Start at the front door and notice which part of the bed appears first. Sometimes rotating the bed or placing its head against an existing return wall removes most of it from that view without adding a divider. For example, a bed running along the entry axis might fit crosswise behind an existing closet projection, leaving the sofa visible when the door opens.

    The mistake is improving the doorway view while making the bed awkward to enter or blocking a closet. Map the furniture footprints with tape, then walk your normal routes carrying laundry. This approach gives directional privacy, not enclosure, and may not suit couples needing access on both sides or studios where every alternative placement obstructs a heater, outlet, or exit route.

    2. Use the Sofa Back as a Low Visual Boundary

    Turn the sofa so its back faces the bed rather than placing every piece against a wall. In a rectangular studio, a compact sofa across the foot of the bed can establish a living area facing the opposite wall. Its back conceals some bedding from seated eye level while leaving the upper room open, preserving daylight and conversation across the apartment.
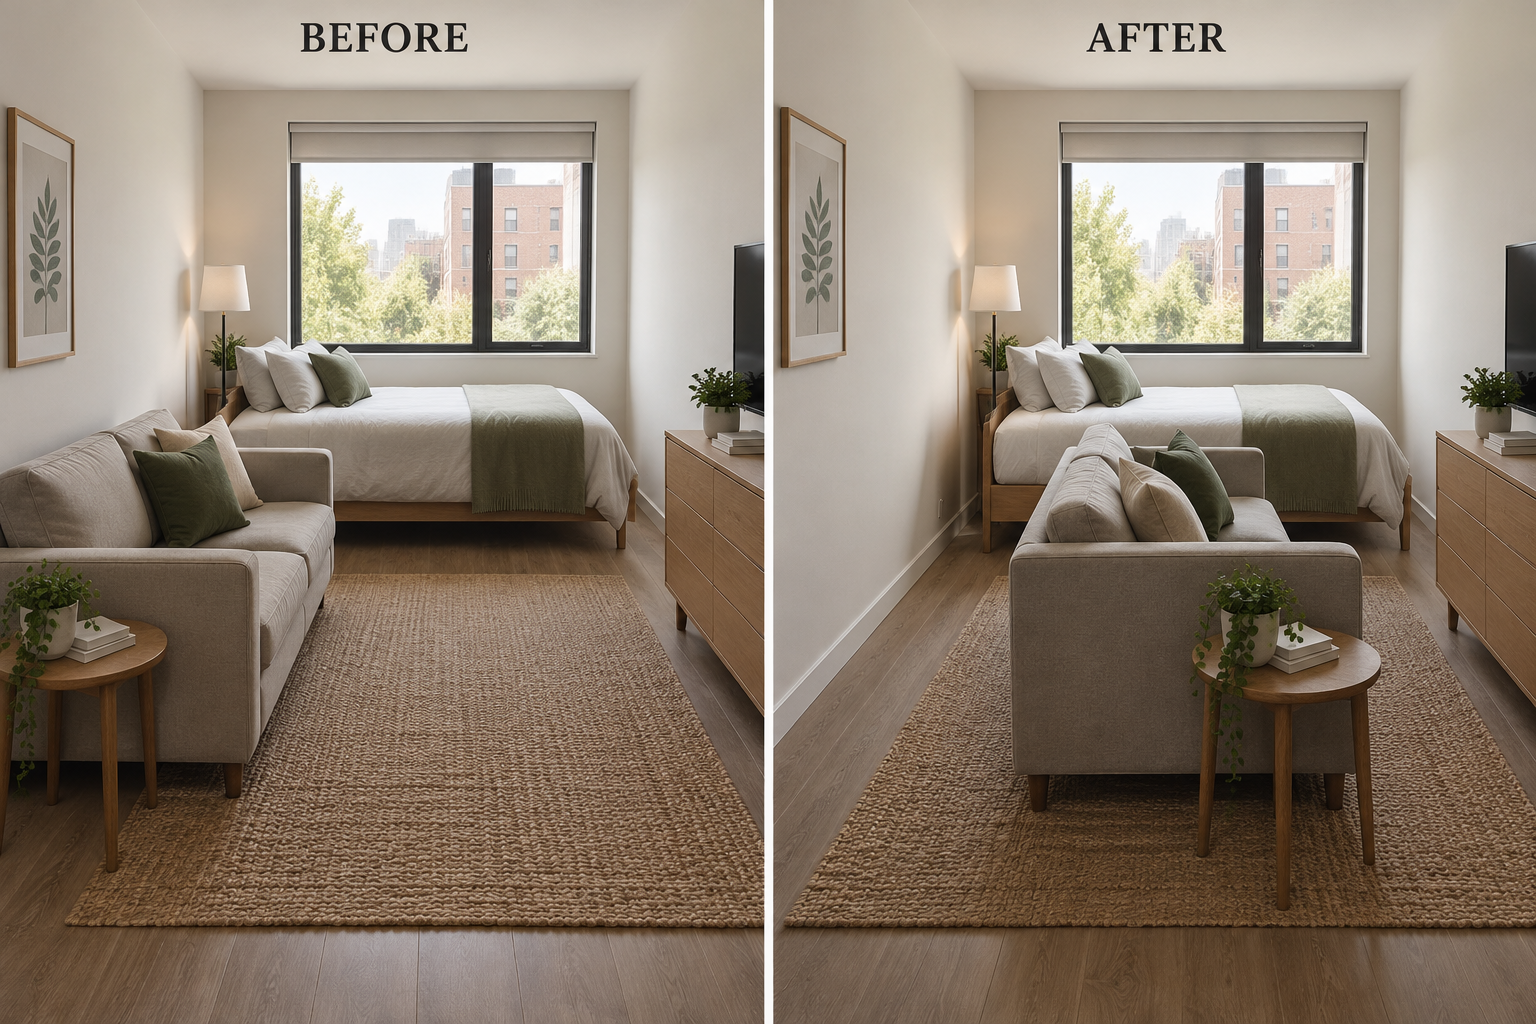
    Before and after views show the same sofa repositioned to create a low boundary at the foot of the bed.

    Avoid wedging the sofa directly against the mattress or adding a console simply to fill the gap. You still need space for bedding changes and comfortable passage around the grouping. A low sofa will not hide a standing person or a tall headboard, so this works best when the goal is a calmer living-room view rather than private dressing space.

    3. Hang a Curtain That Parks Completely Open

    A ceiling-track curtain offers privacy when needed and disappears into a narrow stack afterward. Run it along the exposed side of the bed, with enough fabric to close without pulling taut. In a studio with one shared window, choose a light-filtering textile so the living area still receives softened daylight when the sleeping zone is closed.

    Do not assume every ceiling accepts the same anchors, or that a tension-mounted system is suitable for any span. Get rental approval where required and follow the hardware’s installation instructions. Keep fabric away from heaters, cooking appliances, and exit paths. Sheers blur detail rather than guarantee privacy, especially when the sleeping area is brighter than the room beyond.

    4. Angle a Folding Screen Across the Exposed Corner

    A folding screen works best when it intercepts a specific view rather than trying to span the entire apartment. Place a stable, partially folded screen diagonally near the bed’s exposed corner to conceal the pillows from the sofa. Choose panels opaque enough for your purpose, then test the angle from your usual seat before settling on its position.
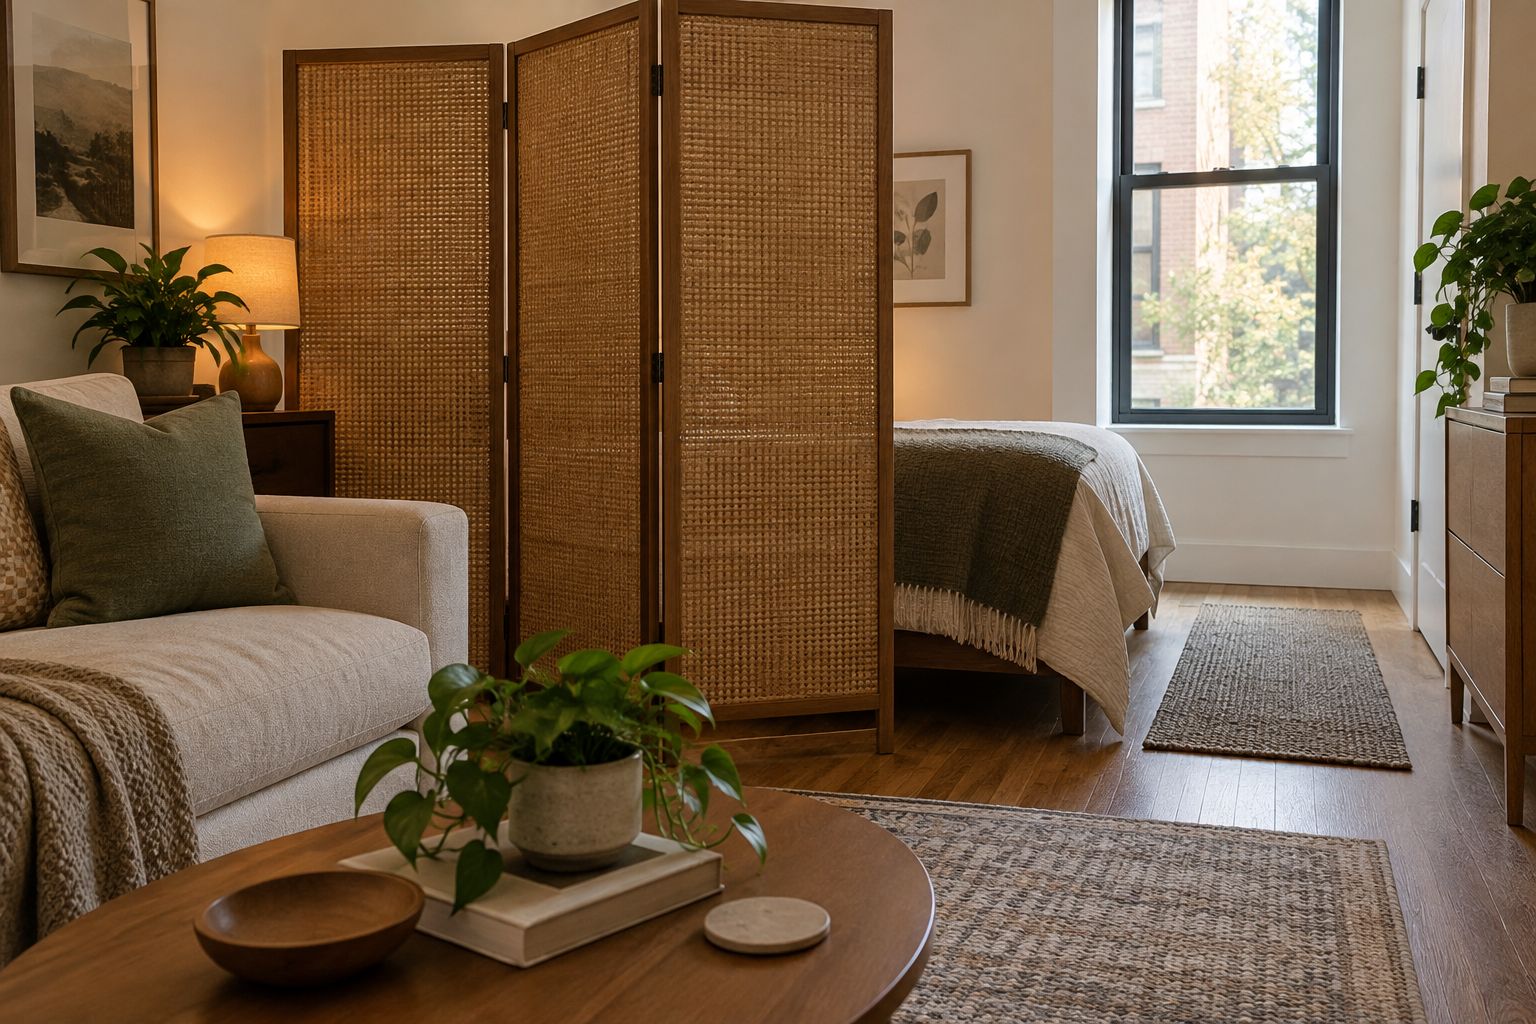
    An angled folding screen hides the pillow end of a bed from the sofa.

    Opening a screen nearly flat can make it unstable, while extending it too far can create a hallway-sized bottleneck. Follow the manufacturer’s stance guidance and account for feet or hinges projecting into the route. This is less suitable around climbing children, energetic pets, or households needing a consistently wide, obstacle-free path through the room.

    5. Filter the View With an Open Bookcase

    An open-backed bookcase can combine storage with selective screening. Position it perpendicular to a wall beside the bed, then place baskets and books around the shelf levels that interrupt the view of the mattress and pillows. Leave some upper compartments open so daylight travels through. A shallow unit may provide enough separation without taking the footprint of a deep cabinet.

    Do not treat an ordinary bookcase as a freestanding partition unless its manufacturer permits that use and the required anchoring is possible. Loading every shelf also turns a light-filtering boundary into a bulky visual block. If your lease prevents necessary securing, or the unit’s back is unfinished and exposed, choose a purpose-built divider instead of improvising.

    6. Choose Translucent Panels When Daylight Is Shared

    For a cleaner, more architectural boundary, consider a purpose-built freestanding divider with translucent rigid panels. A frosted or textured surface can obscure bedding while transmitting more light than an opaque screen. In a studio whose only window sits beside the bed, position the divider between the mattress and seating area, keeping its supporting feet out of the main walking route.

    Translucent does not mean invisible: silhouettes may become clear when a lamp is on behind the panel. Check a material sample under daytime and nighttime lighting before committing. Avoid loose glass sheets or improvised supports, and remember that wide stabilizing bases consume floor space. This option is unsuitable if those bases interfere with your household’s circulation or mobility equipment.

    7. Lower a Roller Shade Only When Privacy Is Needed

    An interior roller shade can screen one straight sightline without leaving fabric gathered beside the bed. Mount a suitable system above the bed’s exposed side using approved hardware, then lower it for guests and raise it for daylight. For example, a shade spanning the view from the dining table can hide the pillow area while leaving the foot-end route open.
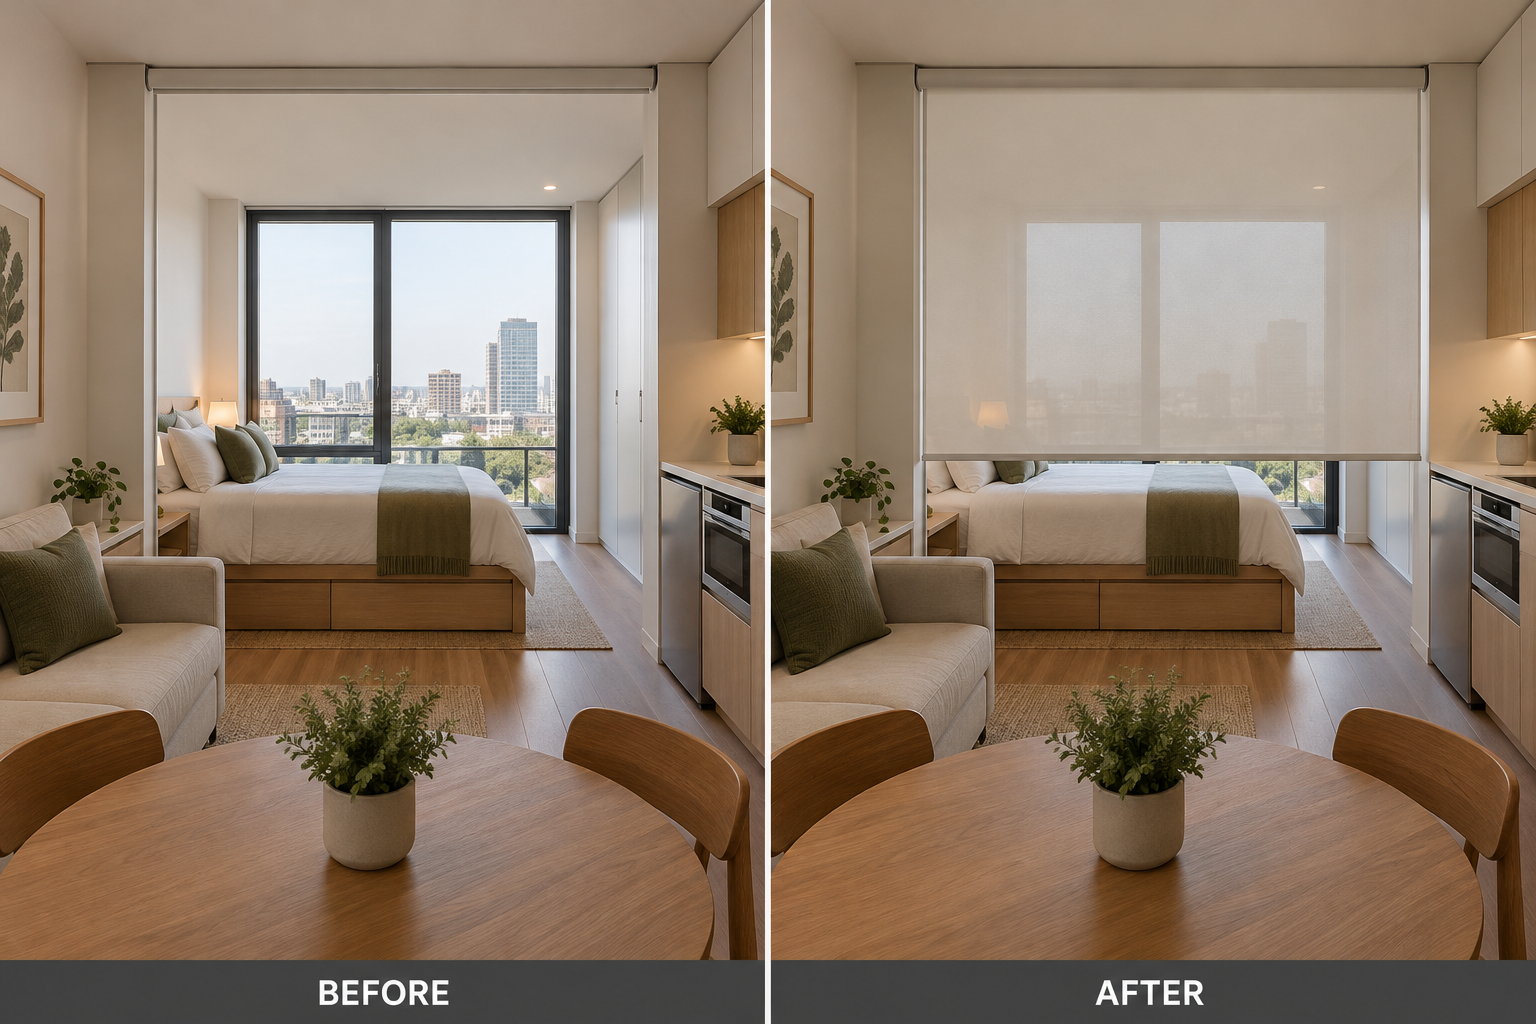
    Before and after views show a roller shade lowered to hide the bed from the dining table.

    Do not assume a window shade is approved for every ceiling application or unsupported width. Confirm mounting requirements and rental permissions, and favor cordless operation, particularly around children. A lowered shade can sway and offers no sound separation. Avoid placing it across the only route out, where someone must lift or duck under it to leave.

    8. Create a Leafy Filter at Seated Eye Level

    Plants can soften a persistent bed view when complete concealment is unnecessary. Group a few upright, leafy plants in stable floor pots between the sofa’s sightline and the pillow end, using foliage rather than a continuous row of containers. In a sunny studio, overlapping leaves can make bedding less visually prominent while preserving an airy connection between the two zones.

    The common mistake is buying plants tall enough to screen the bed without checking available light or their mature spread. Foliage provides filtered views, not dependable privacy, and watering adds maintenance near bedding. Use drip protection, select species appropriate for pets and children, and skip this approach if the plants would crowd circulation or need frequent relocation to survive.

    9. Add a Bed-Attached Privacy Wing

    When the main problem is seeing pillows from one side, a compatible bed-frame-mounted headboard with a side return can provide targeted screening. Look for a manufactured design that wraps slightly around the head of the mattress rather than building a full enclosure. An upholstered wing facing the living area can hide the most recognizable sleeping details without screening the window.

    Do not lean an oversized decorative panel against the bed and call it a headboard. Confirm attachment compatibility and stability, and check whether a projecting wing makes getting in and out difficult. This solution only addresses the head-end sightline; it will not hide the mattress from across the room and may be unsuitable for beds requiring caregiver access.

    10. Make an Exposed Bed Read Like Daytime Seating

    If a physical divider would obstruct the room, reduce the bed’s visual identity instead. For a twin or daybed positioned along a wall, use a fitted daytime cover and supportive back cushions, then store sleeping pillows and the duvet in existing underbed storage. From the living area, the same footprint reads more like a lounge, giving the two daily functions a clearer transition.
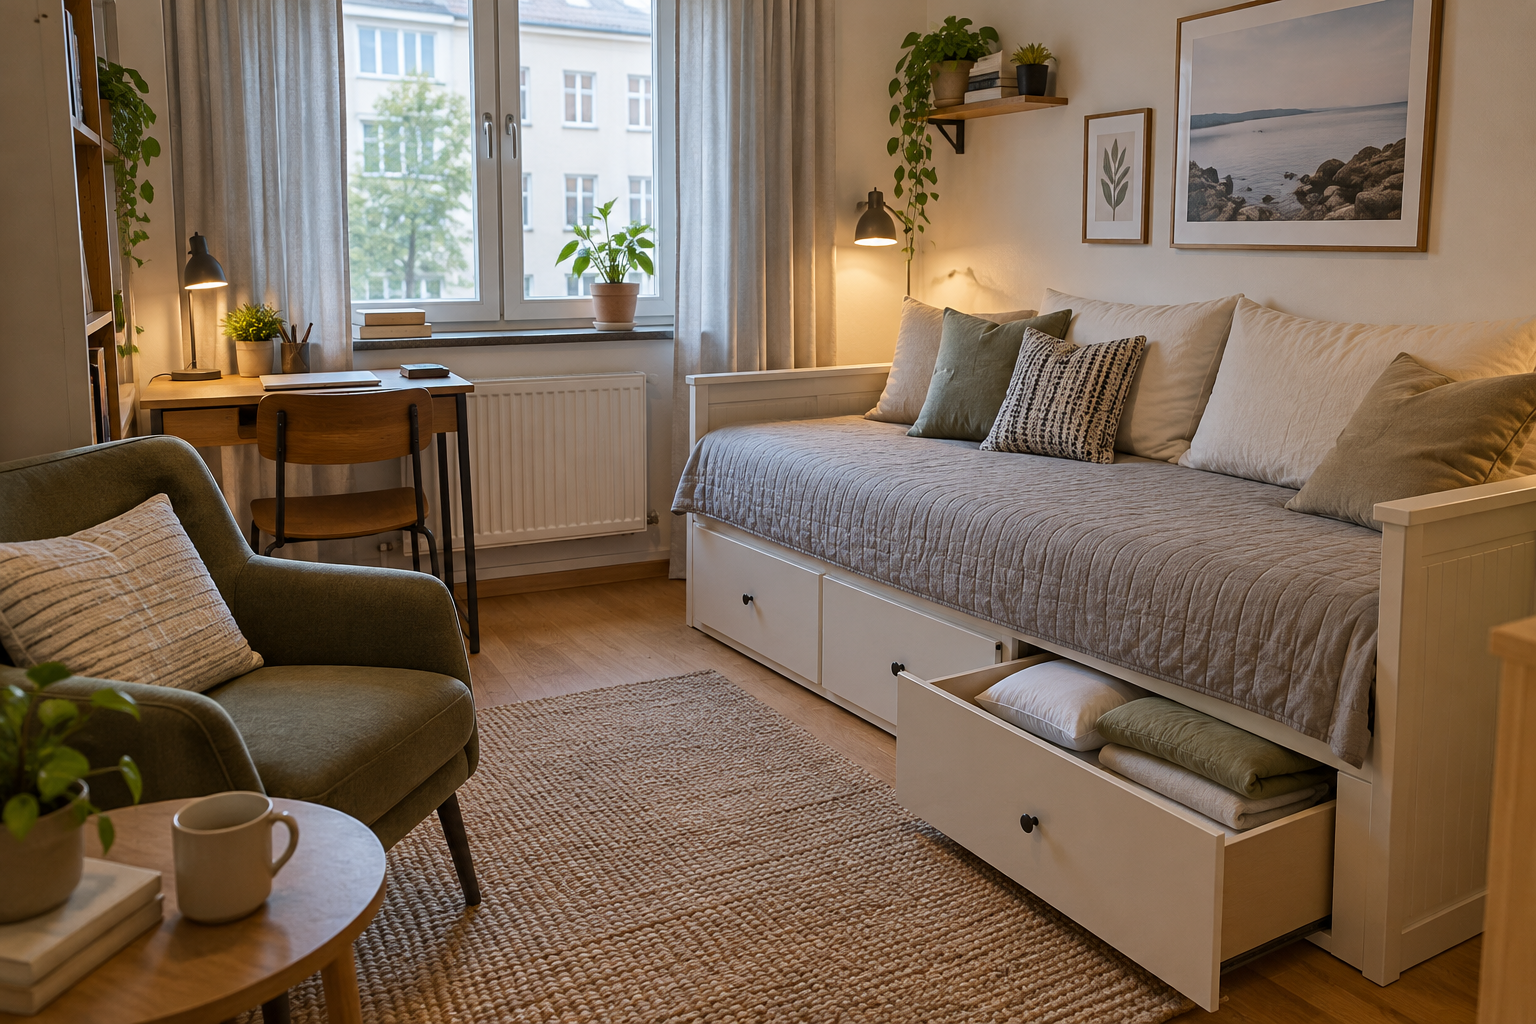
    A covered daybed resembles daytime seating, with sleeping bedding stored in an underbed drawer.

    This is visual camouflage, not privacy for sleeping or changing. Avoid piling on decorative cushions that have nowhere to go at night, and be realistic about the daily reset. A deep full or queen mattress rarely functions like comfortable seating without substantial back support, so this approach is strongest for an existing daybed or narrow bed rather than every studio layout.

    Choose the smallest intervention that fixes your most bothersome view. Test it from the entrance, your favorite seat, and the bed itself, then check it again after dark. A successful studio boundary does not need to resemble a permanent wall: it should give sleeping and living distinct identities while keeping daylight, daily routines, and the way out comfortably available.
  • Small Desk, More Working Room: 10 Ways to Reclaim Depth and Comfort

    Small Desk, More Working Room: 10 Ways to Reclaim Depth and Comfort

    A small desk can feel crowded even when it holds only the essentials. A monitor base consumes the back edge, paperwork pushes the keyboard forward, and loose cables make every adjustment harder. Before replacing the desk, look at how its depth actually gets used. These ten changes address different space problems, so choose the ones that match your equipment and household. Any dimensions mentioned are approximate planning guidelines, not compliance standards; measure your desk, equipment, chair, and surrounding room before buying or moving anything.

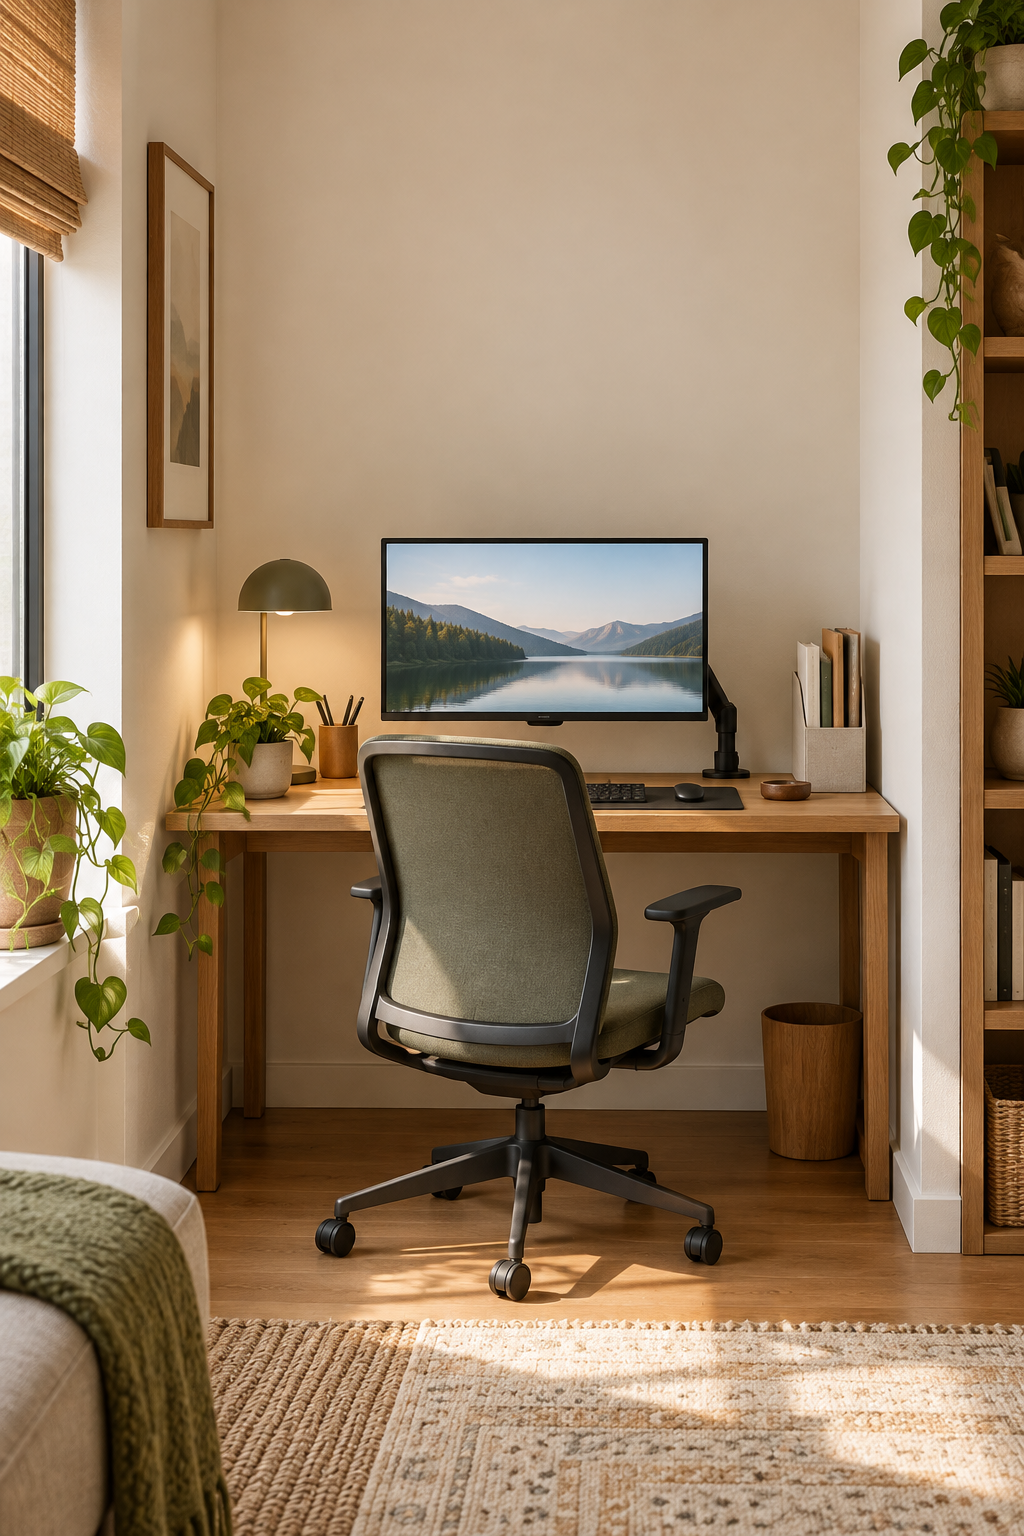
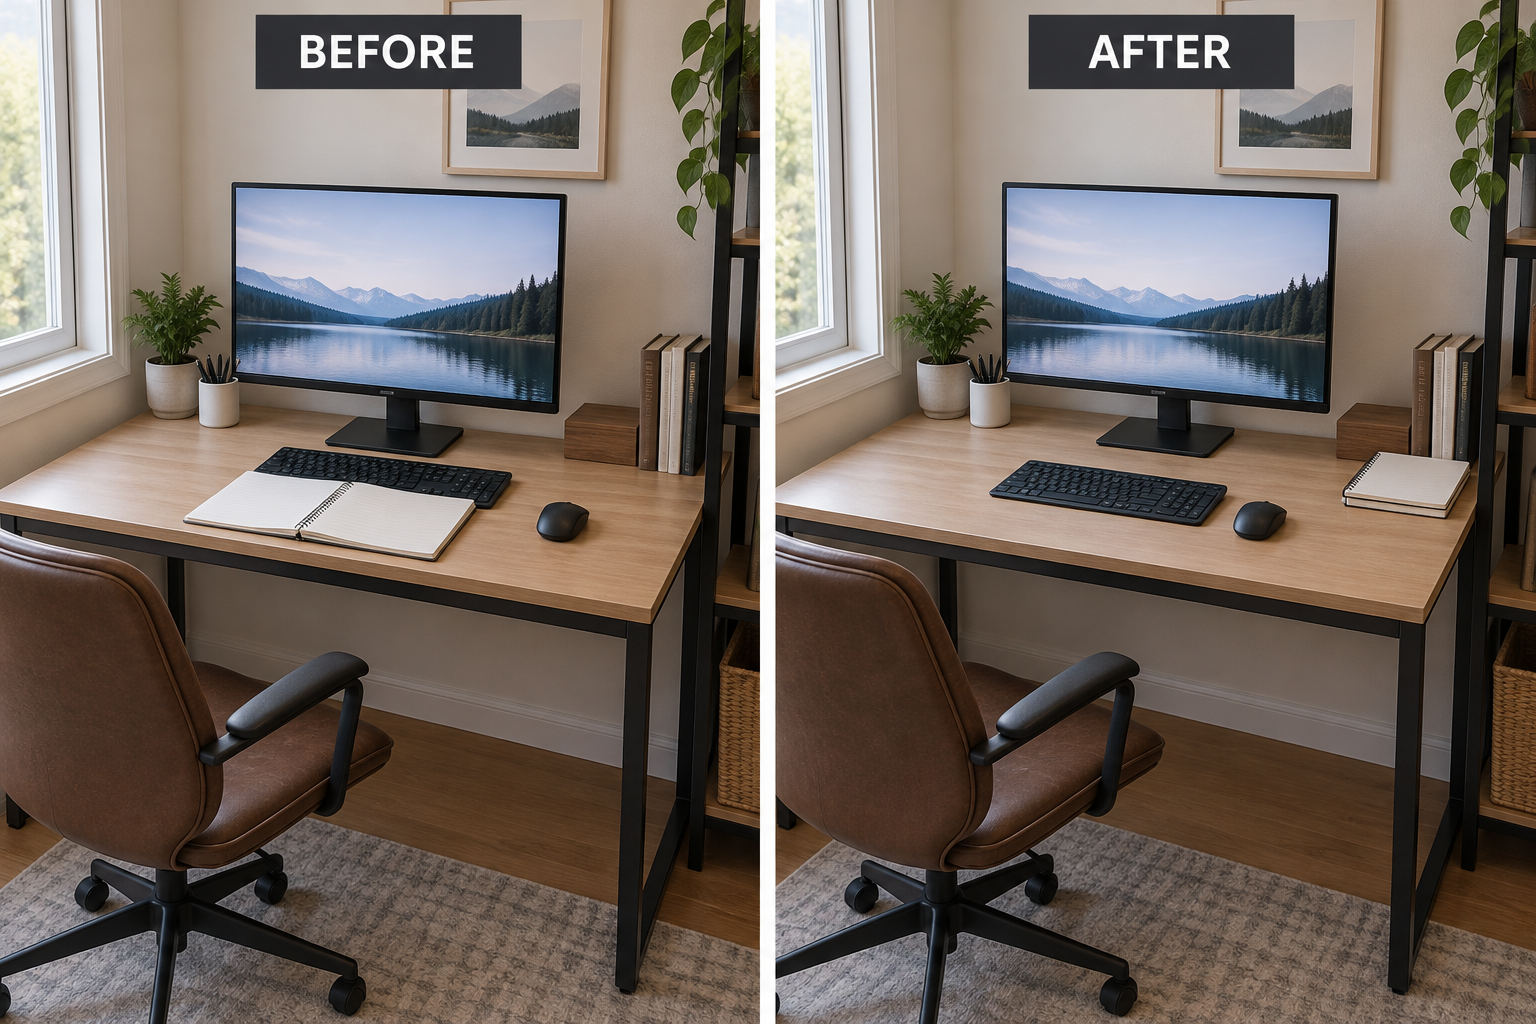
    Compact home-office desk with an elevated monitor, clear keyboard space, and neatly contained paperwork.

    1. Replace the Monitor Base With a Compatible Arm

    A monitor arm can recover the strip of desk occupied by a broad pedestal. Check the screen’s mounting pattern and weight, then verify that your desktop can accept the specified clamp or grommet mount. On a shallow desk, position the screen near the rear edge while keeping enough adjustment range to bring it closer when small text becomes difficult to read.

    Do not assume every desktop can withstand a concentrated clamp load. Glass, hollow-core panels, thin edges, and decorative lips may be unsuitable unless the manufacturers explicitly approve the installation. Arms also need space to swing without striking a wall. If the desk or monitor is incompatible, keep the original stand rather than improvising reinforcement or using an unstable mount.

    2. Reserve a Clear Keyboard-and-Mouse Landing Zone

    Arrange the keyboard and mouse as one working zone instead of fitting them around scattered objects. Center the letter keys on your seated position, place the mouse close beside them, and leave enough surface in front for relaxed hand placement. For example, move a notebook from directly ahead of the keyboard to the unused rear corner without changing the equipment.

    Before and after relocating a notebook to create a centered keyboard-and-mouse zone.

    The common mistake is interpreting clear space as a reason to push everything as far back as possible. That can leave you reaching across the desk. Test the arrangement while seated, with shoulders relaxed and elbows comfortably near your sides. A desk too narrow for your keyboard and normal mouse movement may need different input equipment rather than tighter packing.

    3. Give the Laptop One Clear Role

    When a laptop accompanies an external monitor, decide whether you truly need both screens. If not, a compatible vertical dock can remove the laptop’s open footprint while an external keyboard and mouse handle input. If you need its screen, use a stable stand that raises it beside the monitor and leaves useful surface below, rather than placing it ahead of everything.

    Check the laptop manufacturer’s guidance for closed-display operation, power requirements, and ventilation before choosing a dock. Never block vents or tuck a running computer into a tight padded sleeve. A raised open laptop is also unsuitable for extended typing on its built-in keyboard; without separate input devices, the stand may trade recovered depth for an awkward working position.

    4. Stand Reference Pages Beside the Screen

    A freestanding document holder turns a flat reference sheet into a narrow upright surface. Place it beside the monitor, where you can read it without leaning over the keyboard. For example, a recipe developer reviewing printed edits could keep one active page upright while leaving the center of the desk available for typing and a small pad.

    Upright document holder keeps a reference page beside the monitor and off the keyboard area.

    Avoid treating the holder as a permanent stack rack. Thick piles can hide pages, destabilize a lightweight stand, and recreate clutter vertically. Oversize drawings and documents that need frequent handwriting may work better flat. Adjust the holder’s angle to reduce glare, and keep it out of the mouse path and away from the screen’s essential viewing area.

    5. Move Cable Bulk Off the Desktop

    Route cables toward one rear corner and support the excess in an under-desk basket or manufacturer-approved cable tray. Give the monitor and other movable equipment enough slack for their full adjustment range. A loose loop secured with reusable ties is easier to revise than a tightly bundled knot, especially when a laptop connects and disconnects every day.

    Do not squeeze power bricks into sealed containers or pinch cords beneath clamps. Follow equipment ventilation instructions, avoid overloaded outlets and daisy-chained power strips, and keep cables out of walking routes. Adhesive clips may release or damage finishes, so check rental rules and surface compatibility. A tray is unsuitable if it steals the knee clearance you need.

    6. Relocate Supplies You Do Not Use Every Hour

    Reserve the desktop for tools used during active work, and move backup supplies to nearby storage. A shallow wall organizer can hold pens, envelopes, and charging accessories that otherwise form a row behind the keyboard. In a rental where wall installation is not permitted, use an existing drawer or nearby cabinet rather than adding another desktop organizer.

    More storage is not automatically better if reaching it interrupts every task. Keep frequently used tools accessible, and avoid deep shelves that crowd the monitor or place heavy objects overhead. Obtain rental permission where needed and use fasteners appropriate to the wall and load. If safe mounting is uncertain, choose existing furniture instead of relying on unsuitable adhesive hardware.

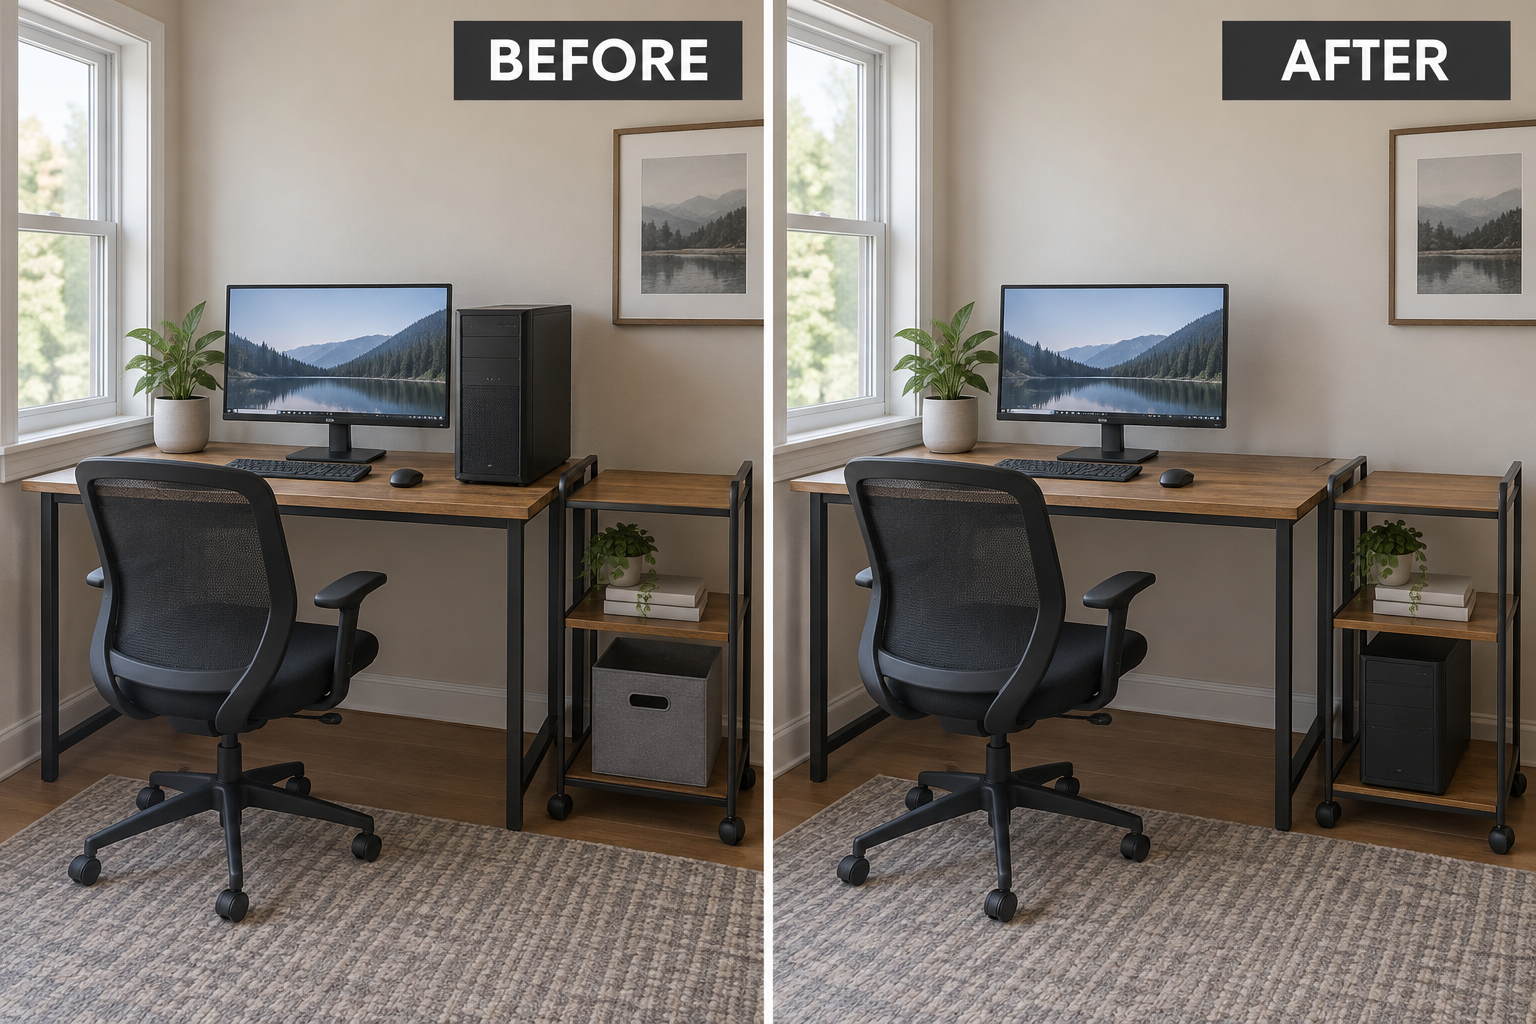
    7. Move the Computer Tower to a Ventilated Side Support

    A desktop computer tower can consume a surprising amount of usable depth when it sits beside the monitor. If you already have a sturdy adjacent cart or low shelf, check its load capacity and the computer’s required ventilation clearances. Moving the tower there can restore a continuous work surface while keeping the computer accessible for power controls and connections.

    Before and after moving a computer tower from the desktop to an existing ventilated cart.

    Do not solve desktop crowding by putting the tower where feet will kick it or where dust and fabric can block airflow. Avoid enclosed cabinetry unless it is suitable for that equipment. The new location must not obstruct doors, exits, or household circulation. If cables cannot reach safely, retain the original position until an appropriate arrangement is available.
    8. Consider a Keyboard Tray Only After Testing Clearance

    A properly fitted keyboard tray can separate typing space from the surface used for documents. Before installing one, mock up its height and depth with measurements, then check seated thigh clearance and full mouse travel. Choose a stable model wide enough for both devices; otherwise, the mouse may remain stranded on the desktop at a different height.

    Trays are not universal fixes. Aprons, crossbars, thin tops, and sit-stand mechanisms can prevent secure attachment, while a low tray may interfere with your legs. Follow mounting instructions and confirm permission before drilling furniture you do not own. If the arrangement forces an uncomfortable reach or leaves too little clearance, a clear desktop input zone is the better option.

    9. Replace a Bulky Lamp Base With Targeted Light

    A large lamp base often occupies the exact corner needed for paperwork or mouse movement. A compatible clamp lamp or securely mounted wall light can return that surface to work. Position the light to illuminate documents without reflecting directly in the monitor; for handwritten work, try placing it opposite your writing hand to reduce the shadow across the page.

    Check that the clamp fits the desktop and does not compete with a monitor arm or cable route. Keep cords away from moving joints, and follow fixture clearance instructions, especially near curtains and shelving. Wall lights require suitable mounting and rental approval when applicable. If neither option fits safely, keep a compact freestanding lamp rather than forcing an insecure attachment.
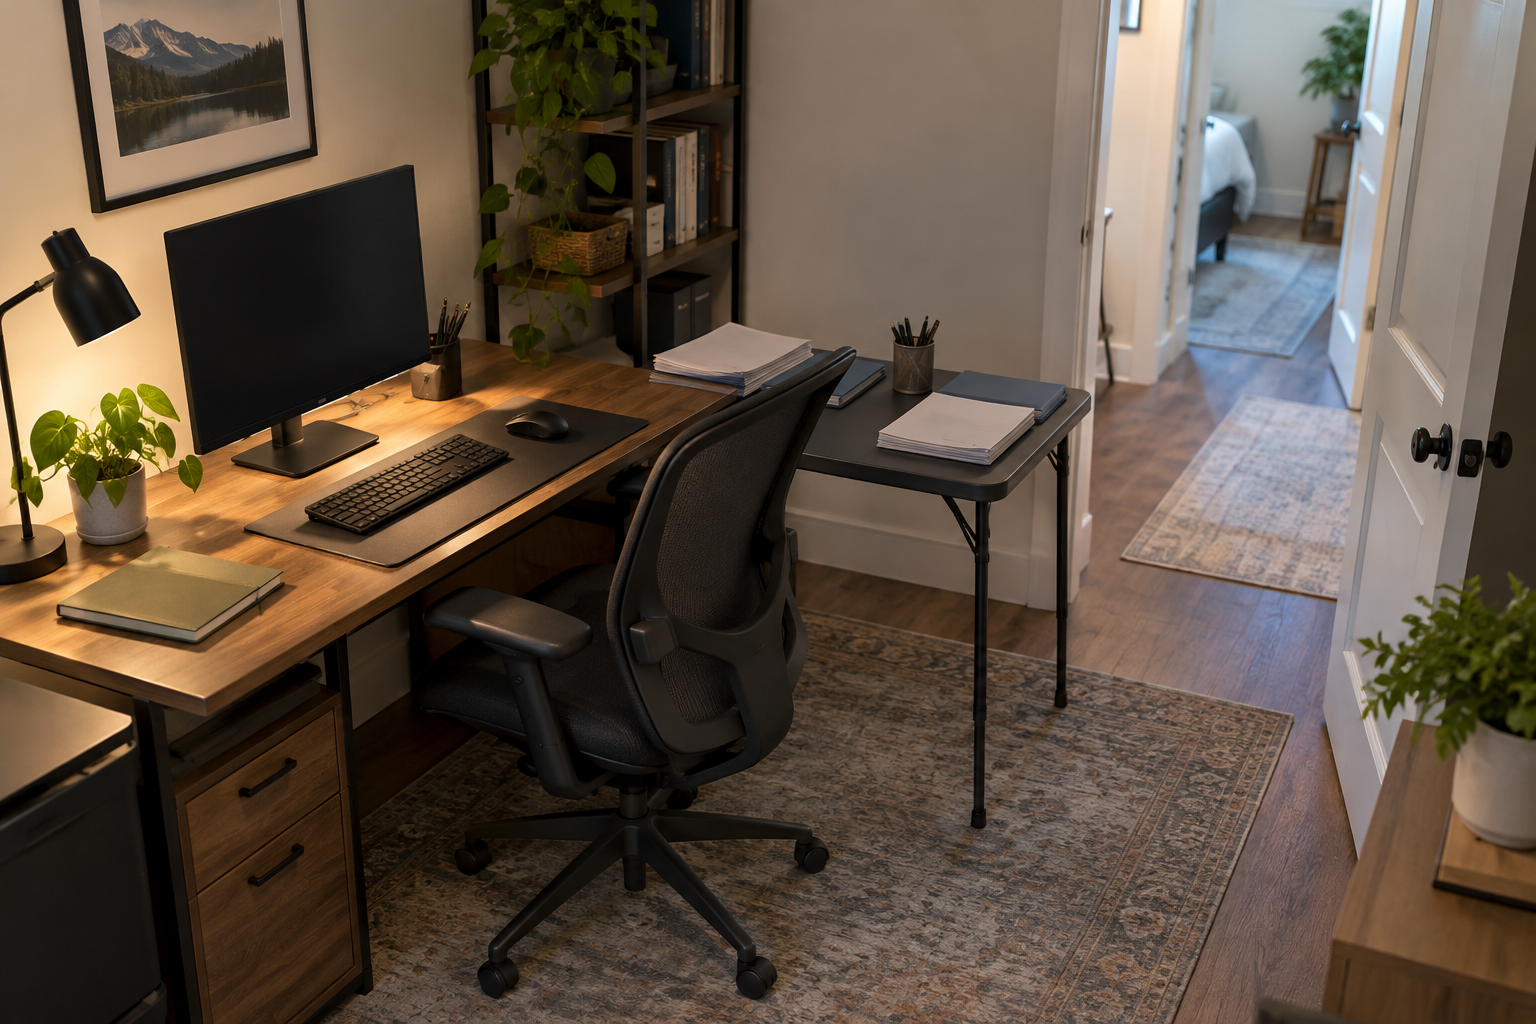
    10. Create a Temporary Return for Paper-Heavy Tasks

    Some tasks simply need more flat space than a shallow desk can provide. For occasional sorting or handwritten review, place a stable folding table beside the desk as a temporary return. Use it for the active spread while keeping the keyboard zone intact, then file the papers and fold the table away when the task is finished.

    Temporary side table holds active paperwork while the main desk remains ready for typing.

    A temporary return is unsuitable if it narrows a necessary walking route, blocks an exit, or prevents someone else from using the room. Do not balance a board between furniture or lean heavily on a lightweight table. Check stability, floor level, and household needs first; in tighter rooms, schedule paper review on an existing dining table instead.
    Start with the obstruction that affects your work most: a deep monitor base, crowded input area, or constant paper spread. Make one change, sit down, and test a normal task before adding another. The goal is not an empty-looking desk. It is enough usable depth, clear movement, and practical support for the way you actually work.

  • A Tiny Home Office on Camera: 10 Background Fixes Without a Makeover

    A Tiny Home Office on Camera: 10 Background Fixes Without a Makeover

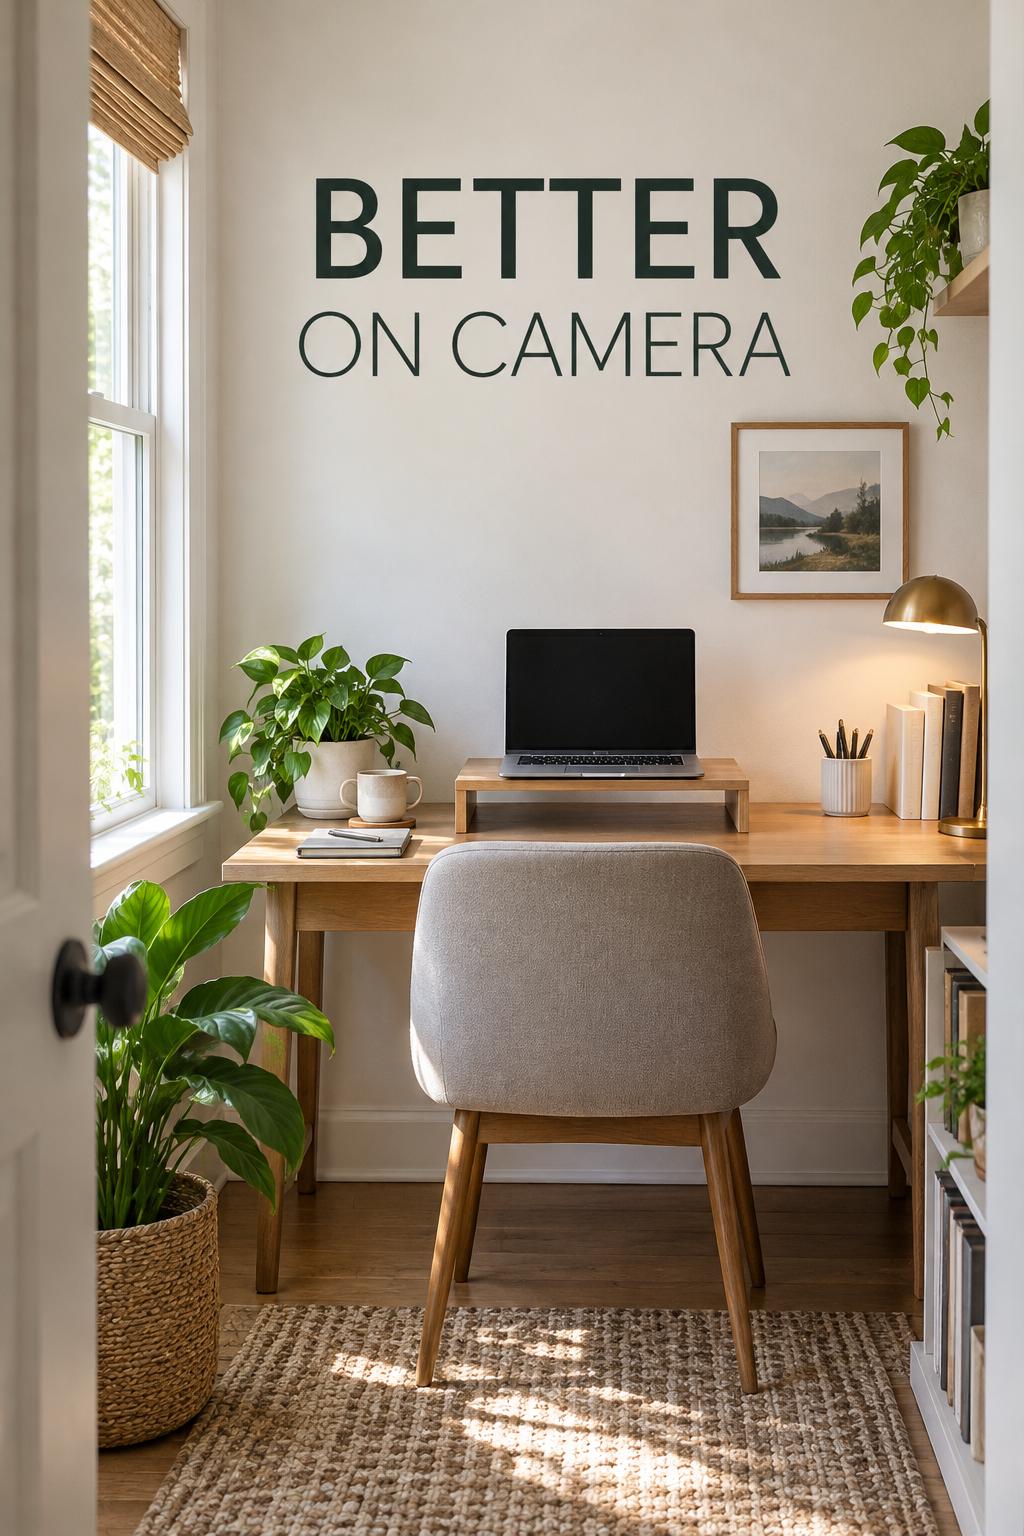
    A tiny home office doesn’t need to look finished from every angle to work beautifully on a video call. It needs one useful camera view: a comfortable face, an orderly background, and nothing private accidentally on display. Before buying anything, open your camera preview and work with what it actually captures. These ten adjustments focus on that rectangle, not a room makeover. Any dimensions below are approximate planning guides; measure your space, equipment, and walking routes before making changes.

    Compact home office with a raised laptop, soft window light, and a simple video-call background.

    1. Raise the Camera Before Rearranging the Room

    Start with the lens near eye level while you sit in your normal working position. A stable laptop riser or adjustable webcam mount can remove the upward view that turns a small office ceiling into your backdrop. For example, raise a laptop on a purpose-made stand, then use a separate keyboard and mouse so the screen height doesn’t dictate your hand position.

    Avoid balancing equipment on narrow stacks or raising the camera so far that you must look sharply upward. A higher lens can also reveal more floor behind you, so check the preview again after adjusting it. If your device must stay low for hands-on work, an independently mounted webcam may be more practical than elevating the whole computer.

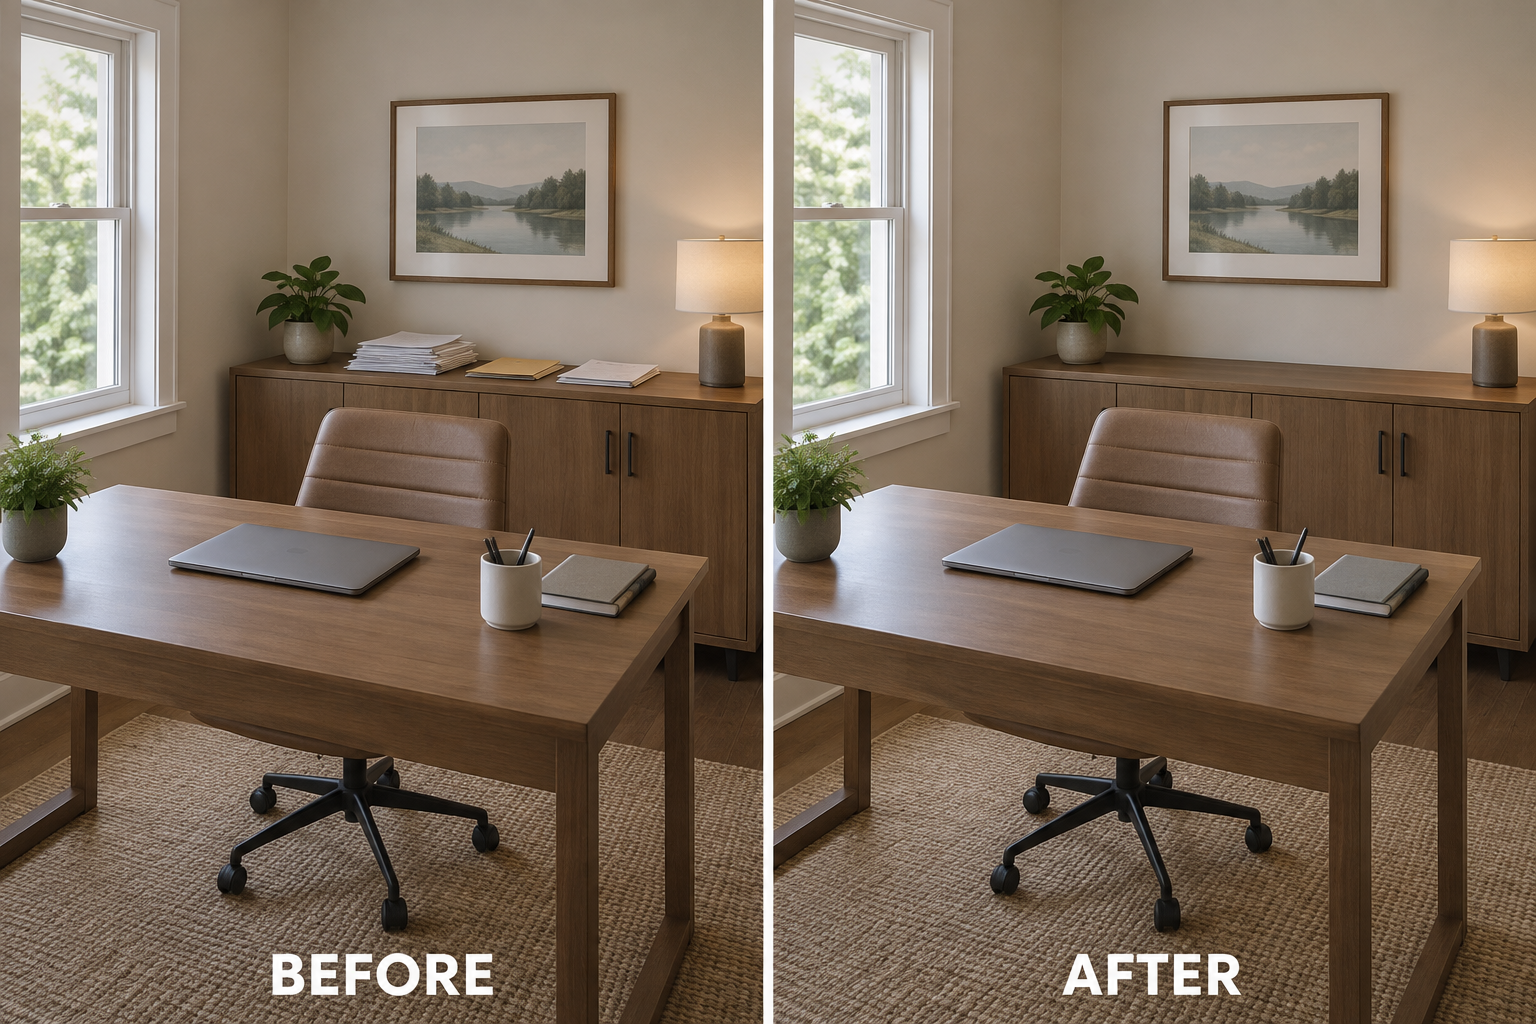
    2. Clear the Visible Paperwork, Not Every Surface

    Use the preview to identify the shelf or cabinet top that actually appears behind you. Move mail, appointment cards, and work documents into an existing drawer or opaque file box. In a small office with a low cabinet, keeping its top clear while storing daily paperwork inside creates a calmer view without demanding a spotless room outside the frame.

    Before-and-after comparison showing visible paperwork stored inside the same cabinet.

    The mistake is relocating a mess into a doorway or onto a chair someone needs. Give the papers a reachable home so this reset takes seconds rather than becoming another chore. If documents must remain open during your call, position them beside the keyboard, outside the camera view, instead of hiding essential work where you cannot use it.

    3. Choose a Tighter View Without Leaning Toward the Lens

    If your webcam offers field-of-view controls, try a narrower setting before moving furniture. Frame your head and shoulders with a little space above your hair, leaving enough room for natural movement. For example, a tighter view can exclude a laundry basket beside the office nook while keeping your chair centered and your working posture unchanged.

    Don’t solve a wide view by putting your face inches from the lens; close placement can exaggerate facial proportions. Heavy digital cropping may also soften the picture. A tight frame is unsuitable when you regularly demonstrate objects or use broad gestures, so test your usual movements and leave the necessary space rather than chasing a perfectly filled rectangle.
    4. Put Daylight Beside Your Face, Not Behind It

    Test a camera position with the window in front of you or slightly to one side, rather than directly behind your chair. Even turning a laptop on the desktop may help. In a narrow office, a modest diagonal setup can bring soft light across your face while leaving a plain interior wall in the background.

    A slightly angled laptop places the window forward of the user and a plain wall behind them.

    A bright window behind you can make the camera darken your face, but facing direct sun is uncomfortable too. Check the arrangement at your actual meeting time because daylight shifts. Don’t turn a workable desk into an awkward workstation just for lighting; when the room orientation is fixed, adjustable window coverage or a small light may be the better compromise.
    5. Remove Reflections That Expose More Than You Expect
    Inspect glass-fronted art, mirrors, and glossy cabinet doors in your preview. They may reflect a bright window, another screen, or someone moving through the house. Try tilting a freestanding frame slightly, relocating a small mirror, or replacing one reflective piece with an unglazed print. A matte background often looks quieter without needing any new furniture.

    Don’t drape fabric over electronics or ventilation openings to conceal shine. Removing a useful mirror may also inconvenience the household, so first see whether a small angle change removes its reflection from view. When reflective built-ins cannot be altered, reposition the camera slightly and confirm that the new angle doesn’t introduce a different privacy problem.

    6. Use a Temporary Screen for Shared-Household Privacy

    Where the background includes a bedroom doorway or busy family route, a lightweight freestanding screen can create a temporary visual boundary. Place it behind your chair only if the floor area allows stable footing and easy passage. For example, a folding screen might conceal an open storage alcove during calls, then fold away against an unused wall afterward.

    A screen provides visual privacy, not reliable sound isolation. It is unsuitable if it narrows a needed exit, interferes with doors, or becomes a tipping hazard around children or pets. Keep it away from heaters and required appliance clearances. If there is no safe footprint, use a tighter camera view or built-in background blur instead.

    7. Create Gentle Contrast With a Reversible Backdrop

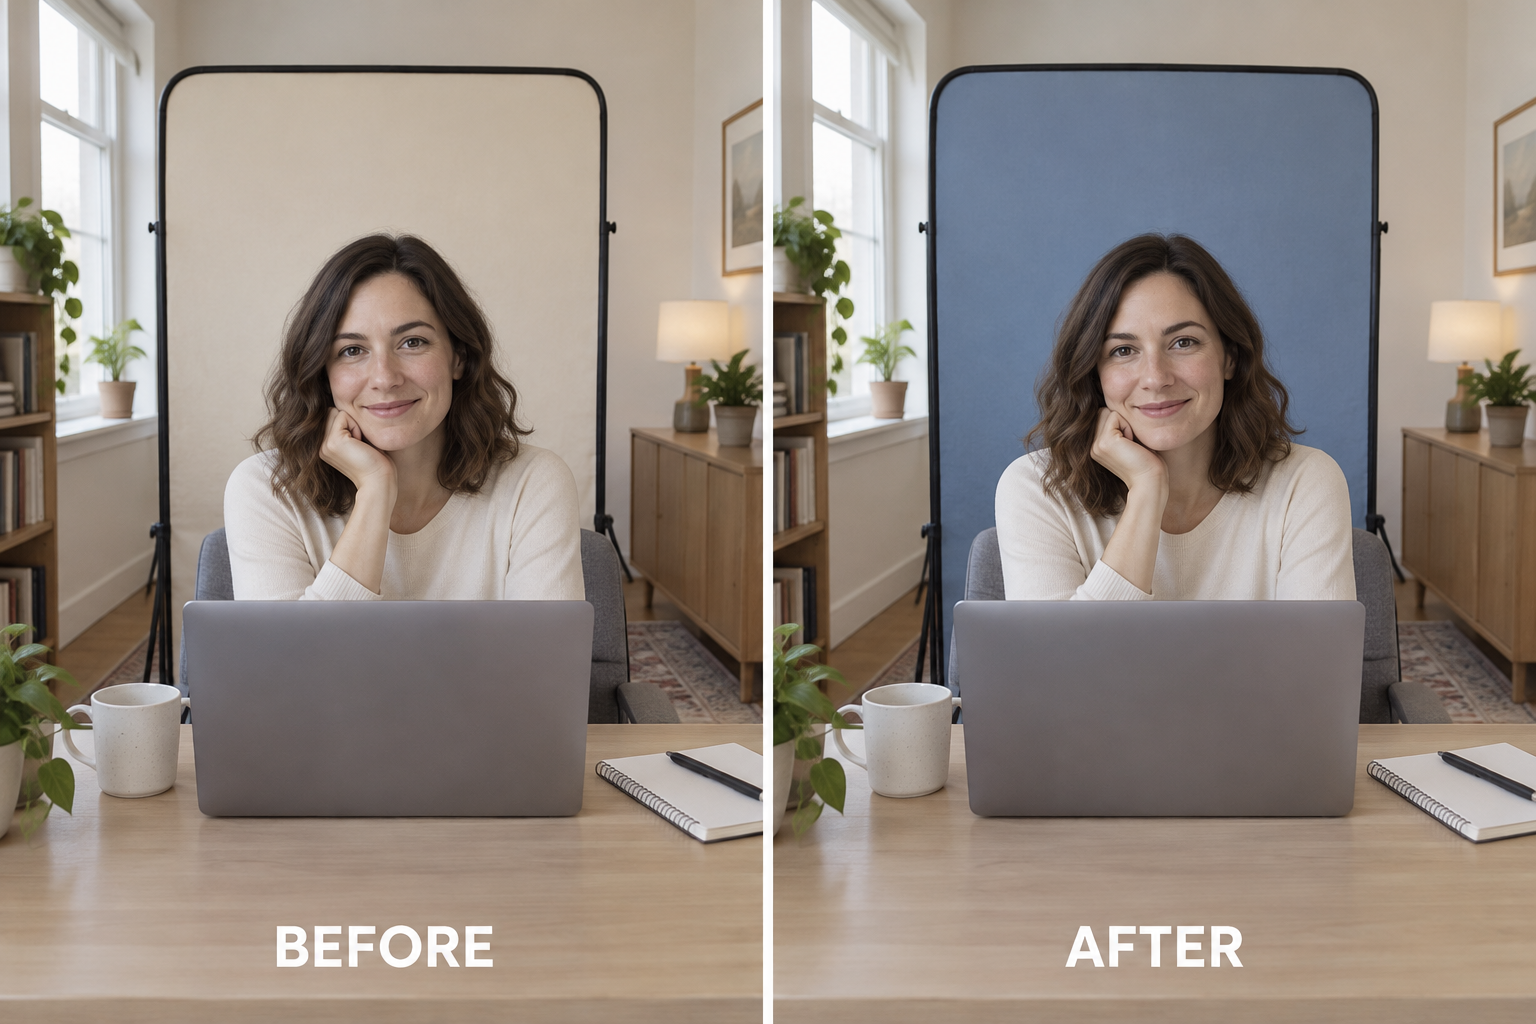
    If your usual work clothes blend into the wall, introduce a quiet contrasting surface behind your upper body. A securely supported reversible fabric-covered panel can offer a light side and a medium-toned side without repainting. For example, flip the panel to its muted blue side when wearing a pale shirt, keeping the same furniture and camera position.

    Before-and-after comparison showing improved shirt contrast by reversing the same backdrop panel.

    Skip highly saturated colors and busy patterns that dominate the picture or complicate background blur. A panel also needs secure support; don’t lean a heavy board loosely behind your chair. Check rental permissions before fastening anything, and choose another approach if a safe installation would obstruct ventilation, access, or a household member’s use of the room.

    8. Borrow a Little Distance From the Back Wall

    When space permits, create a small gap between your seated position and the background rather than pressing the chair against it. Even a modest shift can reduce a harsh wall shadow and make the view feel less cramped. In a shallow office, test moving the working setup forward several inches, then check chair movement and the camera preview.

    Don’t sacrifice comfortable reach, chair clearance, or a safe walking route for an imagined studio-depth effect. A few inches will not guarantee a blurred background, especially with a basic webcam. If moving forward crowds the desk or stretches cables, keep the original position and favor a simpler wall treatment instead of forcing distance the room cannot spare.

    9. Make an Evening Lighting Setting

    Prepare a separate setup for calls after daylight fades. Place a small shaded or diffused desk light near camera height and slightly to one side, outside the frame. Test it with the room’s existing lights on. For example, redirect an adjustable task lamp toward your face through its intended diffuser rather than relying on a bright ceiling fixture alone.

    An exposed bulb near the lens can cause squinting, glare, or distracting reflections in glasses. Keep lamps stable, route cords away from feet, and never improvise a diffuser with fabric over a hot bulb. If the light spills into a shared sleeping area, a smaller directed source may suit the household better than broadly brightening the office.

    10. Add One Removable Piece of Personality

    Once the practical problems are solved, give the background one deliberate focal point. Try a lightweight framed botanical print on an existing picture ledge, positioned to one side of your head in the preview. This adds warmth without turning the wall into a decorating project, and the piece can be swapped or removed when your needs change.

    One botanical print sits off-center behind the user without overlapping their head.

    Avoid arranging art so its frame appears to sprout from your head or placing heavy objects on an unsecured ledge. Follow mounting instructions and rental permissions; removable adhesive products are not suitable for every finish or load. If the background already contains useful shelving, one existing object may provide enough character without adding anything at all.

    The best video-call background is easy to maintain and compatible with the home around it. Start with lens height, framing, and light, then address privacy and one or two visible details. Save a quick reference photo of your finished setup so restoring it before the next meeting takes little thought.

  • An Overstuffed Linen Closet: 10 Ways to Make Towels and Bedding Easy to Find

    An Overstuffed Linen Closet: 10 Ways to Make Towels and Bedding Easy to Find

    A linen closet can hold plenty and still make a clean pillowcase surprisingly hard to find. The problem is often a mismatch between shelf depth, folded sizes, and what your household actually uses. Start with the closet you have, not a shopping list of organizers. These ten changes create clearer storage for towels and bedding without demanding matching linens or a larger home. All dimensions below are approximate planning guidelines; measure your shelves, door opening, and comfortable reach before making changes.

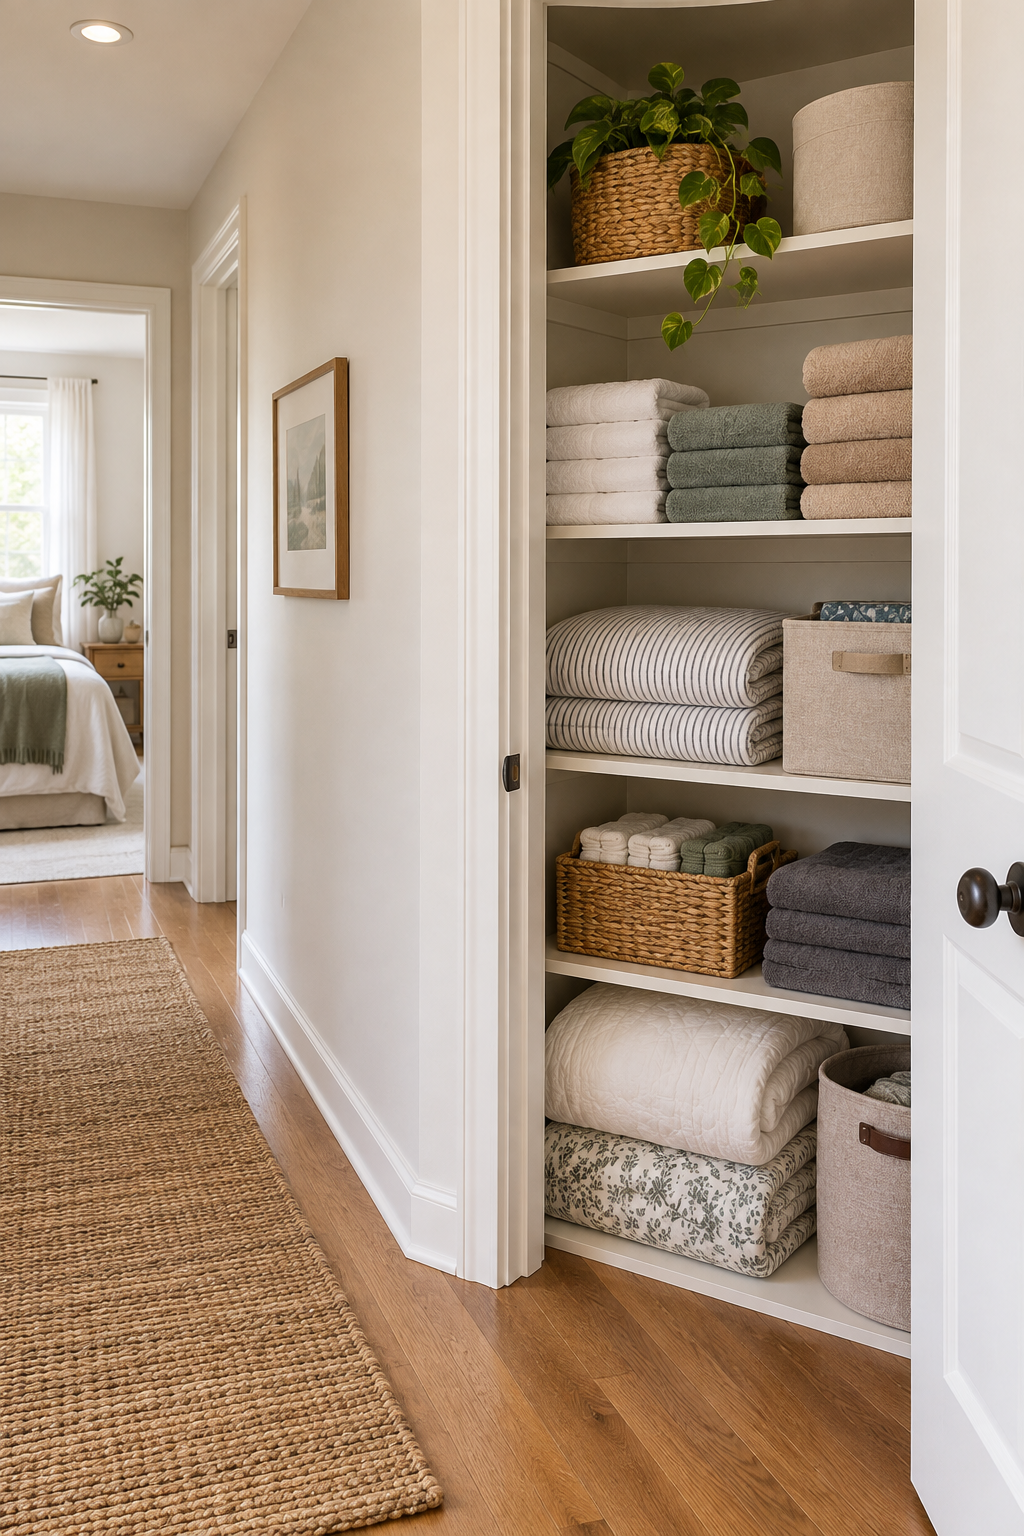
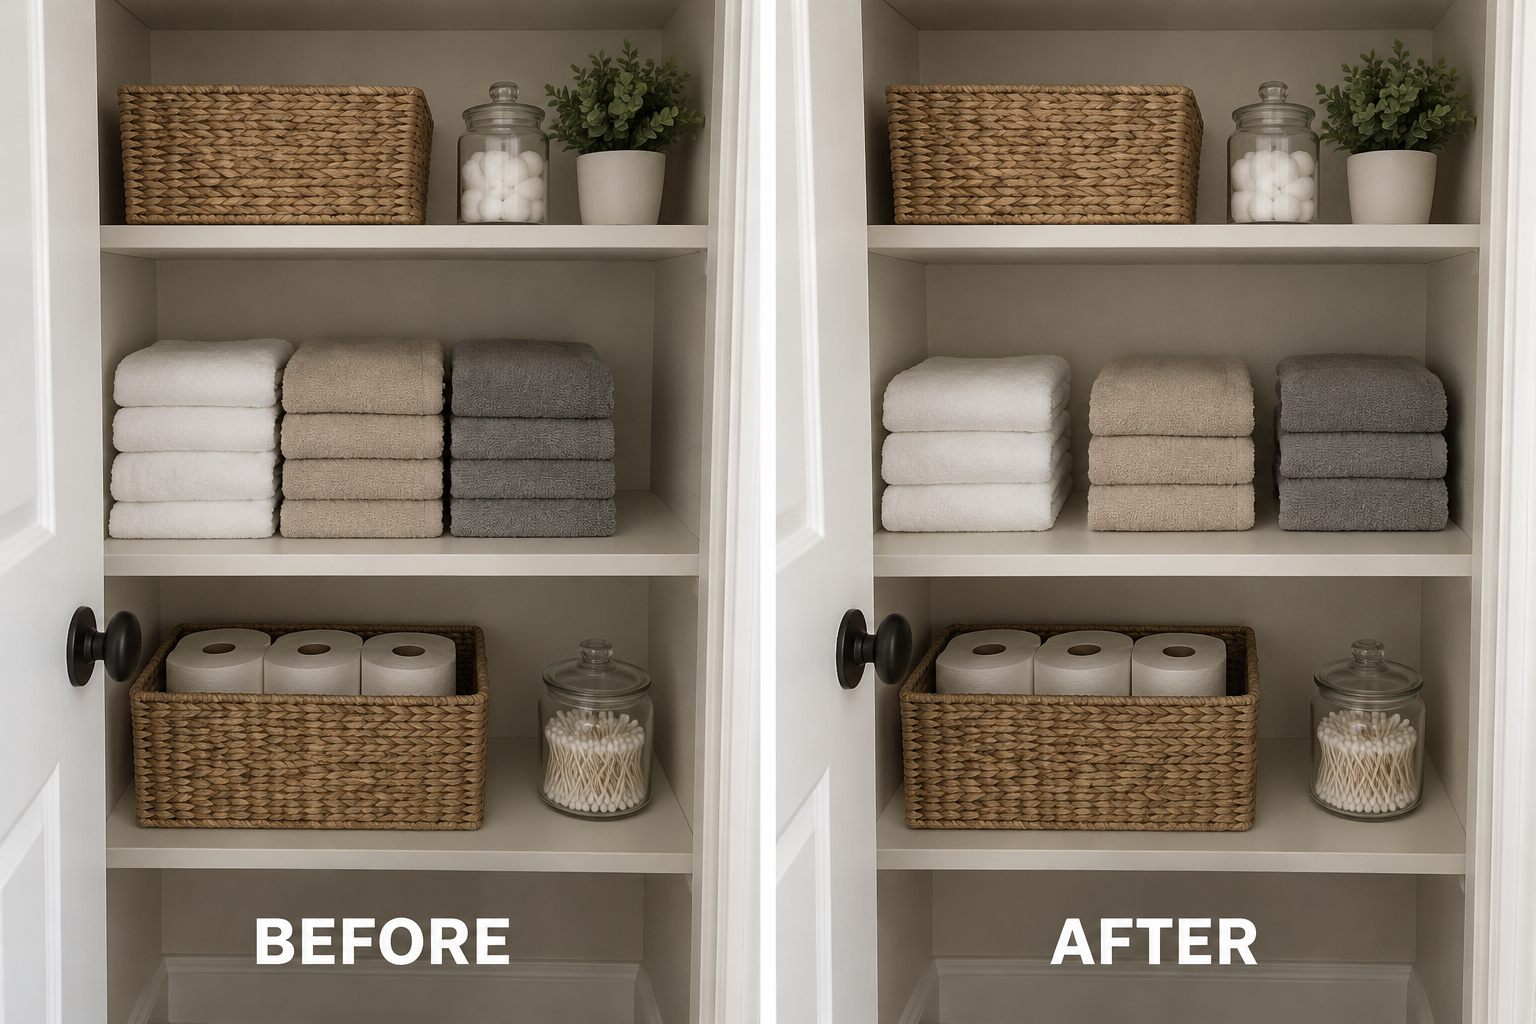
    Organized hallway linen closet with folded towels, bundled bedding, and open space between stacks.

    1. Set Inventory Limits Around Your Laundry Routine

    Empty one shelf at a time and count complete, usable linens by bed and person. Set a working limit that reflects laundry frequency rather than an idealized minimum. For example, a household that washes sheets weekly might keep one set on each bed and one clean replacement, then add extras for overnight guests, illness, or children who need frequent changes.

    The mistake is treating every extra as clutter or keeping everything for an undefined emergency. Keep a deliberate buffer where household needs justify it, and separate worn cleaning towels from bathing towels. Aggressive limits are unsuitable when laundry access is unreliable or care needs create frequent changes. The goal is a manageable inventory, not a closet that looks nearly empty.

    2. Turn Deep Shelves Into Pull-Forward Storage

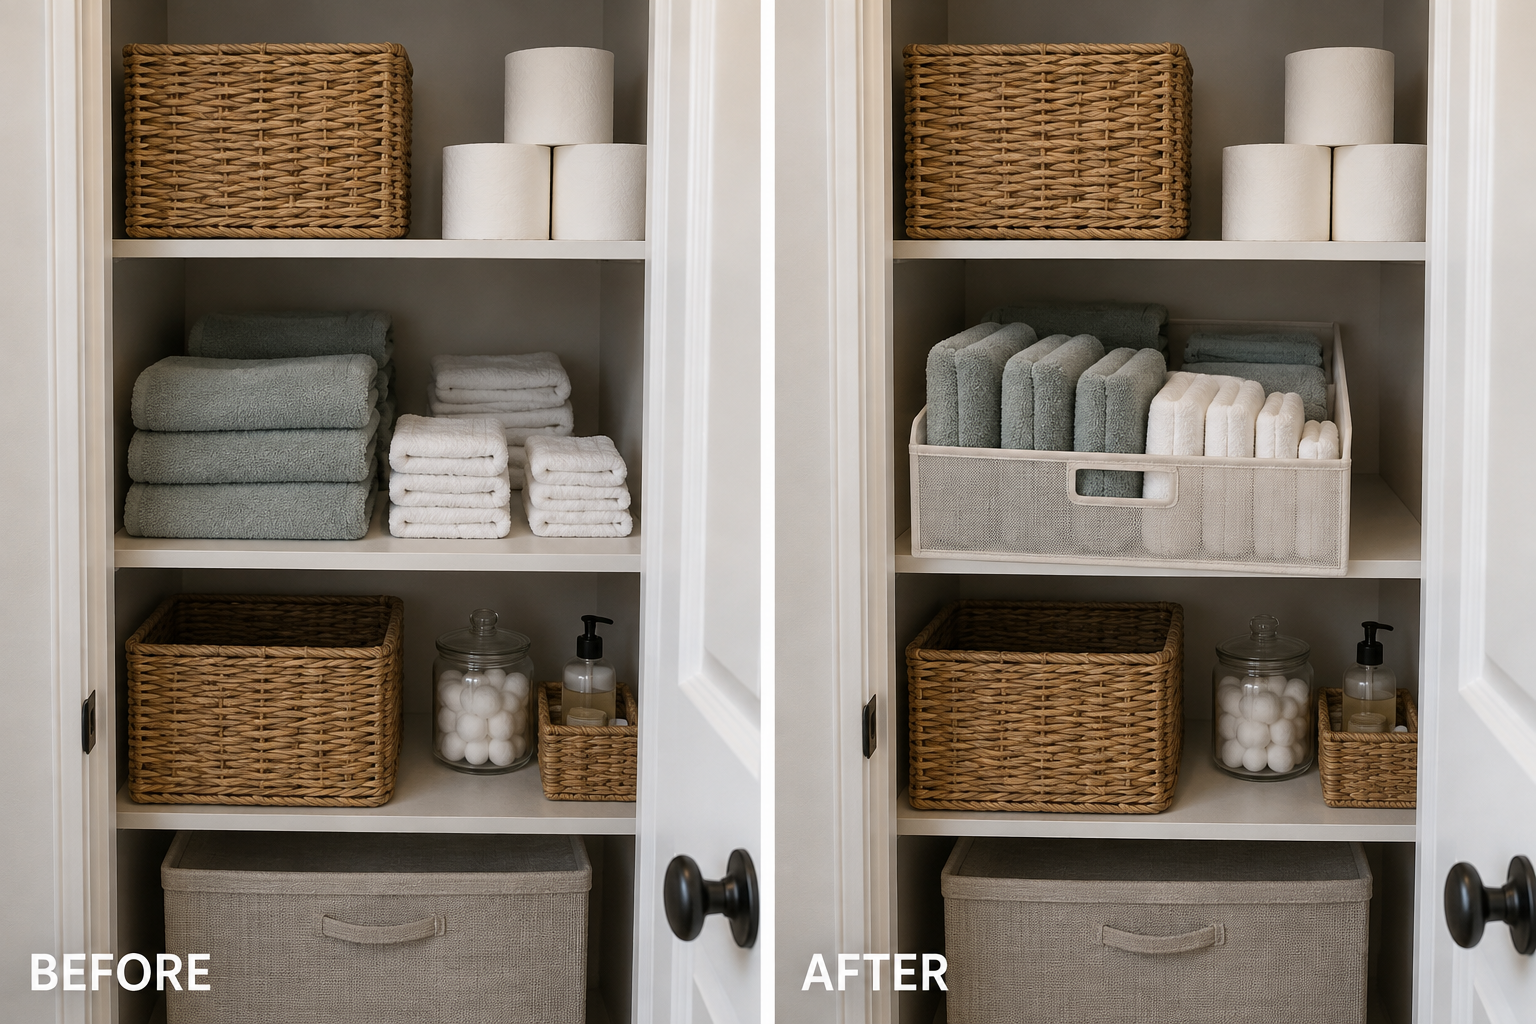
    Measure shelf depth and the usable door opening, including hinges. On a deep shelf, use a lightweight open bin that brings the back contents forward in one motion. A bin roughly 16–20 inches deep may suit some closets, but dimensions vary. For example, keep washcloths and hand towels upright in one removable bin instead of losing them behind bath towels.

    Before and after showing loose towels on a deep shelf organized in a pull-forward bin.

    Avoid buying containers based only on shelf width. A bin can fit inside yet catch on the door frame when pulled out. Full-depth containers also become awkward when packed with heavy bath sheets. Choose easy-grip sides and manageable loads; skip this approach where the opening is too narrow or pulling a loaded bin feels unstable.

    3. Fold to the Shelf Footprint

    Choose the finished fold by measuring the storage space, not by copying a universal towel fold. On a shelf about 12 inches deep, test a bath towel folded into thirds lengthwise and then into a compact rectangle. Adjust until it sits fully supported, with its folded edge visible. Use that towel as the template for the rest of the stack.

    Overly elaborate folds waste time if nobody repeats them after laundry day. Thick towels may need a different fold from thin ones, and rolling can create unstable pyramids on open shelves. Favor a simple, repeatable shape over perfect uniformity. If a fold requires compression to fit, reduce the stack or choose another shelf rather than forcing the door closed.

    4. Give Everyday Linens Your Easiest Reach

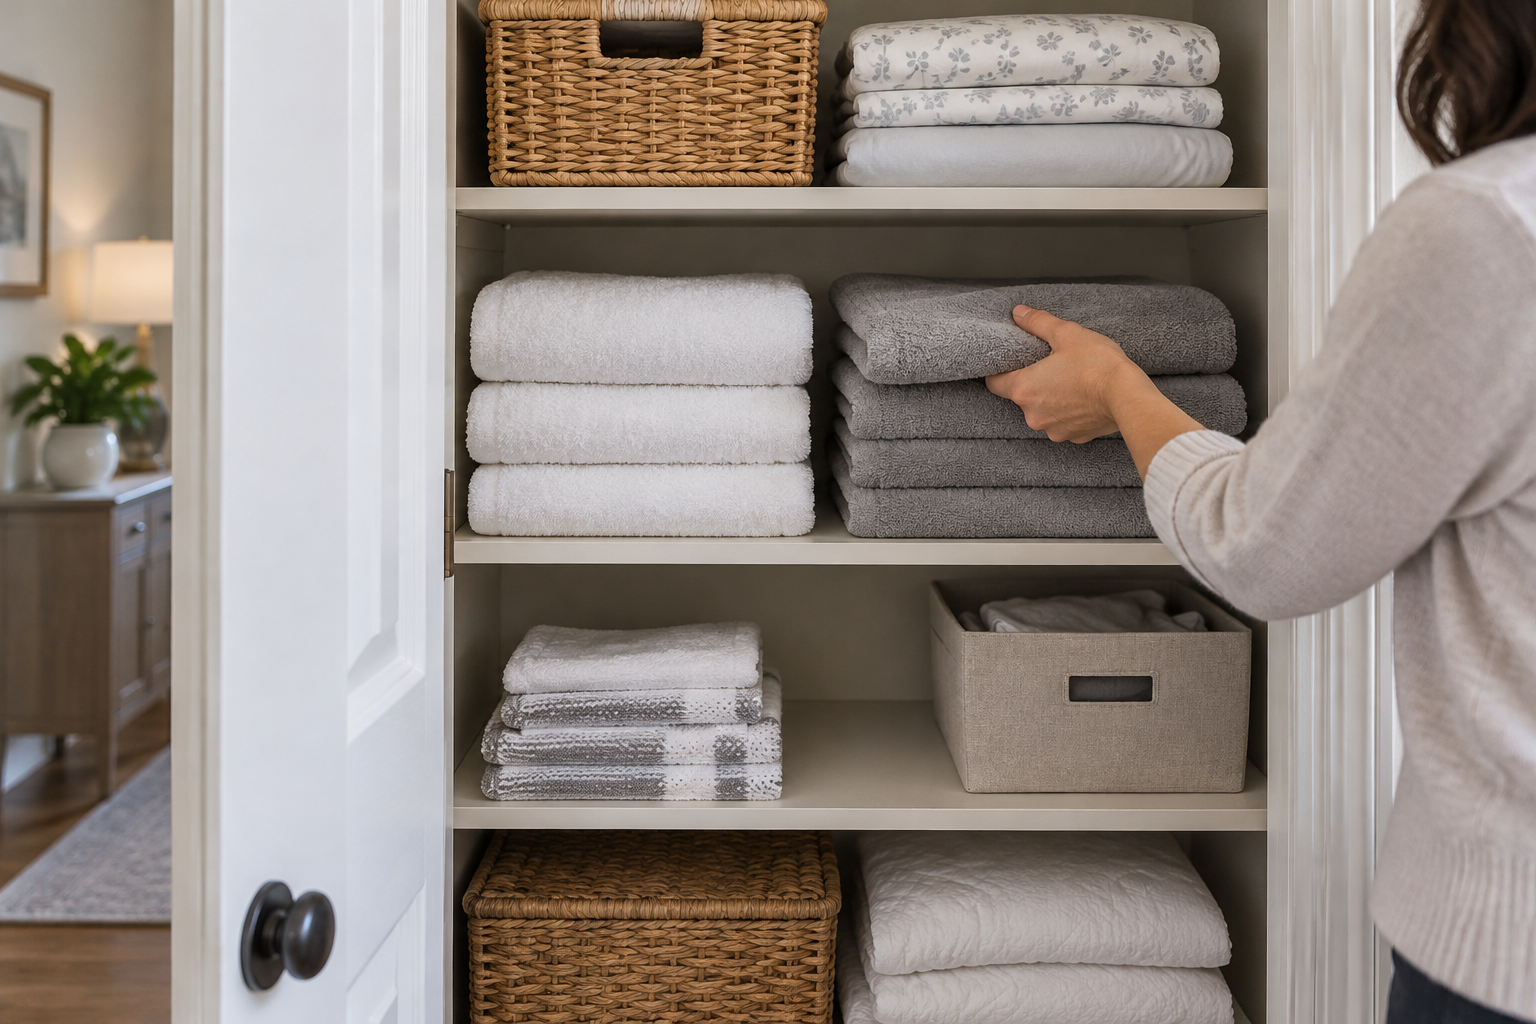
    Place frequently used towels and replacement sheets where the people using them can retrieve them comfortably. For many adults, that means shelves between roughly waist and shoulder height, but test your own reach. A family might give children a lower towel shelf, keep everyday sheets in the middle, and reserve the highest shelf for lightweight, rarely needed guest linens.

    Everyday towels and sheets stored on easy-to-reach middle shelves.

    Do not use the highest shelf for heavy stacks simply because it has spare room. Overhead lifting can turn a routine change into a balancing act. These zones are personal planning choices, not accessibility standards. If upper storage requires a step stool, use a stable one on a clear floor; never climb shelves or leave a stool blocking the hallway.

    5. Keep Each Sheet Set Together

    Fold a fitted sheet, flat sheet if used, and matching pillowcases into one bundle. Slip the pieces inside one pillowcase, leaving the opening loosely tucked rather than stretched tight. For example, place two queen sets side by side so either comes out as a complete package. Separate different bed sizes with distinct shelf positions or simple shelf-edge labels.

    Bundling fails when unrelated spare pillowcases get stuffed into every available opening. Keep unmatched extras in their own small section. Deep-pocket sheets and multiple king pillowcases may make a pillowcase bundle too bulky; use a loose fabric wrap or a dedicated shelf space instead. Whatever the method, dry every piece thoroughly before enclosing it, especially at seams and elastic edges.

    6. Divide Wide Shelves Into Stable Stacks

    Use removable shelf dividers to stop neighboring stacks from leaning into each other. Give bath towels one bay and hand towels another, leaving enough room for fingers at each side. Start with stacks of about four bath towels and test retrieval. If removing the bottom towel topples everything, shorten the stack or add a compatible freestanding shelf insert.

    A divider organizes sideways movement; it does not strengthen a sagging shelf. Check that clips suit the shelf thickness and will not damage a rental finish. Inserts also consume vertical space and may not suit thick quilts. Avoid tall, narrow freestanding arrangements that tip during use, and follow anchoring instructions for any storage unit that requires attachment.

    7. Leave Air Paths Around Stored Linens

    Leave small gaps between stacks and keep fabric from pressing against the back wall. About an inch of rear clearance is a useful starting point where depth allows. For example, spread three towel stacks across a shelf rather than clustering them tightly in one corner. In a humid home, breathable containers and fully dry linens matter more than squeezing in another layer.

    Before and after showing the same towel stacks repositioned with gaps around them.

    Gaps cannot fix an active leak, condensation, or persistent dampness. Investigate those conditions before putting clean textiles back. Avoid airtight packaging for routine storage unless the linens are completely dry and conditions are appropriate. Leaving the door open briefly may help air exchange, but it is unsuitable if the door obstructs a passage or creates a household hazard.

    8. Create a Separate Landing Spot for Used Towels

    Keep the clean linen closet from becoming temporary storage for damp towels. Give used towels a drying spot in the bathroom or laundry area, then move them to the hamper when dry. For example, a freestanding towel rack can handle towels awaiting laundry while a small basket elsewhere collects dry, worn linens. This protects clean inventory from accidental mixing.

    Hooks are convenient, but several wet towels layered on one hook dry poorly. A rack also needs floor space and should not narrow an exit path or crowd a heater. In rentals, get permission for drilled hardware and check surface requirements for removable products. If no safe drying spot exists, adjust laundry timing rather than stuffing damp textiles into the closet.

    9. Use the Door Only for Lightweight Small Linens

    A shallow door organizer can move washcloths or spare pillowcases off crowded shelves. Measure the gap between the closed door and shelf fronts before choosing one, then test the door through its full swing. For example, a slim fabric pocket panel may hold rolled washcloths while leaving the shelves available for larger towels and bedding.

    Over-door hooks can scrape trim, prevent latching, or place too much weight on the door. Keep loads light and follow hardware limits; do not assume every hollow-core door accepts screws. Rental approval may be needed. Skip door storage when it interferes with closing, swings into a tight passage, or hides contents from someone who needs a simpler system.

    10. Give Bulky Bedding One Measured Home

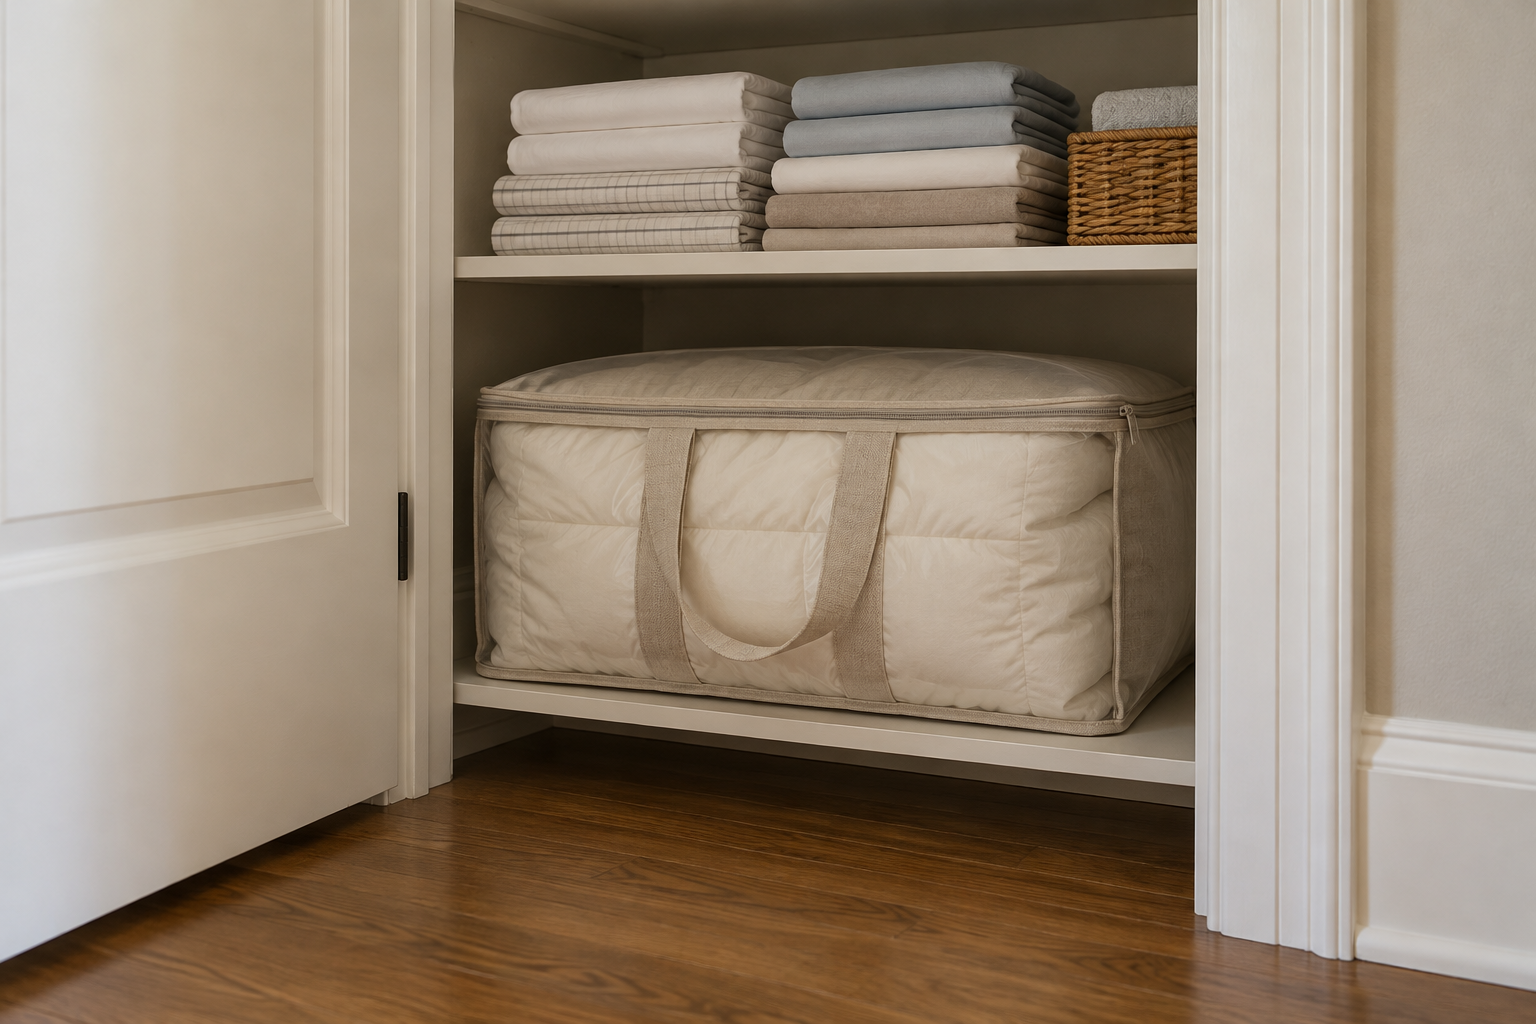
    Reserve a defined lower shelf for a spare comforter or seasonal blanket in a breathable zippered bag with handles. Measure the filled bag, not its empty packaging dimensions, and leave room to pull it straight out. For example, one guest comforter can occupy a single bag while its matching sheets stay in the everyday sheet zone.

    A guest comforter stored in a handled fabric bag on a lower shelf.

    Do not turn that shelf into a compressed tower of every blanket in the house. Vacuum bags save volume but can leave bedding creased, and some fills need gentler storage; follow care guidance. A heavy bag may be unsuitable for someone who cannot lift from a low position. Move it to another measured, dry location rather than blocking the closet floor.

    A useful linen closet lets you take one item without rearranging five others. Start with inventory, then test shelf depth, folding, and reach before adding organizers. After the next laundry cycle, notice what was easy to put away and what resisted. Keep the changes your household can repeat, with enough breathing room for both the linens and the routine.

  • Shoes and Bags Blocking the Door? 10 Fixes for a Tiny Entry

    Shoes and Bags Blocking the Door? 10 Fixes for a Tiny Entry

    A tiny entry gets overwhelmed quickly: two pairs of shoes become six, a backpack lands behind the door, and muddy boots claim the walking path. The answer is not necessarily more furniture. It is giving everyday items a limited, convenient place while protecting the route outside. These ten fixes work with different layouts and budgets; choose the ones that fit your household. Any dimensions mentioned are approximate planning guidelines, not code or accessibility standards. Measure your space, door movement, and belongings before buying.

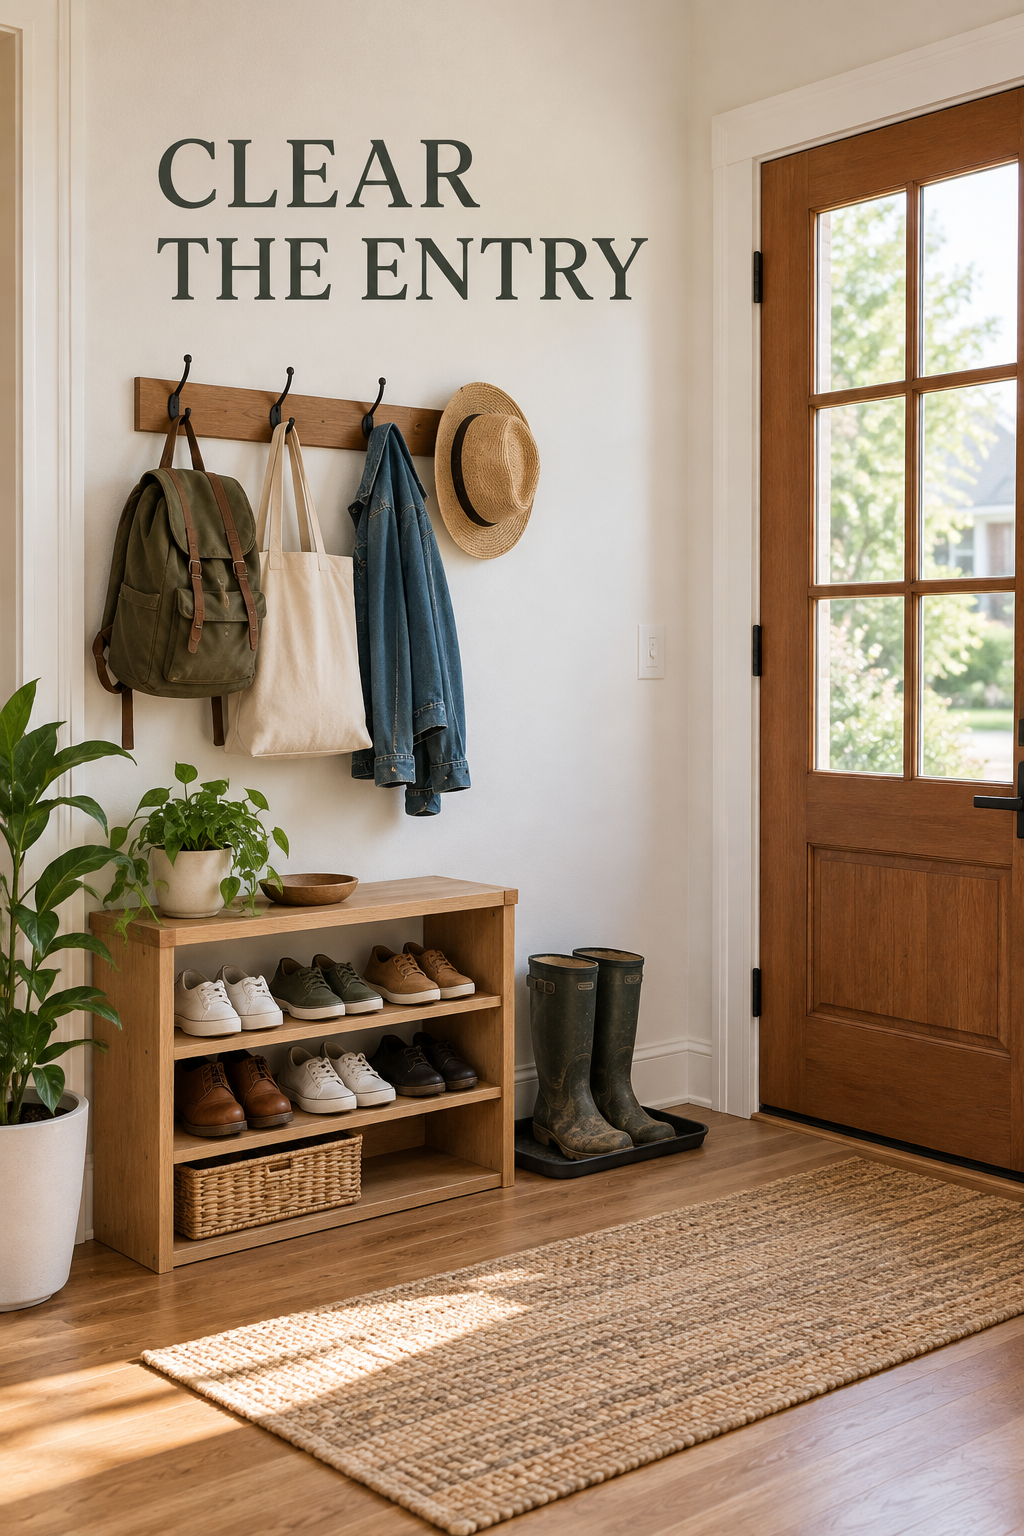
    Tiny entry with contained shoes, hanging bags, a clear doorway, and the headline CLEAR THE ENTRY.

    1. Give Everyday Shoes a Fixed Landing Spot

    Start with the shoes people actually remove at the door. Assign each person a small section of a low, open shoe rack positioned beyond the door swing. For a two-person household, that might mean four everyday pairs total, with toes facing the same direction. Choose a rack that fits your largest shoes completely so heels do not project into the walking route.

    The common mistake is buying a rack for every shoe you own rather than the available footprint. Deep sneakers and large boots can overhang shallow shelves, while stacked tiers may be awkward for someone who cannot bend easily. Skip this approach if even a small floor rack narrows the usable route; a nearby closet may be the better landing spot.

    2. Rotate Backup Shoes Out of the Entry

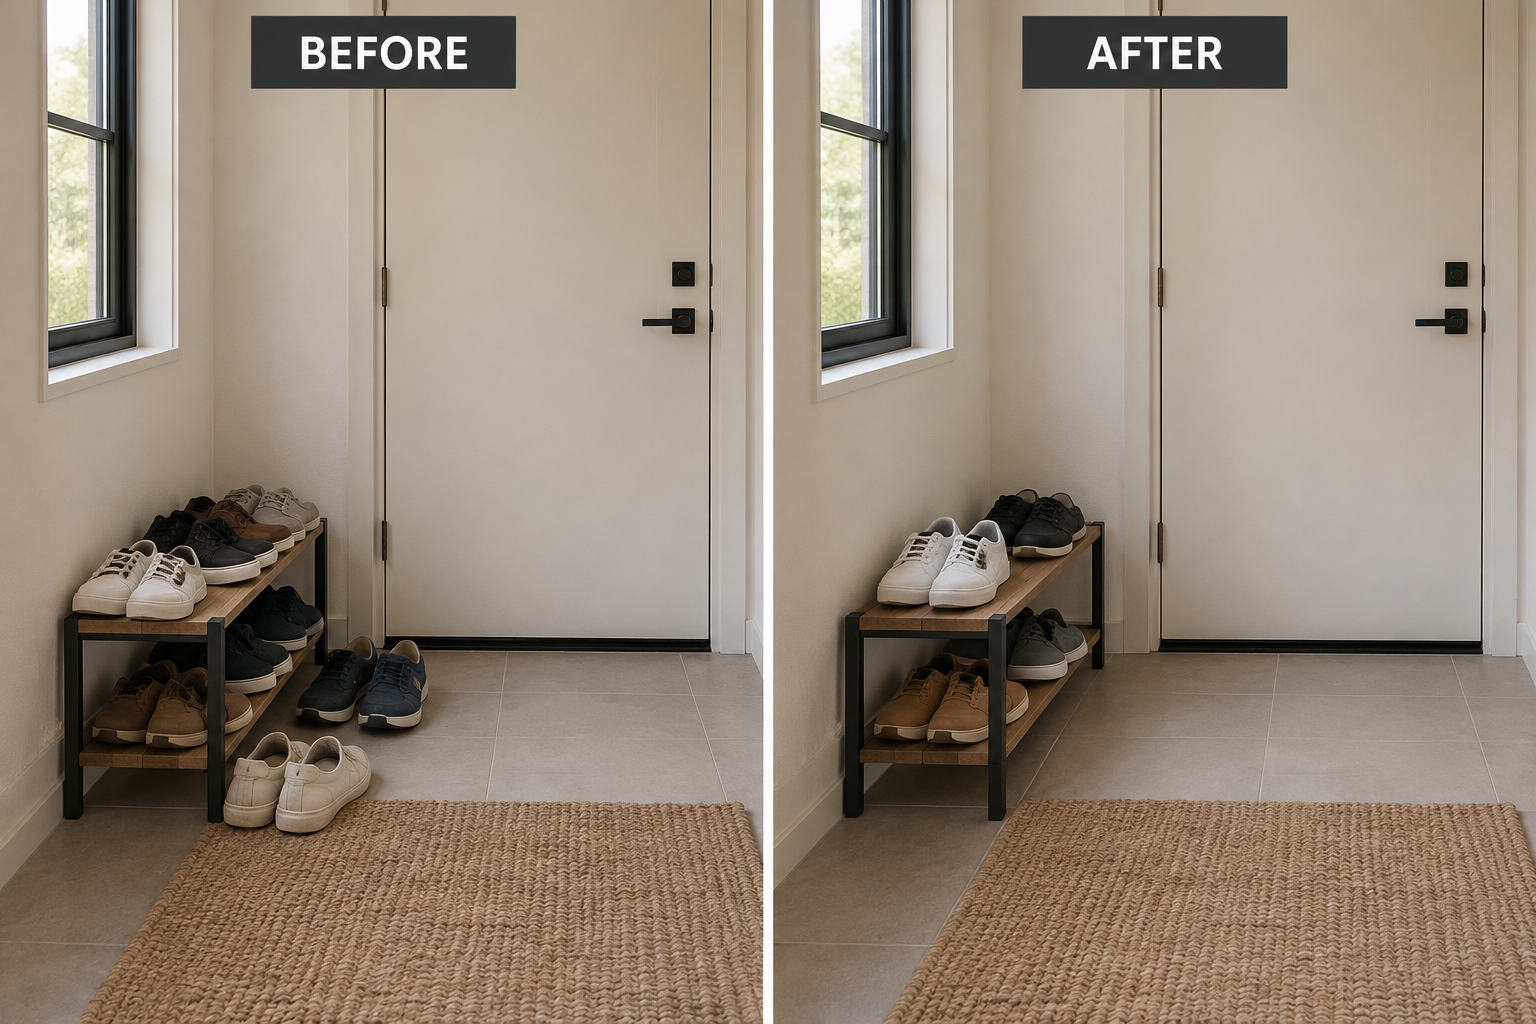
    Keep the entry rack for current-use footwear and move occasional pairs to an existing bedroom or hall closet. Set a simple swap routine: when rain boots come forward, little-used dress shoes go back. In a narrow entry with a two-tier rack, reducing eight pairs to four can eliminate the floor pile without changing the furniture or pretending the room is larger.

    Before and after comparison shows fewer shoes clearing the floor around the same entry rack.

    Do not move the overflow into a distant, packed closet where retrieving a pair becomes a project. Rotation works only when backup storage is accessible and someone maintains the limit. Households with changing work shifts, sports, or mobility needs may need more active pairs. Make the allowance realistic rather than enforcing a tidy arrangement that gets abandoned by Tuesday.

    3. Use a Shallow Shoe Cabinet Where Doors Can Open

    A shallow, enclosed shoe cabinet can contain visual clutter along an otherwise unused wall. Look at actual shoe capacity rather than the product’s pair count; bulky sneakers may occupy an entire compartment. A cabinet around 8 to 12 inches deep might suit some entries, but measure its closed depth, open compartment projection, baseboard clearance, and your shoes before committing.

    A slim profile does not make a cabinet automatically safe or suitable. Follow the manufacturer’s anchoring instructions, and obtain rental permission before drilling. Check for concealed utilities and choose fasteners appropriate to the wall. Avoid placing it where an open compartment blocks the exit, or where required access to an electrical panel, heater, vent, or other equipment would be compromised.

    4. Hang Daily Bags on a Deliberate Hook Rail

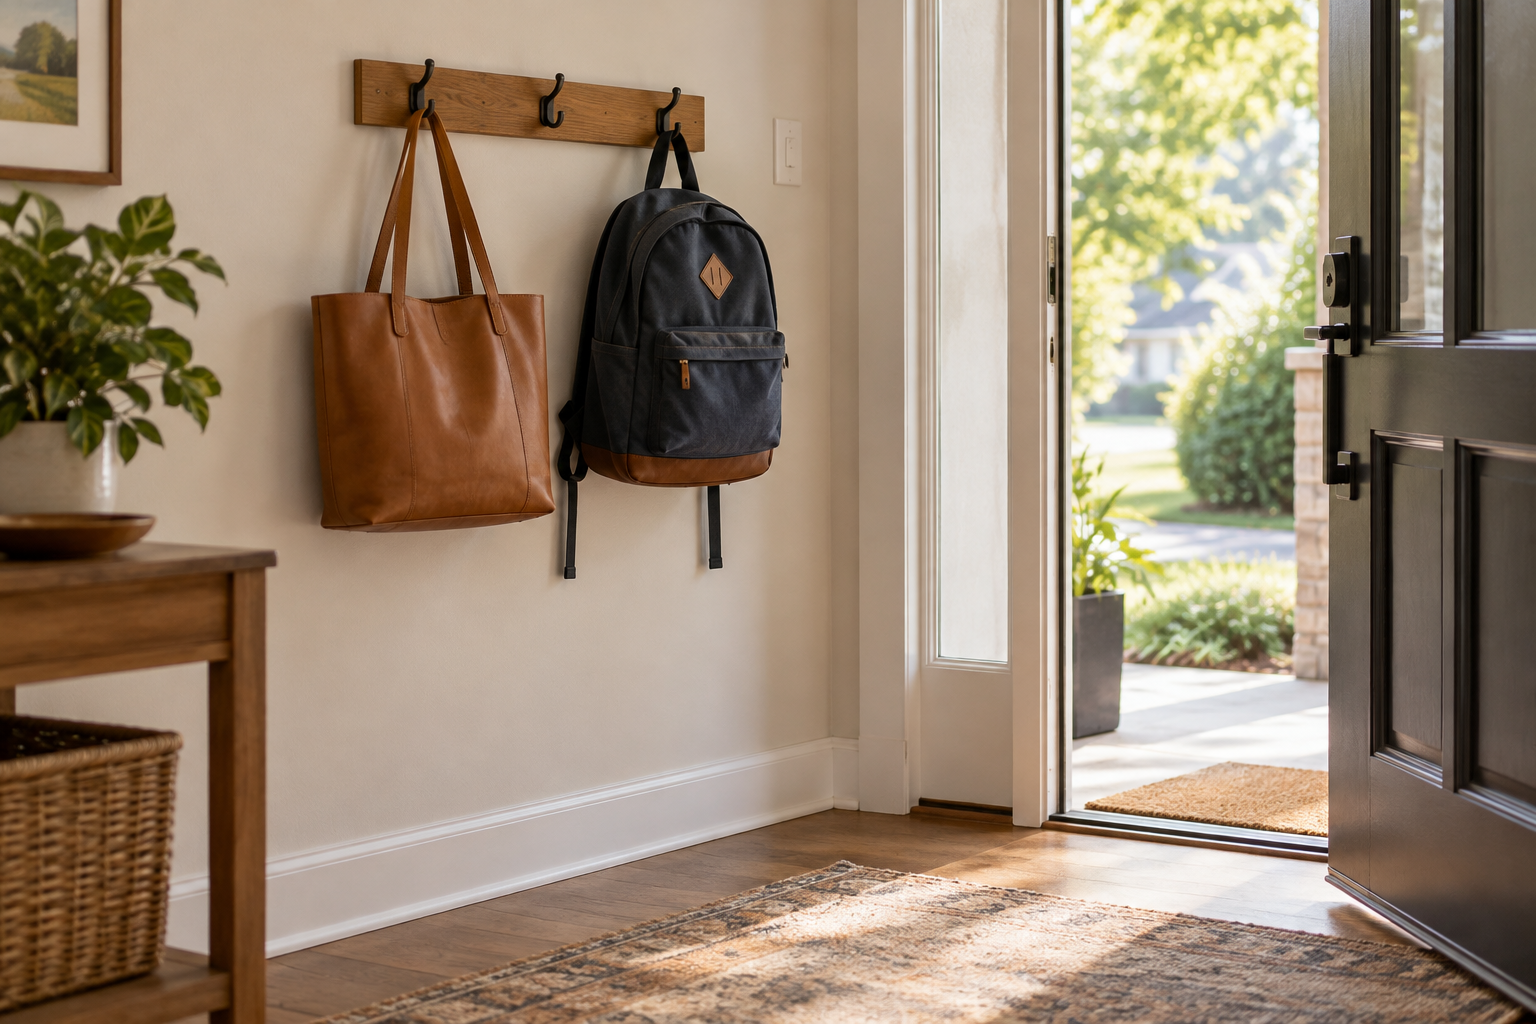
    Put everyday bags on individual hooks instead of piling them on a doorknob. Position a short rail on a side wall where loaded bags will hang outside the walking route. Test the arrangement with your fullest backpack before installation. For example, two spaced hooks can hold a work tote and school backpack without their straps tangling or either bag resting on shoes.

    A work tote and backpack hang separately on a side-wall rail outside the entry path.

    Closely packed hooks often create one large bulge rather than useful storage. Account for bag depth, not just rail length, and keep straps from dangling where feet can catch them. Use hardware rated for the loaded bags and the wall construction. Adhesive hooks may suit very light items if permitted, but they are a poor gamble for heavy daily backpacks.

    5. Choose a Shoe Bench Only If Sitting Helps

    When someone needs to sit while changing shoes, a narrow bench with open storage underneath can earn its footprint. Reserve one cubby per person and keep the seat empty. In a small recessed entry, a roughly 30-inch-wide bench might provide a useful perch and hold two shoe baskets below. Check the actual seat height, stability, and space needed for knees and standing.

    A bench becomes wasted space when bags permanently occupy the seat. It also needs more room in use than its measurements suggest, especially for someone who uses a mobility aid or needs assistance. Do not squeeze one into a passage simply because it fits against the wall. If sitting is unnecessary, a smaller shoe solution usually preserves more usable floor.

    6. File Spare Bags Upright on a Closet Shelf

    Separate the bag you carry today from the bags you occasionally choose. Use removable shelf dividers to stand spare totes and purses upright in a nearby closet, with handles tucked inside their own compartments. One shelf can hold a small selection without the unstable stack that tumbles down whenever you pull out a bag. Support soft bags lightly to maintain their shape.

    Dividers cannot rescue an overfilled shelf, and compressing leather or structured bags can distort them. Measure both shelf depth and overhead clearance before choosing organizers. This works best for dry, occasional bags within comfortable reach; it is unsuitable for damp gym bags or heavy backpacks stored overhead. Keep frequently carried items lower so retrieving them does not require stretching or climbing.

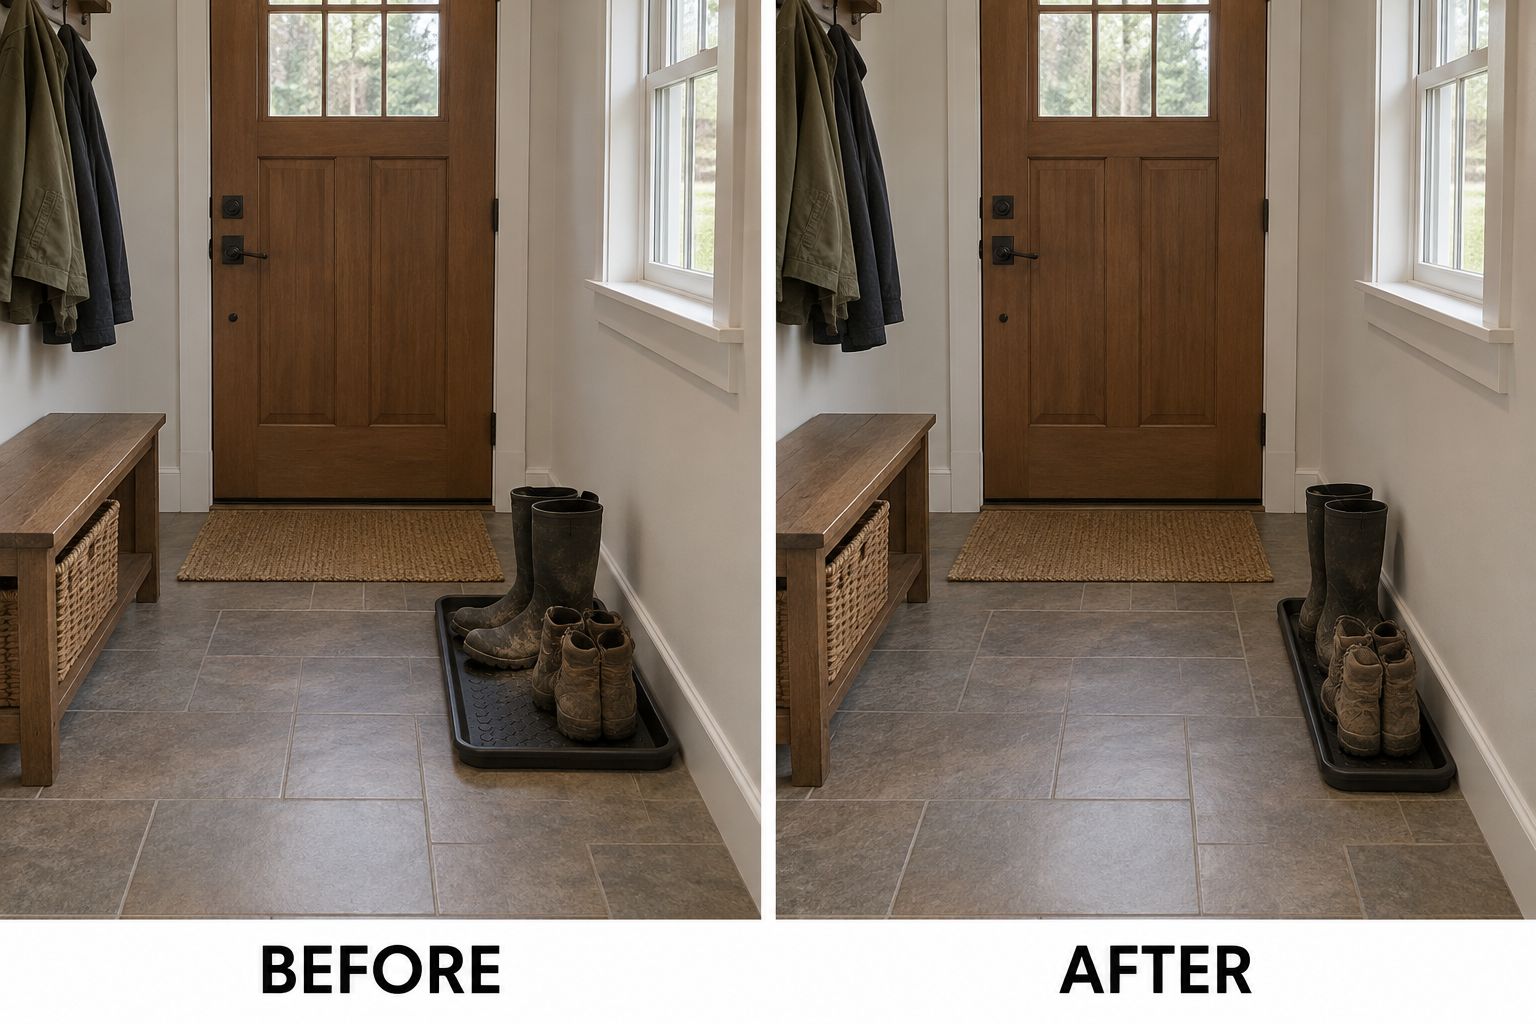
    7. Turn the Boot Tray Along the Wall

    Sometimes the existing boot tray is useful but facing the wrong way. If the wall length allows, rotate a rectangular tray so its long edge runs along the wall rather than projecting into the entry. A roughly 30-by-16-inch tray then projects about 16 inches instead of 30. Park muddy boots inside its rim, beyond the door swing, and check the remaining route in person.

    Before and after comparison shows the same boot tray rotated along the wall to reduce its projection.

    Do not assume every tray can turn successfully: nearby trim, a closet opening, or a floor register may prevent it. A tray also needs regular emptying and cleaning; standing water and grit can damage surrounding flooring. Choose a stable, low-profile rim and let footwear dry. If no orientation leaves a safe route, relocate wet-shoe parking rather than accepting a permanent obstacle.

    8. Use the Inside of a Closet Door for Lightweight Footwear

    A pocket organizer inside a nearby closet door can hold flats, slippers, and small children’s shoes without adding another floor unit. Assign lower pockets to items children can manage independently and keep heavier footwear elsewhere. Before loading it, open and close the door fully to confirm that the organizer clears shelves, hanging clothes, trim, and anything stored behind the door.

    Over-door brackets can scrape paint, interfere with latching, or strain a door when overloaded. Confirm rental rules and hardware compatibility; do not modify a fire-rated door or interfere with its closing. This is not a good home for wet boots, heavy sneakers, or damp items trapped in poorly ventilated pockets. Avoid the front exit door and use a suitable interior closet instead.

    9. Park Heavy Backpacks in a Pull-Out Floor Bin

    For backpacks too heavy for convenient hanging, use a sturdy handled bin that slides completely beneath an existing console or closet shelf. Give each loaded bag an upright slot, with straps tucked inside the bin. A student can pull the bin forward to pack, then return it to its marked-by-fit home, leaving nothing projecting beyond the furniture into the entry.

    The weak point is a bin left halfway out after someone rushes away. Choose a manageable size, test it fully loaded, and avoid free-rolling containers that can drift into the path. Do not add a console just to create this solution in an already tight entry. For anyone who cannot comfortably pull or lift a loaded bin, accessible shelf storage may work better.

    10. Create One Outgoing Tote for Tomorrow’s Errands

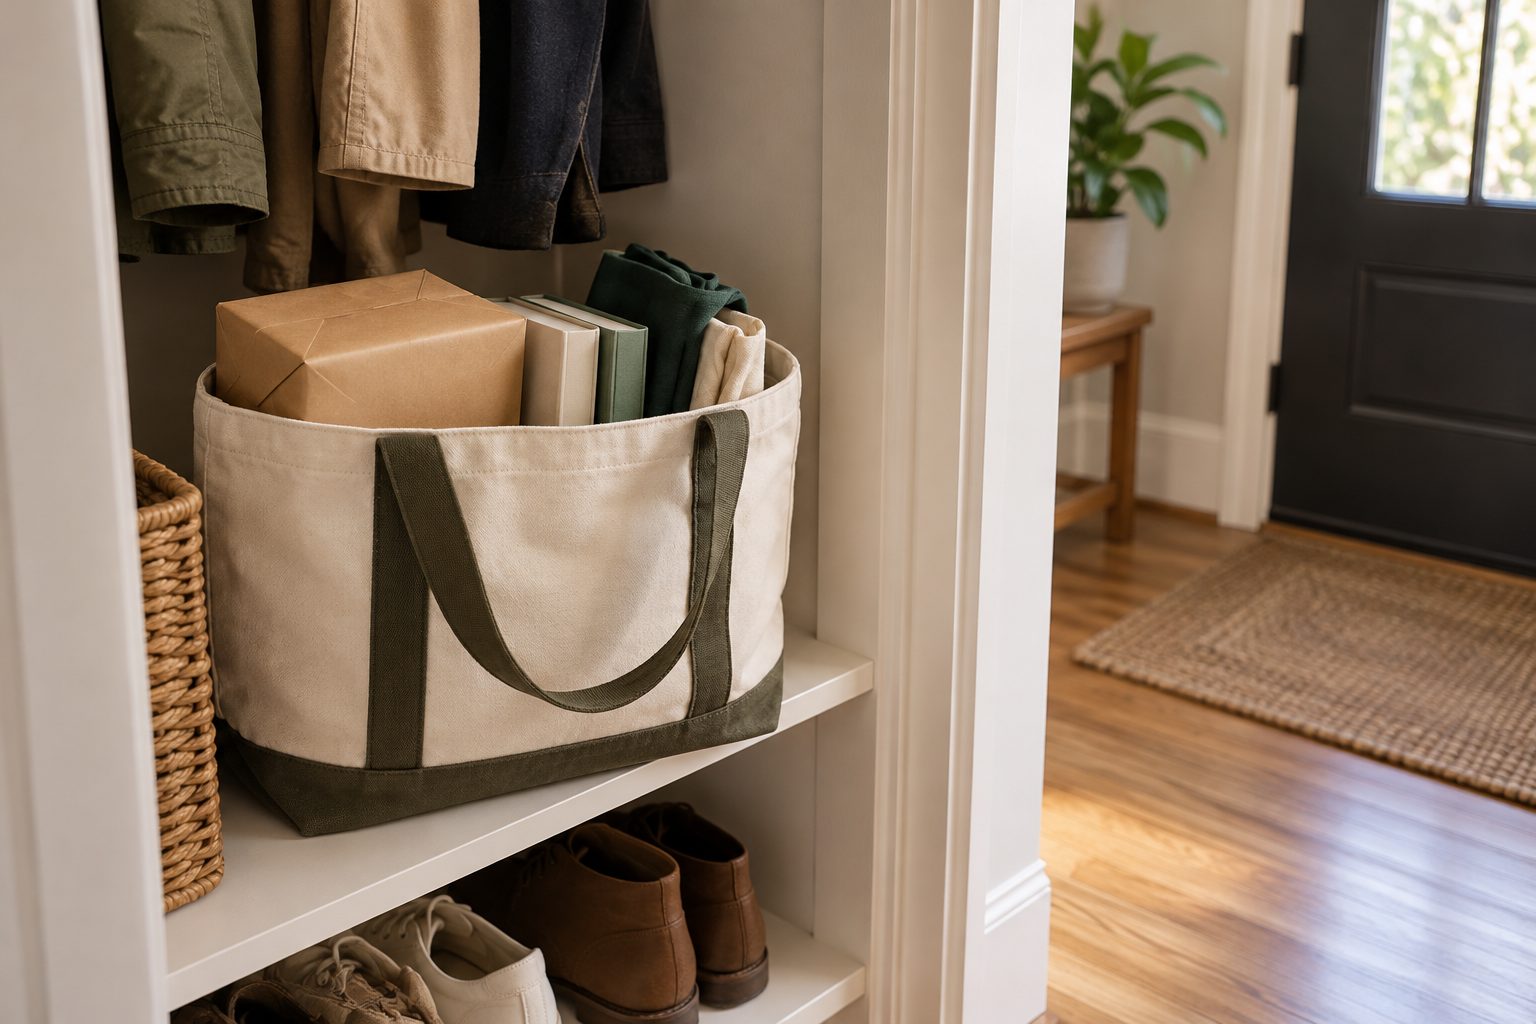
    Stop returns, library books, and reusable shopping bags from becoming separate piles beside the door. Keep one sturdy outgoing tote on a reachable shelf in the entry closet, and pack it during the evening reset. For example, place tomorrow’s return parcel inside with folded shopping bags. Move the tote into the departure routine, not onto the floor as a reminder.

    An outgoing tote on a closet shelf gathers a return parcel, books, and reusable shopping bags.

    An outgoing tote can become permanent storage if nothing actually leaves. Empty it after errands and review it during the next reset. Keep the load comfortable to carry, and store fragile, leaking, or unusually heavy items separately. This system is less useful when household members leave at different times for unrelated destinations; separate small departure bags may be clearer than one shared tote.

    A workable tiny entry gives daily shoes and bags a convenient home, contains muddy items, and leaves the exit route clear. Start with the obstruction you move most often, then test one fix through a normal week. Keep what your household actually uses, adjust what gets ignored, and let easy departures—not maximum storage capacity—be the measure of success.

  • Food Gets Lost in Deep Kitchen Cabinets: 10 Ways to Bring It Within Reach

    Food Gets Lost in Deep Kitchen Cabinets: 10 Ways to Bring It Within Reach

    A deep kitchen cabinet can hold plenty and still feel impossible to use. Crackers disappear behind cereal, cans collect in dark corners, and finding dinner ingredients requires unloading half a shelf. The answer isn't necessarily more storage; it's making existing storage easier to see, reach, and reset. These ten approaches work without renovation, and most can start with supplies you already own. Measure cabinet openings, interior depth, hinges, and shelf clearance before buying organizers; any dimensions mentioned are approximate planning guidelines, not compliance standards.

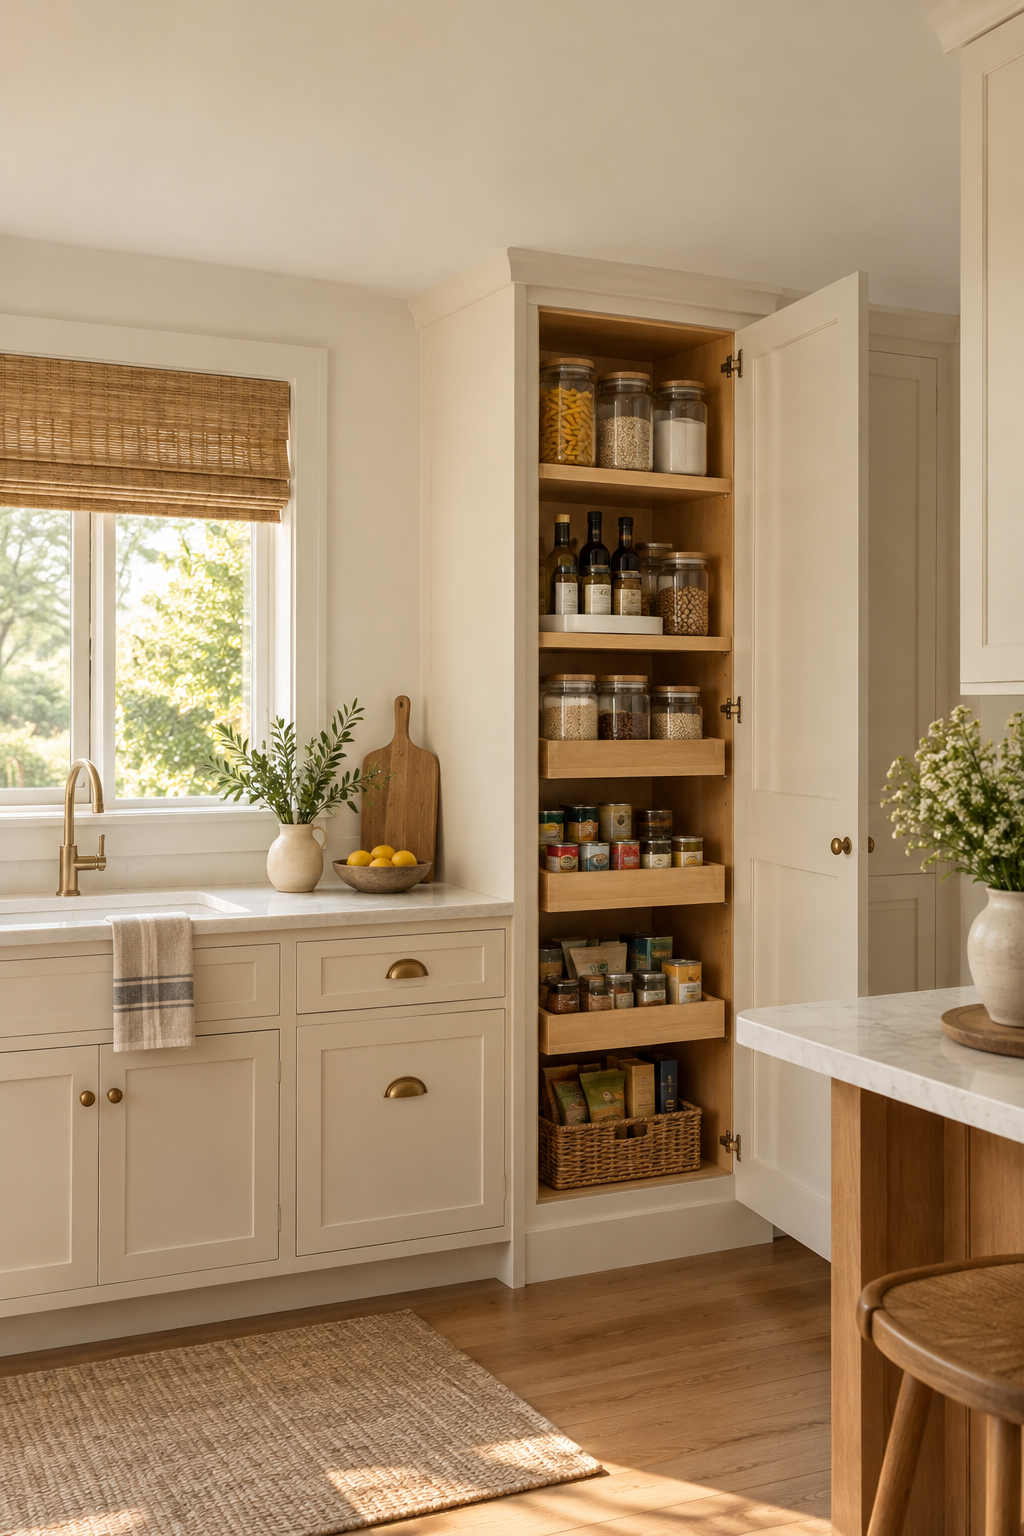
    Open deep kitchen cabinet with grouped food and accessible organizers in a compact kitchen.

    1. Give the Front and Back Different Jobs

    Assign cabinet depth according to how often you actually use something. Keep breakfast foods and everyday dinner ingredients at the front, with unopened duplicates directly behind their matching products. For example, place the open oatmeal container near the shelf edge and its replacement behind it. Put occasional baking supplies farther back, but keep their category visible from the doorway.

    The common mistake is calling the back a reserve zone and filling it with unrelated leftovers. That simply creates a second hiding place. Keep each front-to-back lane specific, and avoid stacking so deeply that checking quantities becomes difficult. If reaching the rear requires climbing or stretching, store lightweight, infrequently used goods there rather than heavy jars or daily staples.

    2. Pull Out a Whole Food Category in One Bin

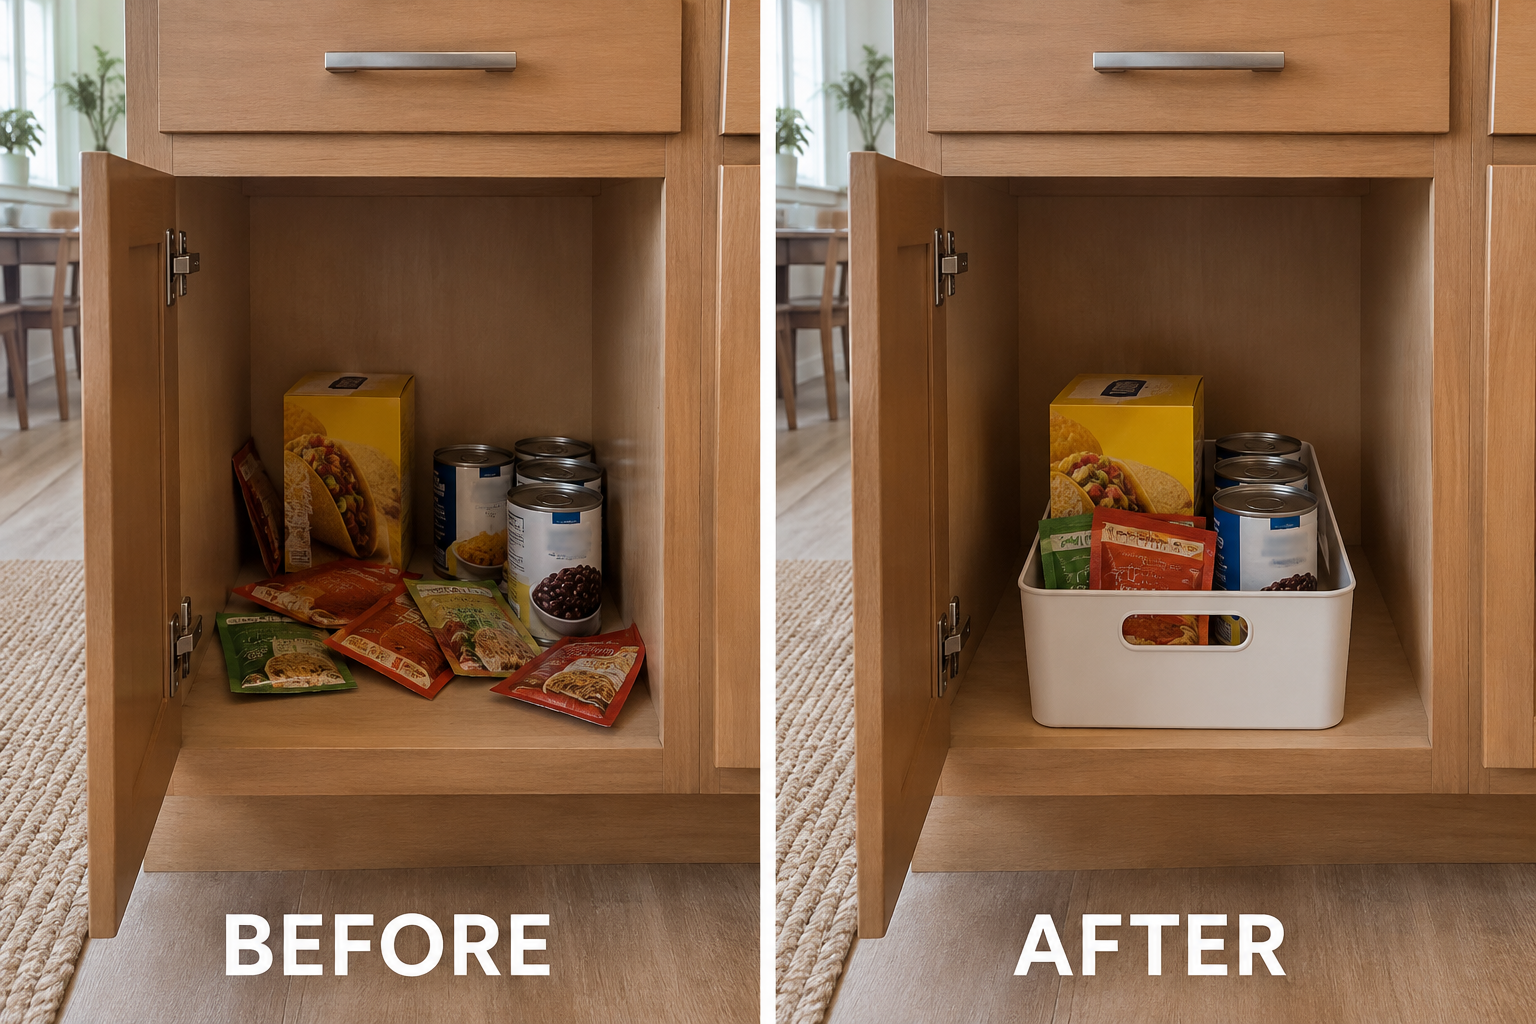
    Use a narrow, handled bin to turn a deep shelf into a removable drawer. Group foods used together, such as taco shells, seasoning packets, and canned beans, so one pull brings the meal components forward. Choose a bin that clears the hinges and leaves room for your hand. Test the fit with an empty cardboard box before purchasing anything.

    Before and after showing loose taco ingredients grouped into one removable handled bin.

    A giant bin can become as awkward as the cabinet itself, especially when loaded with cans. Use several manageable categories instead of one shelf-wide catchall, and check the organizer's load guidance. This approach is unsuitable if you cannot comfortably lift the loaded bin or lack a nearby landing spot; a smaller container may solve both problems.

    3. Rotate Small Bottles Into View

    A turntable works well for small bottles that otherwise form several hidden rows. Place oils, vinegars, or sauces on a stable model with a raised rim, keeping taller bottles toward the center and shorter ones outside. Measure the full turning circle inside the cabinet, including hinge intrusions, and test rotation with the door in its normal open position.

    Don't assume a round organizer uses every inch efficiently. It leaves unused corners and can waste space when filled with rectangular packages. Heavy glass bottles also make rotation harder and spills messier. Skip it on unstable shelves or where bottle height leaves too little clearance; shallow category trays are often better for bulky cartons and bags.

    4. Raise Rear Cans Above the Front Row

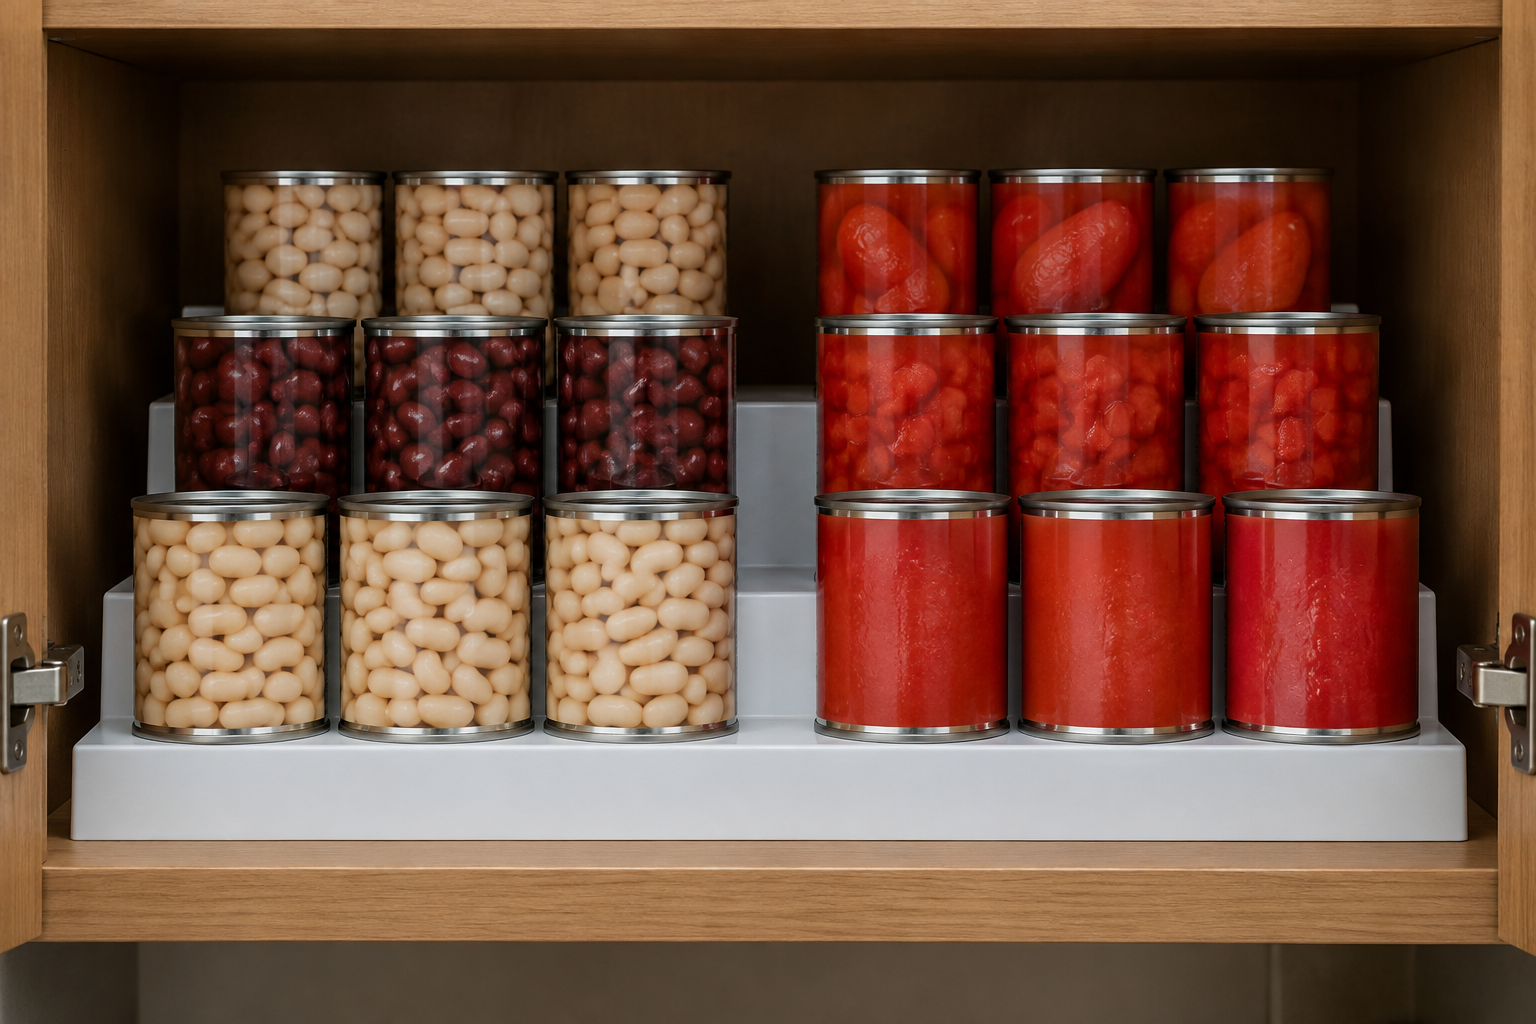
    A sturdy stepped riser reveals the tops and fronts of canned goods without requiring a full cabinet unload. Arrange one row per step, grouping beans together and tomatoes together rather than mixing everything by can size. Choose shallow enough steps that you can grasp each can securely. Measure loaded height, not just the empty organizer, before settling on a shelf.

    Stepped cabinet riser showing three visible rows of canned beans and tomatoes.

    Stacking extra cans on every step defeats the visibility benefit and can make the arrangement unstable. Risers also lift weight higher, so check both shelf capacity and organizer guidance. They are less useful for mixed-height jars or for anyone who finds elevated rear items difficult to grasp. Keep heavy cans on a comfortably reachable shelf, not overhead.

    5. Stand Flat Food Packages Upright

    Store rice pouches, seasoning envelopes, and thin baking mixes upright in a divided file-style organizer. Their top edges stay visible, and removing one packet won't collapse a horizontal stack. Use adjustable dividers to separate dinner grains from baking ingredients. Keep the organizer near the front so you can flip through its contents rather than reach over a pile.

    Overfilling the compartments makes packets difficult to browse and can hide small envelopes between larger pouches. Leave enough looseness to separate items with your fingers. This method isn't suitable for leaky bags or packages that slump unless supported. Keep opened powders tightly sealed, and avoid placing sharp divider edges against thin packaging that could tear.

    6. Add a Retrofit Pullout Where Lifting Is Awkward

    For a lower cabinet holding heavier food, a retrofit sliding basket can bring the entire shelf forward without lifting a bin. Measure the opening at its narrowest point, including hinges and any center stile. Check required mounting surfaces and extension space. A pullout holding flour, sugar, and rice can make a deep base cabinet considerably easier to use.

    These organizers often require screws, so renters should obtain permission before installation. Follow the manufacturer's mounting and load instructions; a poorly secured pullout can tip or damage cabinetry. Hardware also reduces usable width and height. Skip this option if the cabinet structure is unsuitable or the extended basket would obstruct a doorway, appliance, or essential walking route.

    7. Decant Only the Foods Visibility Will Help

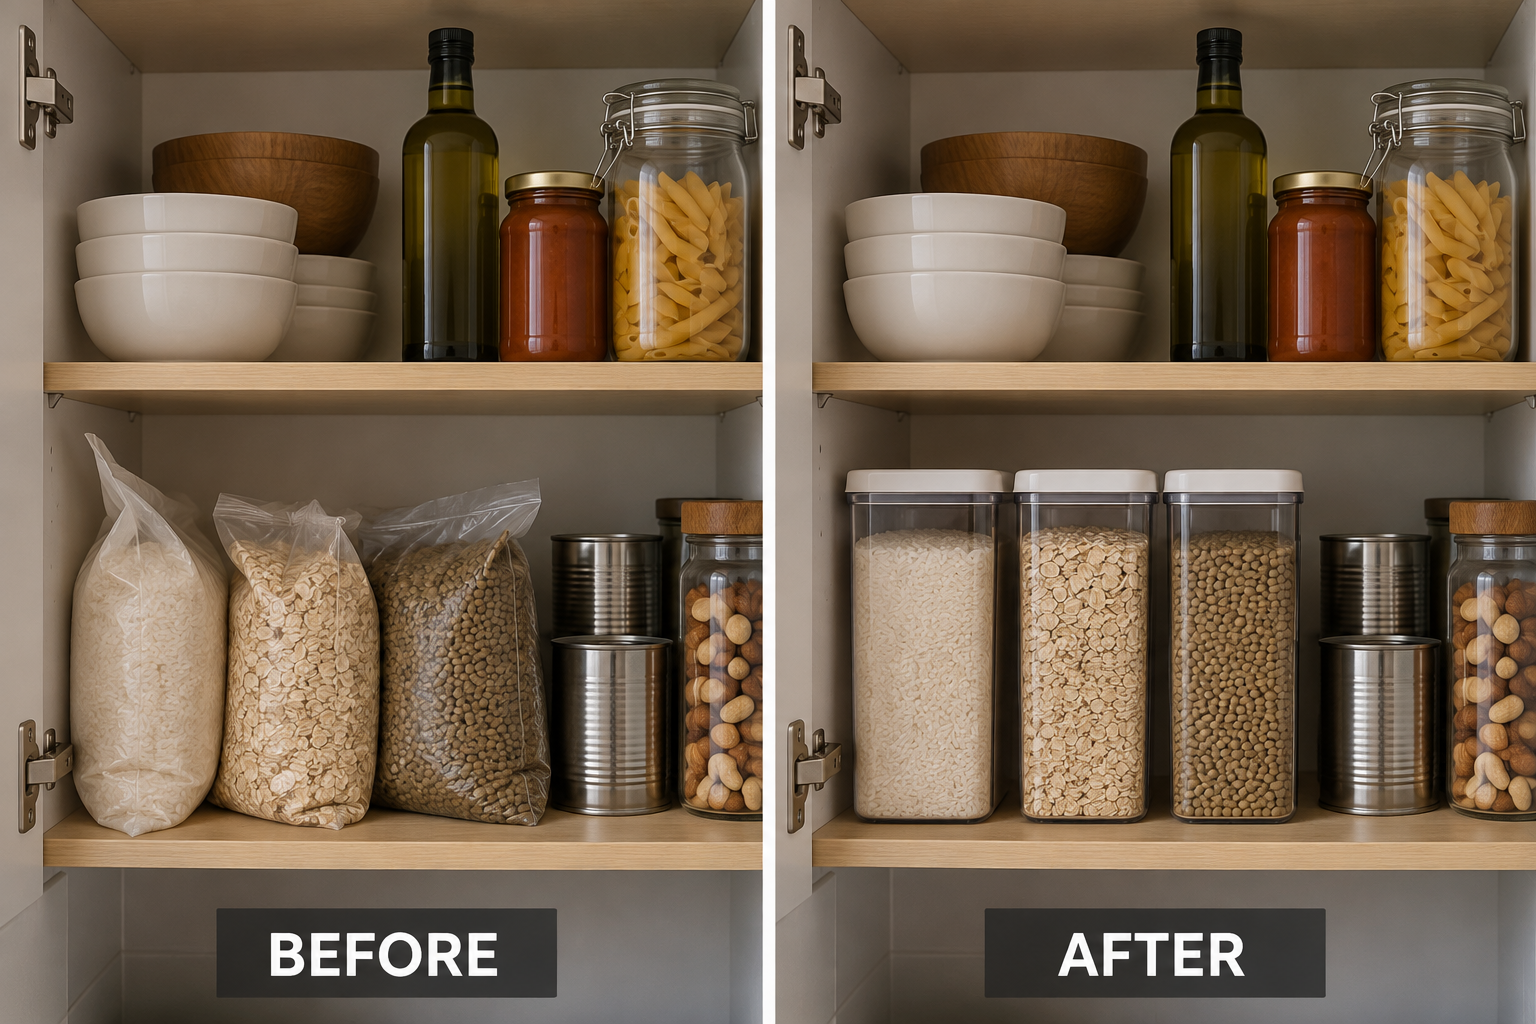
    Transfer frequently used dry staples from floppy, opaque bags into clear, food-safe containers. Straight-sided containers make remaining quantities obvious and can prevent a half-empty bag from disappearing behind another package. Start with two or three foods, such as rice, oats, and lentils. Choose sizes that hold your usual purchase while fitting the shelf's depth and overhead clearance.

    Before and after showing three dry staples moved from opaque bags into clear containers.

    Decanting everything creates extra washing and can separate food from cooking directions, allergen information, and dates. Retain those details with each container, and don't top off old food indefinitely. Wash and thoroughly dry containers between batches. Keep products in original packaging when household allergy management, identification needs, or infrequent use makes transferring them more trouble than help.

    8. Use the Empty Air Beneath a Shelf

    A shallow under-shelf basket can give lightweight food its own visible level instead of letting it disappear behind taller goods. Try it for tortillas, small snack packets, or unopened flatbread. Measure the basket's drop and the thickness of the shelf it clips onto. Position it toward the front, leaving the foods below easy to see and remove.

    The mistake is treating this added level as free capacity. A basket can block tall containers, interfere with the door, or strain an unsuitable shelf edge. Follow its load limit and reserve it for lightweight items, not cans or jars. Avoid clip-on models where the fit is loose or where the supporting shelf is damaged.

    9. Light the Back Without Adding Clutter

    Sometimes food isn't poorly organized; it's simply in shadow. A removable, rechargeable cabinet light can reveal rear contents without taking up shelf space. Mount it near the front underside of the shelf above, aimed inward so tall packages don't immediately block it. Test placement temporarily before attaching it, and choose a model intended for the cabinet environment.

    Lighting won't fix overcrowding, and a fixture hidden behind cereal boxes does little good. Adhesive mounts can damage rental finishes, so check permissions and product instructions first. Keep lights away from moisture and heat, maintain appliance clearances, and avoid trailing charging cords through doors. Skip lights that require awkward removal or charging you are unlikely to maintain.

    10. Build a Quick Shelf Sweep Into Grocery Day

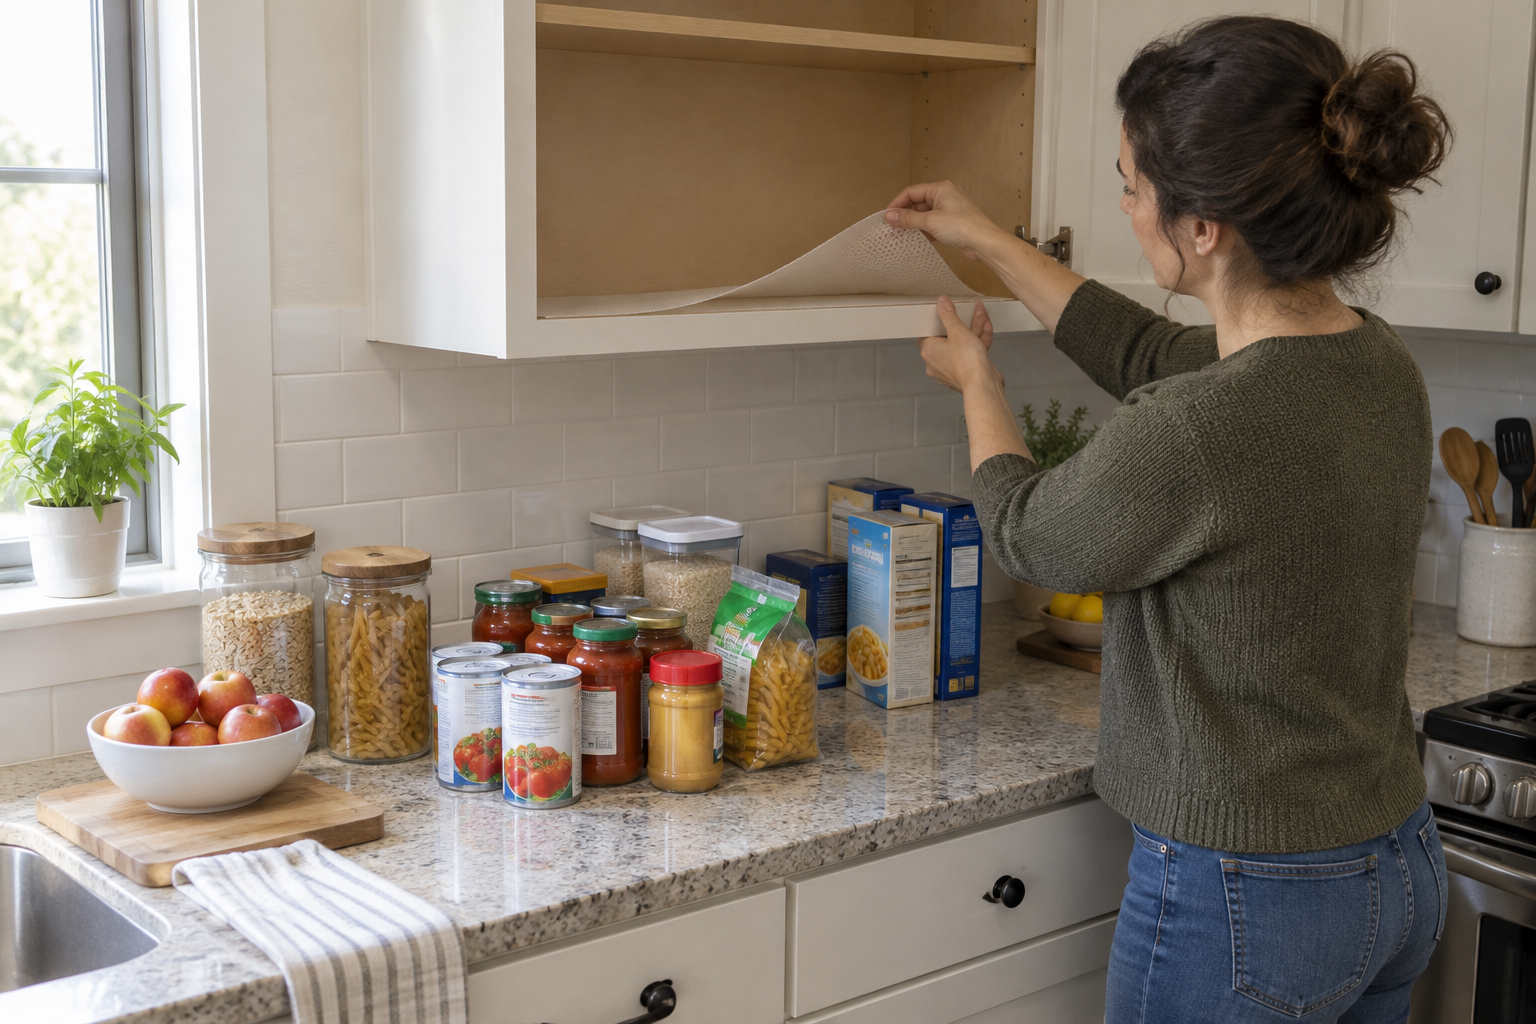
    Before putting groceries away, bring the contents of one deep shelf onto a clear counter. Check the back, wipe crumbs with a suitable cleaner, dry the surface, and return older matching products in front of new ones. Work through a different shelf each shopping trip. A fitted, removable, washable liner can simplify cleanup if the cabinet finish permits it.

    One cabinet shelf emptied for cleaning with its food grouped on the adjacent counter.

    Don't empty the entire kitchen at once or leave food across a busy walkway. A small, repeatable sweep is more useful than an exhausting overhaul. Avoid thick or curling liners that catch containers, and let surfaces dry before restocking. If counter space is scarce, use a cleared table or clean tray and finish one section before starting another.

    Start with the cabinet that causes the most frustration, not a shopping list of organizers. Decide what belongs at the front, reveal what hides behind it, and choose one access tool that suits the food and your household. Leave enough room to grasp, remove, and clean around everything. A deep cabinet becomes useful when you can find what you have and put it back without a struggle.

  • No Counter Space to Cook? 10 Ways to Build a Practical Prep Zone

    No Counter Space to Cook? 10 Ways to Build a Practical Prep Zone

    A small kitchen can have enough room to cook without having much permanent counter space. The trick is to protect one useful preparation surface, then give appliances, ingredients, and dirty dishes somewhere else to go. Start with your actual routine: take food out, wash it, chop it, cook it, and clean up. These ten changes support that sequence without assuming you can renovate. Measure your room, equipment, and door swings first; any dimensions you use for planning are not a substitute for code, accessibility, or manufacturer requirements.

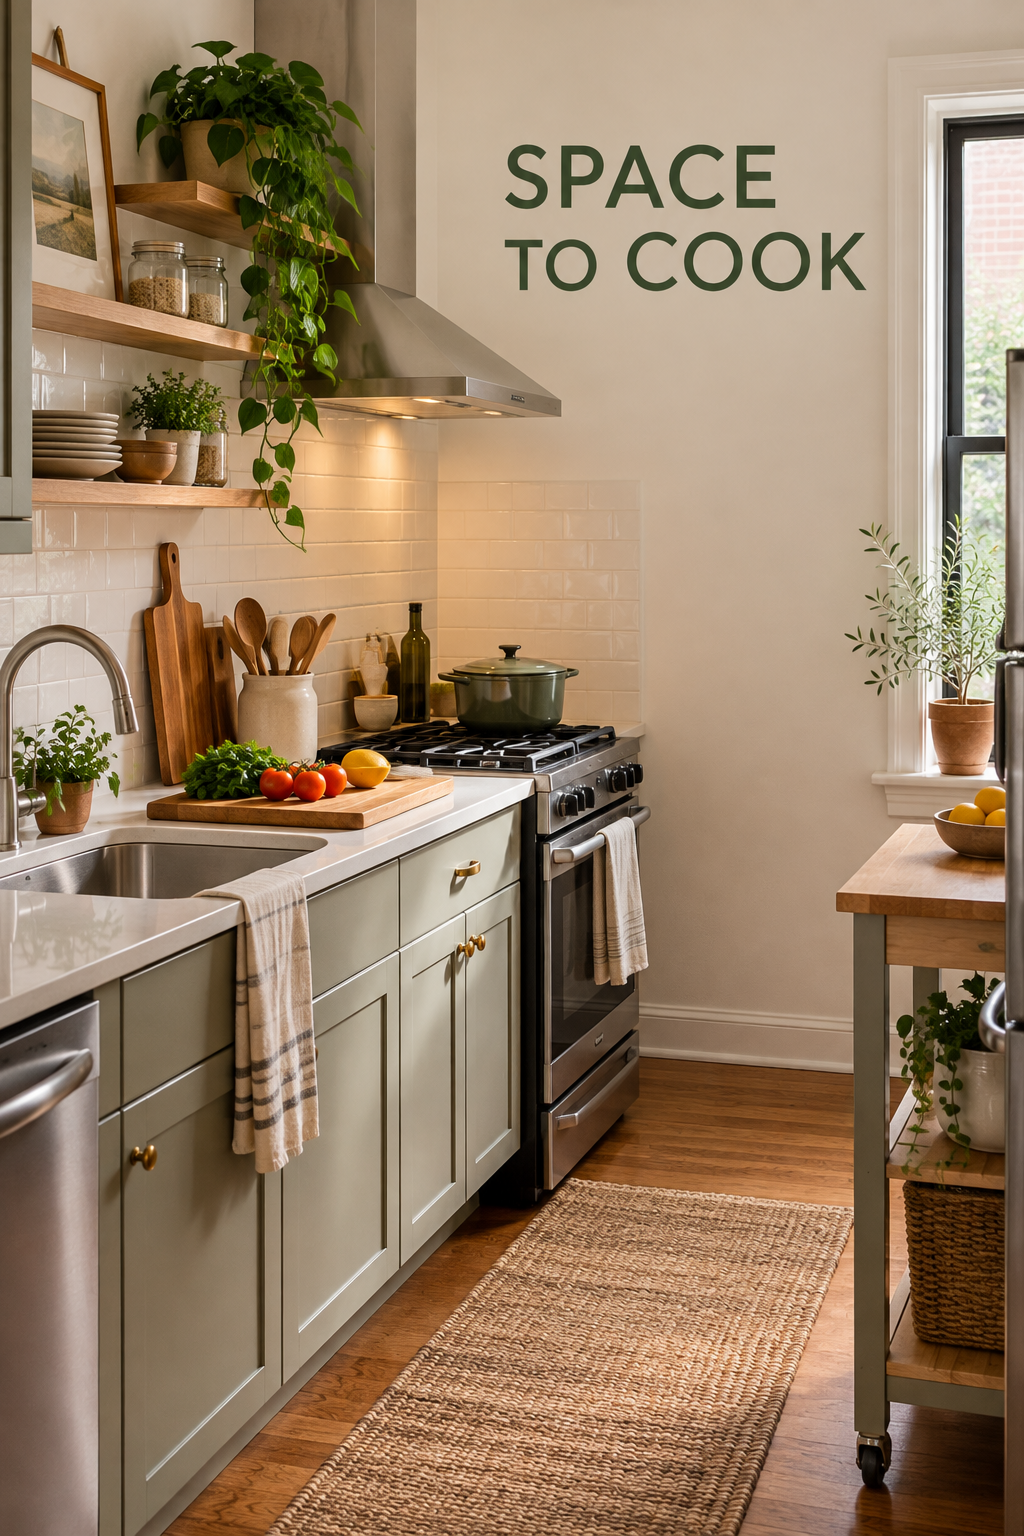
    Small kitchen with a clear cutting-board prep area and a narrow cart parked nearby.

    1. Protect One Surface for the Whole Prep Sequence

    Choose your best uninterrupted surface and make it the default chopping spot, even if it currently holds the mail. Arrange the next meal around a simple progression: ingredients come out, produce gets washed, food moves to the board, and prepared ingredients travel to the stove. For vegetable pasta, place washed vegetables beside the board and a bowl for chopped pieces on the stove-facing side.

    The mistake is treating this surface as both the clean workspace and the dirty-dish landing area. Keep dirty dishes in a separate spot that does not block sink access. Prepare ready-to-eat foods before raw meat, then wash and sanitize the board, tools, and surface as appropriate. If several people cook together, agree on handoff points rather than squeezing everyone around the same board.

    2. Store Occasional Appliances Away From the Prep Counter

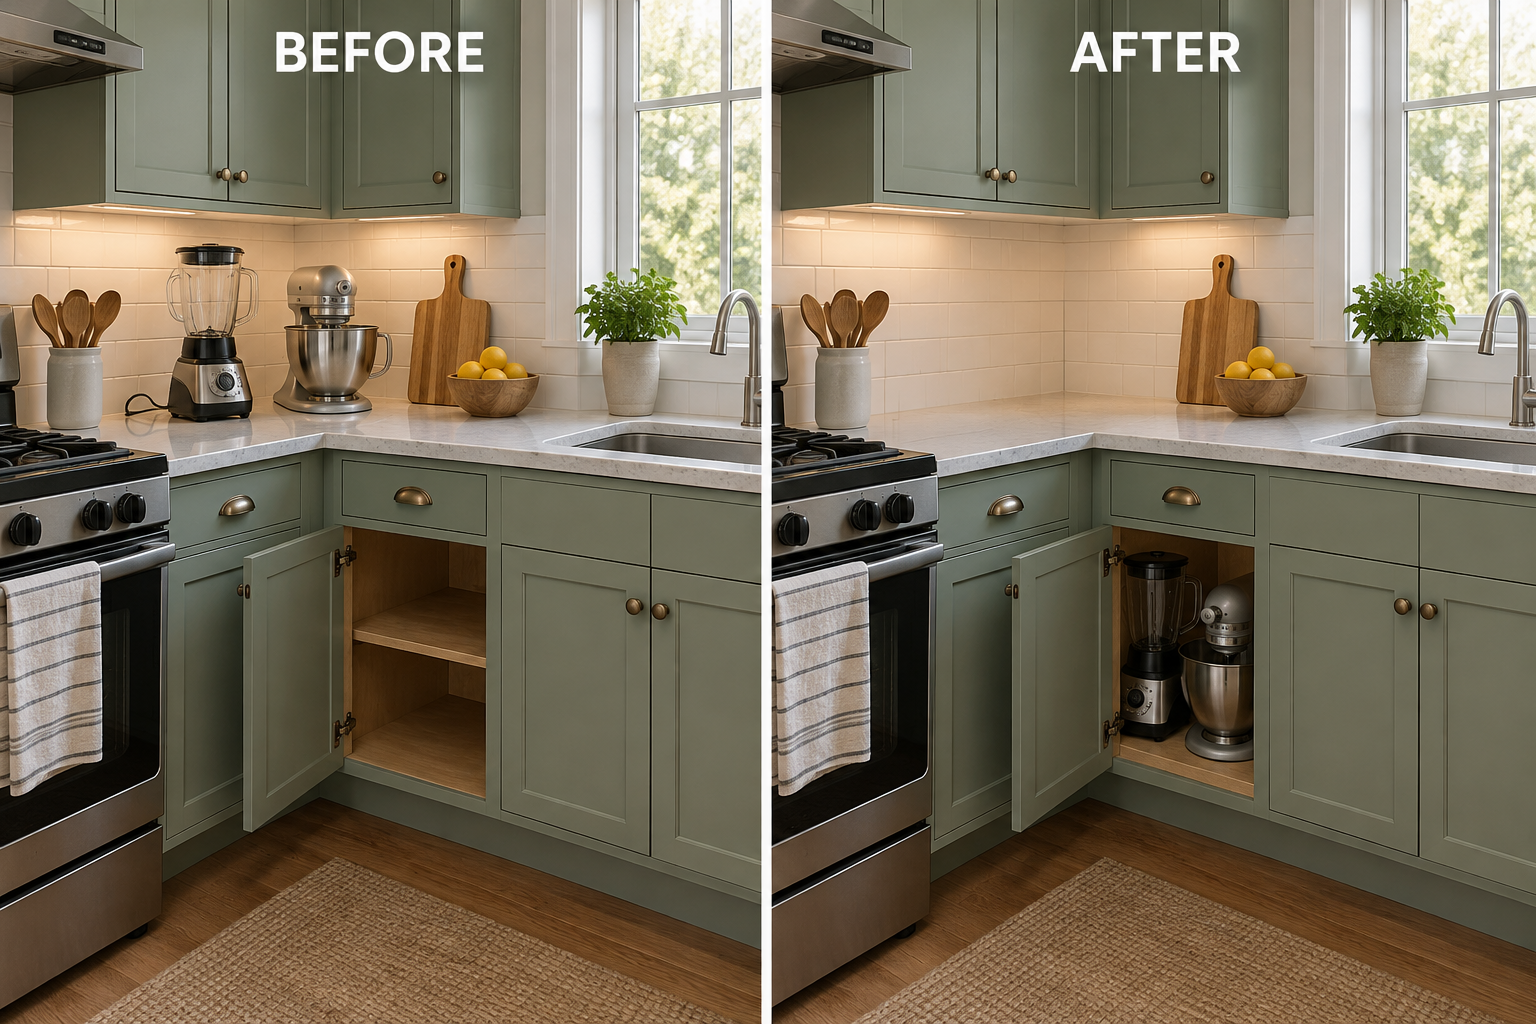
    Reclaim counter space by giving occasional appliances a dry storage home. A blender used on weekends or a mixer used monthly can live on an accessible cabinet shelf instead of beside the sink. Measure the appliance with its attachments, then test the lift before committing. Keep the cleared counter available for daily prep rather than filling it with another decorative or storage item.

    Before and after comparison showing a blender and mixer moved from the counter to a lower cabinet.

    Do not turn a storage cabinet into an operating appliance garage unless the installation and appliance instructions specifically allow it. Unplug appliances and let heated equipment cool before storing; avoid putting a heavy machine overhead or where retrieving it requires an awkward twist. This approach is less useful for equipment used every day, especially when lifting is difficult. Prioritize an easy, repeatable routine over an entirely bare counter.

    3. Bridge Part of the Sink With a Fitted Board

    A sink-spanning cutting board can create a temporary chopping area without adding furniture. Choose a food-contact-safe board designed to fit your sink securely, with supports that prevent rocking or sliding. In a double-bowl sink, cover only one bowl so the other remains available for handwashing and rinsing. Wash vegetables first, drain them, and then set up the board for chopping.

    An oversized loose board balanced on the rim is not an equivalent solution. Check stability before every use, and keep the underside away from dirty dishes or standing water. Remove, wash, and dry the board after prep. Skip this option if it blocks your only practical handwashing access, cannot sit securely, or forces you to reach uncomfortably around the faucet.

    4. Add a Locking Cart That Parks Out of the Way

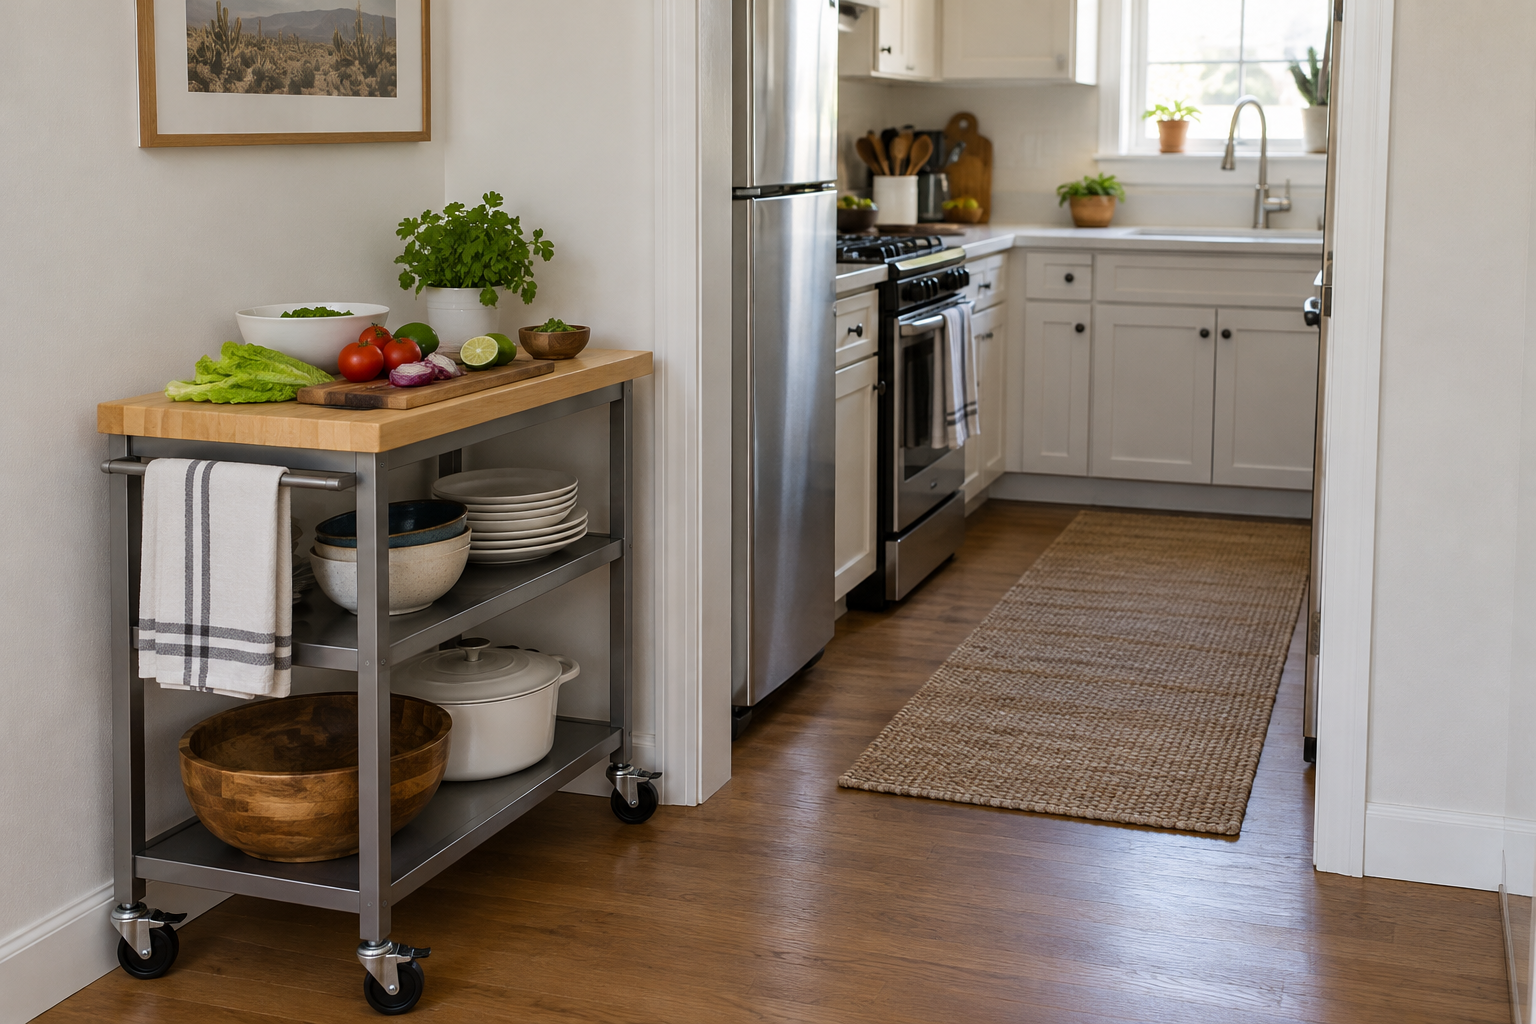
    A small kitchen cart works best when it has both a cooking position and a parking position. Pick a stable model with locking casters and a washable, food-safe preparation top, or use a separate cutting board. For taco night, roll it beside the kitchen entrance, lock it, and chop toppings there. Store bowls underneath so the top remains available rather than becoming another shelf.

    Locking kitchen cart provides a chopping surface without blocking the kitchen entrance.

    A cart that technically fits can still block the refrigerator, dishwasher, or route out of the room. Measure it with doors open and account for everyone who uses the kitchen, including mobility aids. Never use it as a rolling platform for hot pans, and do not operate heat-producing appliances on it unless their instructions permit the setup. Skip it if no safe parking spot exists.

    5. Install a Fold-Down Prep Ledge Where It Can Open Safely

    A wall-mounted folding table can turn an unused wall into a temporary prep zone. Choose hardware and a top rated for the intended load, and have the mounting matched to the wall construction. A renter might request written permission before installation. Open the ledge for assembling sandwiches or portioning ingredients, using a washable cutting board rather than cutting directly on an unsuitable tabletop.

    The folded depth is only half the decision: measure the open table and the space occupied by the person using it. Avoid locations that obstruct exits, crowd hot appliances, or interfere with doors. Lightweight decorative brackets may not withstand chopping pressure. This is unsuitable when secure mounting is unavailable, rental permission is denied, or another household member needs the passage kept open continuously.

    6. Use a Purpose-Built Pull-Out Work Surface

    A cabinet-compatible pull-out worktop can provide a small station for measuring ingredients or assembling lunches. Look for a system specifically designed as a work surface, with suitable supports, stops, and a stated load rating. For example, a professionally fitted pull-out beneath the counter can hold a cutting board and sandwich ingredients, then disappear once it has been cleaned and dried.

    Do not balance a board across an ordinary open drawer; drawer slides and boxes may not tolerate downward or sideways prep forces. Even a purpose-built surface can reduce cabinet storage and require a clear standing area. Follow its limits, avoid leaning on it, and obtain permission for cabinet alterations in a rental. It is a poor match for vigorous kneading unless expressly designed for that work.

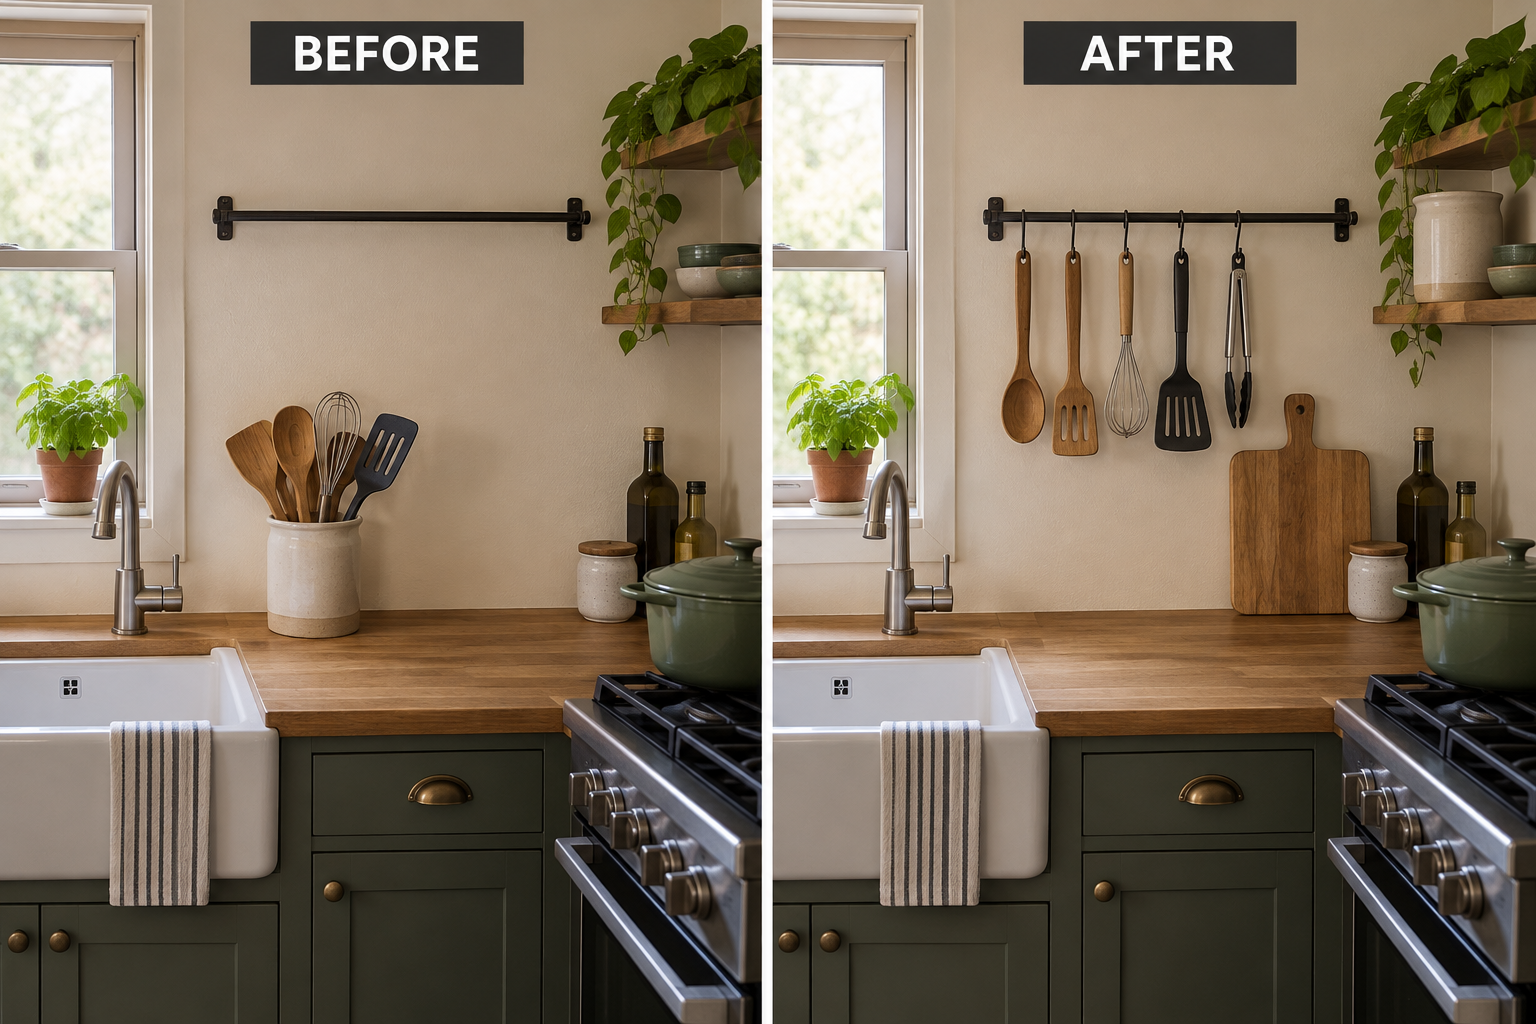
    7. Lift Everyday Tools Onto a Reachable Wall Rail

    A short utensil rail can free the counter footprint occupied by a crowded crock. Mount it on a suitable wall away from the cooking heat and splash zone, using appropriate fixings and rental permission where needed. Hang only frequently used, fully dry tools within comfortable reach. Move the empty crock to an existing storage shelf, leaving the newly cleared counter edge available for your cutting board.

    Before and after comparison showing utensils moved from a counter crock onto an existing wall rail.

    More hanging storage is not always better. Tools that dangle into the working area, collect cooking grease, or require reaching across a burner create new problems. Avoid hanging sharp knives where children can reach them, and do not assume adhesive hooks can carry a loaded rail. If drilling is prohibited or the wall location is awkward, keep fewer tools in an accessible drawer instead.

    8. Borrow the Dining Table for Clean Preparation Tasks

    A nearby dining table can become a second prep station for tasks that do not need the sink. Clear it completely, clean the surface, and set down a stable food-safe cutting board. Use it to tear greens, assemble wraps, or portion cooled ingredients into containers. Carry supplies in a tray so you can set up and restore the table without repeated trips.

    Do not prepare food directly on a decorative table protector or porous craft mat. Keep homework materials, pet items, and household cleaners out of the setup. Table height may be uncomfortable for prolonged chopping, and raw meat preparation adds sanitation demands far from the sink. This option works best for short, clean tasks when the household can spare the table until prep is finished.

    9. Right-Size the Board and Contain the Scraps

    A cutting setup can waste space even when the counter is clear. Choose a board large enough for the food you actually prepare but small enough to sit fully supported. Set a compact scrap bowl beside it and transfer chopped ingredients into a mixing bowl as you work. For soup, process one vegetable at a time instead of spreading every ingredient across the counter.

    Shrinking the board too far makes knife work cramped, while piling ingredients around its edges defeats the purpose. Match the board to the task: a large squash needs more support than herbs do. Keep scraps separate from usable food, empty the bowl before it overflows, and use a separate clean container for finished ingredients. If a task requires more room, switch to a larger safe surface.

    10. Give the Microwave a Safe Operating Home Off the Counter

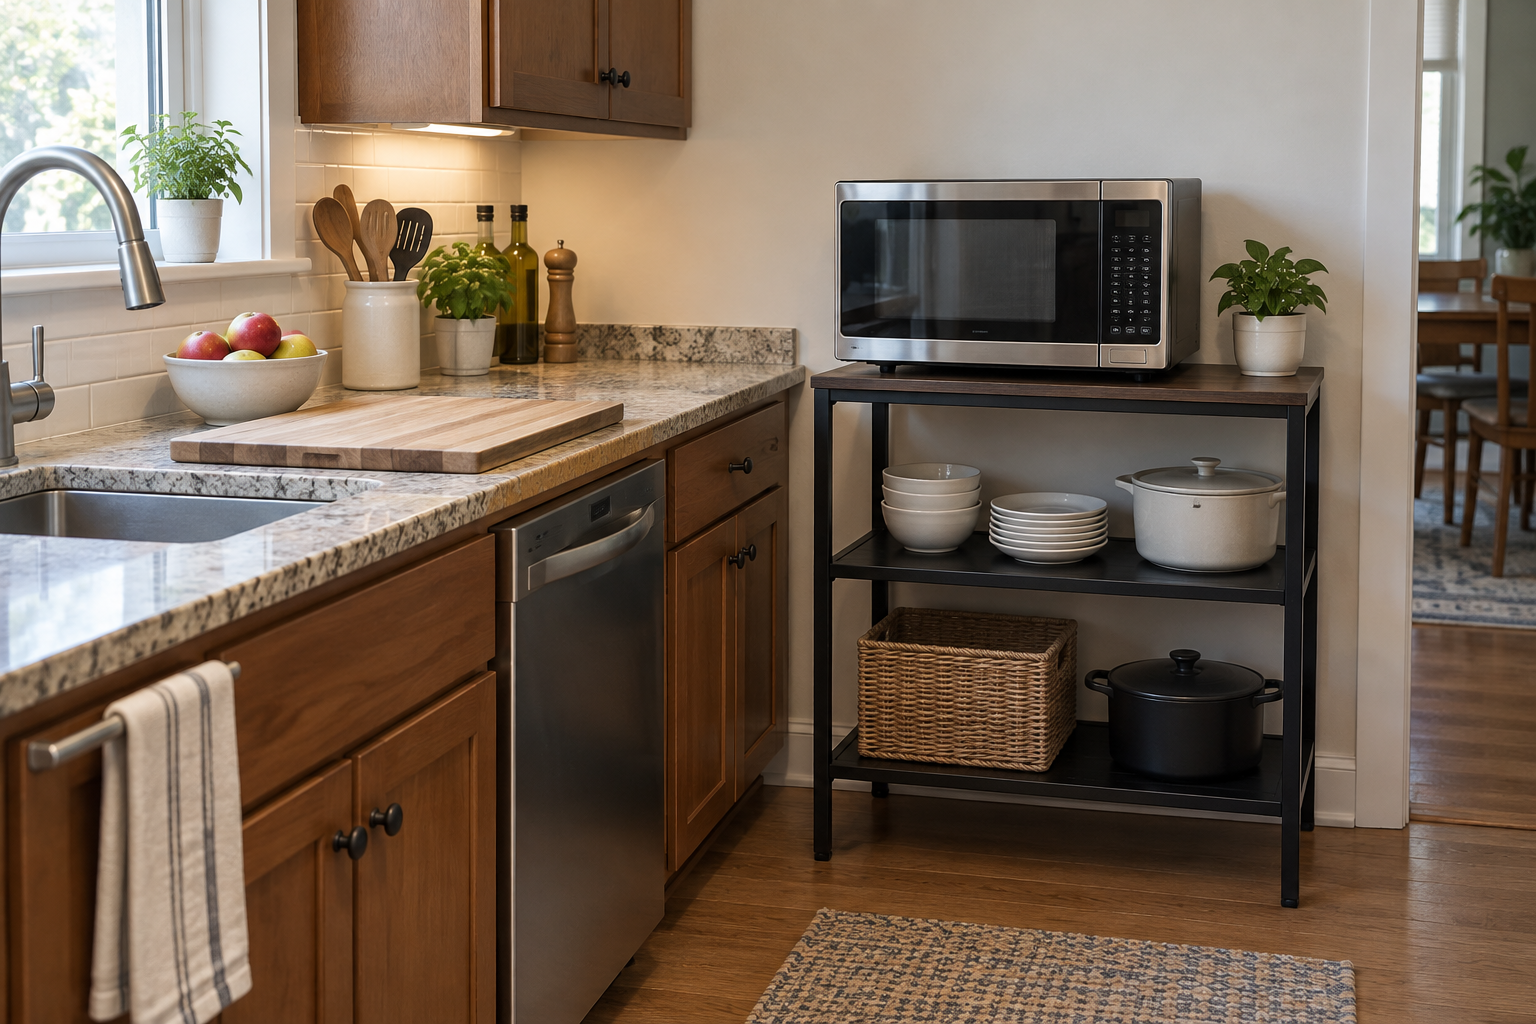
    If the microwave occupies your only useful prep stretch, consider a purpose-built stand or an approved shelf installation nearby. Check the exact model’s ventilation requirements, support needs, door movement, and electrical instructions before choosing a location. A stable stand can free the original counter for chopping while keeping the microwave at a comfortable height with a nearby heat-safe place to set down a dish.

    Microwave on a dedicated open stand leaves the kitchen counter available for chopping.

    An ordinary crowded bookcase is not automatically a suitable appliance station. Do not enclose a countertop microwave, substitute extension cords for a suitable electrical setup, or place it where lifting hot liquids becomes awkward. Follow the manufacturer’s clearances and anchoring requirements, and seek qualified installation help where necessary. If the only alternative compromises ventilation, stability, or safe handling, keep it on the counter and reclaim space elsewhere.

    You do not need to use every solution. Start by clearing one prep surface and testing a complete meal there. Add a movable or temporary surface only if a specific task still lacks room. The best small-kitchen setup makes clean preparation, safe cooking, and everyday cleanup easier without turning the room into an obstacle course.

  • No Space for Nightstands? 10 Bedside Storage Solutions for a Small Bedroom

    No Space for Nightstands? 10 Bedside Storage Solutions for a Small Bedroom

    A small bedroom doesn’t need matching nightstands to feel comfortable and organized. It needs a reachable place for your glasses, water, phone, and whatever helps you settle in. Start by checking what you actually use overnight, then measure beside, beneath, and behind the bed. All dimensions below are approximate planning guidelines, not clearance requirements. Test your reach from your usual sleeping position, and keep doors, exits, heating equipment, and everyday walking routes clear.

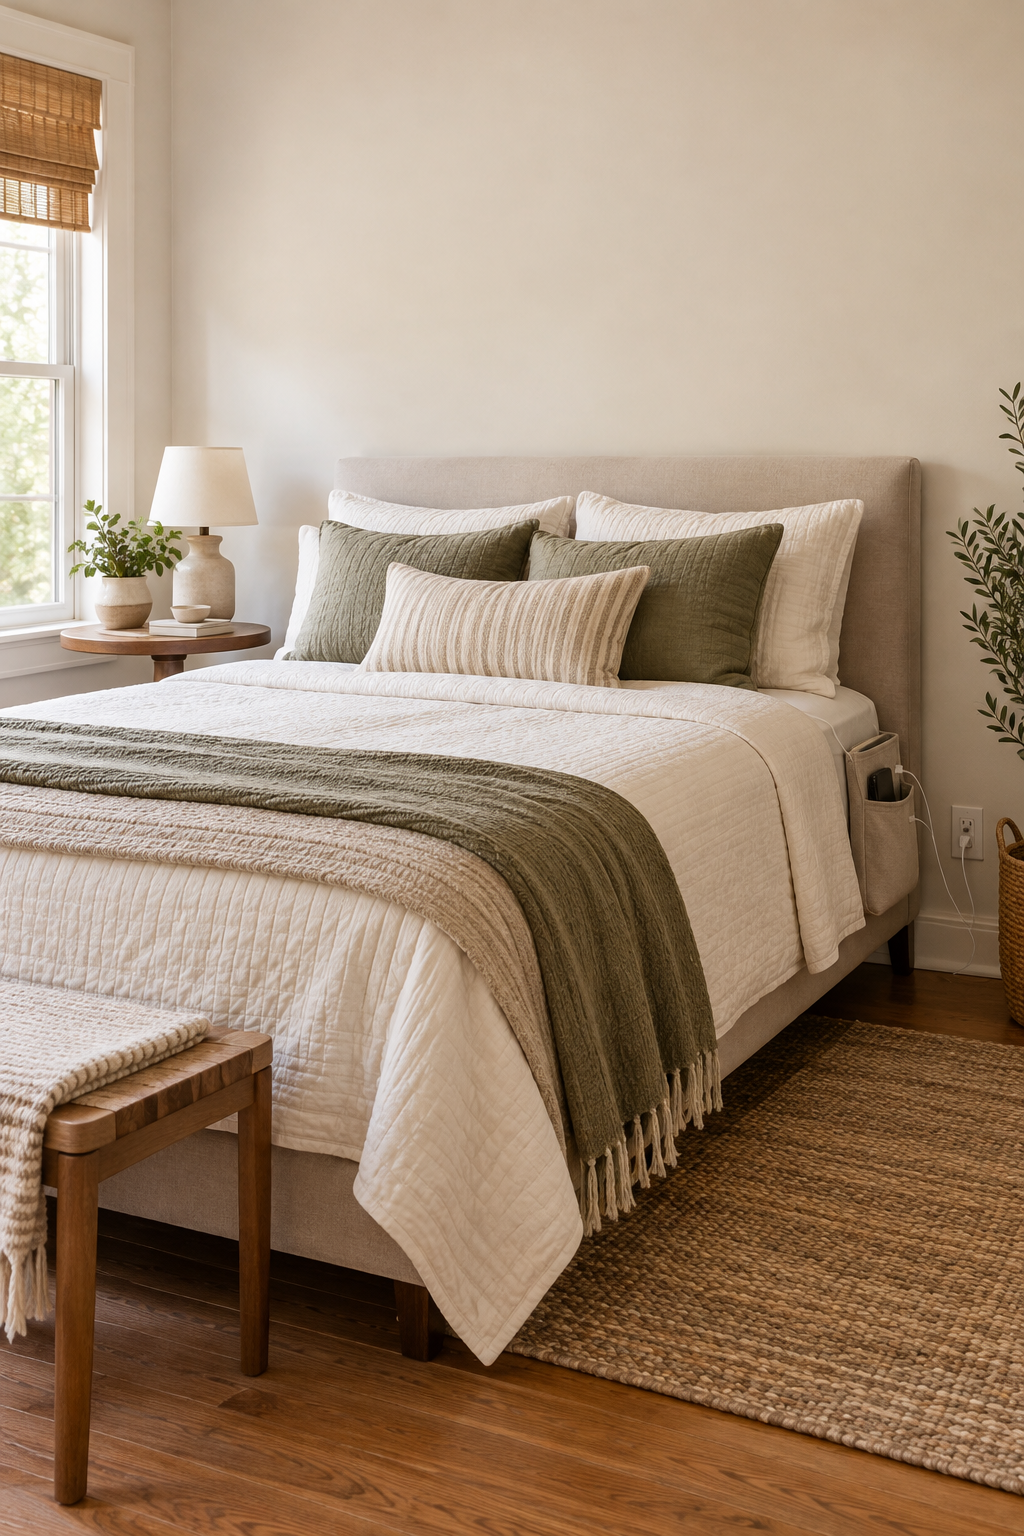
    Small bedroom with a slim bedside table, fabric mattress caddy, and clear walking space.

    1. Choose a Slim Pedestal Table for the Essentials

    A small pedestal table gives you a landing spot without the bulk of drawers and four corner legs. Look for a top roughly 8–12 inches across, then measure the base separately. Beside a low bed, a compact metal table can hold glasses, a phone, and a small water bottle while leaving the surrounding floor visually open.

    Don’t assume a narrow top means a narrow footprint: some bases spread well beyond the surface. A lightweight table may also tip when bedding catches its edge. Choose a stable design, avoid placing breakable drinks near the rim, and skip this option if children, pets, or balance needs make a small movable surface unreliable.

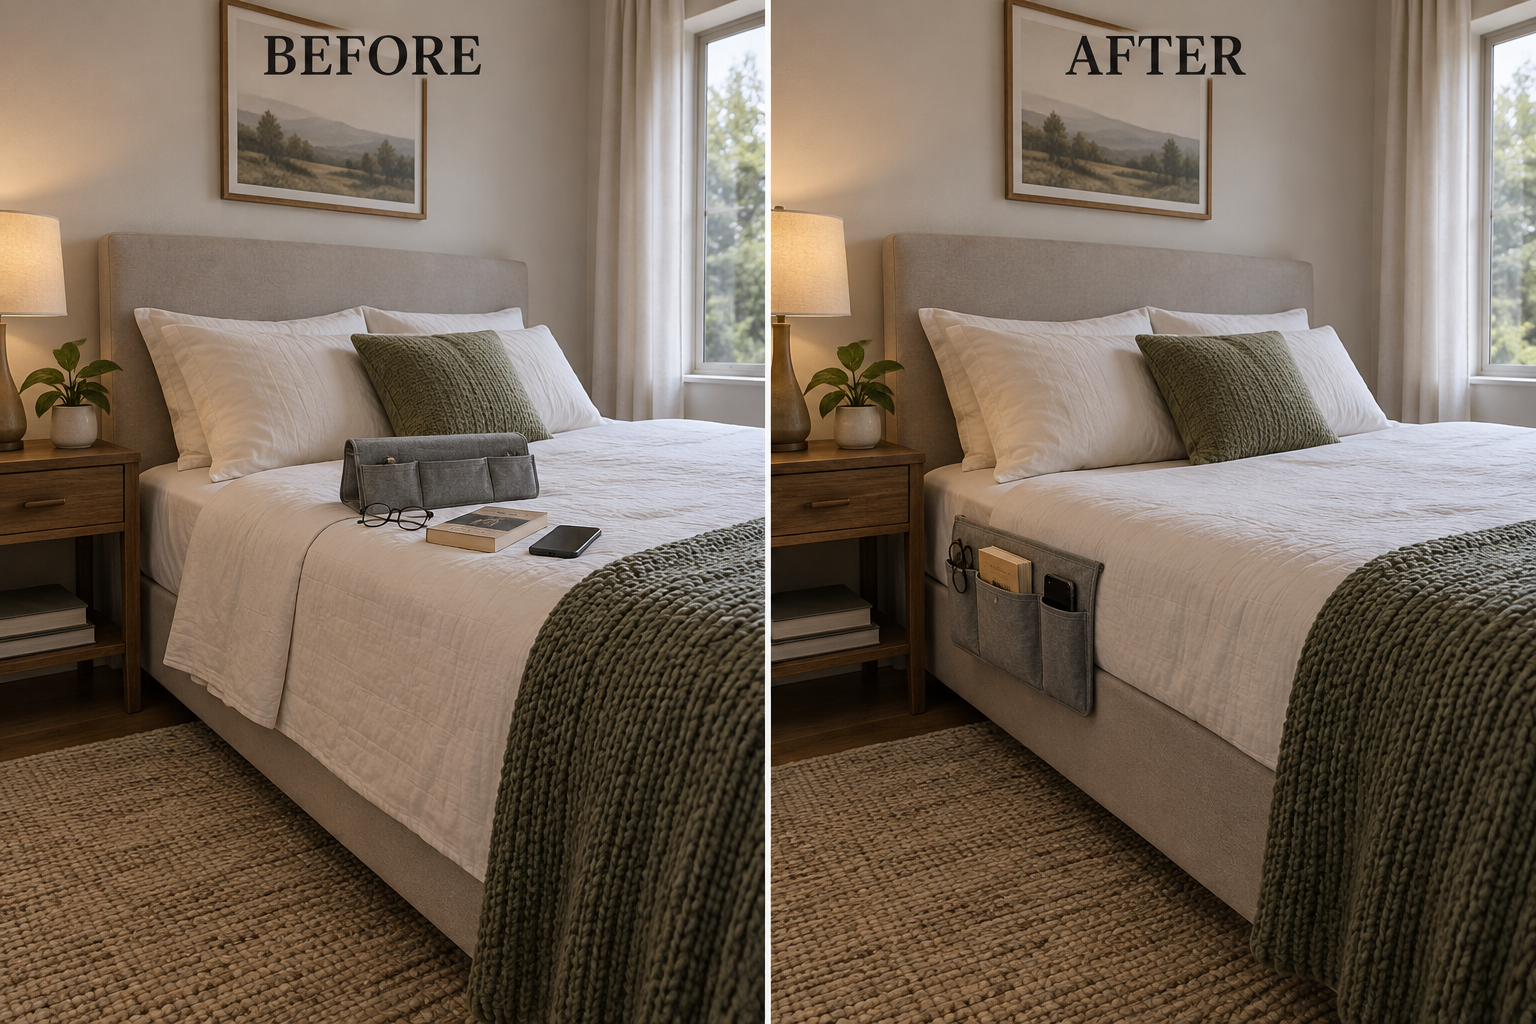
    2. Tuck a Fabric Caddy Beside the Mattress

    A mattress caddy turns the bed’s side into soft storage for lightweight essentials. Choose a model designed for your mattress and frame, then position its pockets near your shoulder rather than down by your knees. For example, give glasses their own soft pocket, slide a paperback into the largest section, and keep the phone pocket easy to reach.

    Before and after showing bedside essentials moved from the bed into a mattress caddy.

    Overloading the pockets is the usual mistake; a heavy bottle can pull the caddy loose or make it sag. Check how its support flap works with adjustable bases, slats, and mattress protectors. Keep charging devices uncovered and cords outside the bedding. This solution suits small objects, not hot drinks, bulky equipment, or anything that needs a rigid surface.

    3. Slide a C-Shaped Table Under the Bed

    A C-shaped table can bring its surface over the mattress edge while its base slides underneath the bed. Measure the underbed height and check for center supports before choosing one. In a tight room, a small rectangular top can sit beside your pillow at night and move outward when you need to change the sheets.

    The catch is compatibility, not just width. Platform beds with solid plinths, low rails, or storage drawers may leave nowhere for the base to go. A top positioned too far over the mattress can also obstruct getting up. Test the arrangement with your bedding in place, and don’t treat the table as a support handle.

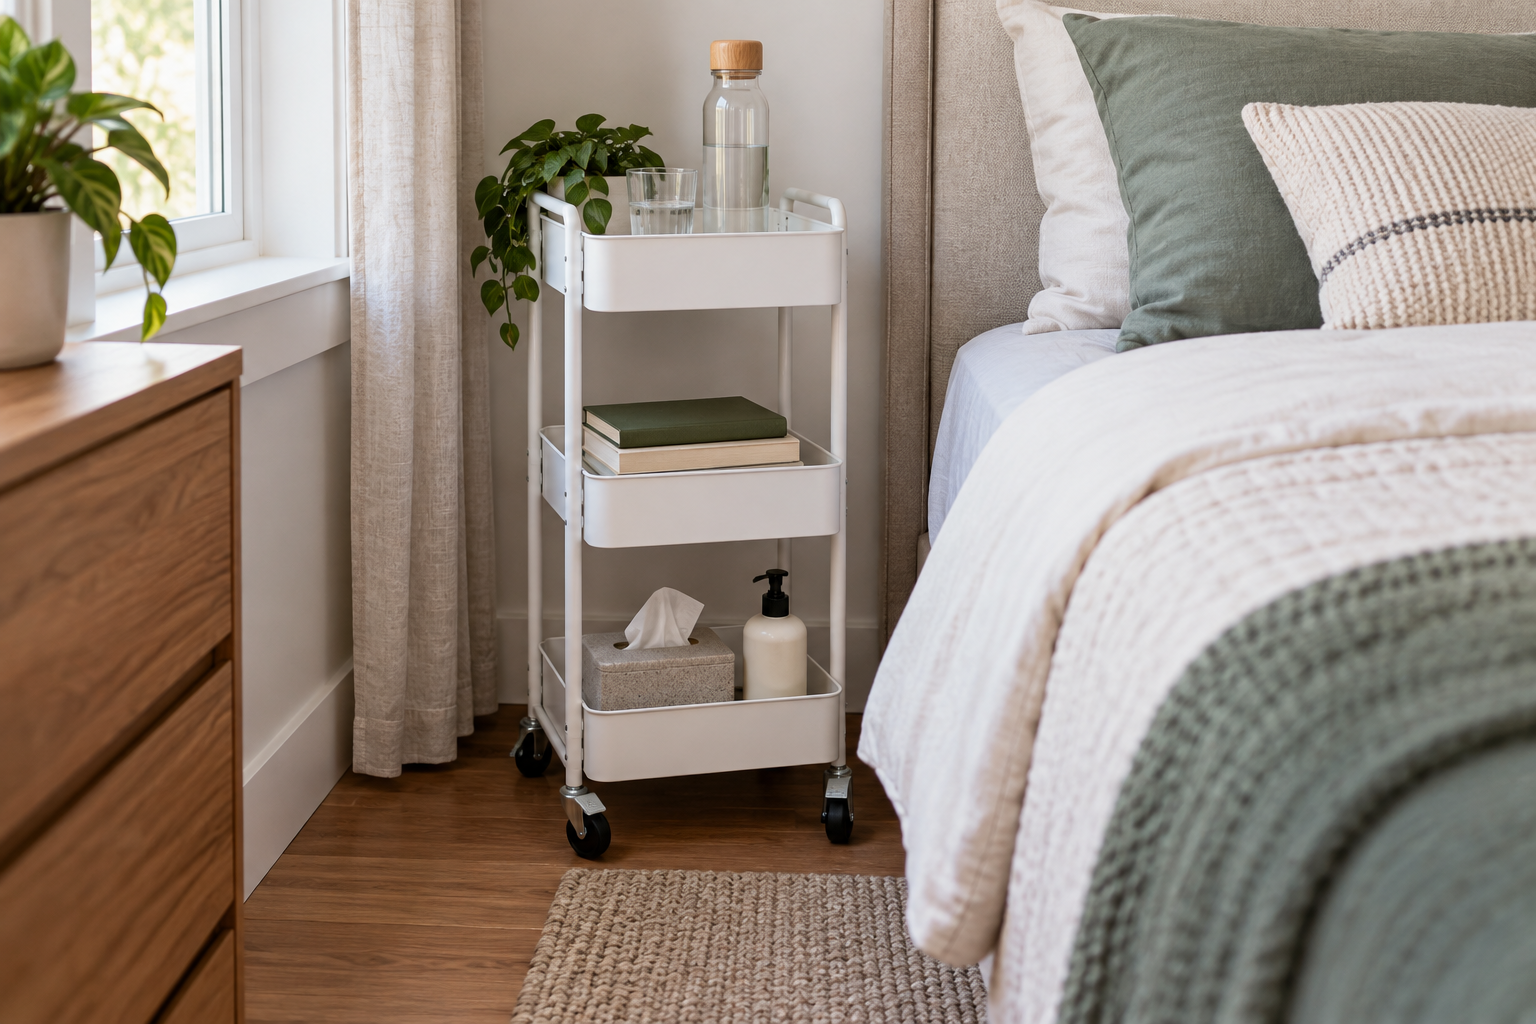
    4. Park a Narrow Rolling Cart Beside the Pillow

    A slim rolling cart stacks storage vertically without requiring wall holes. Use the top tier for your nightly essentials, the middle for books, and the bottom for spare tissues or lotion. A cart around 6–10 inches wide may fit an awkward gap, but measure its handles and wheels, too. Lock the casters whenever it is parked.

    Narrow rolling cart organizing nighttime essentials across three tiers beside a bed.

    A cart fails when it fills the only usable path or becomes difficult to move on thick carpet. Keep heavier supplies low, and don’t run a charging cable across its wheels. Leave required space around heaters and other equipment according to their instructions. If the cart must move every time you leave bed, choose something smaller.

    5. Attach a Tray to a Compatible Bed Frame

    A clamp-on bedside tray provides a small surface without using floor space or drilling into the wall. Measure the exposed bed rail’s thickness and shape, then match those measurements to the tray’s stated limits. On a compatible wooden frame, a padded clamp can support a phone, glasses, and a lightweight cup within easy reach.

    Don’t improvise a clamp connection on upholstery, a thin decorative rail, or a moving bed mechanism. Follow the tray’s load limit and check that tightening it won’t damage the finish. Skip this approach if the attachment loosens, projects into your exit route, or encourages someone to push down on it while standing up.

    6. Let an Existing Dresser Do Bedside Duty

    Sometimes the best solution is moving the bed rather than buying another piece. If a low dresser already sits nearby, arrange the bed so one corner of its top is comfortably reachable. Reserve that corner with a shallow tray for nighttime items, and use a small section of the nearest drawer for less-used bedside supplies.

    Height and drawer access determine whether this works. A tall dresser may require an awkward upward reach, while a mattress pressed against drawer fronts makes storage frustrating. Preserve room to operate the drawers and follow the dresser manufacturer’s anchoring instructions. In a rental, obtain permission for required anchoring rather than leaving furniture unsecured.

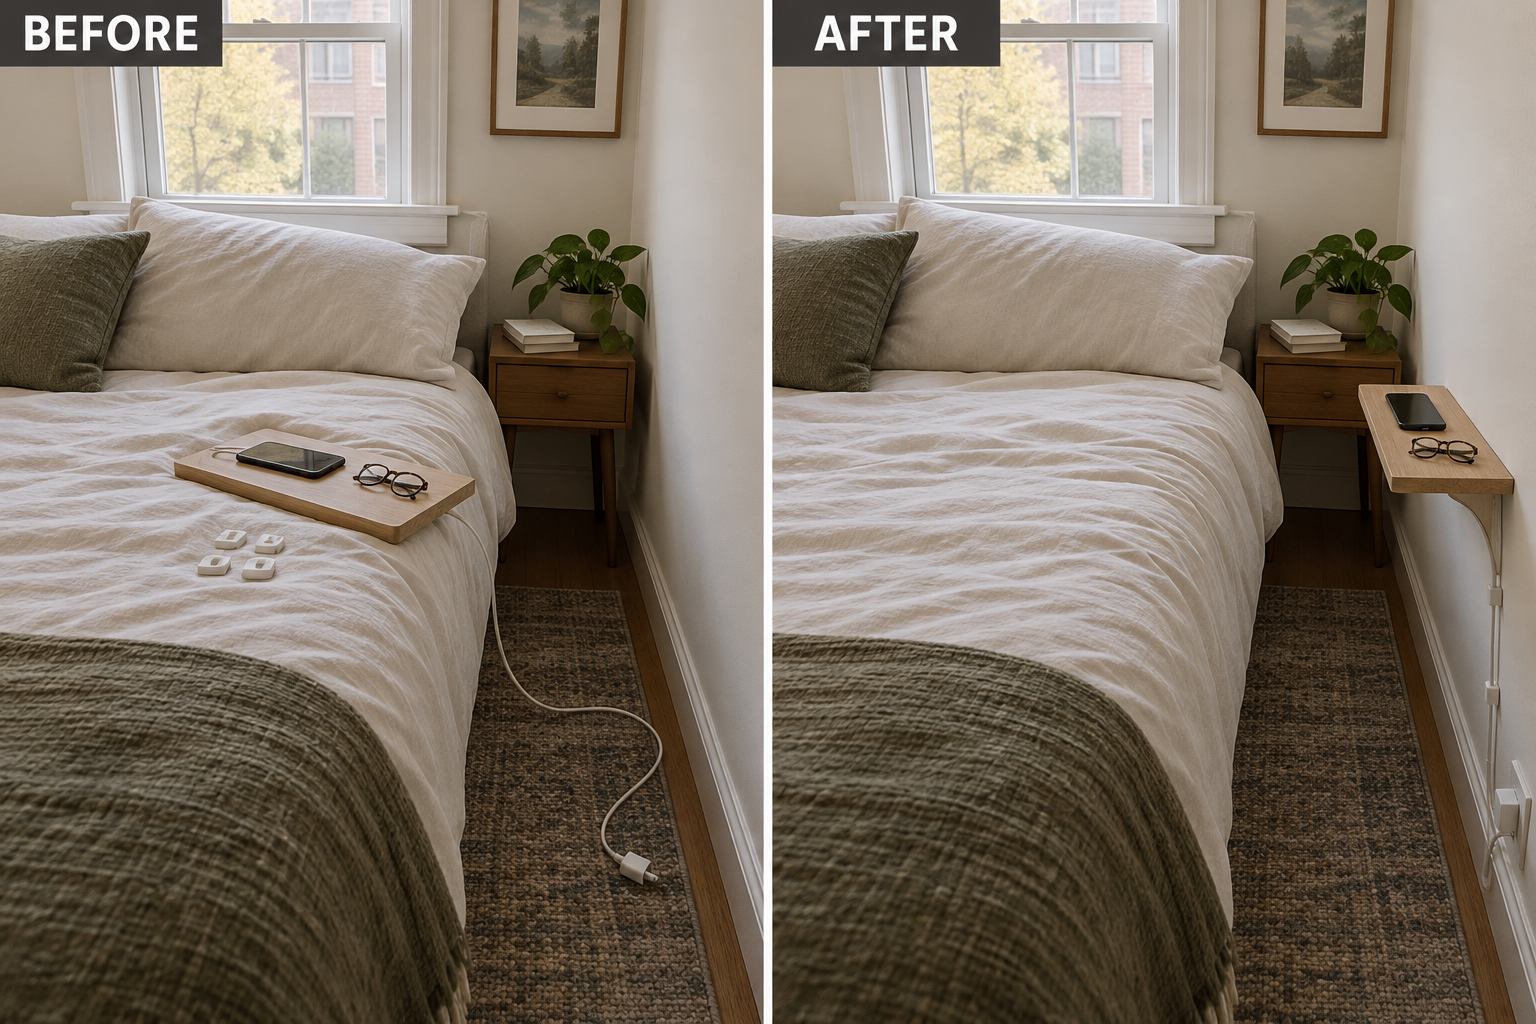
    7. Install a Shallow Ledge with a Clear Cable Route

    Where your lease allows mounting, a shallow wall ledge can hold essentials above an otherwise unusable bedside strip. Position it beside the mattress, not over your pillow, and test the height before installation. Add compatible cord guides along the wall so a charging cable reaches the ledge without dangling across the bed or collecting on the floor.

    Before and after showing a shallow bedside ledge installed with a neatly guided charging cable.

    Don’t assume adhesive strips can support a loaded shelf; use mounting hardware appropriate to the wall and the manufacturer’s instructions. Cable clips can also damage rental paint, even when marketed as removable. Keep cords unpinched and charging devices ventilated. If permission, wall construction, or a safe outlet route is uncertain, choose a freestanding solution instead.

    8. Use a Head-End Underbed Drawer for Backup Supplies

    A shallow rolling drawer near the head of the bed can replace the storage portion of a nightstand. Measure beneath the frame and allow enough side room to pull it open. Store tissues, spare reading glasses, or a bedtime book inside, with frequently used items at the front. Close it completely before settling in for the night.

    This is backup storage, not a good place for something you need instantly while lying down. Repeated bending may be uncomfortable, and an open drawer becomes a nighttime obstacle. Avoid trailing pull loops and loose charging cables underneath. It’s unsuitable when a rug blocks the wheels or the bedside gap cannot accommodate the drawer’s full travel.

    9. Replace a Nightstand with a Small Storage Stool

    A compact storage stool combines a nighttime surface with a place to stash spare bedding or sleep accessories. Choose a stable model with a firm, flat top; some upholstered versions need a fitted tray. Beside a modest-height bed, it can hold your glasses overnight and provide an occasional seat while you put on socks.

    The tradeoff is access: everything on top must move before you open the compartment. Store occasional-use items inside rather than nightly necessities. Confirm that the stool is designed for sitting if you intend to use it that way, and avoid wheeled or rounded designs that shift easily. Soft, uneven tops are poor resting places for drinks.

    10. Choose a Bed-Integrated Headboard Shelf

    When replacing a bed frame, consider a compatible headboard with built-in shelf storage. A low ledge extending beside the pillow can hold glasses and a book without separate nightstands. Measure the complete bed’s depth, not just the mattress: even shallow headboard compartments can shift the mattress forward. Favor reachable side cubbies over deep shelves behind your head.

    Bed-integrated storage headboard with shallow side cubbies replacing separate nightstands.

    Don’t wedge an unrelated shelving unit behind the mattress and assume the bed will stabilize it. Use a compatible system assembled as instructed, including any required anchoring and rental permission. Keep heavy objects away from sleeping heads and check cable openings for pinch points. This option makes less sense when the existing bed works well or room depth is already tight.

    The best bedside storage fits both your room and your nighttime habits. Choose one reachable spot for daily essentials, then give backup supplies a separate home. Before committing, measure the full footprint, try the reach, and check cords and walking routes. A small, dependable setup is more useful than squeezing in a conventional nightstand.

  • When the Bed Blocks the Closet: 10 Small-Bedroom Clearance Fixes

    When the Bed Blocks the Closet: 10 Small-Bedroom Clearance Fixes

    A small bedroom can hold a bed and still fail at the everyday basics: opening the closet, reaching a nightstand, or walking out without turning sideways. Before replacing furniture, measure the room, mattress, bed frame, and every door swing, including closet handles. The dimensions below are approximate planning guidelines, not building-code or accessibility standards. Your household may need more space for mobility aids, caregiving, or nighttime movement. Start with the smallest adjustment that restores both closet access and a dependable path to the bedroom exit.

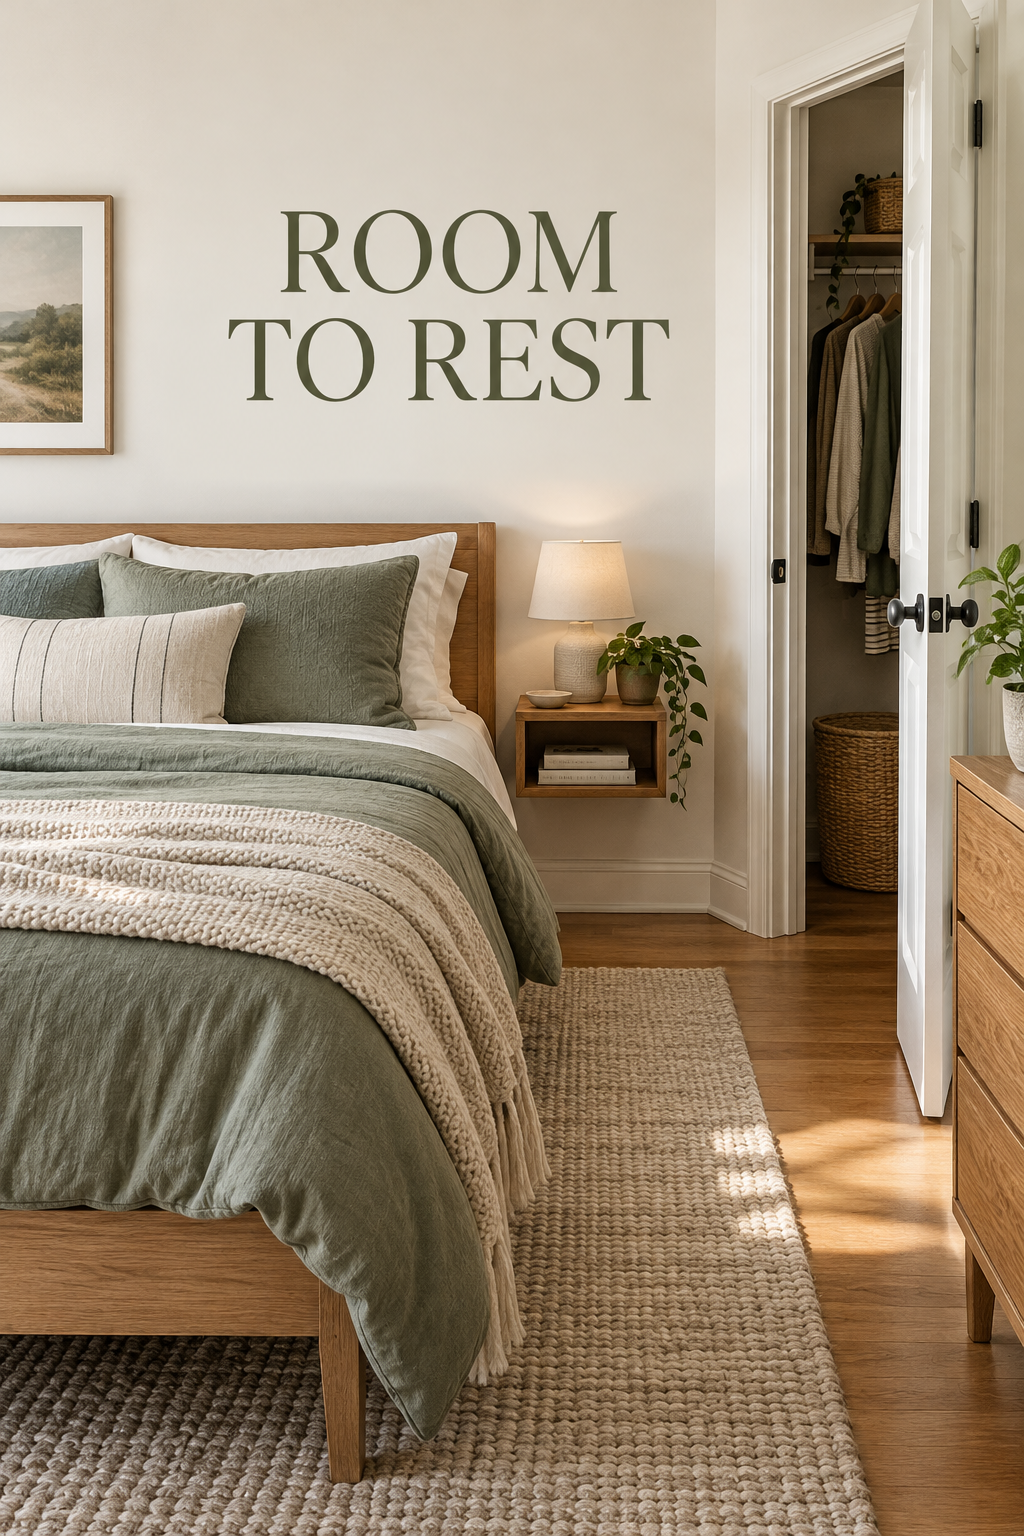
    Small bedroom with a clear path between the bed and open closet, beneath the headline ROOM TO REST.

    1. Recover the Gap Behind the Headboard

    Check whether unused space behind the bed is stealing the inches your closet needs. In an approximately 10-by-11-foot bedroom, moving a freestanding headboard four inches closer to a plain wall can recover four inches at the foot. That may let a closet door finish its swing instead of striking the mattress. Check the frame supports and baseboard before moving anything.

    Do not force the bed against an outlet, crush a cord, or crowd a heater to gain clearance. Bulky headboard legs may prevent the mattress from moving as far as expected. This fix suits a small shortfall, not a door that overlaps the bed by a foot. Preserve any clearance required by heating equipment and keep window operation unobstructed.

    2. Rotate the Bed onto a Different Wall

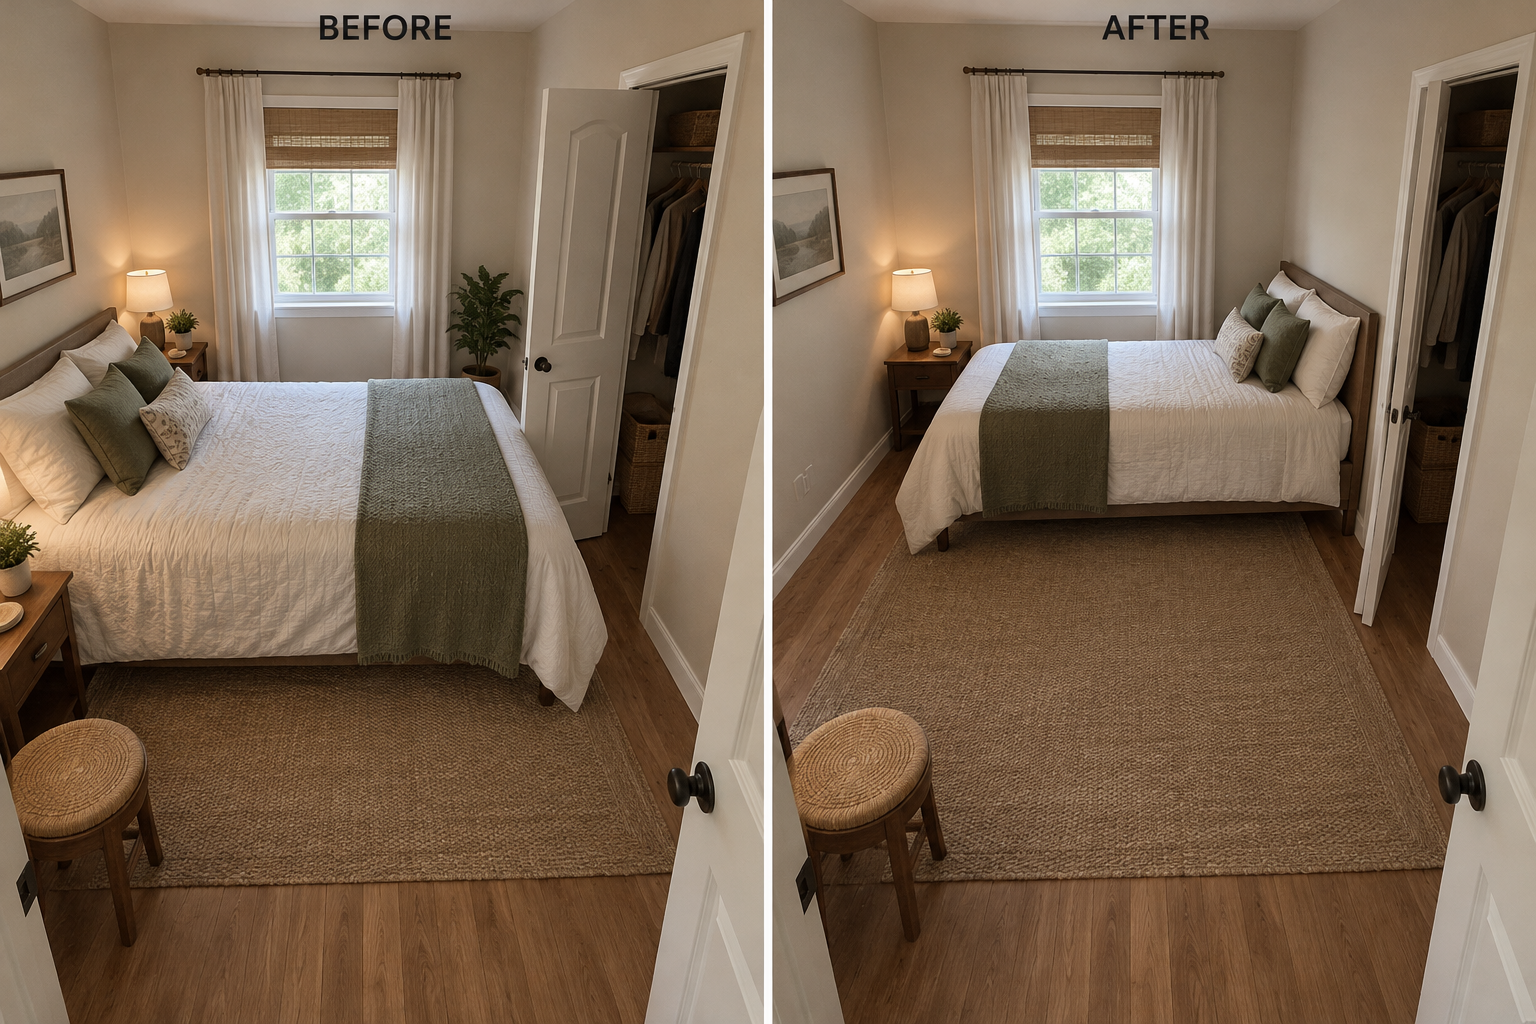
    A quarter-turn can move the mattress out of a closet door’s arc without changing the furniture. Sketch both orientations first. In an approximately 10-by-12-foot room with the closet near one corner, shifting a queen bed’s headboard to the adjacent uninterrupted wall may put its narrower side, rather than its foot, beside the closet approach. Test the bedroom entry at the same time.

    Before and after comparison showing a rotated bed clearing the closet door swing.

    Do not assume the longer wall automatically works better. Rotation can solve the closet collision while leaving one sleeper trapped behind the bed or putting a pillow against a radiator. Tape the proposed footprint on the floor and walk around it. Reject the arrangement if opening either door requires moving bedding or squeezing through an unreliable exit path.

    3. Offset the Bed Instead of Centering It

    Symmetry is optional; closet access is not. If the closet sits beside the bed, shift the frame several inches away from it while retaining usable access on both sides. For example, redistributing two roughly 28-inch bedside gaps into about 24 inches and 32 inches may give the closet side enough working room. Confirm the actual door arc rather than relying on those numbers.

    The mistake is treating the narrower side as leftover space nobody will use. A gap that works for one person may be unsuitable for a partner, someone with limited balance, or a caregiver. Try the route at bedtime before committing. Keep the closet-side aisle free of laundry baskets so the recovered width remains available when the door opens.

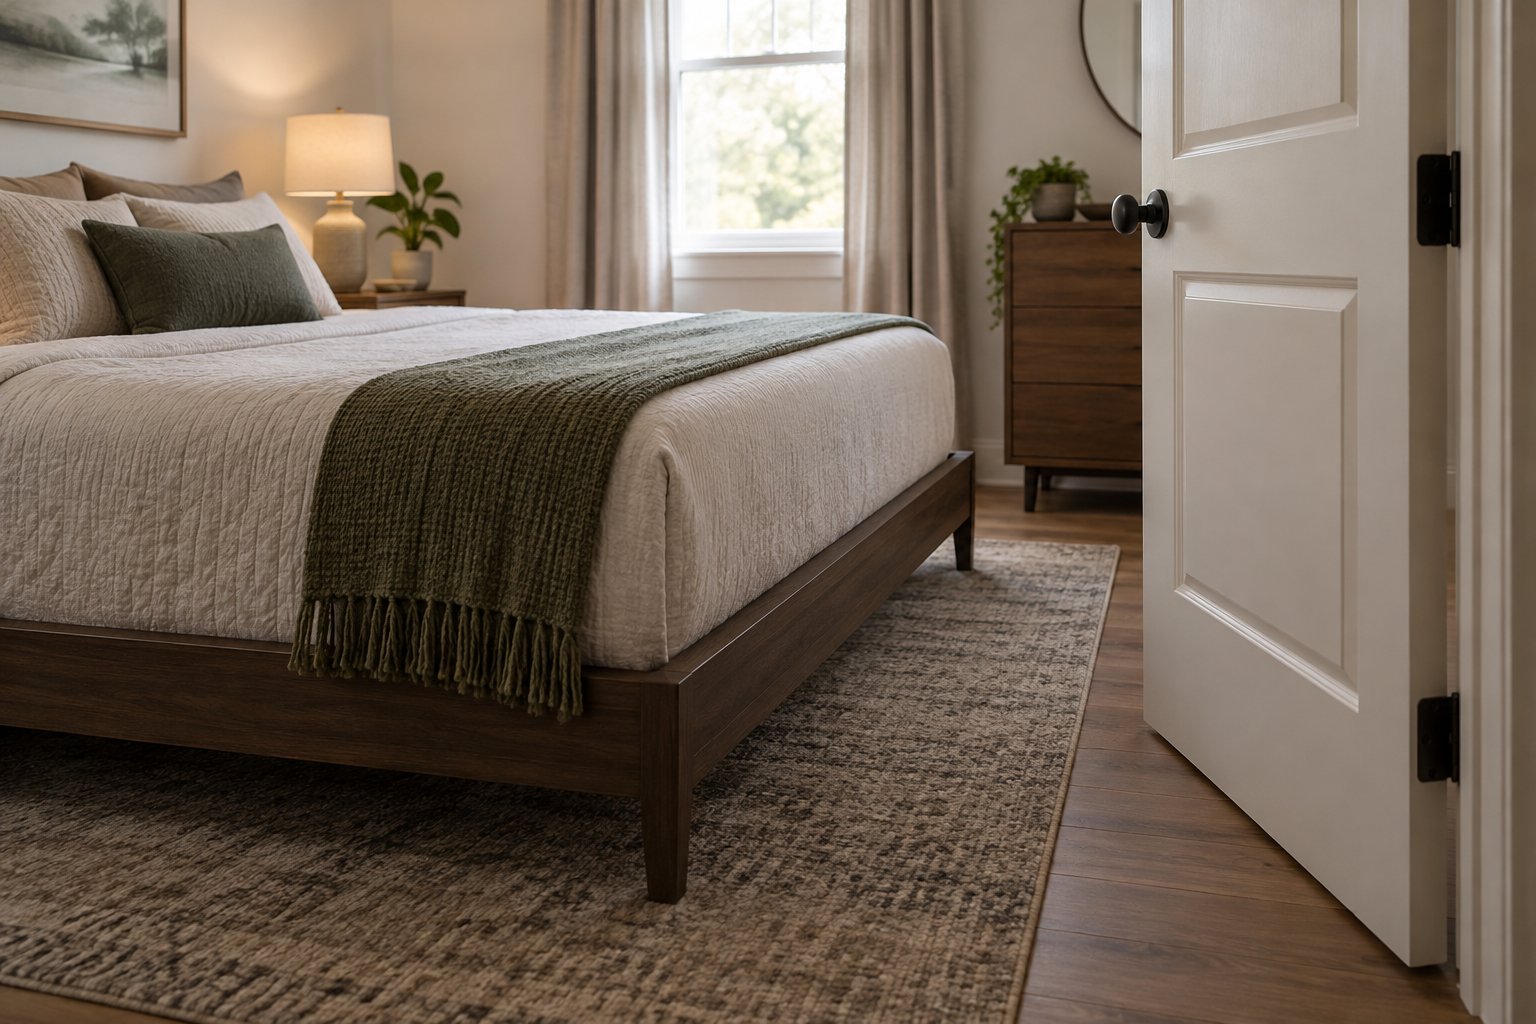
    4. Choose a Frame That Stays Close to the Mattress

    Measure the outside of the bed, not just the mattress. A queen mattress is approximately 60 by 80 inches, but a padded frame or sleigh footboard can extend well beyond it. Replacing an oversized surround with a straightforward platform may recover several inches exactly where a closet door catches. Compare complete assembled dimensions, including projecting legs, before ordering.

    Slim platform bed frame leaves room for a closet door to open past its foot.

    A frame labeled compact can still have toe-catching legs or a thick headboard. Avoid solving the door collision with a replacement that creates a new nighttime obstacle. Also check mattress support requirements and bed height. Removing a footboard from an existing frame is appropriate only when its construction permits it without weakening the bed; consult the assembly instructions.

    5. Reduce Mattress Size Where It Actually Helps

    When the room is fundamentally overfilled, a smaller mattress can restore meaningful clearance. Moving from a queen to a full typically saves about six inches in width and five in length. That can help a closet beside the bed or beyond its foot. Mark the smaller footprint, including its frame, and test the closet with a person standing in front of it.

    Downsizing is not automatically the economical or comfortable answer: it may require new bedding and a new frame, and two adults may find a full too restrictive. Taller sleepers should consider the lost length. If only width is the problem, compare dimensions carefully; a different mattress format may preserve length, but its frame still needs to fit.

    6. Replace the Closet Door's Outward Swing

    If the bed already has sensible access, changing the closet door may be more effective than moving it. Bypass sliding panels remove the outward swing, while bifold panels reduce—but do not eliminate—the projection. For a roughly five-foot-wide reach-in closet facing the bed, compare both systems using the opening’s actual width, height, and available mounting surfaces.

    Sliding doors expose only part of the closet at once, and bifold handles may still hit the bed. Check whether interior drawers can open behind the proposed panels. Renters need written permission before changing doors or tracks; homeowners should verify suitable attachment points. Neither system compensates for an aisle too narrow to stand in and handle clothing comfortably.

    7. Replace the Nightstand That Blocks the Door

    Sometimes the bed is not the actual obstruction: the nightstand is. If a deep bedside cabinet sits inside the closet swing, replace it with a shallower wall shelf outside that arc. A shelf around eight inches deep can hold a phone and glasses without occupying the same floor area as an 18-inch-deep cabinet. Confirm clearance with the closet fully open.

    Before and after comparison showing a shallow bedside shelf replacing a nightstand that blocked the closet.

    Do not install a shelf where the door handle will strike its edge, or assume a small shelf can safely support anything. Follow mounting and load requirements, and obtain rental permission where needed. This tradeoff removes enclosed bedside storage. If medications, medical equipment, or other essentials require a larger stable surface, relocate the cabinet rather than shrinking it indiscriminately.

    8. Resolve Competing Bedroom and Closet Doors

    Two doors can make an otherwise workable bed position feel impossible. If the bedroom entry opens across the closet approach, ask whether a professionally assessed change in handing or swing would separate their paths. Keep the bed in place while testing the proposed movement on paper. A suitable change can preserve closet access without sacrificing either sleeper’s side of the bed.

    This is not a casual hinge swap. A revised entry swing can obstruct a hallway, collide with another door, or affect required exit arrangements. Get landlord approval and qualified advice about local requirements before altering it. If a safe change is unavailable, choose another layout; leaving the bedroom door partly closed is not a dependable clearance solution.

    9. Use a Foldaway Bed Only with a Safe Daily Routine

    In a bedroom that doubles as a daytime workspace, a properly installed wall bed can make the closet accessible when the bed is stored. Measure both positions, including the cabinet depth and operating area. This works best when daytime closet access is sufficient and the lowered bed still leaves a clear route to the bedroom exit throughout the night.

    Do not choose this solution if lowering the bed blocks the only safe route out or essential nighttime supplies. Installation requires appropriate structural attachment and strict adherence to the manufacturer’s instructions, making it unsuitable for many rentals. The mechanism, lifting effort, and daily reset also matter. A foldaway bed is not useful if household members cannot operate it reliably.

    10. Move the Dresser out of the Closet Approach

    Look beyond the bed for furniture narrowing the closet’s landing area. A dresser opposite the mattress can force you into the door swing just to reach clothing. Move it to an unused wall outside that approach, or relocate some folded storage to another room. Keep the bed fixed while testing this change so you can judge the clearance gained from one move.

    Dresser relocated away from the closet leaves a clear standing area beside the bed.

    Do not move the dresser into the exit path or place it where open drawers trap someone beside the bed. Check drawer extension as well as cabinet depth, and anchor furniture according to its instructions with appropriate rental approval. Underbed drawers are not an automatic substitute: they also need opening space and can recreate the same conflict at floor level.

    The best arrangement lets you open the closet, reach everyday belongings, and leave the room without moving furniture first. Measure the complete bed, test every door and drawer, and walk the proposed layout before buying anything. A few recovered inches may be enough; when they are not, prioritize comfortable sleeping and reliable circulation over symmetry or extra storage.

  • Why Your Small Living Room Looks Busy—and 10 Ways to Coordinate What You Own

    Why Your Small Living Room Looks Busy—and 10 Ways to Coordinate What You Own

    A small living room can feel crowded even when the furniture fits and the floor is clear. Often, the distraction comes from relationships: a pinkish beige beside a yellow cream, several competing wood finishes, or patterns asking for equal attention. The most useful small living room ideas address those relationships before suggesting another purchase. These ten adjustments work with existing furniture and belongings. To judge the difference honestly, photograph each change with the same furniture, camera position, framing, and lighting rather than comparing two completely different rooms.

    Compact living room with coordinated beige upholstery, mixed wood tables, and blue and rust accents.

    1. Find the Color That Already Dominates

    Start with the largest surfaces you cannot easily change: flooring, sofa upholstery, walls, and the main rug. Name their colors more precisely than “neutral.” A beige sofa might lean pink, while oak flooring reads yellow-orange. Make a quick list, then identify the most visually dominant family. For example, if warm oak and a camel sofa fill most of the view, use existing cream and earthy accessories as the supporting group.

    The common mistake is choosing a palette from a tiny favorite object while ignoring the sofa and floor. That can leave every large surface looking accidental. Following the dominant family is economical, but it may reduce the prominence of a beloved contrasting color. If fixed finishes are evenly divided between warm and cool, do not force unanimity; choose a supporting textile that visibly contains both.

    2. Compare Neutral Undertones Side by Side

    Lay existing throws and cushion covers directly against the sofa, then compare them in daylight. Look for a shared undertone rather than an exact color match. Beside a pink-beige sofa, a yellowish cream may look unexpectedly sharp. For a controlled test, turn an existing reversible throw from its yellow-cream side to its muted rose-beige side, leaving every other object untouched. The furniture stays identical; only the adjacent textile color changes.

    Before and after views show the same sofa with a yellow-cream throw reversed to muted rose-beige.

    Avoid declaring every warm-and-cool combination a mistake. Contrast can be attractive, especially when it is deliberate and repeated. Closely coordinated neutrals create continuity, but they can also make a room feel flat. This approach may not suit a space built around crisp black-and-white contrast or a deliberately colorful collection. Use it when two supposedly similar neutrals seem to clash, not when you simply prefer contrast.

    3. Give Mixed Woods a Clear Relationship

    Compare wood finishes by undertone, darkness, and grain instead of trying to make every piece match. A honey-oak coffee table and dark walnut side table can coexist when their warm undertones relate. If you already own a small walnut frame, place it where it echoes the side table. Let the most prominent wood remain dominant, with the secondary finish appearing as a smaller, intentional supporting note.

    Trying to disguise every difference with stain can create more work than harmony, particularly with veneers or rental-owned pieces. Mixed finishes preserve character, although strong grain and several orange-red tones may still compete. If each piece has a different undertone, prioritize the two largest ones and soften their meeting point with an existing neutral textile. This is less useful when that textile would hide a functional surface.

    4. Choose One Noticeable Texture per Cluster

    Treat texture as visual information, not just softness. On a compact sofa, chunky knit, shaggy faux fur, nubby upholstery, and heavily slubbed linen can compete even in matching cream. Keep one strongly textured item in each grouping and pair it with quieter fabrics you own. For example, retain a chunky knit throw beside two smooth cotton cushions so the knit becomes a clear feature rather than another competing surface.

    A chunky-knit throw stands out beside smooth cotton cushions on a beige sofa.

    The mistake is removing all texture because the room looks busy. Smooth surfaces everywhere can feel severe and may reveal wrinkles or wear more clearly. Texture also contributes comfort, so visual quiet should not override a favorite blanket’s usefulness. This strategy may be unnecessary in a room with plain furniture and little pattern; there, several subtle textures can supply welcome depth without creating competing focal points.

    5. Assign Patterns Different Jobs

    Choose one existing pattern to lead, usually the largest or most visible, and let the others support it through smaller scale or lower contrast. If a rug has broad navy-and-cream geometry, pair it with a fine stripe and a solid cushion rather than another bold geometric. Keep at least one color shared across the patterns. Their designs can differ when their visual weight is clearly unequal.

    A frequent mistake is judging patterns individually rather than together from the doorway. Several attractive medium-scale prints can merge into visual static. A clear hierarchy sacrifices some equal-opportunity display, so rotate favorite covers instead of showing all of them simultaneously. This method may not suit an intentionally dense patterned room; in that case, a tight shared palette can provide continuity without requiring one obvious leading print.

    6. Edit Shine Without Eliminating Metal

    Notice where reflective finishes catch your eye: a chrome lamp, brass tray, glazed vase, and mirrored frame can each create a bright interruption. Group smaller shiny objects on an existing matte tray, or move one reflective accessory away from the window’s strongest glare. For example, keeping a brass lamp prominent while relocating a glossy vase can establish a focal point without replacing either piece.

    Do not assume all metal must share one finish. Matching every knob, frame, and lamp can look overly coordinated, and necessary replacements add expense. Reducing scattered highlights creates calm but may also reduce sparkle in a dim room. If the space has little daylight, retain a useful reflective accent and address competing decorative glints instead. Never move a task lamp where it no longer lights the seat.

    7. Spread an Existing Accent Across the View

    A color looks more intentional when it appears in separated parts of the room rather than one crowded cluster. Redistribute existing accents without adding anything. If three rust-colored objects sit together on a shelf, leave the vase there, move the cushion to the sofa, and place the bowl on the coffee table. The same color now links foreground, middle distance, and background while every piece of furniture stays put.

    Before and after views show the same rust accents redistributed from one shelf to the sofa and coffee table.

    The common mistake is repeating an accent so evenly that the room feels dotted or themed. Repetition works best with unequal amounts: one substantial textile, one medium object, and one small detail. It trades concentrated impact for a more connected view. If the accent is exceptionally bright, or the room already contains a strong patterned rug, two separated appearances may be enough; there is no required count.

    8. Quiet the Seams Between Large Pieces

    Look at boundaries where upholstery, rug, and curtains meet. Strong contrast at every edge can make each object look separately outlined. Use an existing throw or cushion in an intermediate tone to soften one especially abrupt transition. Between a charcoal chair and a pale cream rug, a medium-gray throw can create a visual step. Keep other boundaries crisp so the room retains definition rather than becoming uniformly blended.

    Avoid covering every contrasting surface; draped textiles can become clutter themselves, especially when they pool on the floor. Softening boundaries reduces fragmentation but also makes individual silhouettes less distinct. It may not suit a room where low contrast makes furniture difficult to see. Keep walking routes and furniture edges clearly readable, and skip any arrangement that lets loose fabric interfere with moving around or using the seat.

    9. Let Artwork Connect Existing Finishes

    Use artwork you already own as a bridge between colors that otherwise seem unrelated. A print containing blue, tan, and cream can connect a blue chair with warm wood and pale upholstery. Move it into the main seating view rather than adding matching accessories. If several frames compete, group the ones with related finishes and give a visually stronger frame a separate position.

    A mistake is expecting a tiny picture to reconcile several dominant colors across the whole room. The connecting colors need to be visible from normal seating distance. Moving artwork costs nothing, but grouping frames can concentrate visual weight on one wall. This approach may not suit fragile pieces that cannot be safely rehung or rentals with mounting restrictions; use an existing stable display surface without overcrowding it.

    10. Run a Controlled Before-and-After Check

    Finish by photographing the room from a marked spot at the same time of day, with the same lens, framing, furniture, and lamp settings as your baseline. Change one relationship at a time: reverse the throw, redistribute accents, or simplify the pattern mix. Compare full-size images rather than filtered thumbnails. If a change only looks better because the second photograph is brighter or wider, you have not isolated the design decision.

    Doorway view documents the coordinated room from a marked, repeatable camera position.

    The mistake is letting a photograph overrule how the room functions. A coordinated arrangement can still put the useful throw out of reach or crowd a side table. Photographs clarify visual relationships but flatten depth and alter color. If a change looks good only on screen, check it from the sofa and doorway in daylight and evening light. Keep the version that works comfortably in person.

    Visual calm does not require a matching furniture set. It comes from making existing differences easier to understand: related undertones, a clear pattern hierarchy, controlled texture, and accents that connect rather than compete. Start with the relationship that bothers you most, make one reversible adjustment, and compare it honestly. Keep the character of your belongings while giving each piece a clearer role.