A tiny entry gets overwhelmed quickly: two pairs of shoes become six, a backpack lands behind the door, and muddy boots claim the walking path. The answer is not necessarily more furniture. It is giving everyday items a limited, convenient place while protecting the route outside. These ten fixes work with different layouts and budgets; choose the ones that fit your household. Any dimensions mentioned are approximate planning guidelines, not code or accessibility standards. Measure your space, door movement, and belongings before buying.
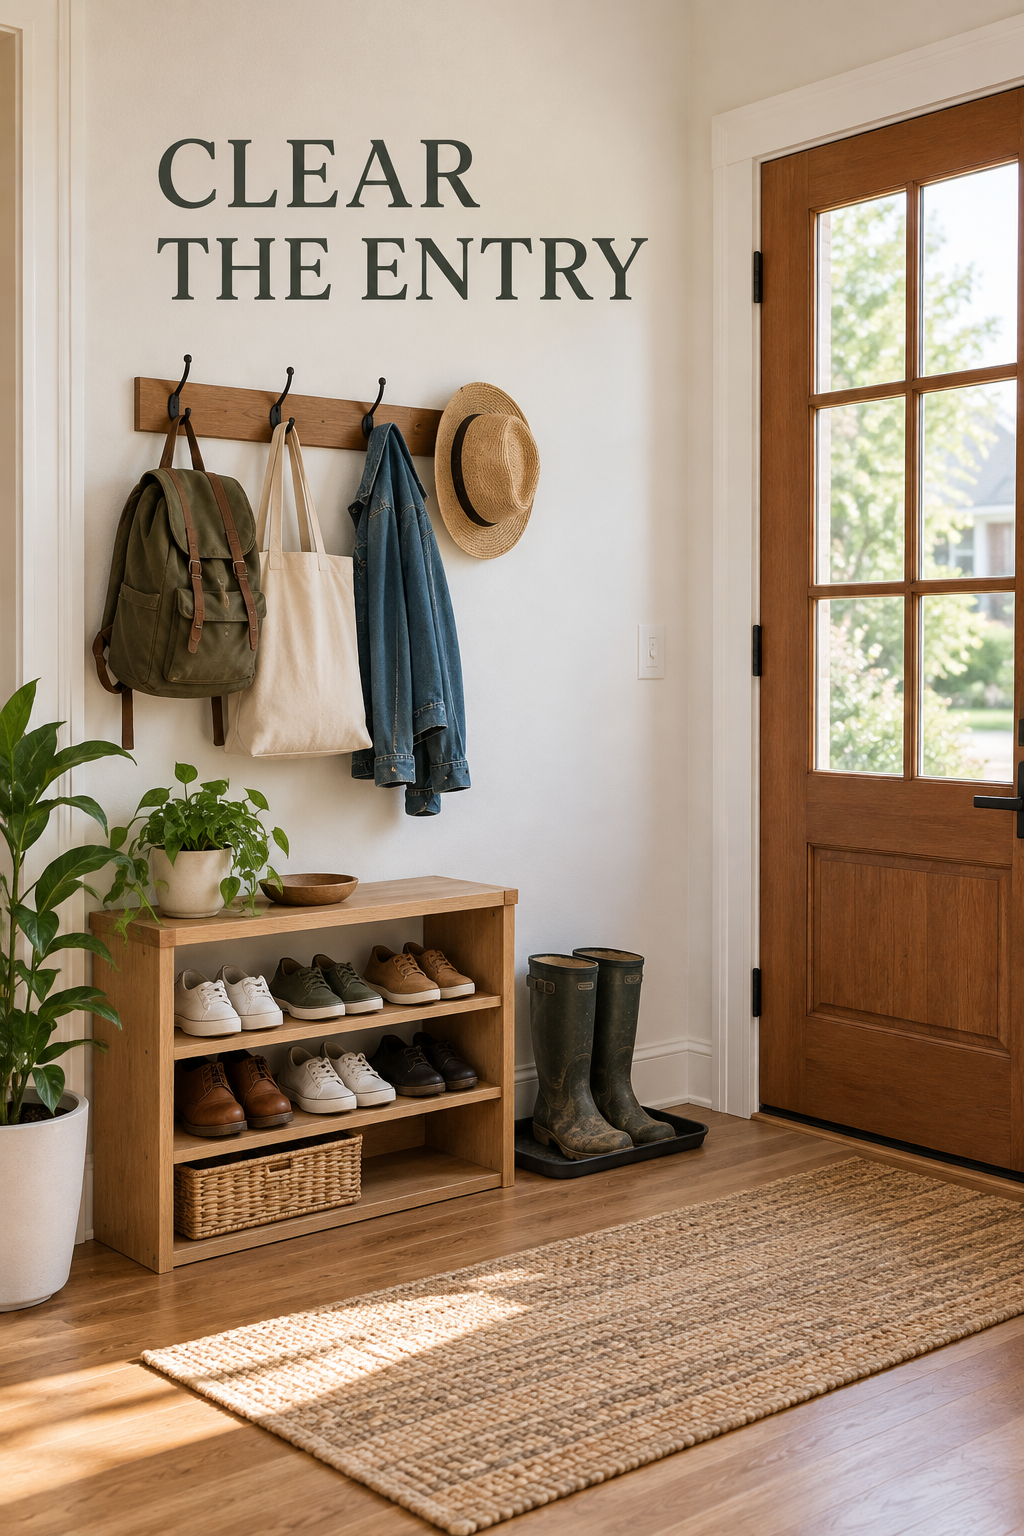
1. Give Everyday Shoes a Fixed Landing Spot
Start with the shoes people actually remove at the door. Assign each person a small section of a low, open shoe rack positioned beyond the door swing. For a two-person household, that might mean four everyday pairs total, with toes facing the same direction. Choose a rack that fits your largest shoes completely so heels do not project into the walking route.
The common mistake is buying a rack for every shoe you own rather than the available footprint. Deep sneakers and large boots can overhang shallow shelves, while stacked tiers may be awkward for someone who cannot bend easily. Skip this approach if even a small floor rack narrows the usable route; a nearby closet may be the better landing spot.
2. Rotate Backup Shoes Out of the Entry
Keep the entry rack for current-use footwear and move occasional pairs to an existing bedroom or hall closet. Set a simple swap routine: when rain boots come forward, little-used dress shoes go back. In a narrow entry with a two-tier rack, reducing eight pairs to four can eliminate the floor pile without changing the furniture or pretending the room is larger.
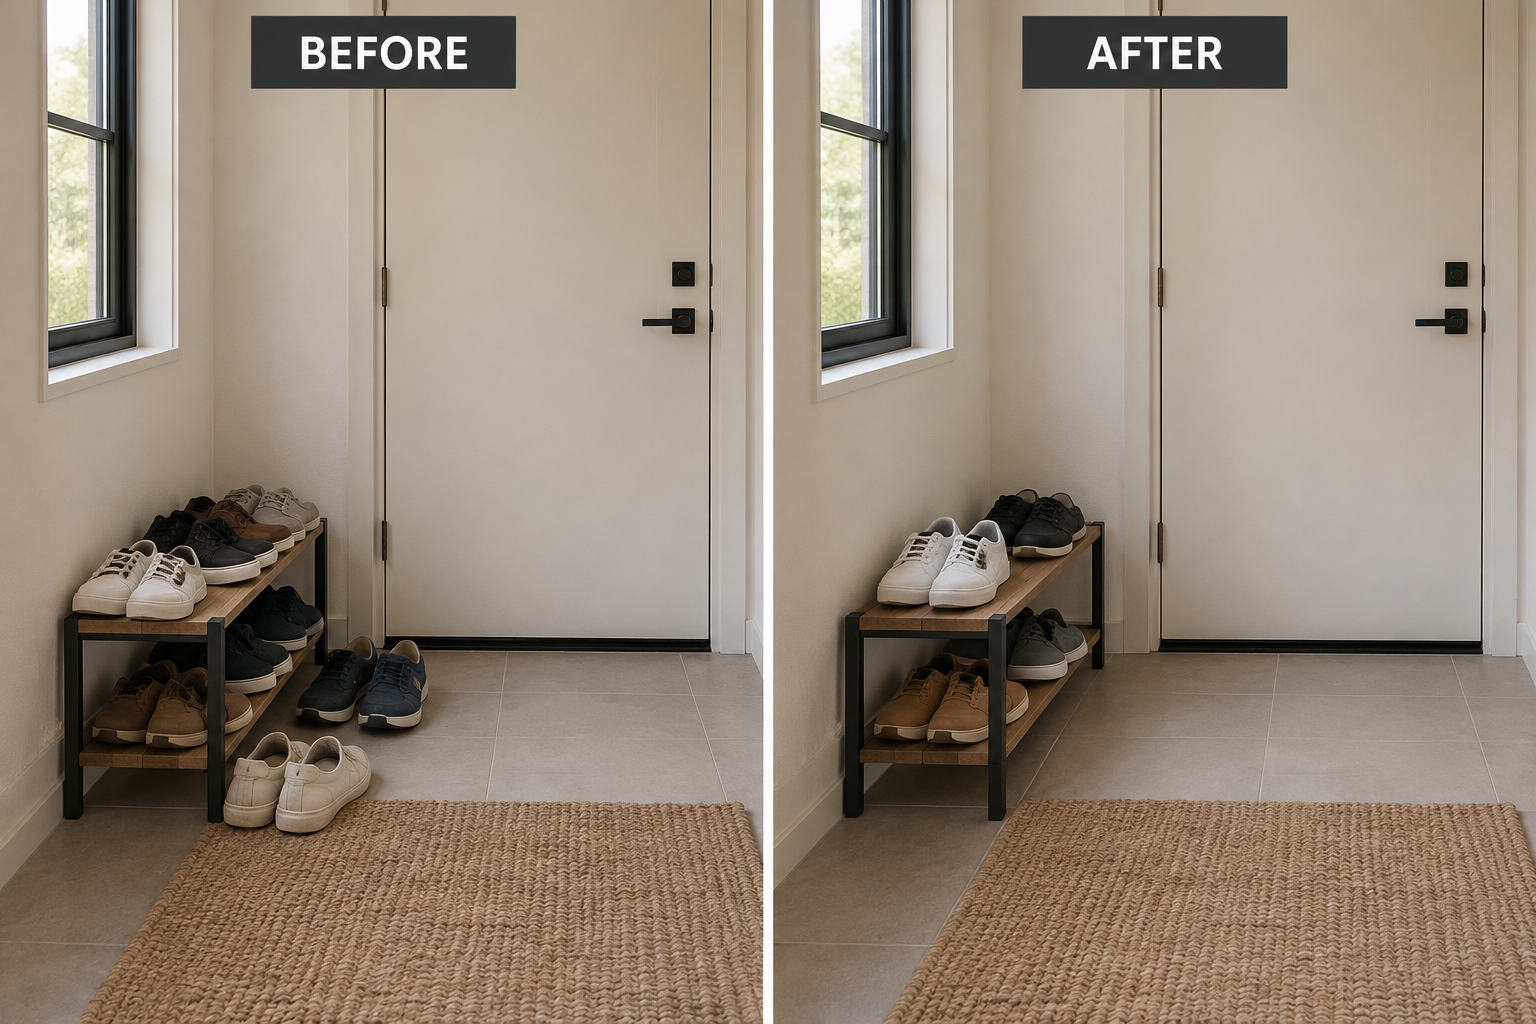
Do not move the overflow into a distant, packed closet where retrieving a pair becomes a project. Rotation works only when backup storage is accessible and someone maintains the limit. Households with changing work shifts, sports, or mobility needs may need more active pairs. Make the allowance realistic rather than enforcing a tidy arrangement that gets abandoned by Tuesday.
3. Use a Shallow Shoe Cabinet Where Doors Can Open
A shallow, enclosed shoe cabinet can contain visual clutter along an otherwise unused wall. Look at actual shoe capacity rather than the product’s pair count; bulky sneakers may occupy an entire compartment. A cabinet around 8 to 12 inches deep might suit some entries, but measure its closed depth, open compartment projection, baseboard clearance, and your shoes before committing.
A slim profile does not make a cabinet automatically safe or suitable. Follow the manufacturer’s anchoring instructions, and obtain rental permission before drilling. Check for concealed utilities and choose fasteners appropriate to the wall. Avoid placing it where an open compartment blocks the exit, or where required access to an electrical panel, heater, vent, or other equipment would be compromised.
4. Hang Daily Bags on a Deliberate Hook Rail
Put everyday bags on individual hooks instead of piling them on a doorknob. Position a short rail on a side wall where loaded bags will hang outside the walking route. Test the arrangement with your fullest backpack before installation. For example, two spaced hooks can hold a work tote and school backpack without their straps tangling or either bag resting on shoes.
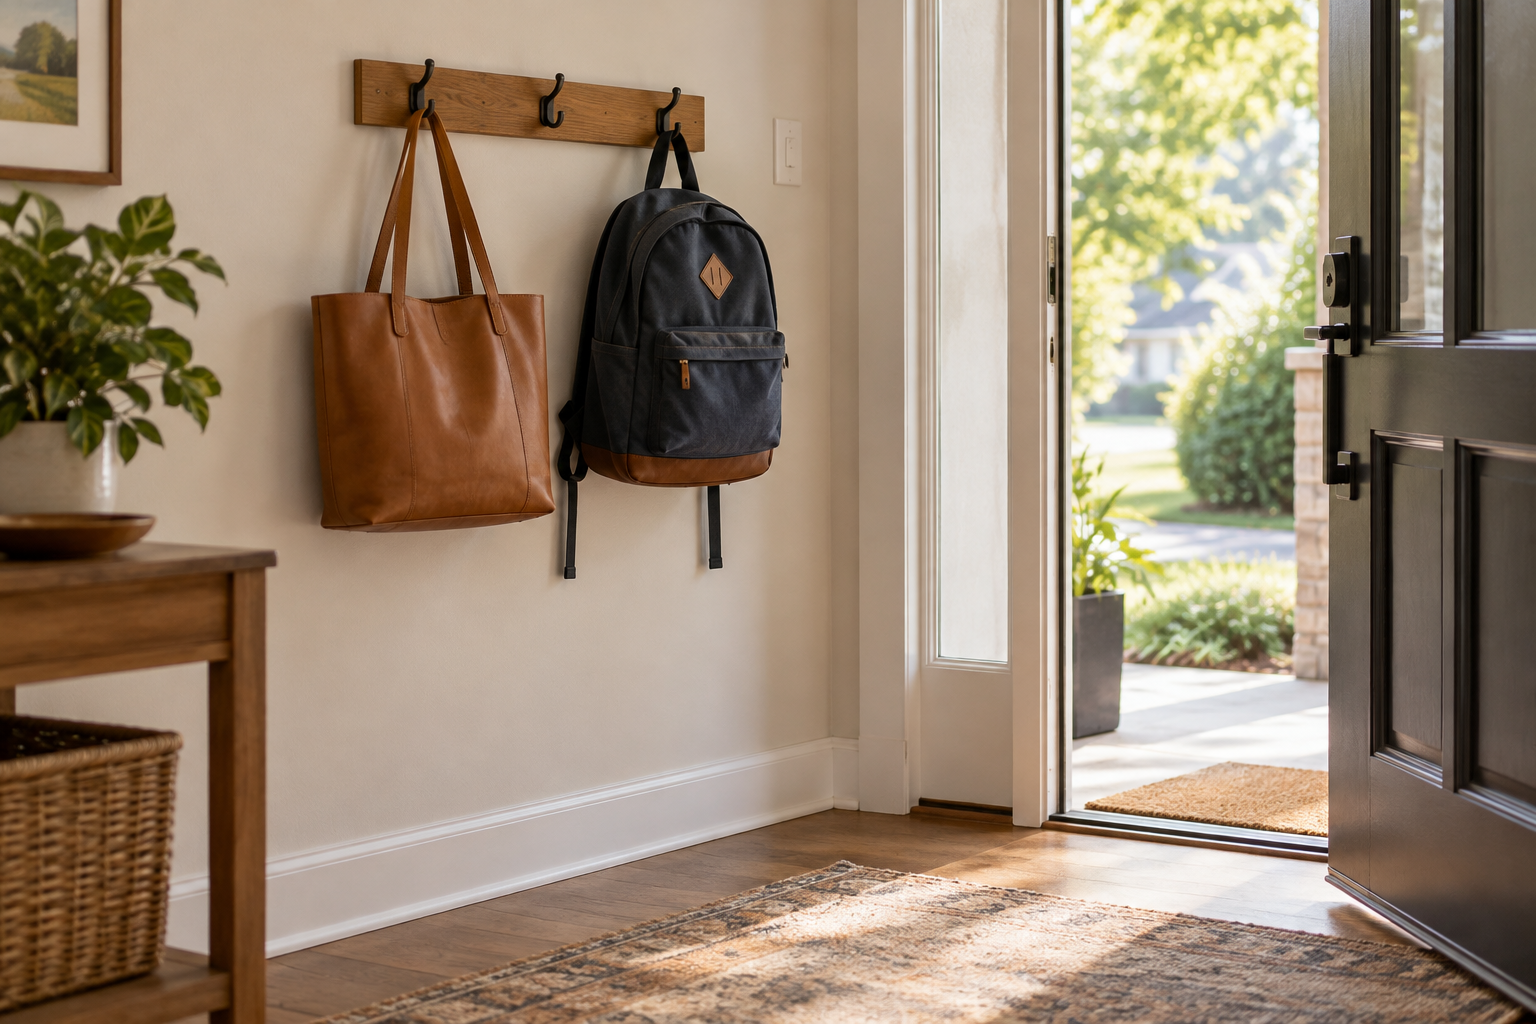
Closely packed hooks often create one large bulge rather than useful storage. Account for bag depth, not just rail length, and keep straps from dangling where feet can catch them. Use hardware rated for the loaded bags and the wall construction. Adhesive hooks may suit very light items if permitted, but they are a poor gamble for heavy daily backpacks.
5. Choose a Shoe Bench Only If Sitting Helps
When someone needs to sit while changing shoes, a narrow bench with open storage underneath can earn its footprint. Reserve one cubby per person and keep the seat empty. In a small recessed entry, a roughly 30-inch-wide bench might provide a useful perch and hold two shoe baskets below. Check the actual seat height, stability, and space needed for knees and standing.
A bench becomes wasted space when bags permanently occupy the seat. It also needs more room in use than its measurements suggest, especially for someone who uses a mobility aid or needs assistance. Do not squeeze one into a passage simply because it fits against the wall. If sitting is unnecessary, a smaller shoe solution usually preserves more usable floor.
6. File Spare Bags Upright on a Closet Shelf
Separate the bag you carry today from the bags you occasionally choose. Use removable shelf dividers to stand spare totes and purses upright in a nearby closet, with handles tucked inside their own compartments. One shelf can hold a small selection without the unstable stack that tumbles down whenever you pull out a bag. Support soft bags lightly to maintain their shape.
Dividers cannot rescue an overfilled shelf, and compressing leather or structured bags can distort them. Measure both shelf depth and overhead clearance before choosing organizers. This works best for dry, occasional bags within comfortable reach; it is unsuitable for damp gym bags or heavy backpacks stored overhead. Keep frequently carried items lower so retrieving them does not require stretching or climbing.
7. Turn the Boot Tray Along the Wall
Sometimes the existing boot tray is useful but facing the wrong way. If the wall length allows, rotate a rectangular tray so its long edge runs along the wall rather than projecting into the entry. A roughly 30-by-16-inch tray then projects about 16 inches instead of 30. Park muddy boots inside its rim, beyond the door swing, and check the remaining route in person.
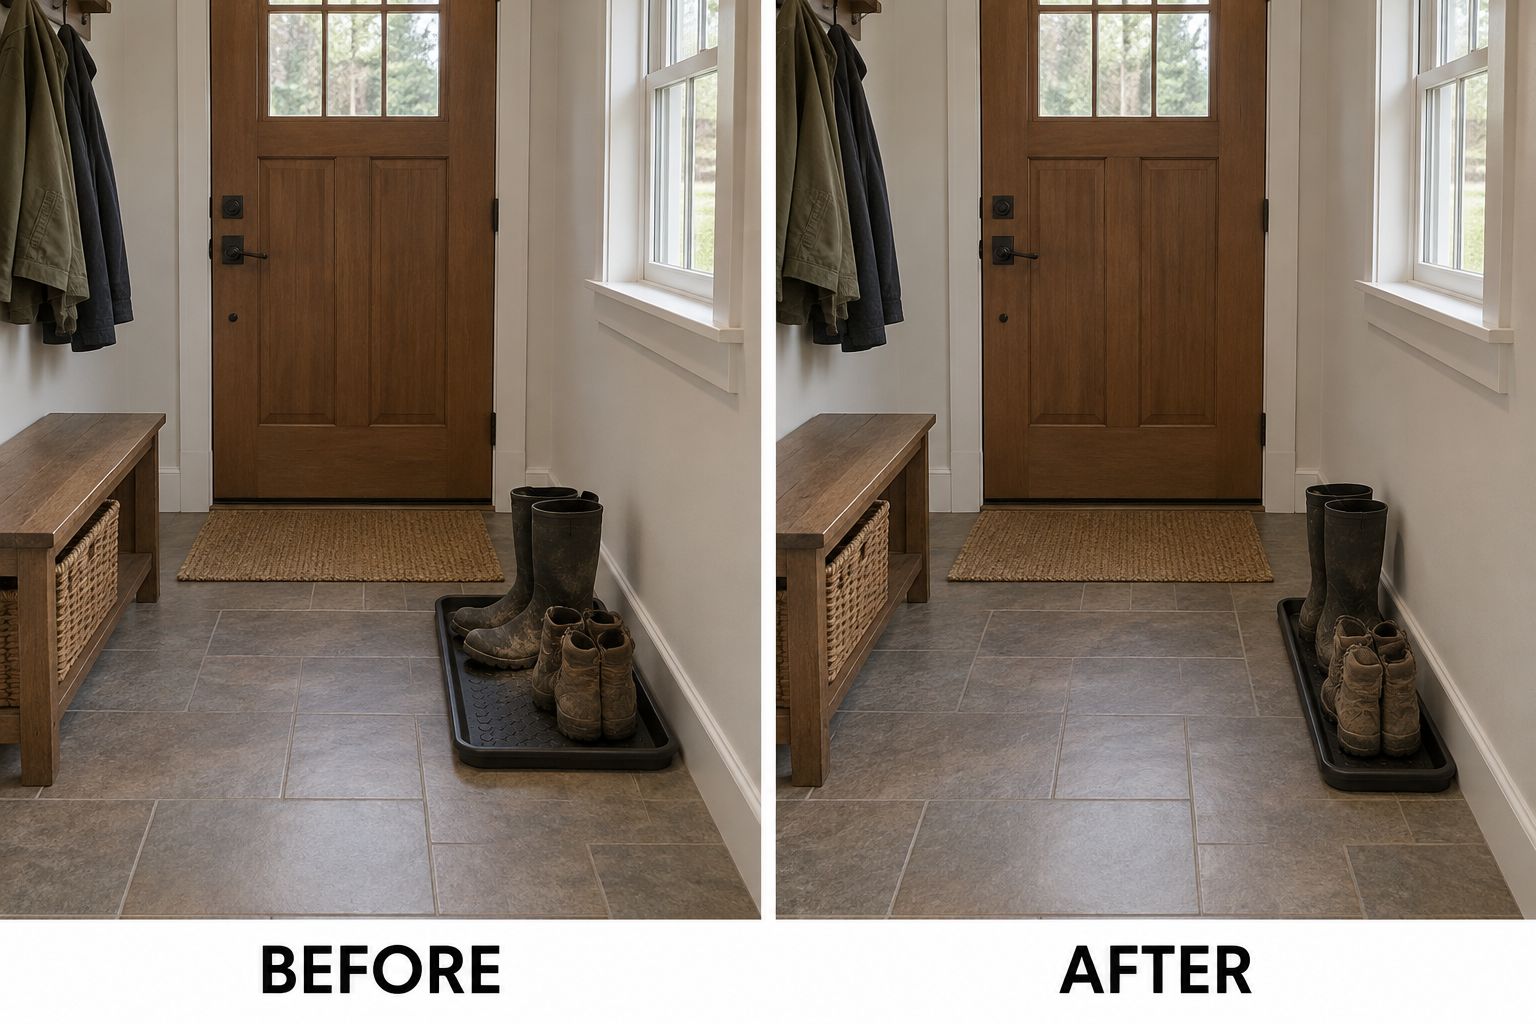
Do not assume every tray can turn successfully: nearby trim, a closet opening, or a floor register may prevent it. A tray also needs regular emptying and cleaning; standing water and grit can damage surrounding flooring. Choose a stable, low-profile rim and let footwear dry. If no orientation leaves a safe route, relocate wet-shoe parking rather than accepting a permanent obstacle.
8. Use the Inside of a Closet Door for Lightweight Footwear
A pocket organizer inside a nearby closet door can hold flats, slippers, and small children’s shoes without adding another floor unit. Assign lower pockets to items children can manage independently and keep heavier footwear elsewhere. Before loading it, open and close the door fully to confirm that the organizer clears shelves, hanging clothes, trim, and anything stored behind the door.
Over-door brackets can scrape paint, interfere with latching, or strain a door when overloaded. Confirm rental rules and hardware compatibility; do not modify a fire-rated door or interfere with its closing. This is not a good home for wet boots, heavy sneakers, or damp items trapped in poorly ventilated pockets. Avoid the front exit door and use a suitable interior closet instead.
9. Park Heavy Backpacks in a Pull-Out Floor Bin
For backpacks too heavy for convenient hanging, use a sturdy handled bin that slides completely beneath an existing console or closet shelf. Give each loaded bag an upright slot, with straps tucked inside the bin. A student can pull the bin forward to pack, then return it to its marked-by-fit home, leaving nothing projecting beyond the furniture into the entry.
The weak point is a bin left halfway out after someone rushes away. Choose a manageable size, test it fully loaded, and avoid free-rolling containers that can drift into the path. Do not add a console just to create this solution in an already tight entry. For anyone who cannot comfortably pull or lift a loaded bin, accessible shelf storage may work better.
10. Create One Outgoing Tote for Tomorrow’s Errands
Stop returns, library books, and reusable shopping bags from becoming separate piles beside the door. Keep one sturdy outgoing tote on a reachable shelf in the entry closet, and pack it during the evening reset. For example, place tomorrow’s return parcel inside with folded shopping bags. Move the tote into the departure routine, not onto the floor as a reminder.
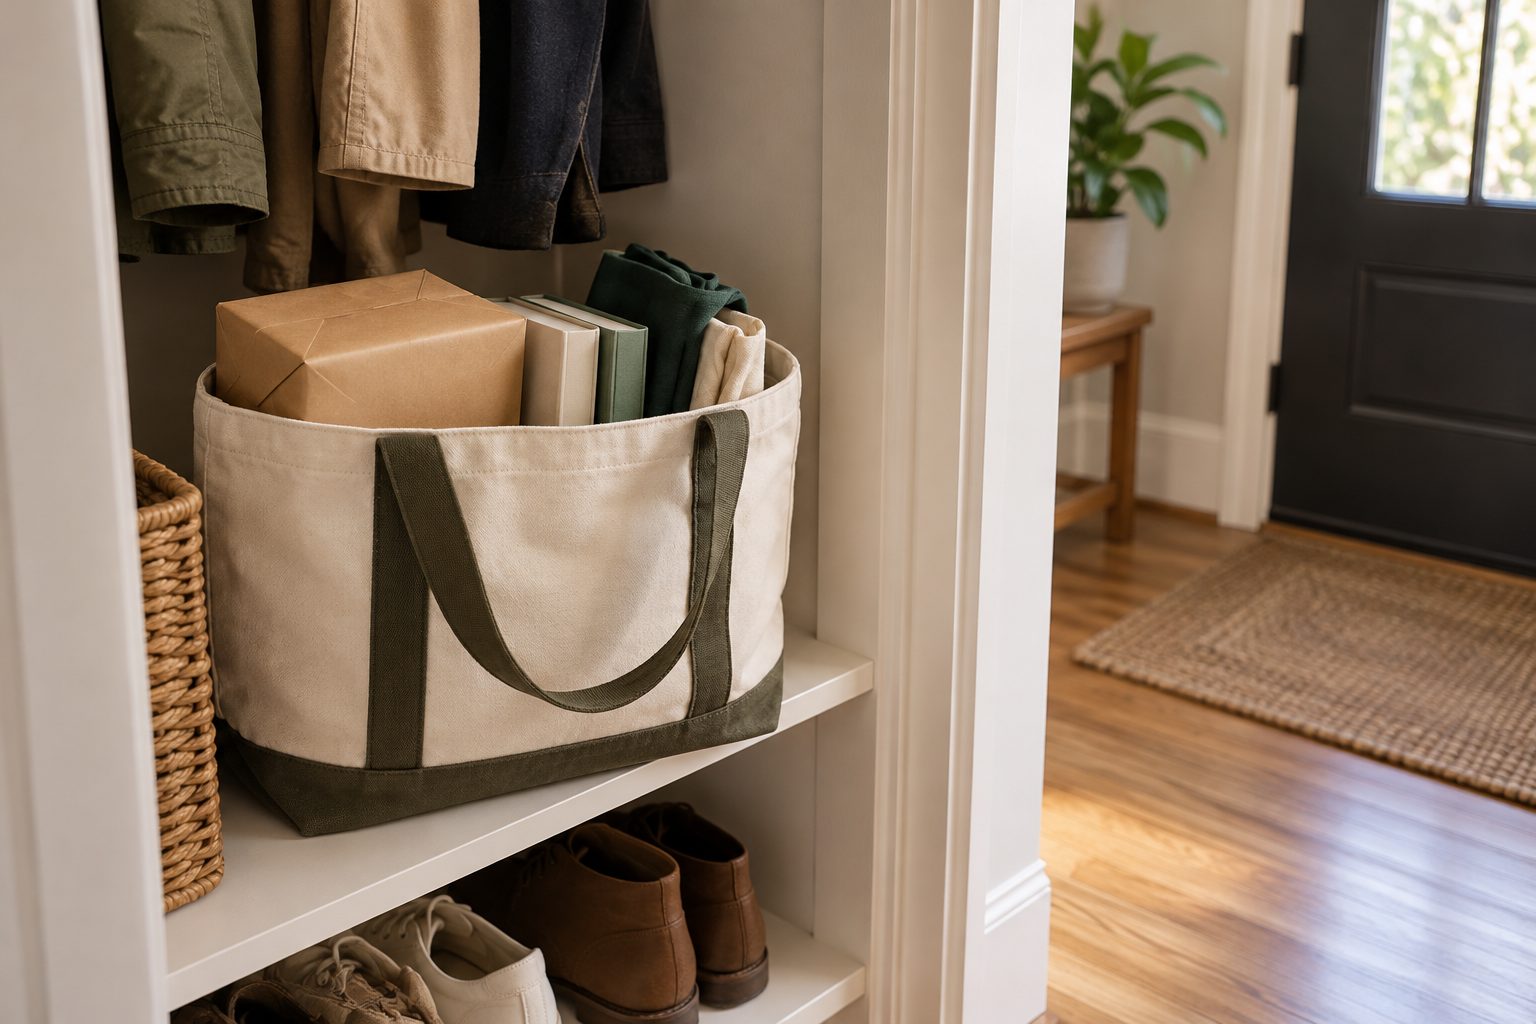
An outgoing tote can become permanent storage if nothing actually leaves. Empty it after errands and review it during the next reset. Keep the load comfortable to carry, and store fragile, leaking, or unusually heavy items separately. This system is less useful when household members leave at different times for unrelated destinations; separate small departure bags may be clearer than one shared tote.
A workable tiny entry gives daily shoes and bags a convenient home, contains muddy items, and leaves the exit route clear. Start with the obstruction you move most often, then test one fix through a normal week. Keep what your household actually uses, adjust what gets ignored, and let easy departures—not maximum storage capacity—be the measure of success.
Leave a Reply